Simple Heirloom Crochet Poncho Free Pattern
Make this crochet poncho free pattern that is perfect year round! This is perfect crochet project for warm weather, think late night bonfires and beach walks, or the cooler months when you want an extra layer over your sweater!
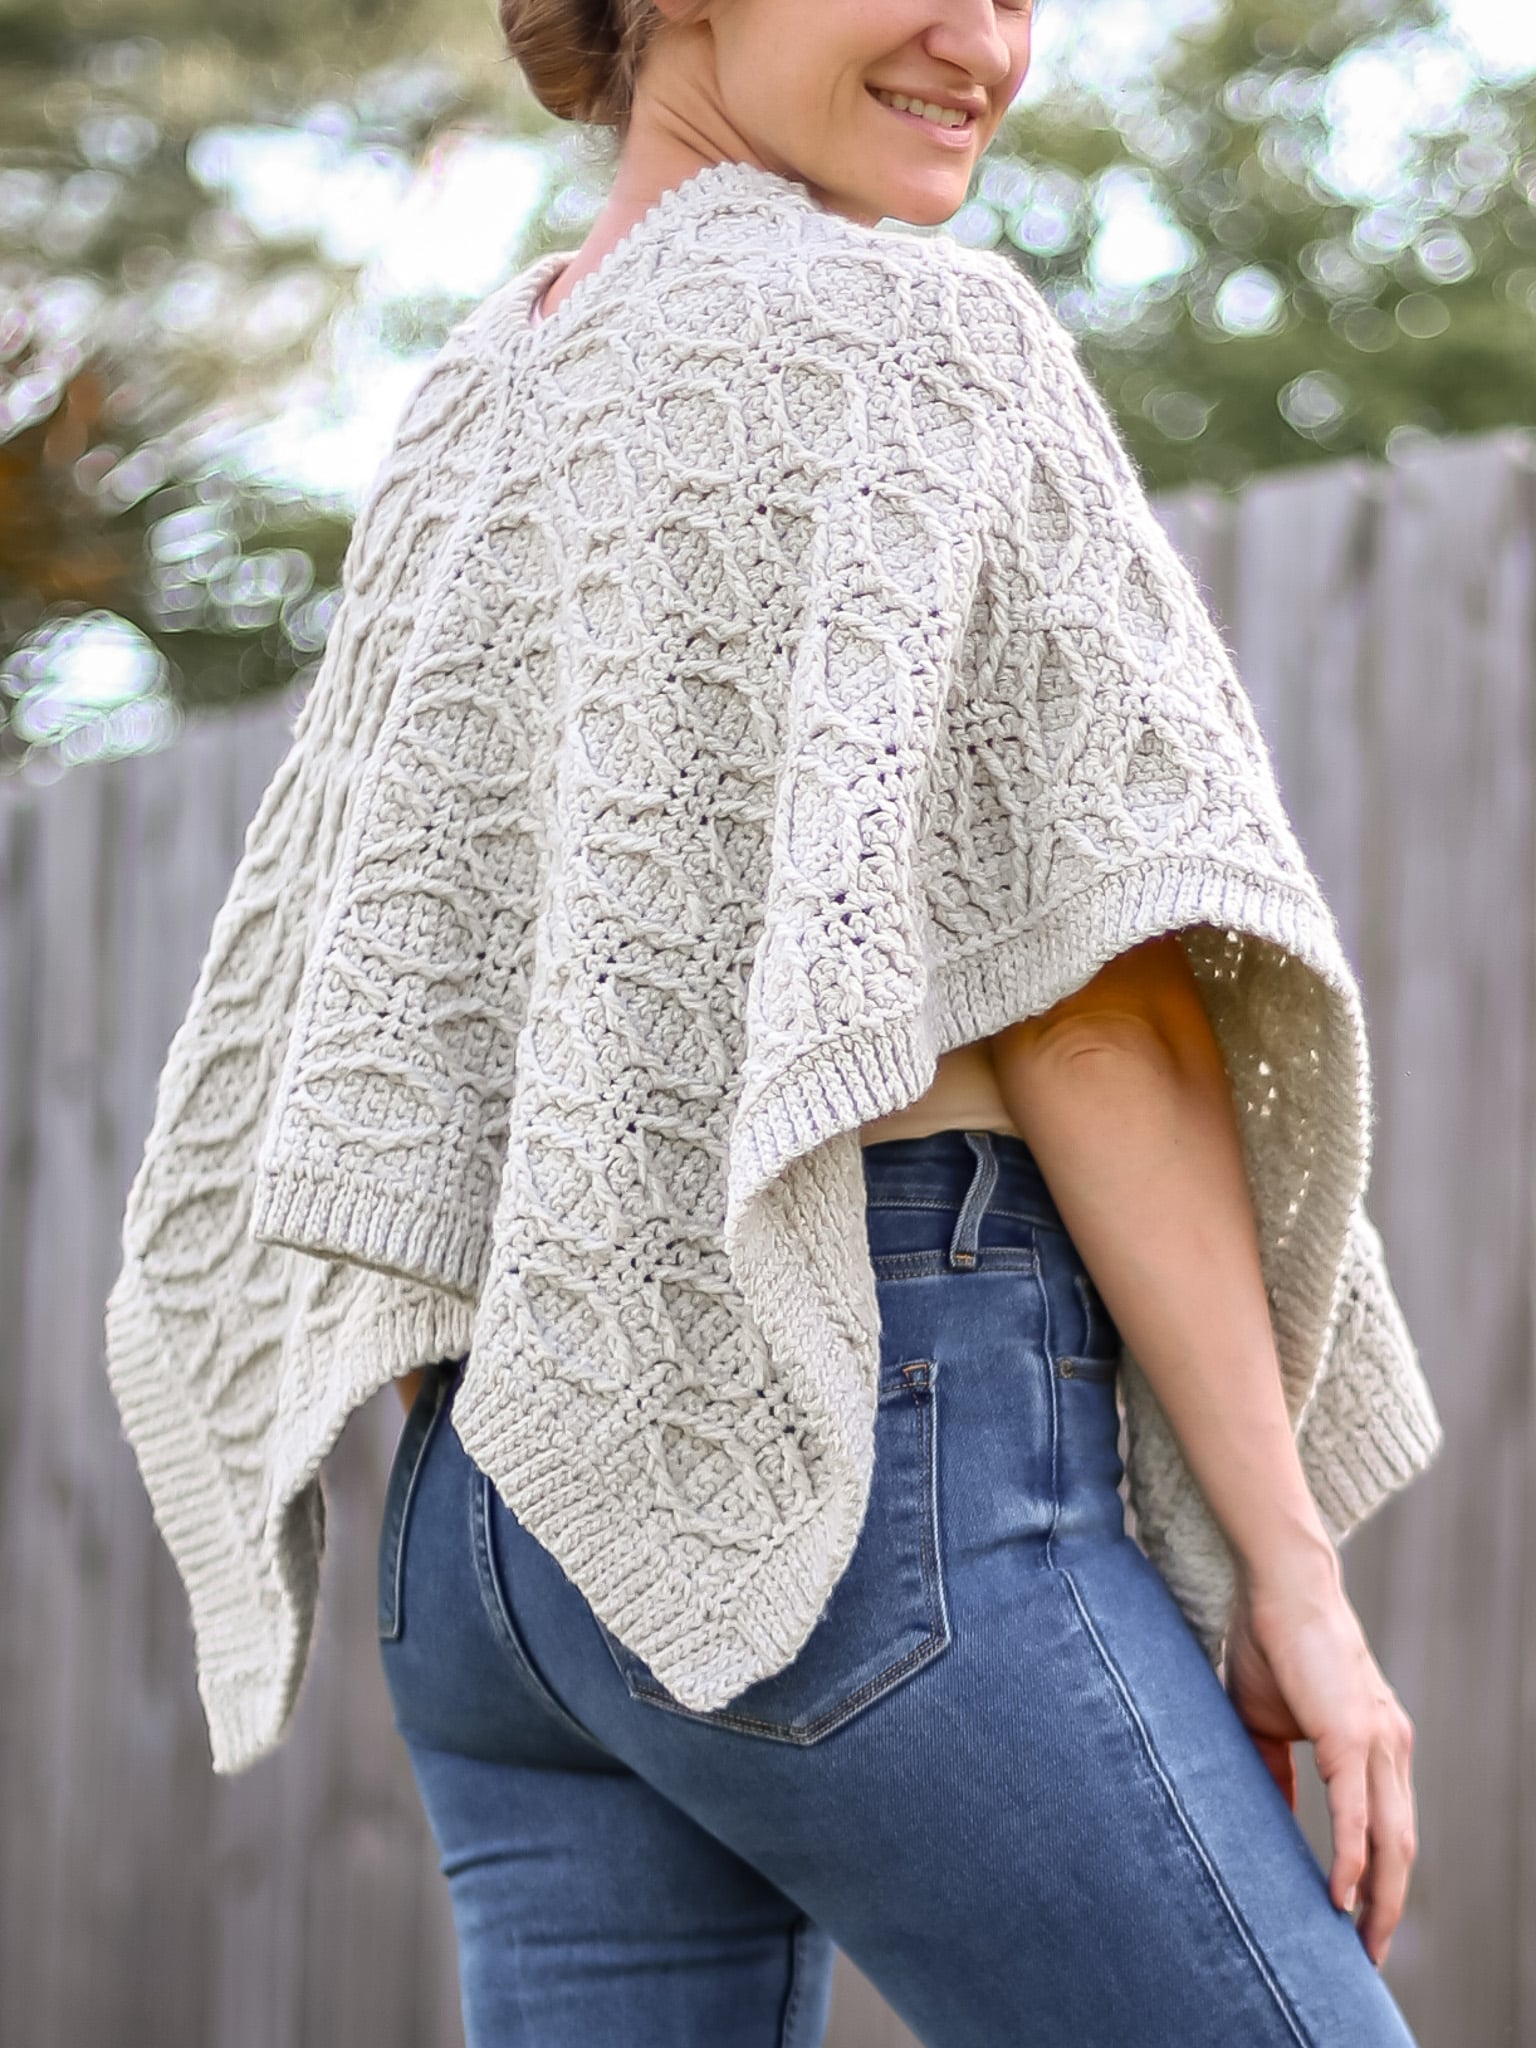
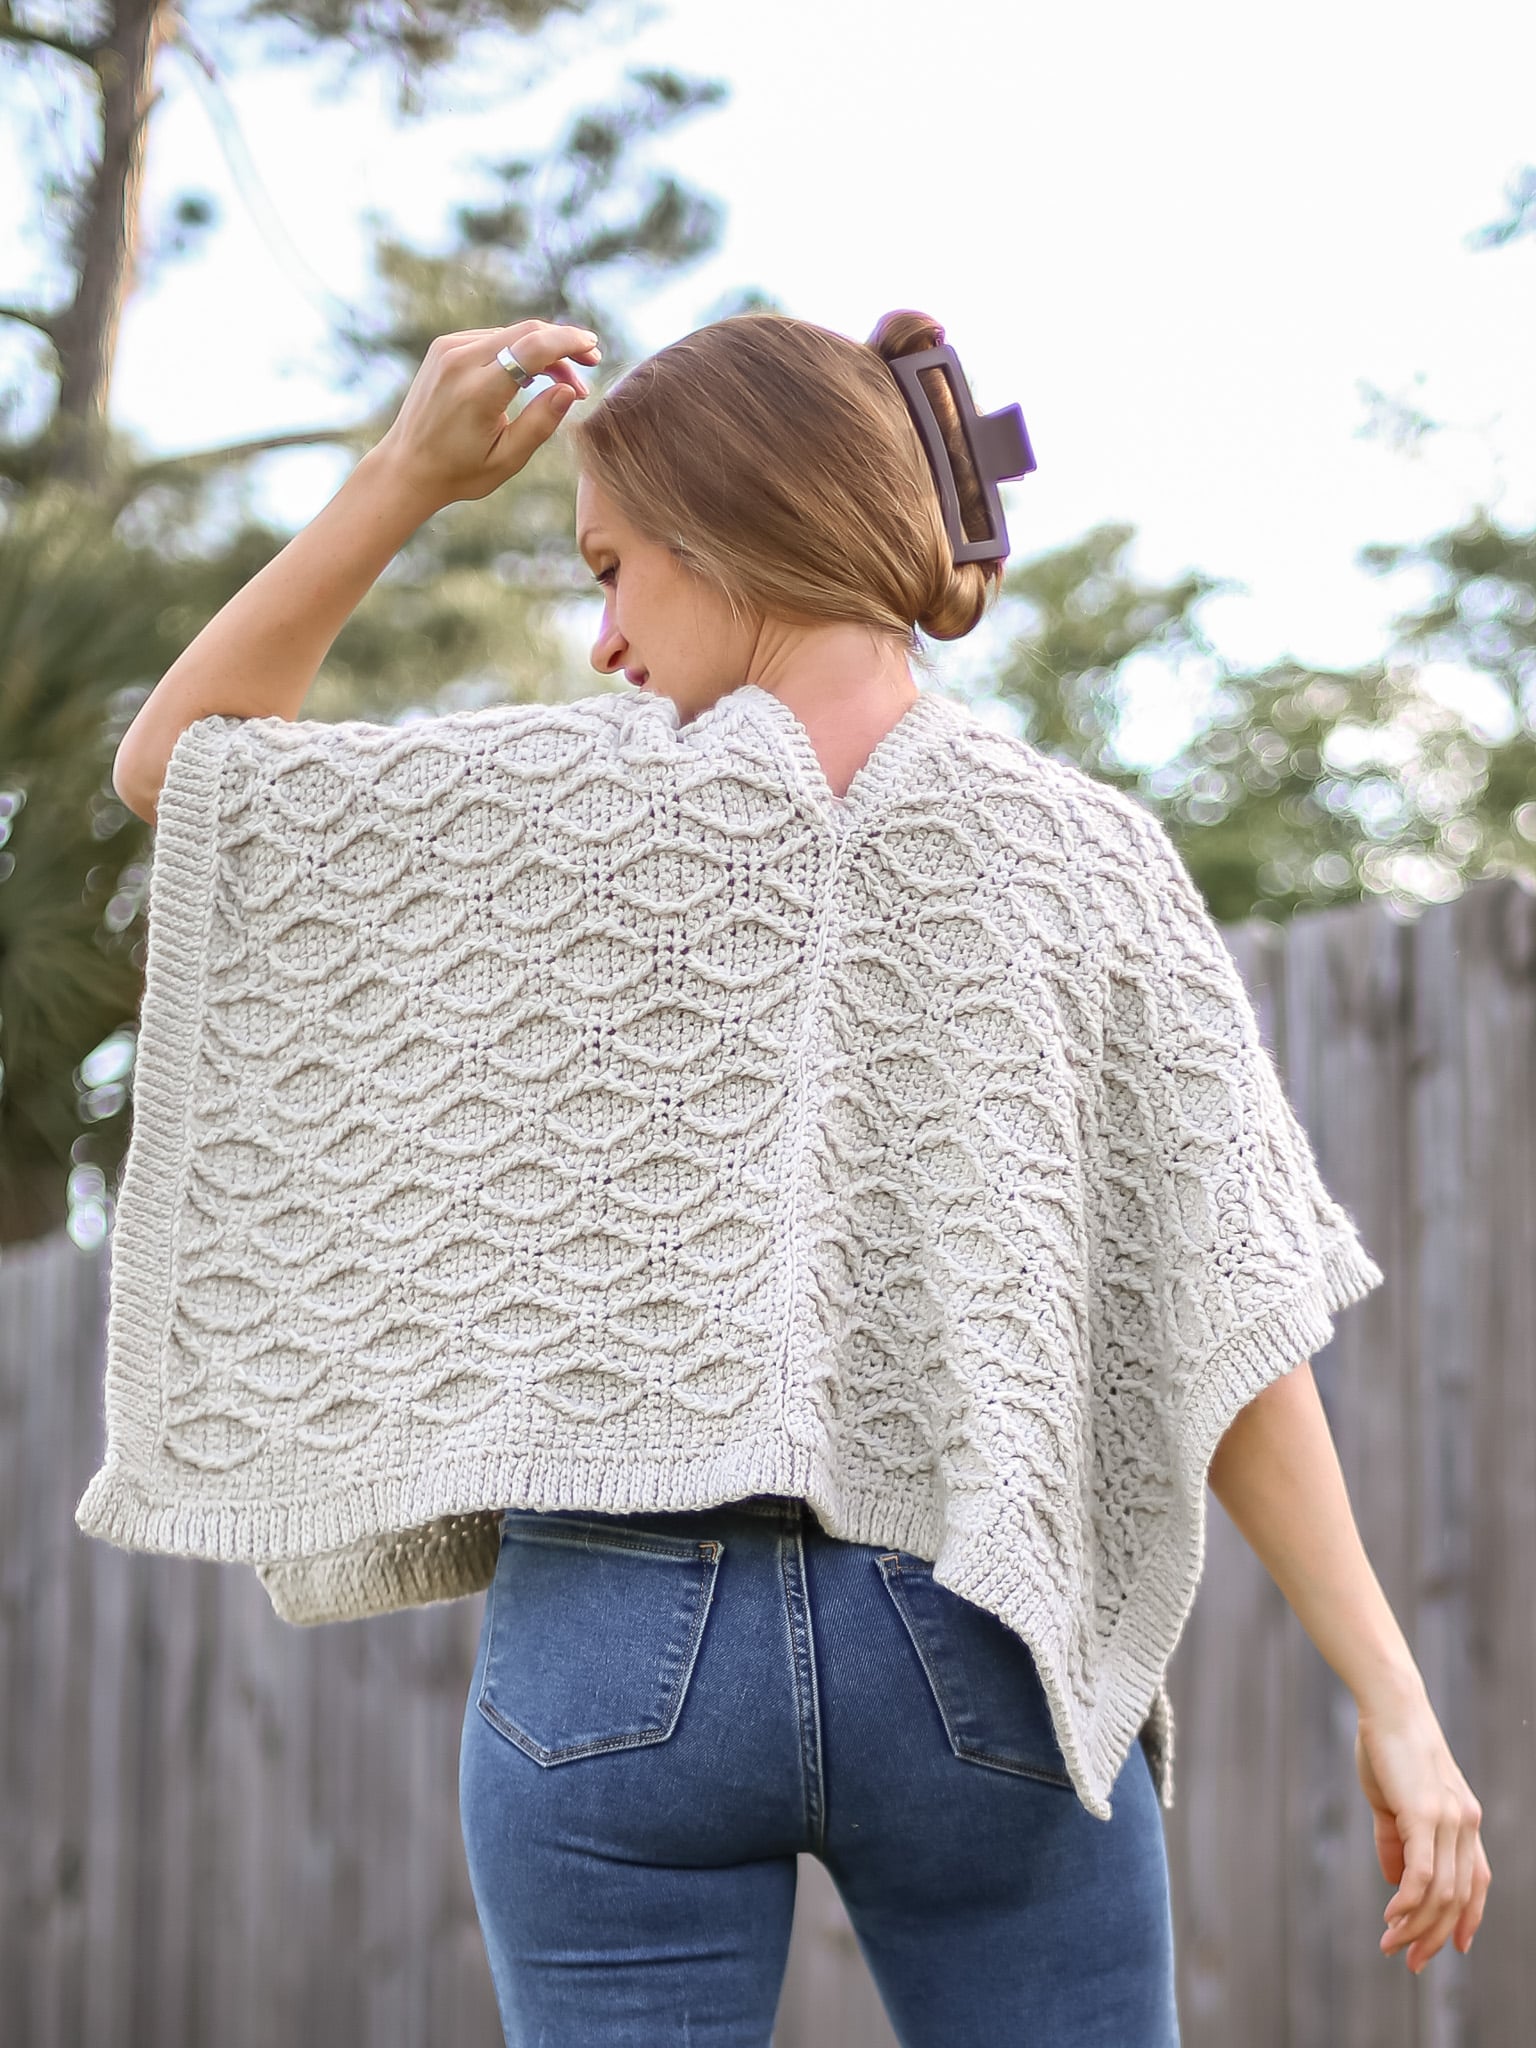
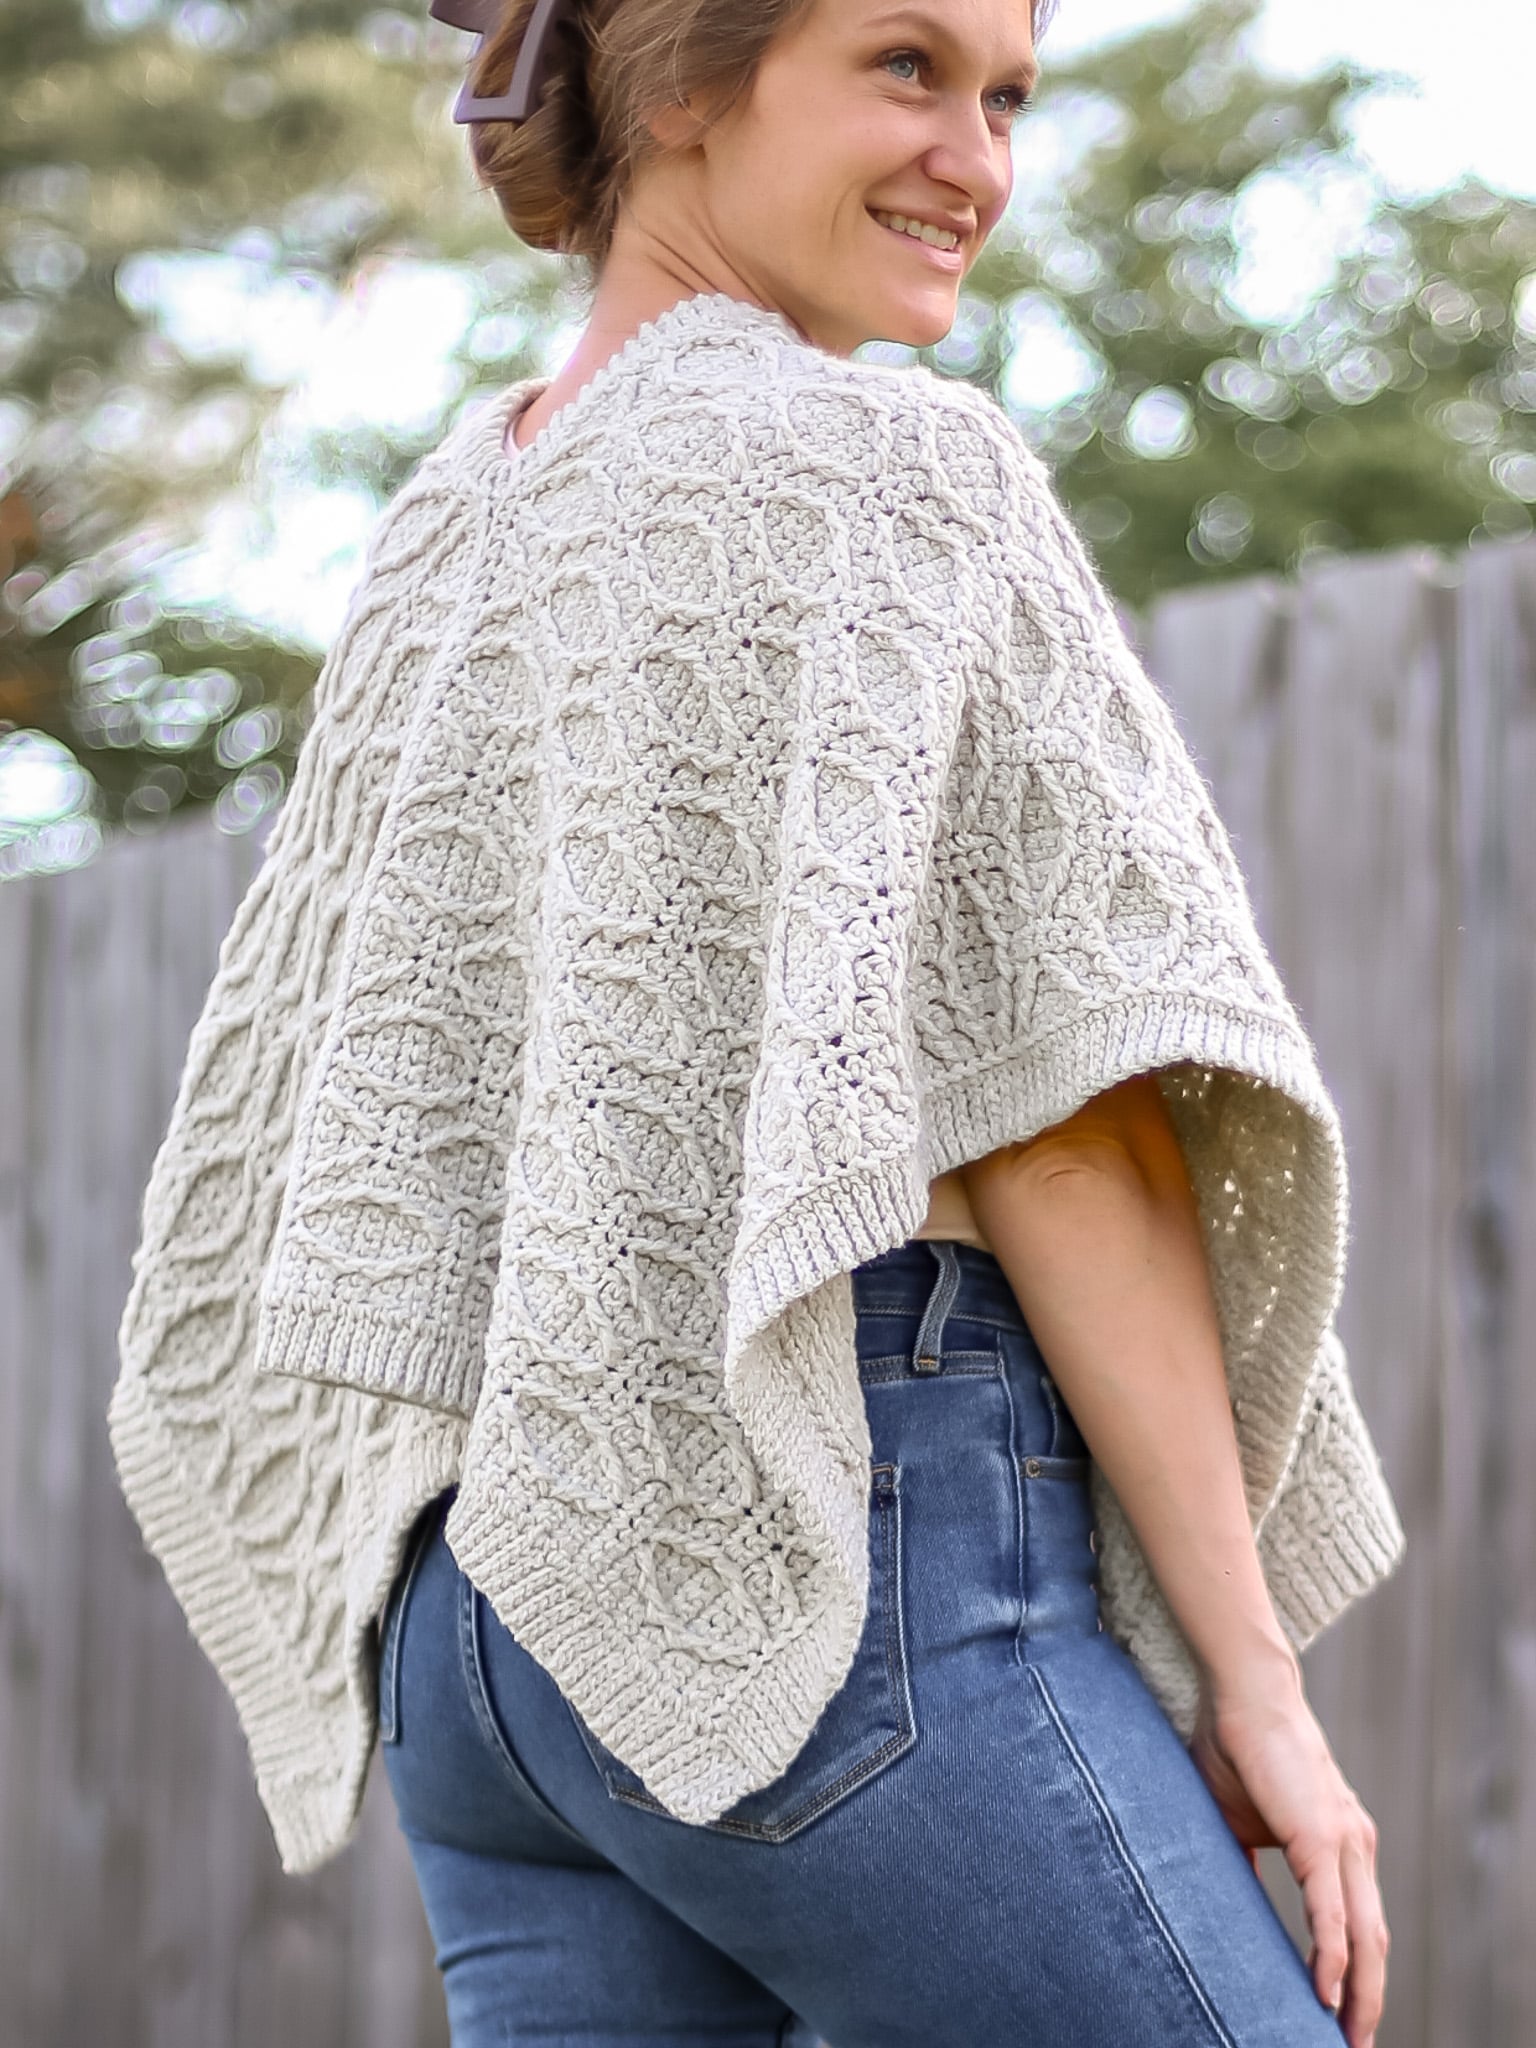
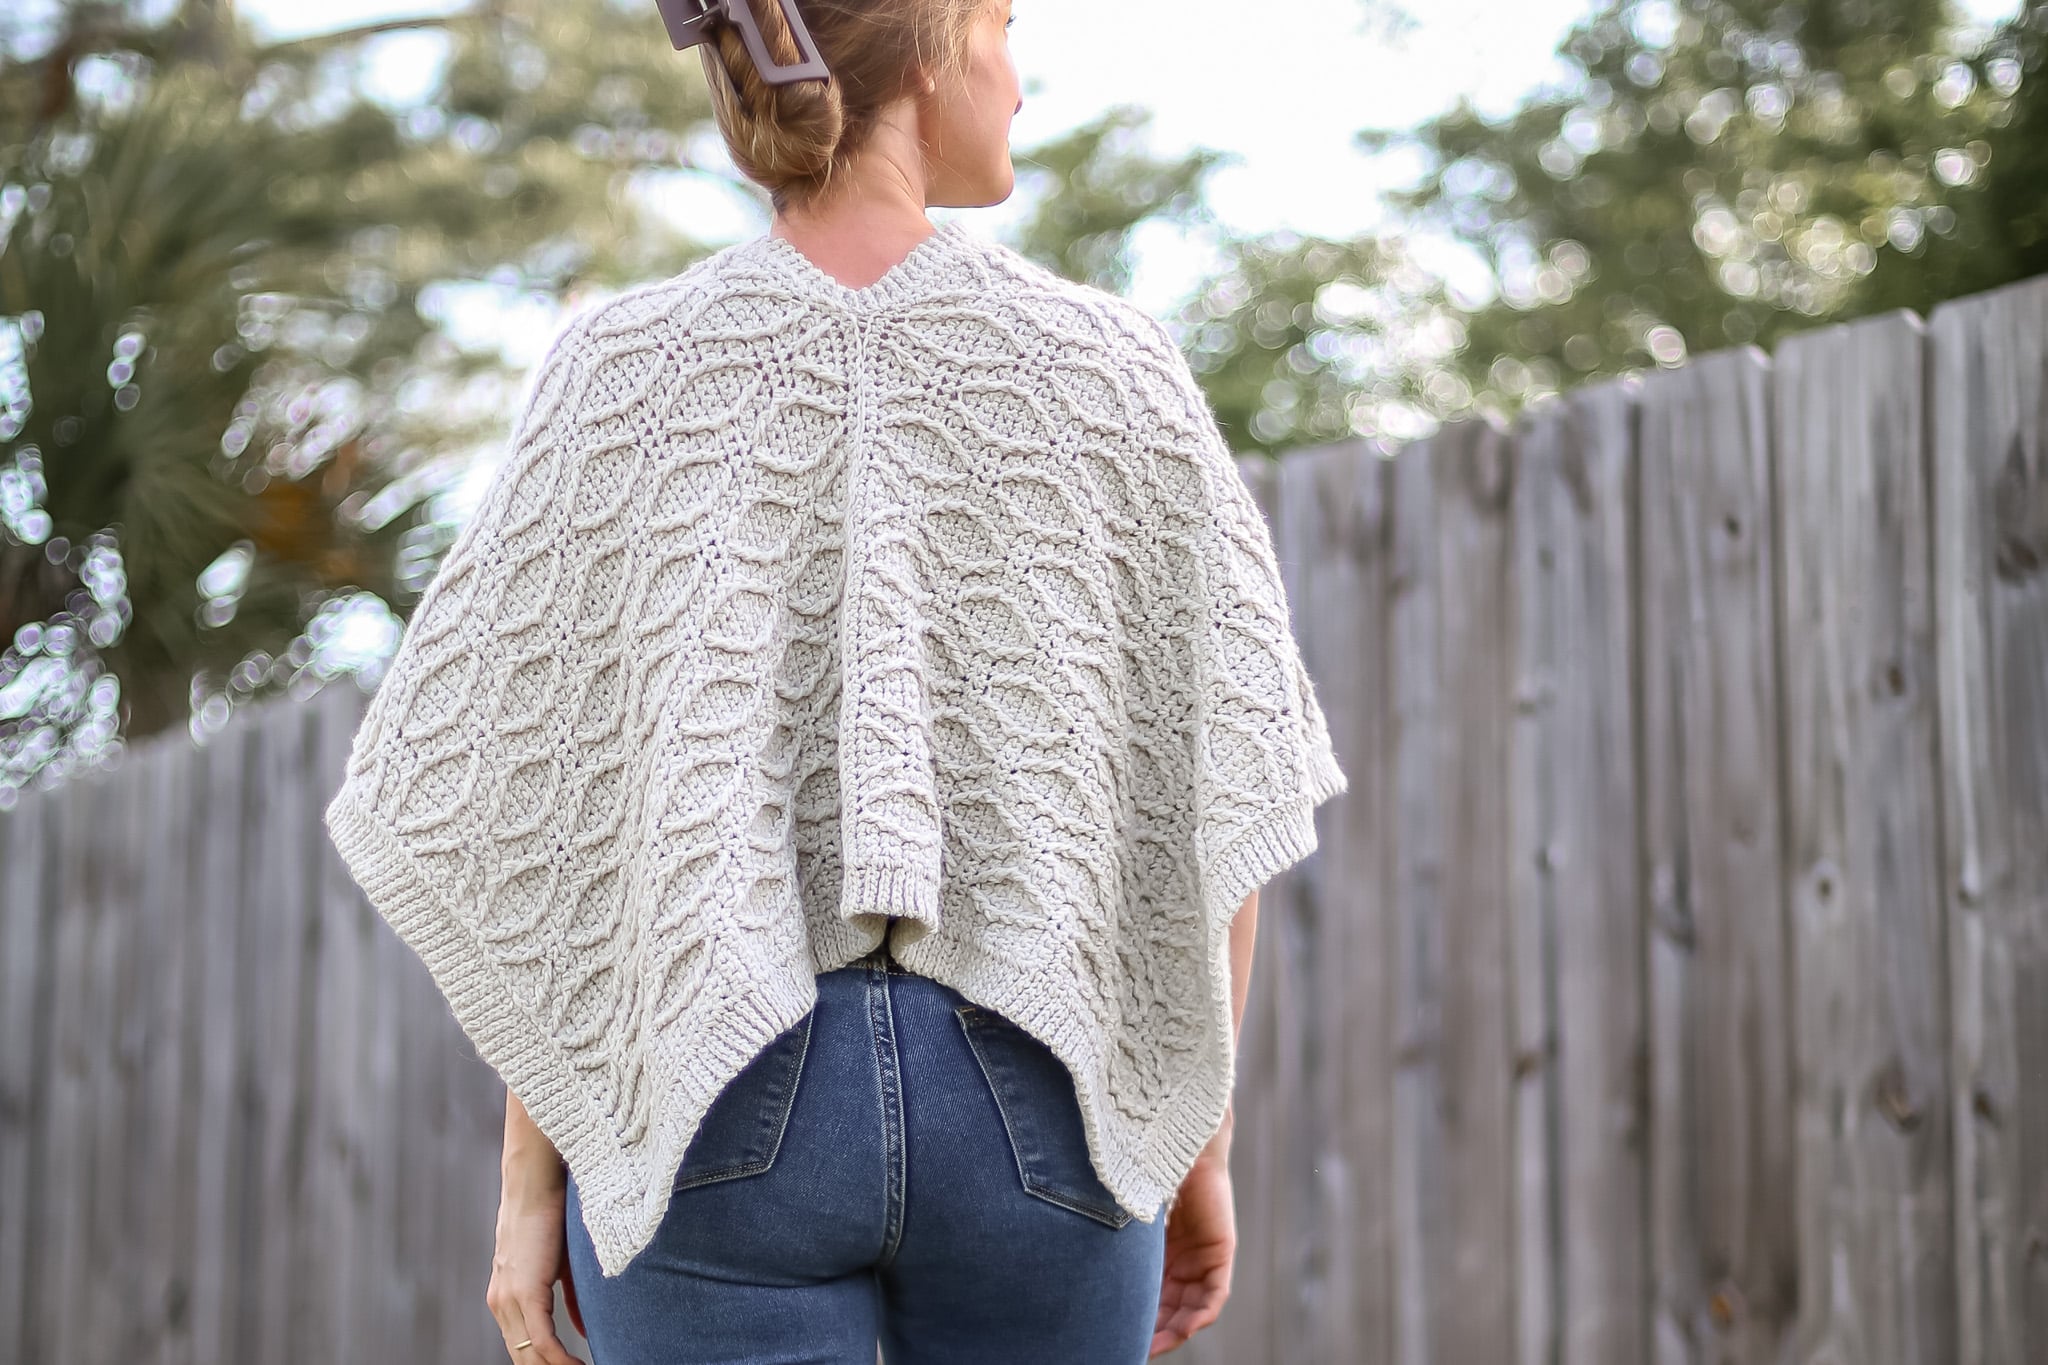
This cabled poncho uses a simple stitch pattern and two identical rectangular panels to create a dreamy pullover poncho! The knit look crochet ribbing made with slip stitches brings the handmade pullover poncho up a notch elevating this design!
Use the easy Table of Contents Below to read more about the Simple Diamond Heirloom Poncho, to get your materials and start using the crochet poncho free pattern and crochet stitch diagram in this blog post, Happy Crocheting!
Best Bang for your Buck, get a Kit From Lion Brand includes a PDF ad-free pdf version of this pattern and Yarn!
Get a PDF Pattern on in my Etsy Shop or Ravelry!
About this Perfect Crochet Poncho Free Pattern
This pattern is written in US Crochet Terms and is designated as an Advanced Sill Level Pattern since it uses cables.
However, if you are a beginner crocheter looking to try cables for the first time this would be a perfect project! Since you only have to make two simple rectangles that makes for easy construction putting this in the simple crochet poncho category!
If you are comfortable with basic crochet stitches and willing to learn a new technique you can defiantly make this cozy poncho!
Although this is a cabling pattern, we are using basic stitches with some more advanced stitch placement that an experienced crocheter will love but new crocheters can definitely get the hang of!
Created for a Collection
This crochet poncho free pattern was created in collaboration with Lion Brand to bring you a collection of heirloom quality crochet pieces!
I believe crochet is meant to help you slow down, create with intention and help you to disconnect to reconnect. Yarn crafts have been experiencing some sort of a revival, especially among a younger generation searching for a tangible hobby.
I designed these 4 pieces to take my grandma hobby to the next level creating yet more advanced crochet patterns that allow my brain to stretch. I hope you enjoy all of them as much as I enjoyed creating them!
- Diamond Trellis Heirloom Blanket Wrap
- Garden Heirloom Baby Blanket
- Woven Tiles Heirloom Throw
- Simple Diamond Heirloom Poncho (that’s this one)
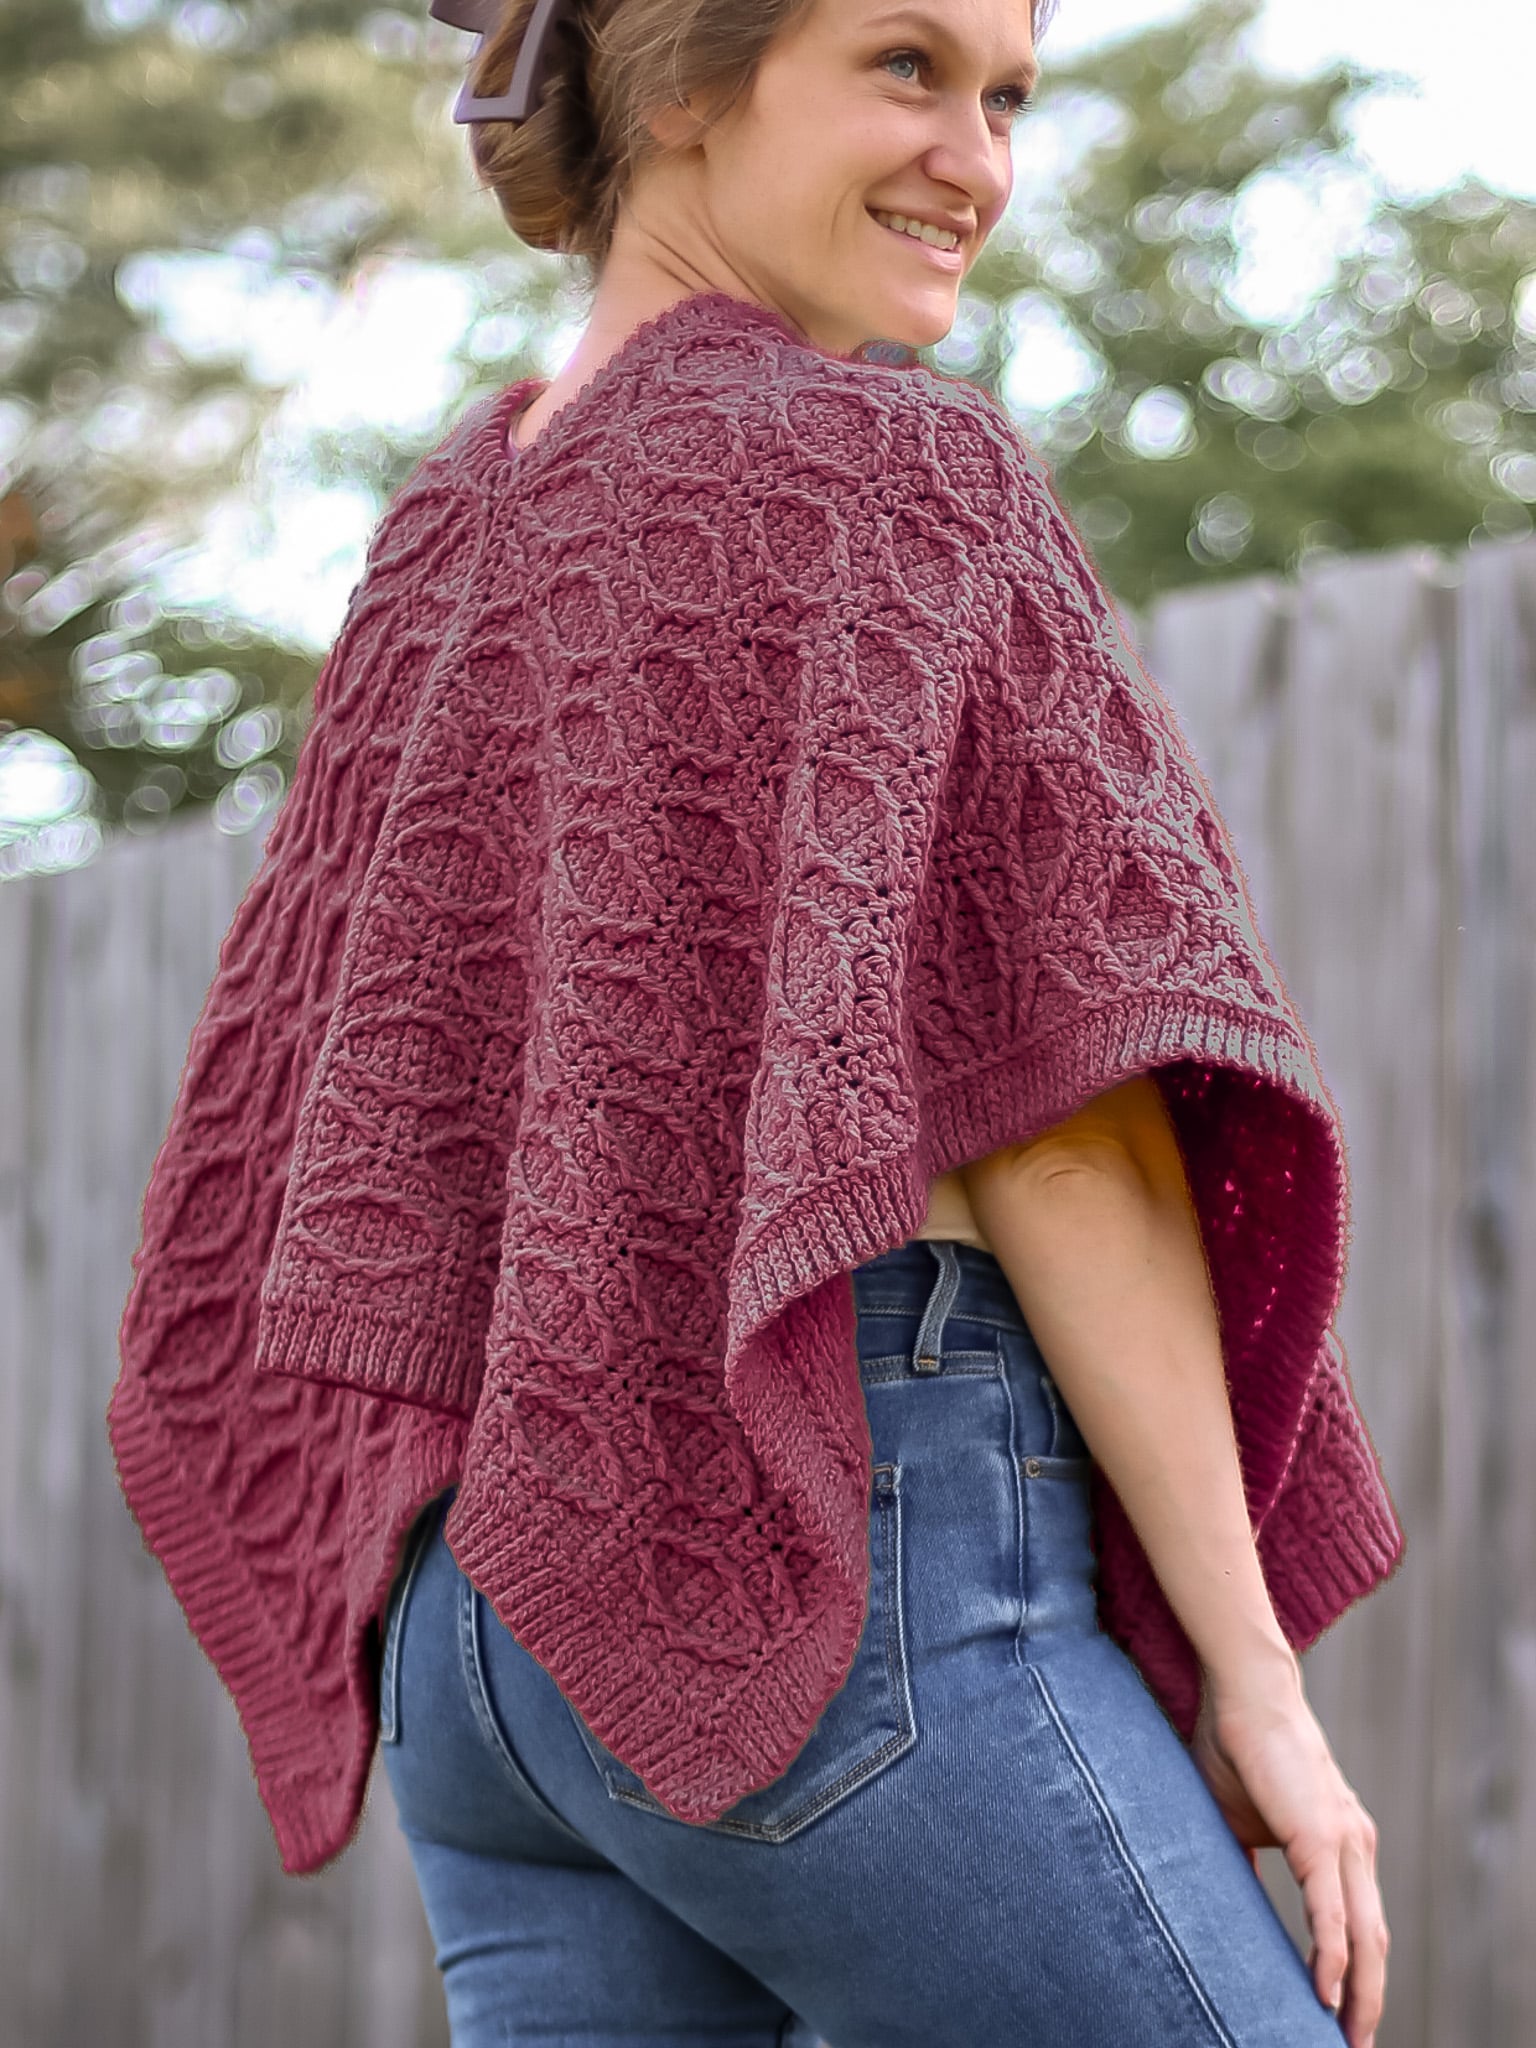
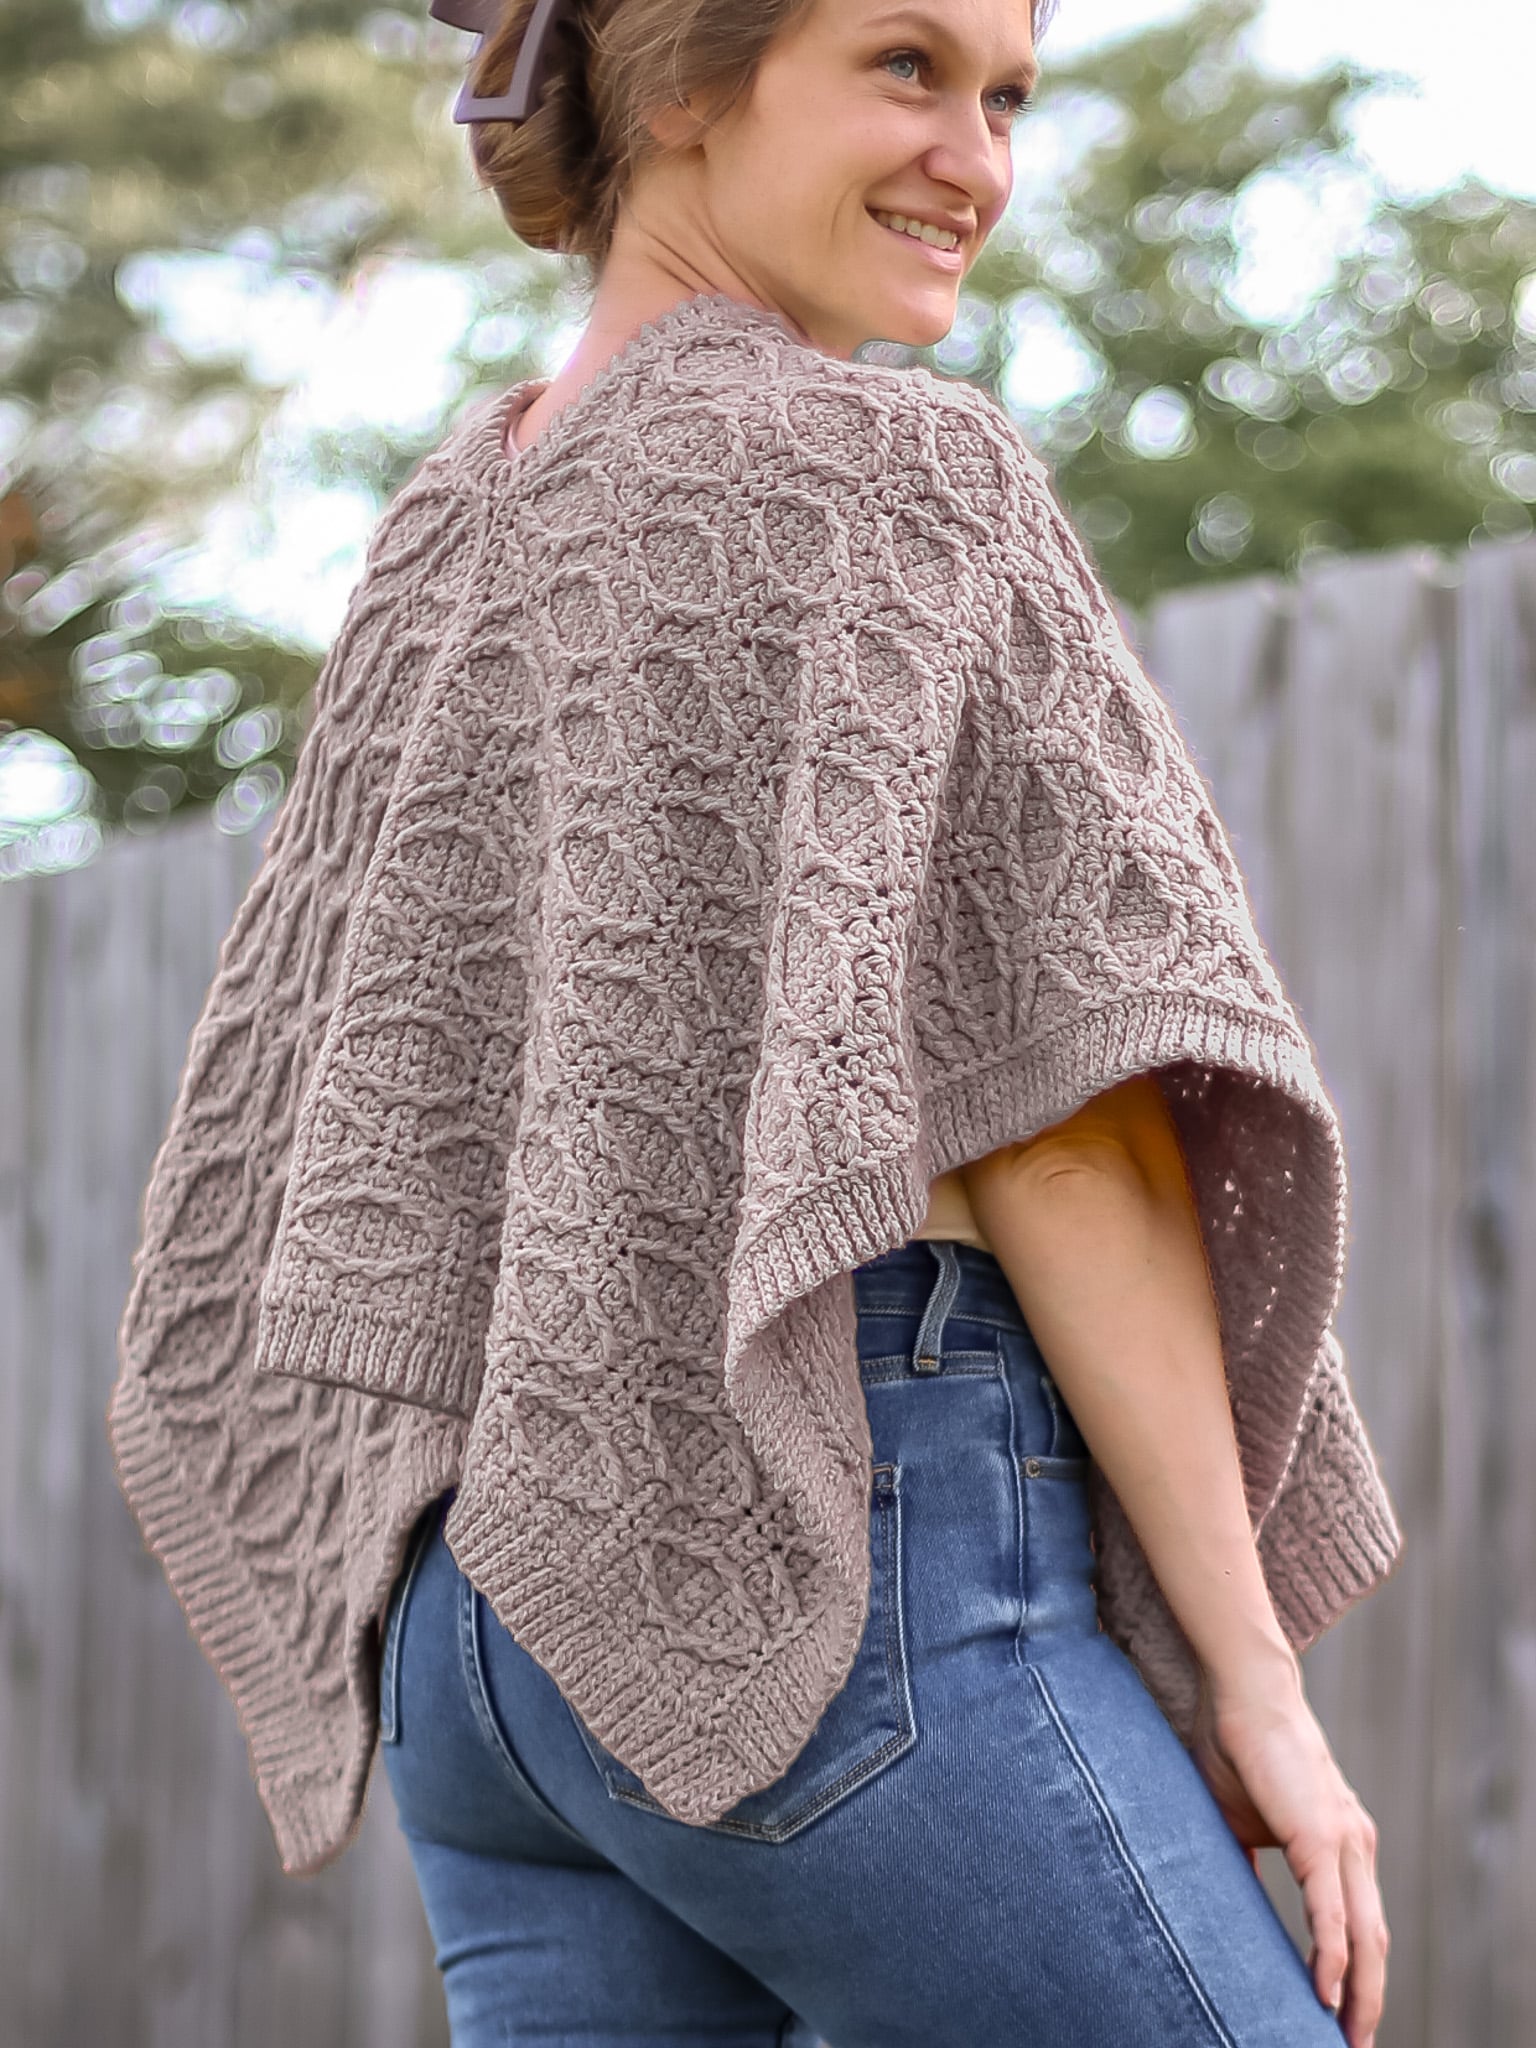
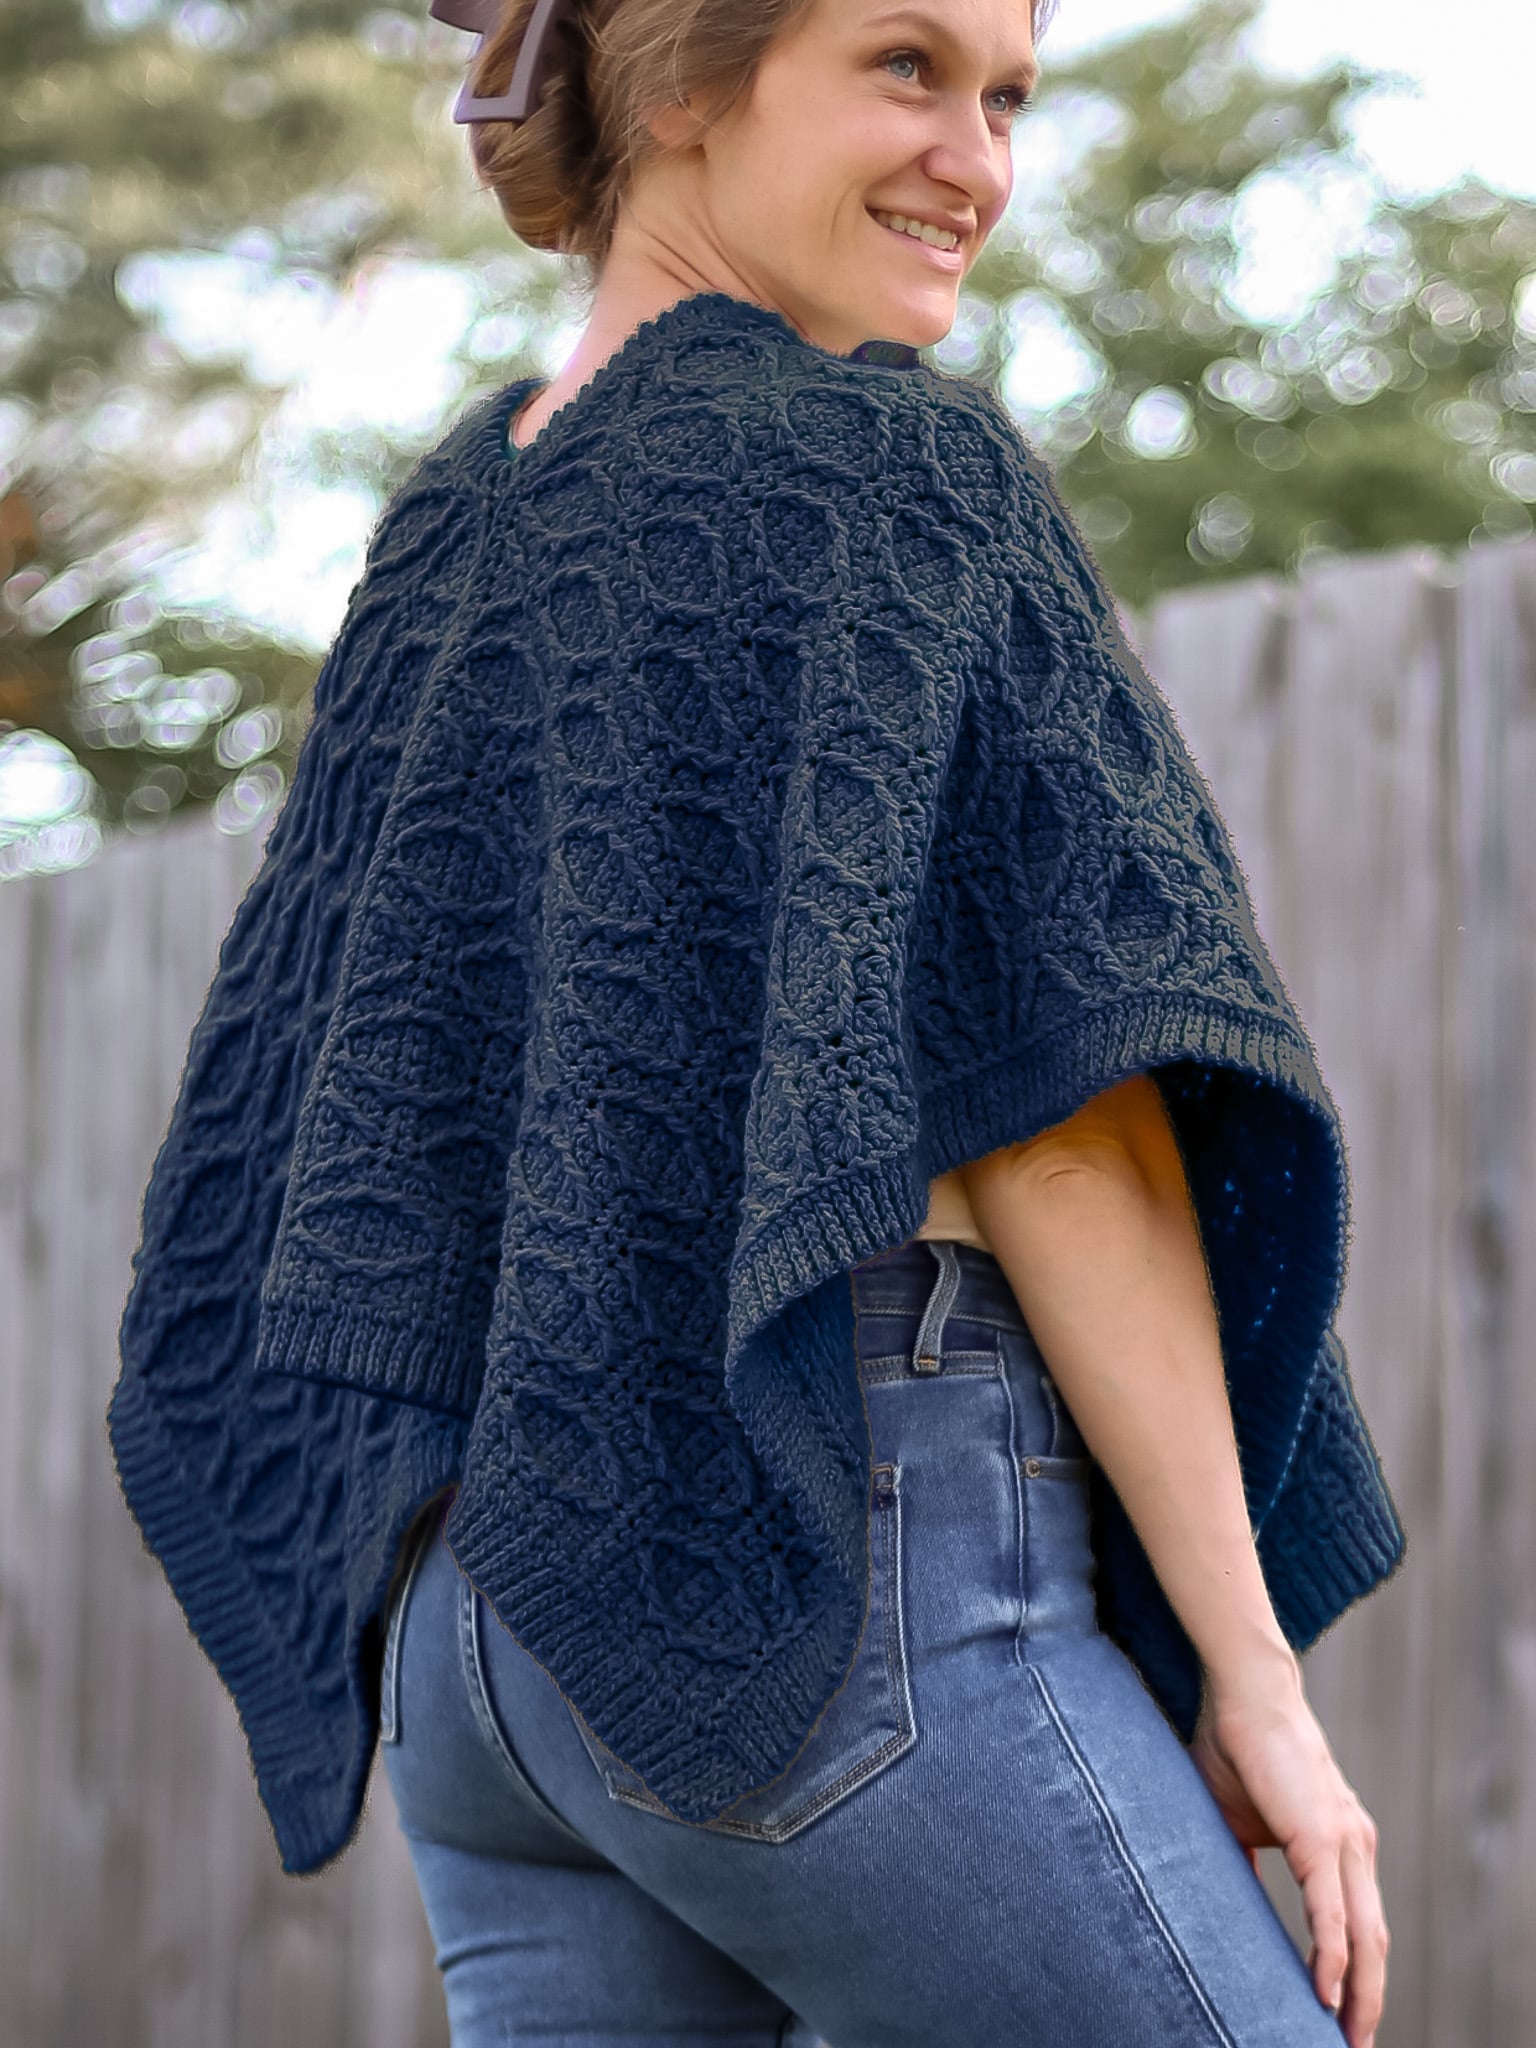
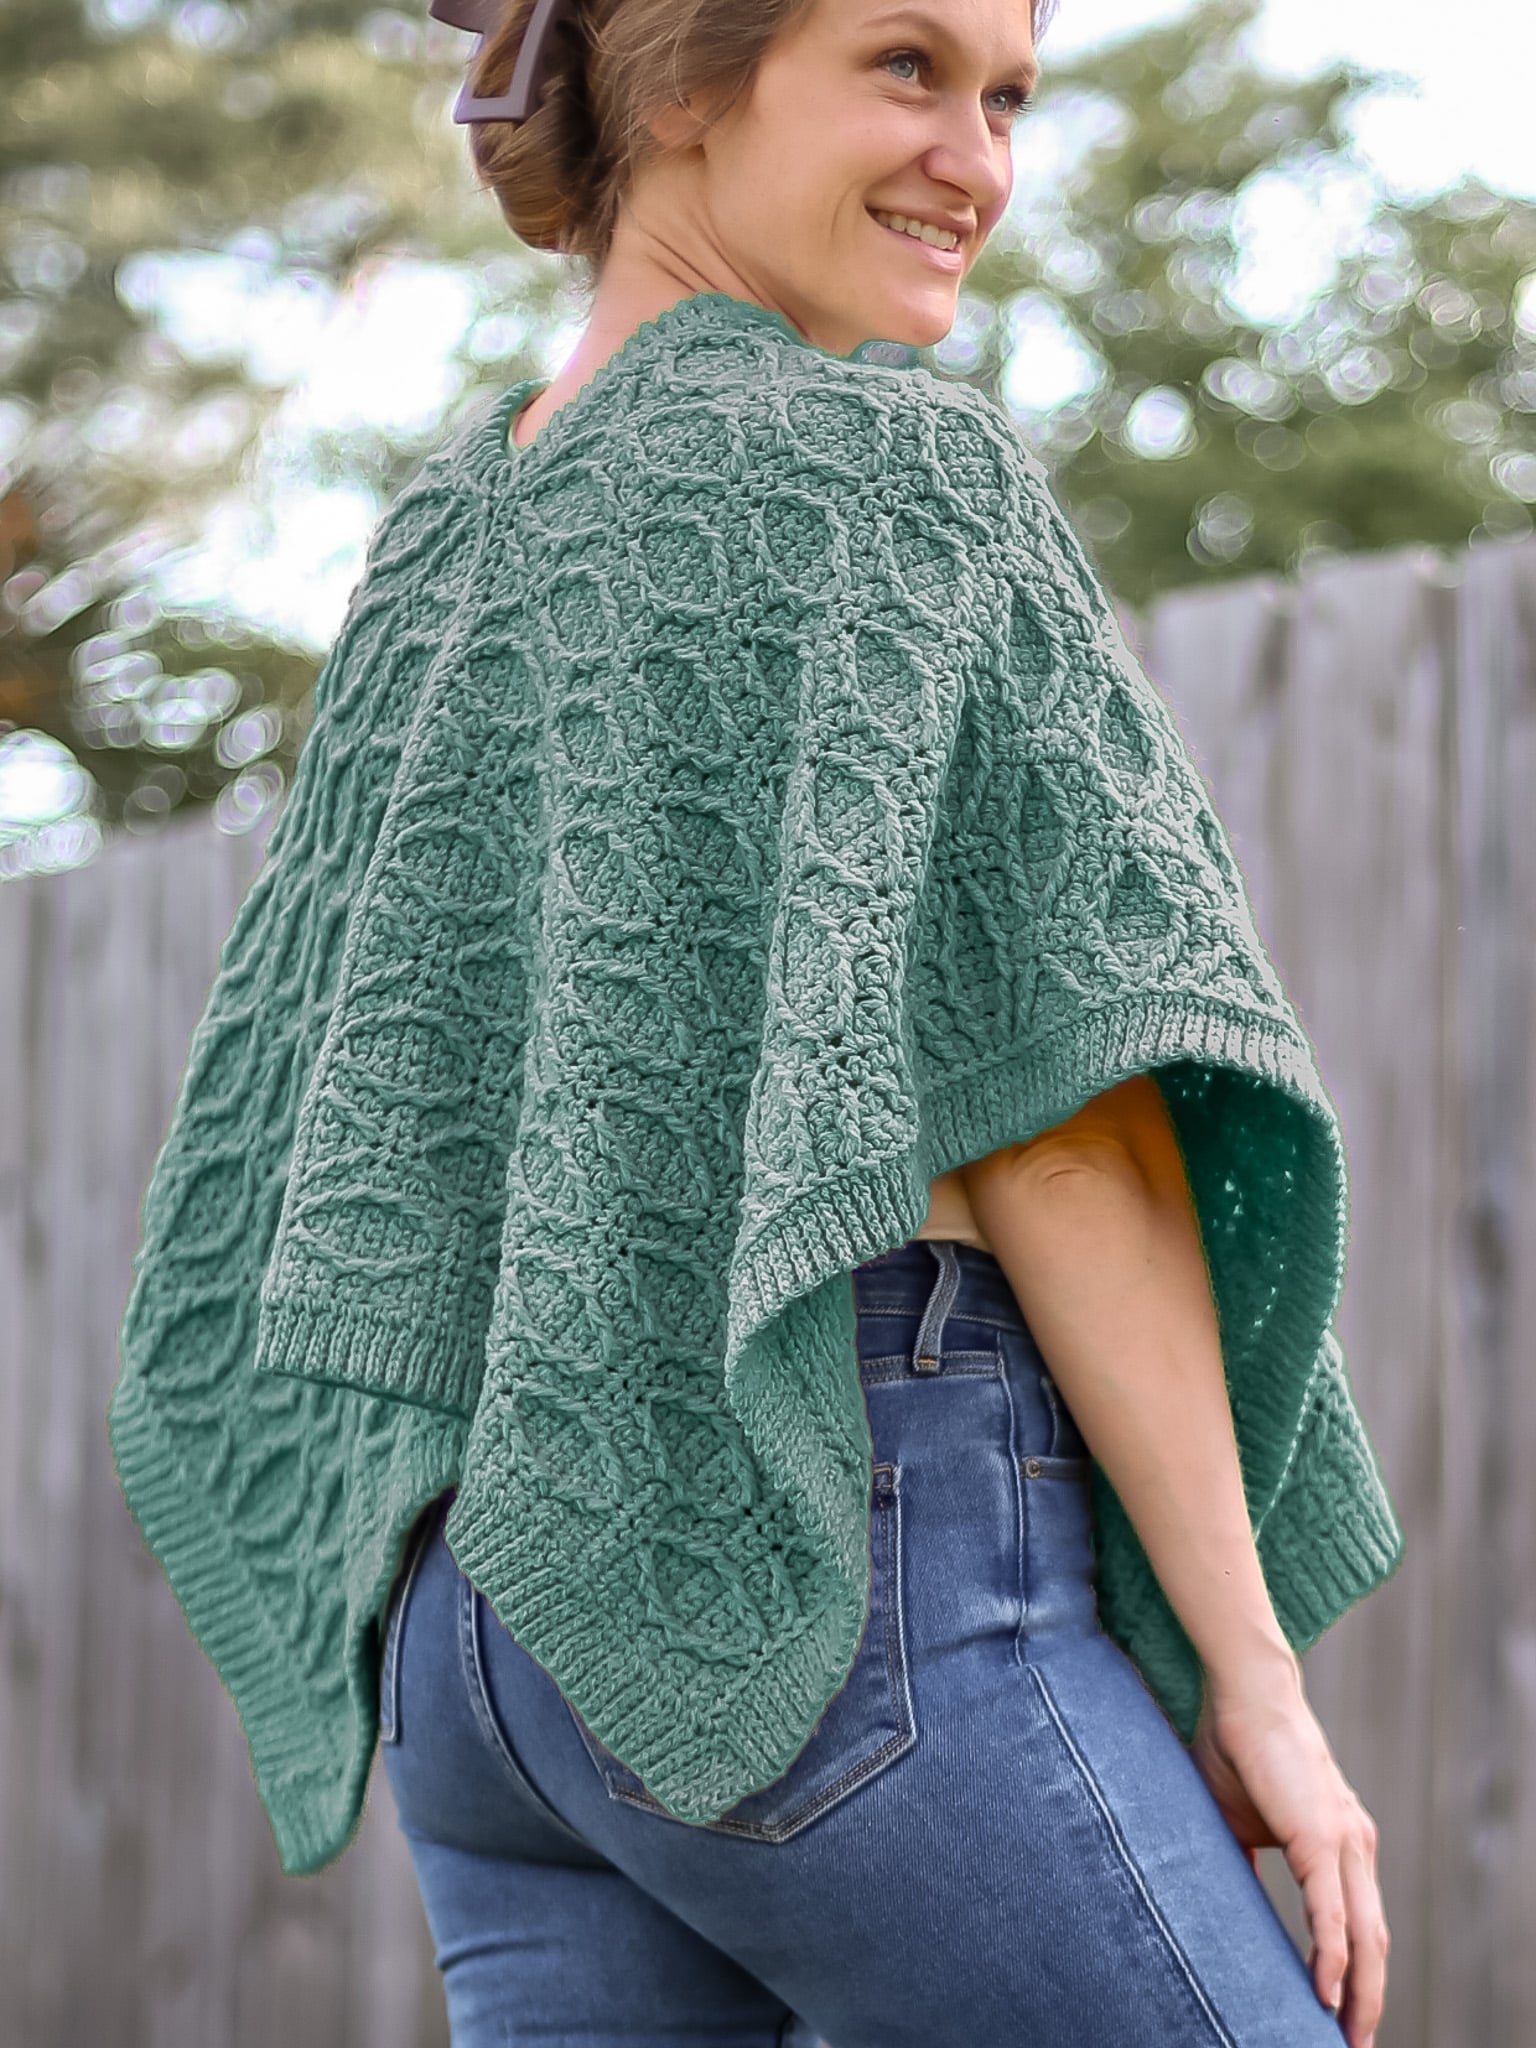
Color Choices for Any Season
This crocheted poncho was made using Wool-Ease, an 80% acrylic, 20% wool blend that combines the warmth of wool with the easy-care benefits of acrylic making it a yarn that is perfect for any season.
This worsted weight yarn comes in 30 gorgeous colors so you will surly be able to find a color that matches your style and fits the season you are creating for.

About the Yarn and Yarn Substitutes
Wool-Ease, with the right stitches and some blocking or steaming, creates a beautiful drape that makes this poncho have wonderful drape and is surprisingly lightweight!
I personally think that Wool Ease is kind of a puffy worsted, meaning the stitches have some serious squish. I think that for this semi easy poncho you could possibly use a lighter bulky weight yarn.
If you do decide to change the yarn weight or even keep the same wight but a different yarn please make sure to do a test swatch for gauge. If your gauge is off it’s not just sizing that is affected, but yardage too, and you don’t want to run out of yarn while making your handmade crochet poncho!
Here are a few good yarn subs:
- Vanna’s Choice – great choice for a 100% Acrylic with tons of colors!
- Color Theory – Super soft, gorgeous colors!
- Pima Cotton – for my 100% natural fiber girlies, you’ll love the softness of this yarn!
Come find me on…
- Like my Facebook Page
- Join my Facebook group!
- Subscribe to my YouTube Channel for Free Crochet Tutorials
- Get PDFs on Etsy
- Get PDFs on Ravelry
- Sign Up for the Life and Yarn Newsletter for more free modern crochet patterns!
- Please Note: Some links may be affiliate links that help to support the Life + Yarn Blog with a small commission at no added cost to you, thank you!
- Copyright 2026, Life and Yarn, Brianna Iaropoli. Pattern contents are NOT to be re-shared, DIRECT LINKS ONLY to this post for the pattern.
- Be sure to check out all of my other free crochet poncho patterns!
Materials
- Size 6.00 mm crochet hook
- 7 (8, 10) Skeins of Lion Brand Wool-Ease in Natural Heather
- #4 Worsted Weight Yarn 1370 (1570, 1970) yards
- Stitch Markers (optional)
- Yarn Needle
Gauge
- 14 sts by 16 rows is 4” by 4” in sc.
- Wether you are working with the recommended yarn, a yarn of similar fiber content or something different, gauge for this pattern along side your preferred blocking method is EXTREMELY important.
- Lion Brand’s Wool-Ease does/can block out significantly while other fibers might not.
- My PREBLOCKED Poncho Panels are 36” by 16.5” with trim on the Standard Size.
- My BLOCKED Poncho Panels are 41 by 17” once dry on the Standard Size, I used steam blocking.
- Please note that the WORN Gauge will be a bit larger due to the weight of the final fabric.
- The cables will lay much nicer once blocked.
- If using a different fiber, say 100% wool or 100% cotton for example, you may need to change your hook and/or blocking method to reach the same Blocked/Finished Gauge.
- If you would like your blanket wrap even larger consider wet blacking and pinning to really open up the stitches.
- Always treat your swatch the way you will treat your final project, some surprises are great, but not this one is not!
Sizing
- Petite (Standard, Plus)
- Size Chart is Blocked Measurements

How to Adjust Sizes
- How to Adjust the Length of the Body: The length of your body is dictated by the number of rows in this pattern. To add length you will add rows to the Body Panels within the cable section. Remember to add the same number of rows to both panels so each panel is the desired length/
- How to Adjust the Neck Opening: To adjust the Neck Opening you just need to seam more or less stitches together.
- How to Adjust Trims: If you would like thicker trims add more chains before you start your slip stitches. You can create more of a cowl neck by doing a longer chain when starting the ribbing around the neck opening.
- A Note on Yardage: Cables eat a lot of yarn in crochet so please be mindful of your gauge.
- IMPORTANT NOTE: Any changes to sizing will affect your yardage, buy an extra skein if you plan to adjust sizing to avoid running out of yarn or lot color variations.
Stitch Descriptions and Abbreviations
- Chain Stitch – ch
- Stitch(es) – st(s)
- Skip – sk
- Back Loop Only – blo
- Slip Stitch – sl st
- Single Crochet – sc
- Front Post Double Crochet – FPdc -Work a double crochet as you normally would by placing your hook from front to back to front around the post of the designated stitch.
- Foundation Single Crochet – Fsc – Chain 2, insert hook into 2nd chain from hook, yarn over and pull up a loop (2 loops on hook), yarn over, draw through 1 loop, (2 loops on hook with 1 ch created), yarn over, draw through all loops (1 loop on hook, 1 foundation single crochet with chain at the bottom). *Insert hook to the bottom of the stitch you just made, it will look like the top or “V” of a stitch, yarn over, pull up 1 loop (2 loops on hook), yarn over, draw through 1 loop (2 loops on hook with 1 ch created), yarn over, draw through all loops;* repeat from * to * for desired amount of stitches.
Pattern Notes
- * Designates a repeat.
- Skill Level: Advanced
- “sc 1” means to single crochet in the next stitch.
- “sc 2” means to single crochet in each of the next 2 stitches.
- “2 sc” means to single crochet twice in the next stitch to create an increase.
- There are NO chain 1’s in the cable section but there ARE chain 1’s in the trim rows/rounds.
- Pattern is designed using the Size Groupings “Petite (Standard, Plus)”. Read more about customizing your size in the “Tips for Sizing” below.
- Stitch count does not change from Row 1 unless noted.
- Watch the Video Tutorial for a close up to create invisible seams.
Crochet Cables Tips and Notes
- When a FPdc is created make sure to skip the single crochet stitches behind.
- You will have the same number of stitches in all cable rows as single crochet rows.
- To create the Row 3 FPdc sts you will work them in the Fsc Row. Each next cable row will work its FPdc sts in FPdc sts of the previous row.
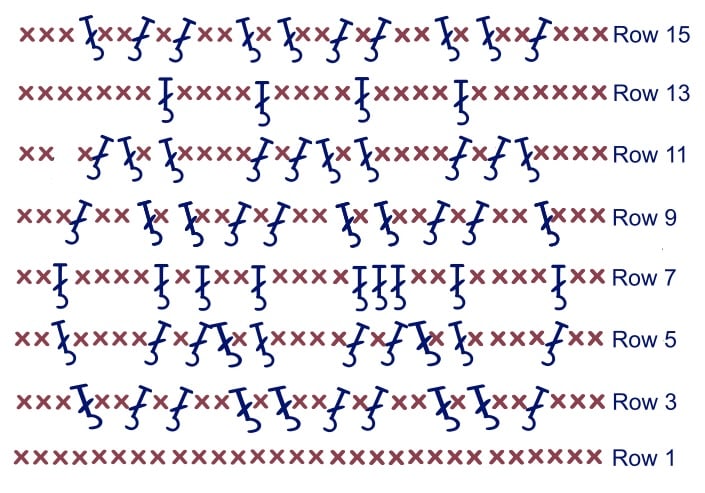
- Row 15 is an exception and has FPdc sts worked in single crochet stitches so be mindful of your stitch placement in the rows and when to work in a single crochet. Use the stitch diagram for clarity.
- Reference the crochet stitch diagram for the repeats and proper stitch placement, note that FPdc sts are worked in FPdc sts but for clarity the diagram does NOT show the overlap.
- FPdc sts are always worked in FPdc sts with the exception of Row 3 where the FPdc sts are worked in the Foundation Single Crochet Stitches of Row 1 and Row 15.
- If you find that your Front Post Double Crochet Stitches are too tight you can swap them for Treble Crochet Stitches.
Crochet Poncho Free Pattern
Body Panels – Make 2
Row 1 – Fsc 100 (120, 120)
Row 2 – Turn, sc across in each stitch.
Note: To create the Row 3 FPdc sts you will work them in the Fsc Row. Each next cable row will work its FPdc sts in FPdc sts of the previous row.
Row 3 – Turn, sc 3, sk 4-Fsc, FPdc in next Fsc st, sc 2, FPdc in next Fsc st, sc 1, sk-1 Fsc, FPdc in next Fsc st, sk 2-Fsc, sc 1, *sk 2-Fsc, sc 1, FPdc in next Fsc, sc 1, sk 1-Fsc, FPdc in next Fsc, sc 2, FPdc in next Fsc, sc 1, sk 1-Fsc,** FPdc in next Fsc, sk 2-Fsc, sc 1, repeat from * across ending last rep at ** before last 2 sts, sc 2 in remaining sts.
Row 4 – Turn, sc across in each stitch.
Row 5 – Turn, sc 2, FPdc in next FPdc, sc 4, FPdc in next FPdc, sc 1, FPdc in next FPdc, *FPdc in next FPdc, sc 1, FPdc in next FPdc, sc 4, FPdc in next FPdc,** sc 1, FPdc in next FPdc, repeat from * across ending last rep at ** before last 2 sts, sc 2 in remaining sts.
Row 6 – Turn, sc across in each stitch.
Row 7 – Turn, sc 2, FPdc in next FPdc, sc 4, FPdc in next FPdc, sc 2, *sc 2, FPdc in next FPdc, sc 4, FPdc in next FPdc,** sc 2, repeat from * across ending last rep at ** before last 2 sts, sc 2 in remaining sts.
Row 8 – Turn, sc across in each stitch.
Row 9 – Turn, sc 3, FPdc in next FPdc, sc 2, FPdc in next FPdc, sc 1, FPdc in next FPdc, sc 1, *sc 1, FPdc in next FPdc, sc 1, FPdc in next FPdc, sc 2, FPdc in next FPdc, sc 1,** FPdc in next FPdc, sc 1, repeat from * across ending last rep at ** before last 2 sts, sc 2 in remaining sts.
Row 10 – Turn, sc across in each stitch.
Row 11 – Turn, sc 4, FPdc 2 in next 2-FPdc, sc 1, FPdc in next FPdc, sc 2, *sc 2, FPdc in next FPdc, sc 1, FPdc 2 in next 2-FPdc, sc 1, ** FPdc in next FPdc, sc 2, repeat from * across ending last rep at ** before last 2 sts, sc 2 in remaining sts.
Row 12 – Turn, sc across in each stitch.
Row 13 – Turn, sc 7, FPdc in next FPdc, sc 2, *sc 2, FPdc in next FPdc, sc 4,** FPdc in next FPdc, sc 2, repeat from * across ending last rep at ** sc in each remaining st.
Row 14 – Turn, sc across in each stitch.
Row 15 – Turn, sc 3, sk 4-sc, FPdc in next sc, sc 2, FPdc in next sc, sc 1, FPdc in next FPdc, sc 1, *sc 1, FPdc in next FPdc, sc 1, sk 1-sc, FPdc in next sc, sc 2, FPdc in next sc, sc 1,** FPdc in next FPdc, sc 1, repeat from * across ending last rep at ** before last 2 sts, sc 2 in remaining sts.
Row 16 – Turn, sc across in each stitch.
Rows 17 to 90 (90, 102) – Repeat Rows 4 to 15 ending on a Row 12 repeat.
Crochet Stitch Diagram
Assembly and Seaming Instructions
- Lightly pre-block your panels to help relax your stitches to make seaming your poncho together easier.
- Lay your front panels with the right sides up and your final rows aligned.
- Starting at the outer edge of one side thread a darning needle with approximately 30” of yarn and use a mattress stitch to join 35 (45, 45) stitches, finish off.
- Repeat Step 3 on the other side.
- You will have 30 stitches left unworked to for the neck opening.
Front and Back Body Trims
- Reattach your yarn in the Foundation Single Crochet Row of one side of your poncho, chain 6, turn so that the right side of the poncho is facing you, sl st in the second chain from the hook and each next chain back to the Fsc of poncho. [5 total sl sts]
- Sl st in the next st of Poncho, turn, skip first sl st, sl st blo next 5 sts.
- Turn, ch 1, sl st blo in next 5 sl sts.
- Sl st in the next st of Pocho turn, skip first sl st, sl st blo next 5 sts.
- Repeat Steps 3 and 4 to the end.
Repeat Steps 1-5 on the other panel.
Side Body Trims
Note: For the trims here you will be working in the Slip Stitches and the Row Ends. Be sure to work evenly over the row ends.
- Reattach your yarn in a Slip Stitch Row of one side of your poncho, chain 6, turn so that the right side of the poncho is facing you, sl st in the second chain from the hook and each next chain back to the poncho. [5 total sl sts]
- Sl st in the next st, turn, skip first sl st, sl st blo next 5 sts.
- Turn, ch 1, sl st blo in next 5 sl sts.
- Sl st in the next st turn, skip first sl st, sl st blo next 5 sts.
- Repeat Steps 3 and 4 to the end.
Neck Trim
- Reattach your yarn in the Final Row of one side of your poncho panels in the neck opening, chain 4, turn so that the right side of the poncho is facing you, sl st in the second chain from the hook and each next chain back to the final row of the poncho. [3 total sl sts]
- Sl st in the next st of poncho, turn, skip first sl st, sl st blo next 3 sts.
- Turn, ch 1, sl st blo in next 3 sl sts.
- Sl st in the next st of poncho turn, skip first sl st, sl st blo next 3 sts.
- Repeat Steps 3 and 4 to the end then seam the first row to the last row.
Loved this project? Check out some other easy crochet poncho patterns on my Ponchos and Ruanas Category!


