Free Classic Baby Blanket Crochet Pattern – Beautiful Vintage Style
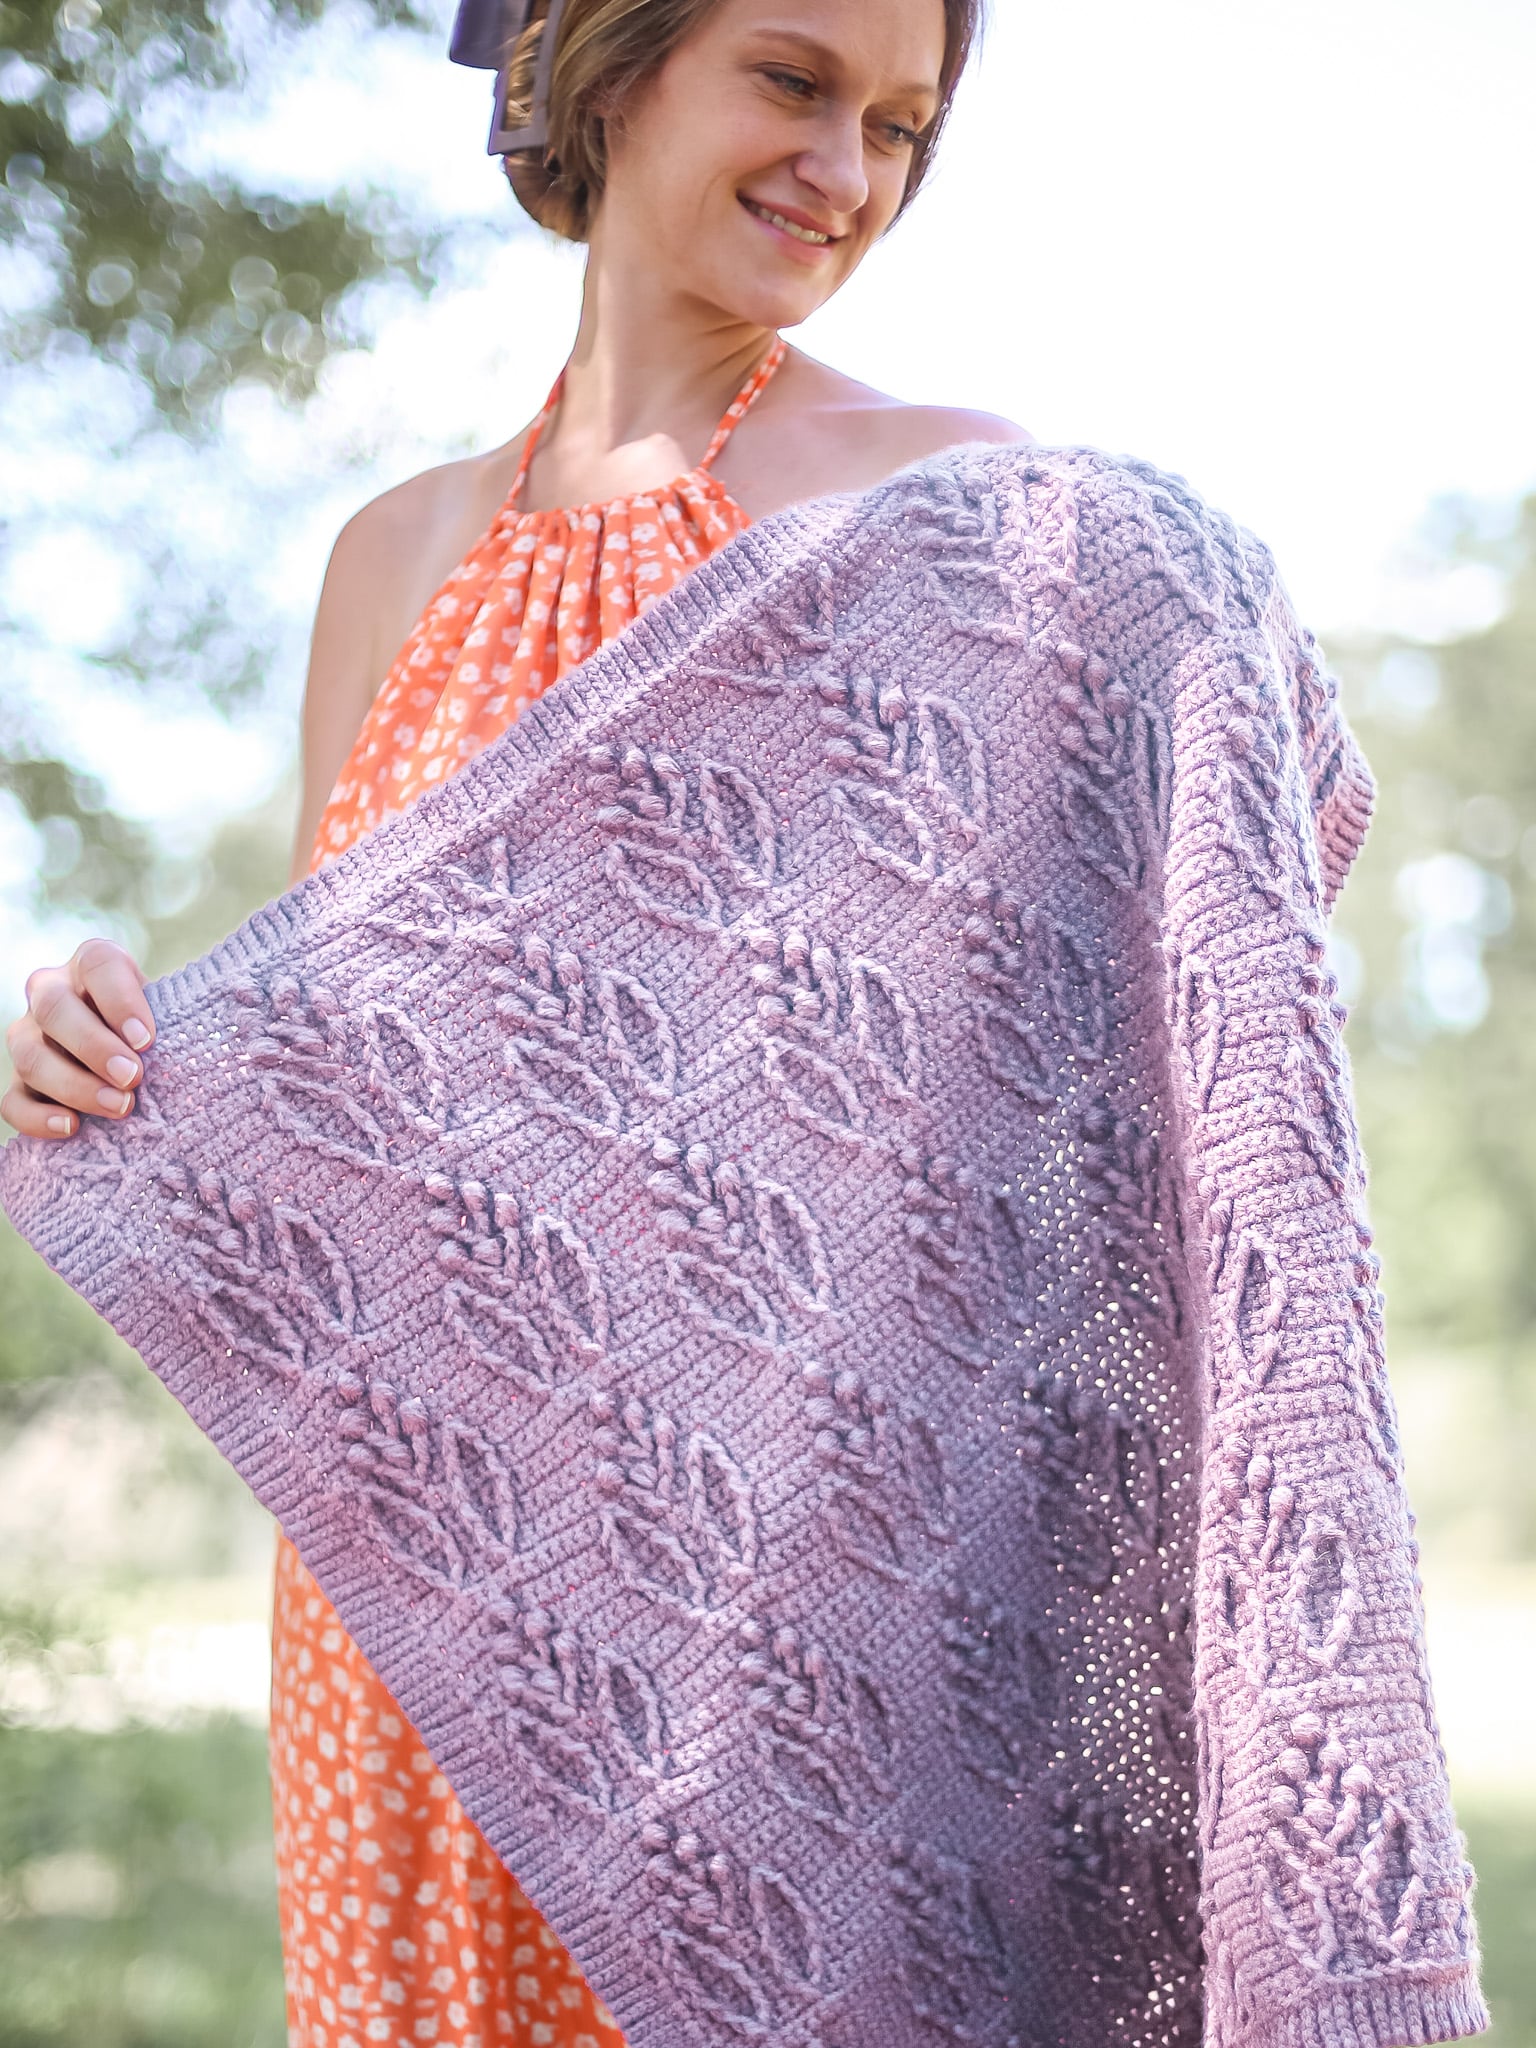
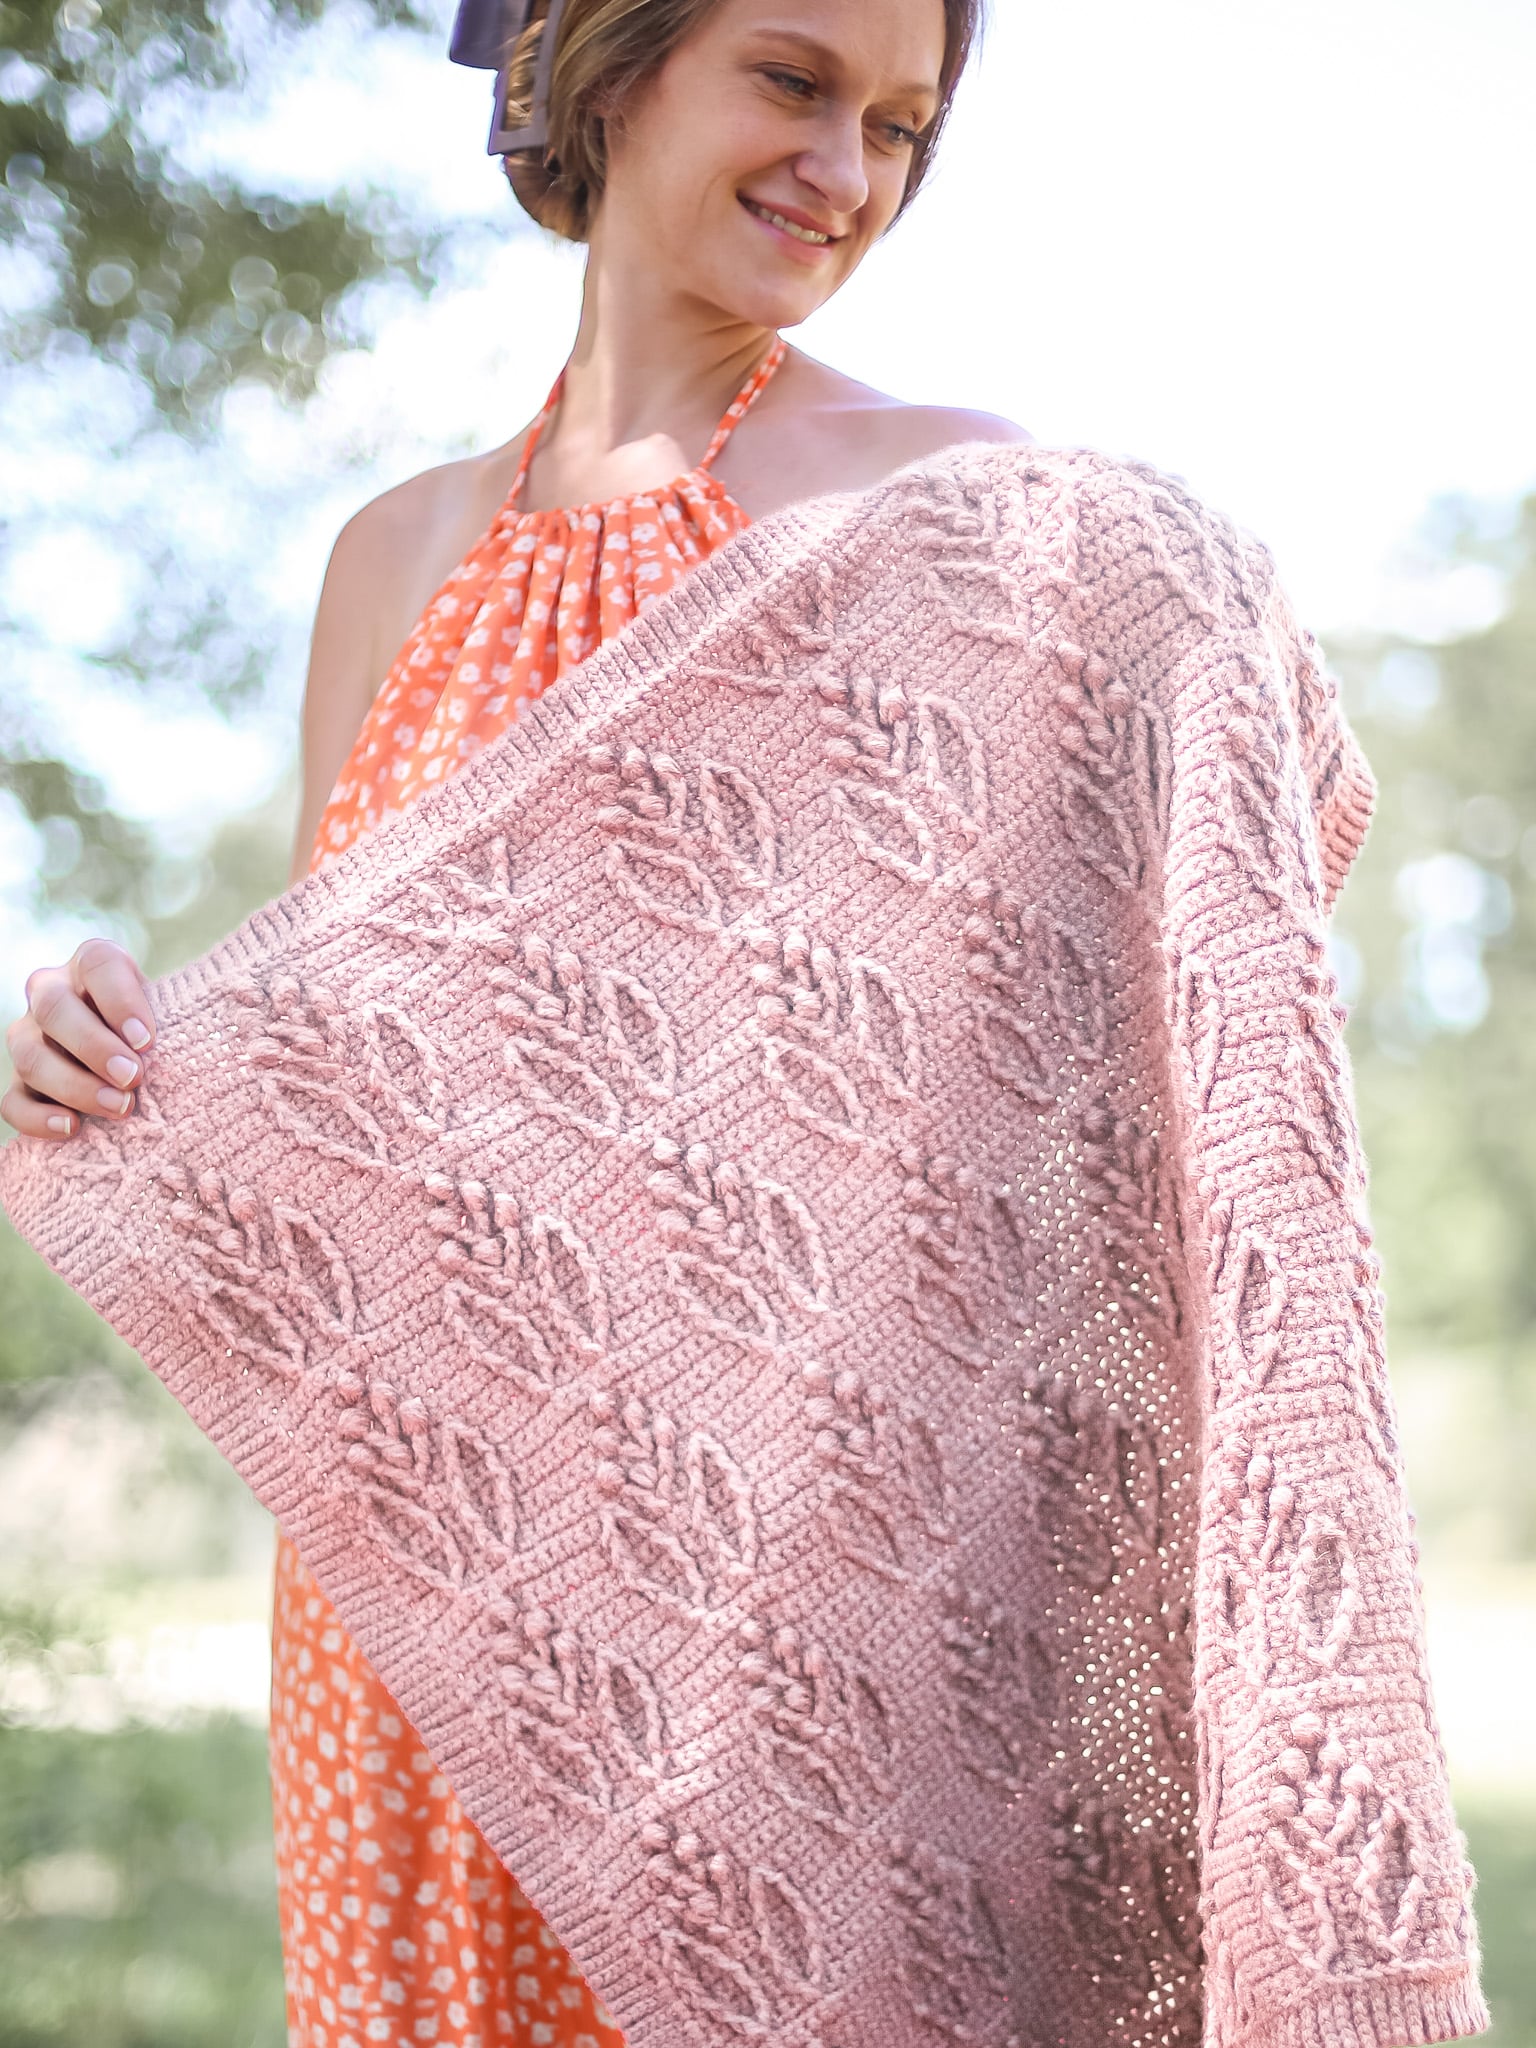
Crochet Baby Blankets are meant to be something special, an item to be gifted and cherished. The Garden Heirloom Baby Blanket is a perfect gift for a baby girl.
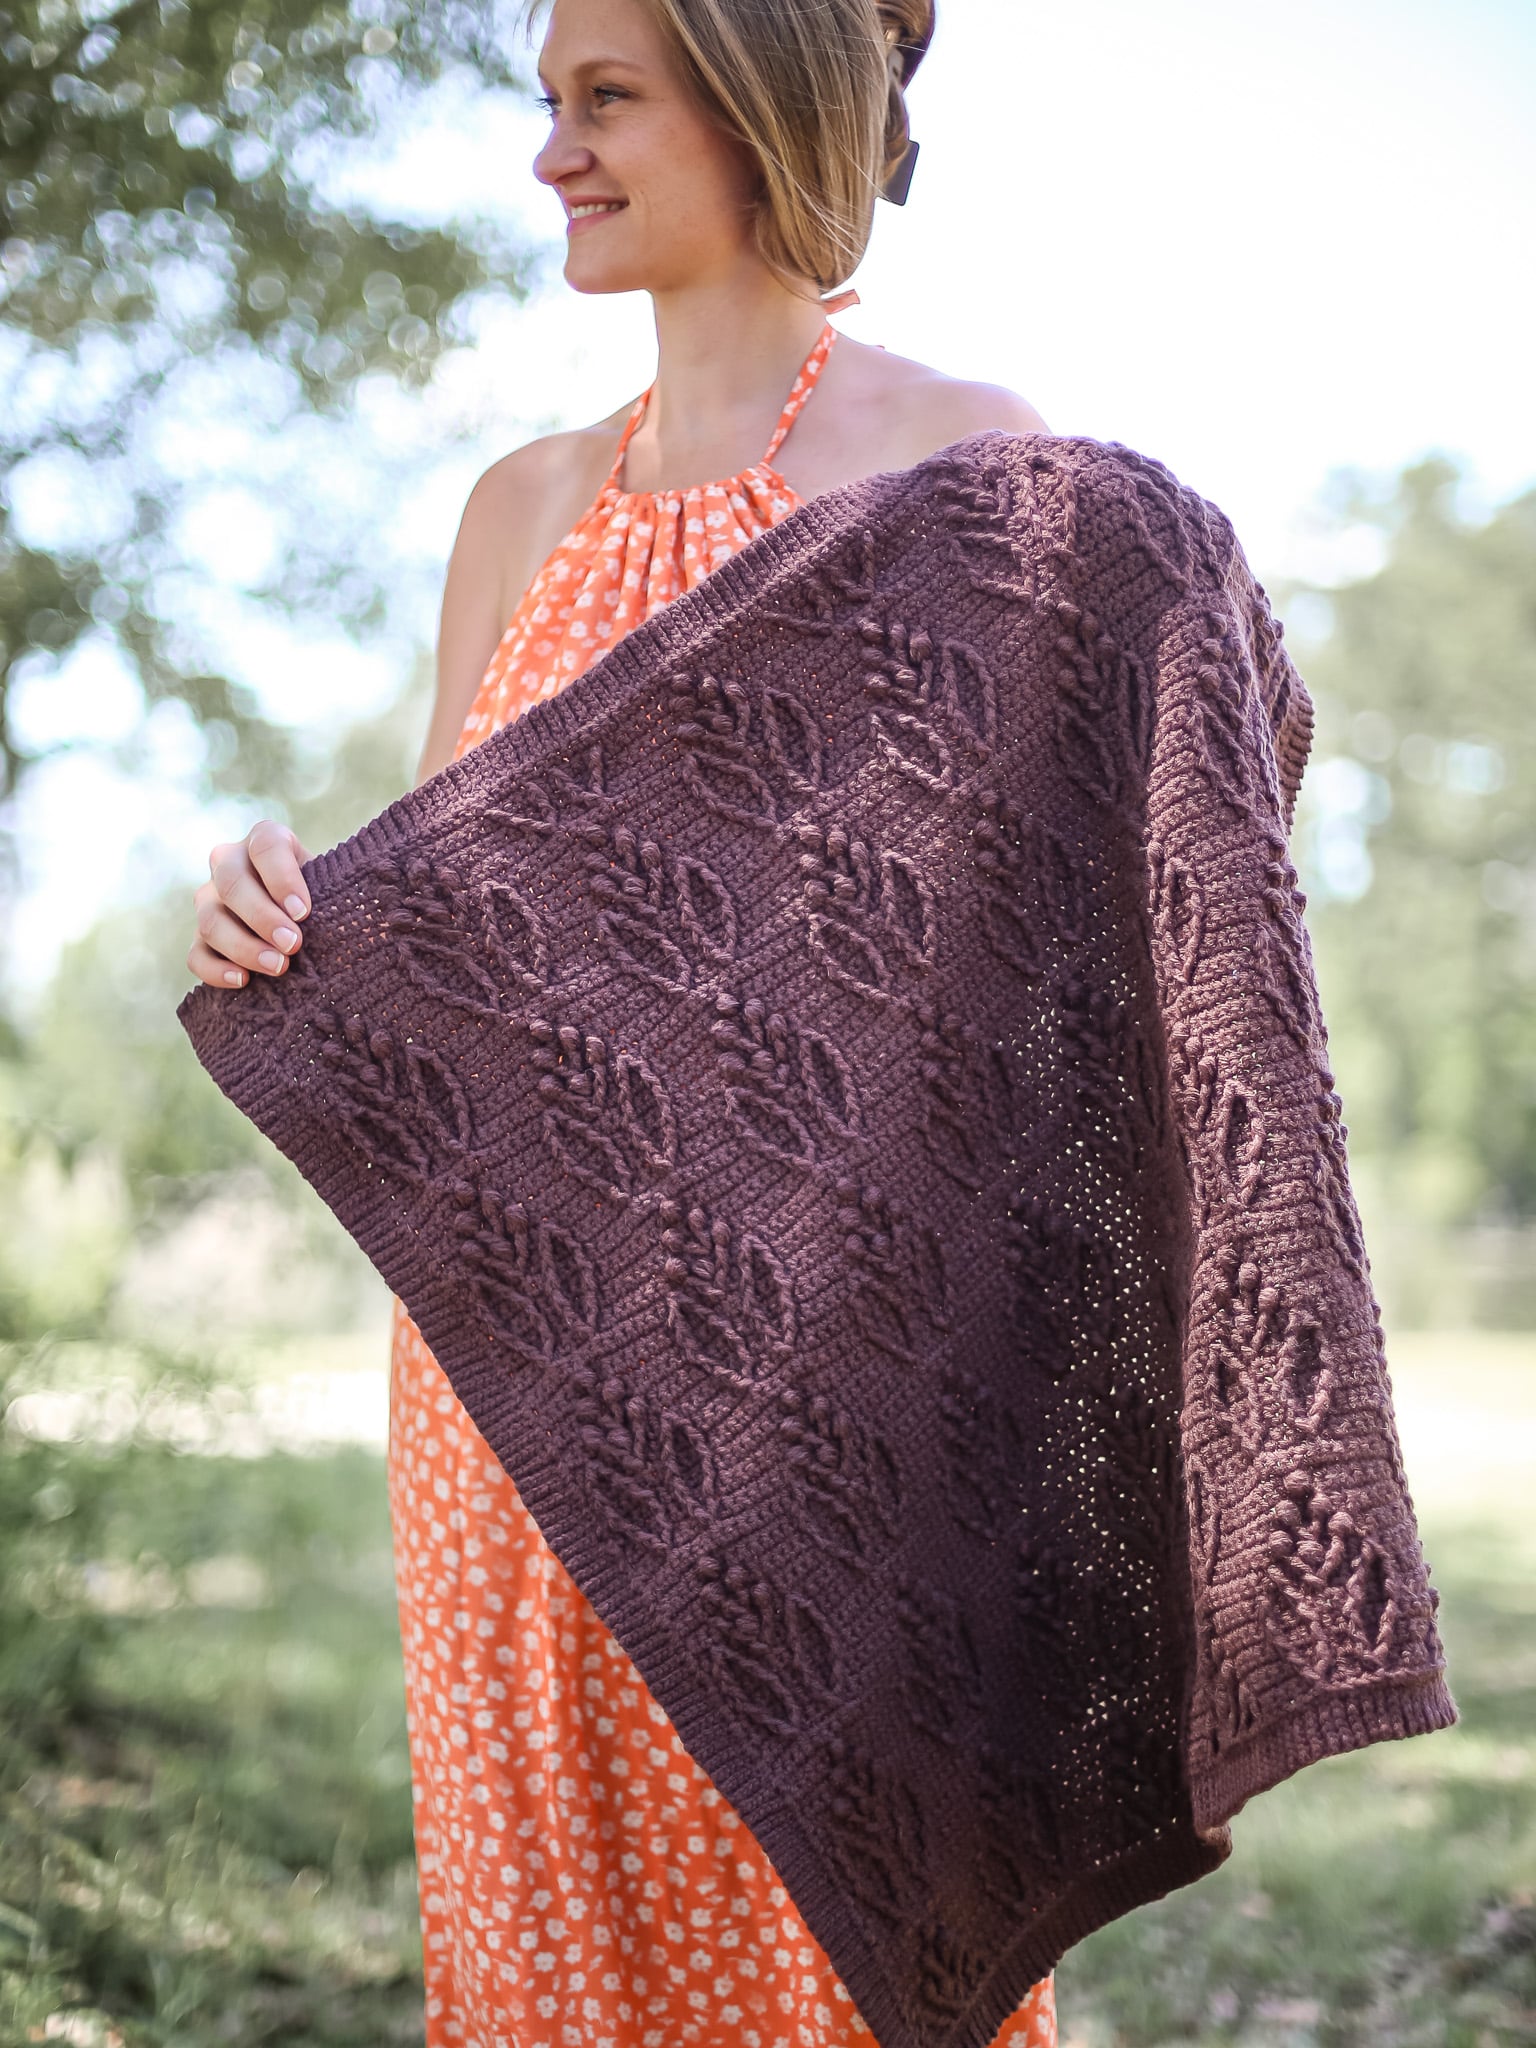
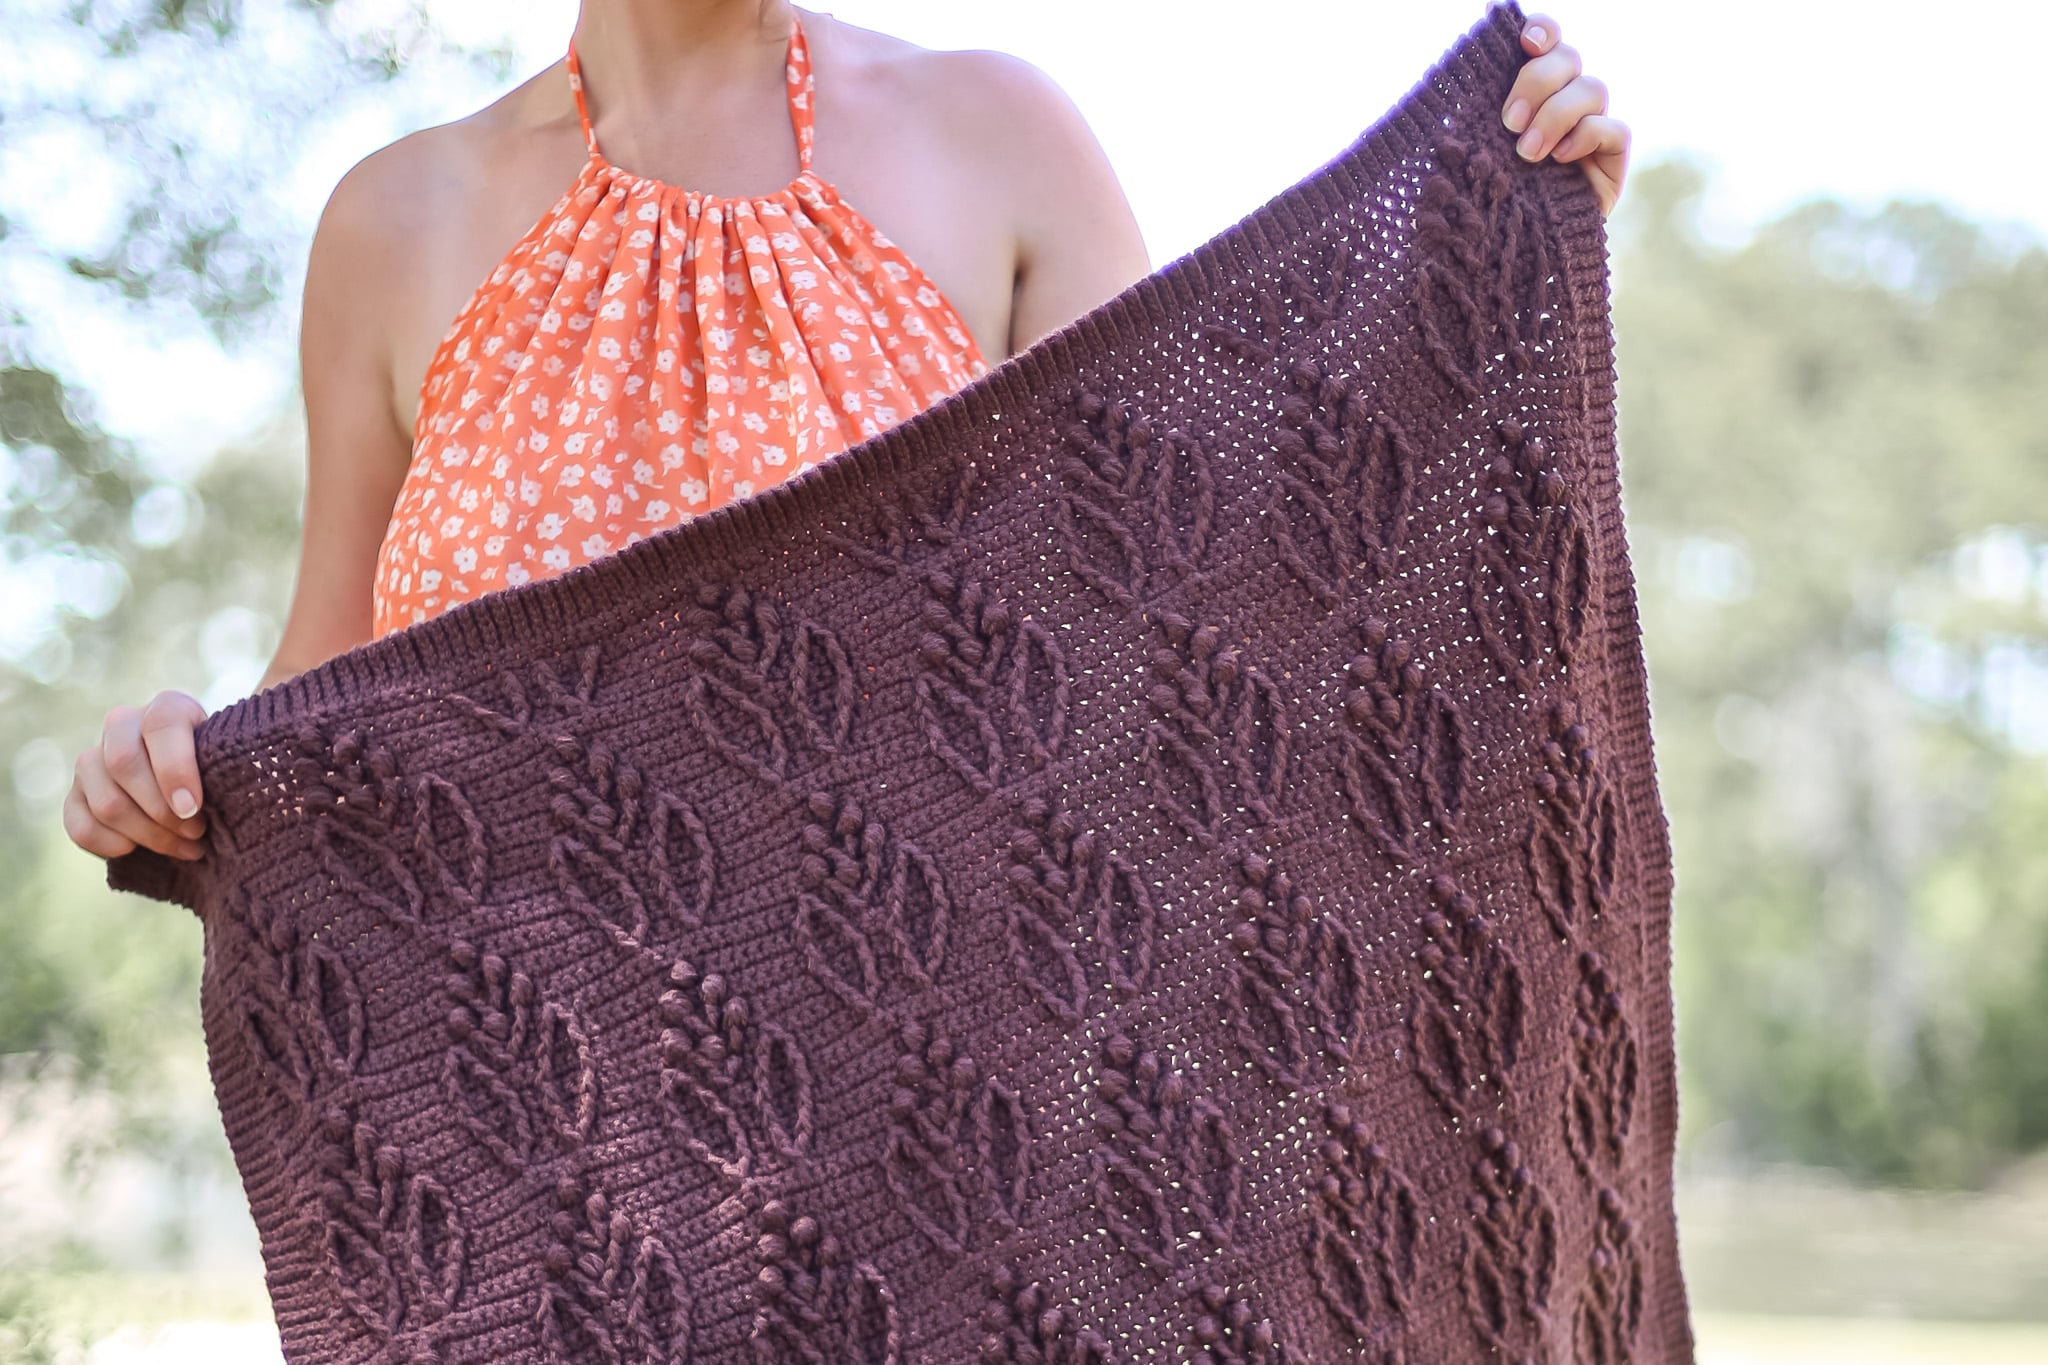
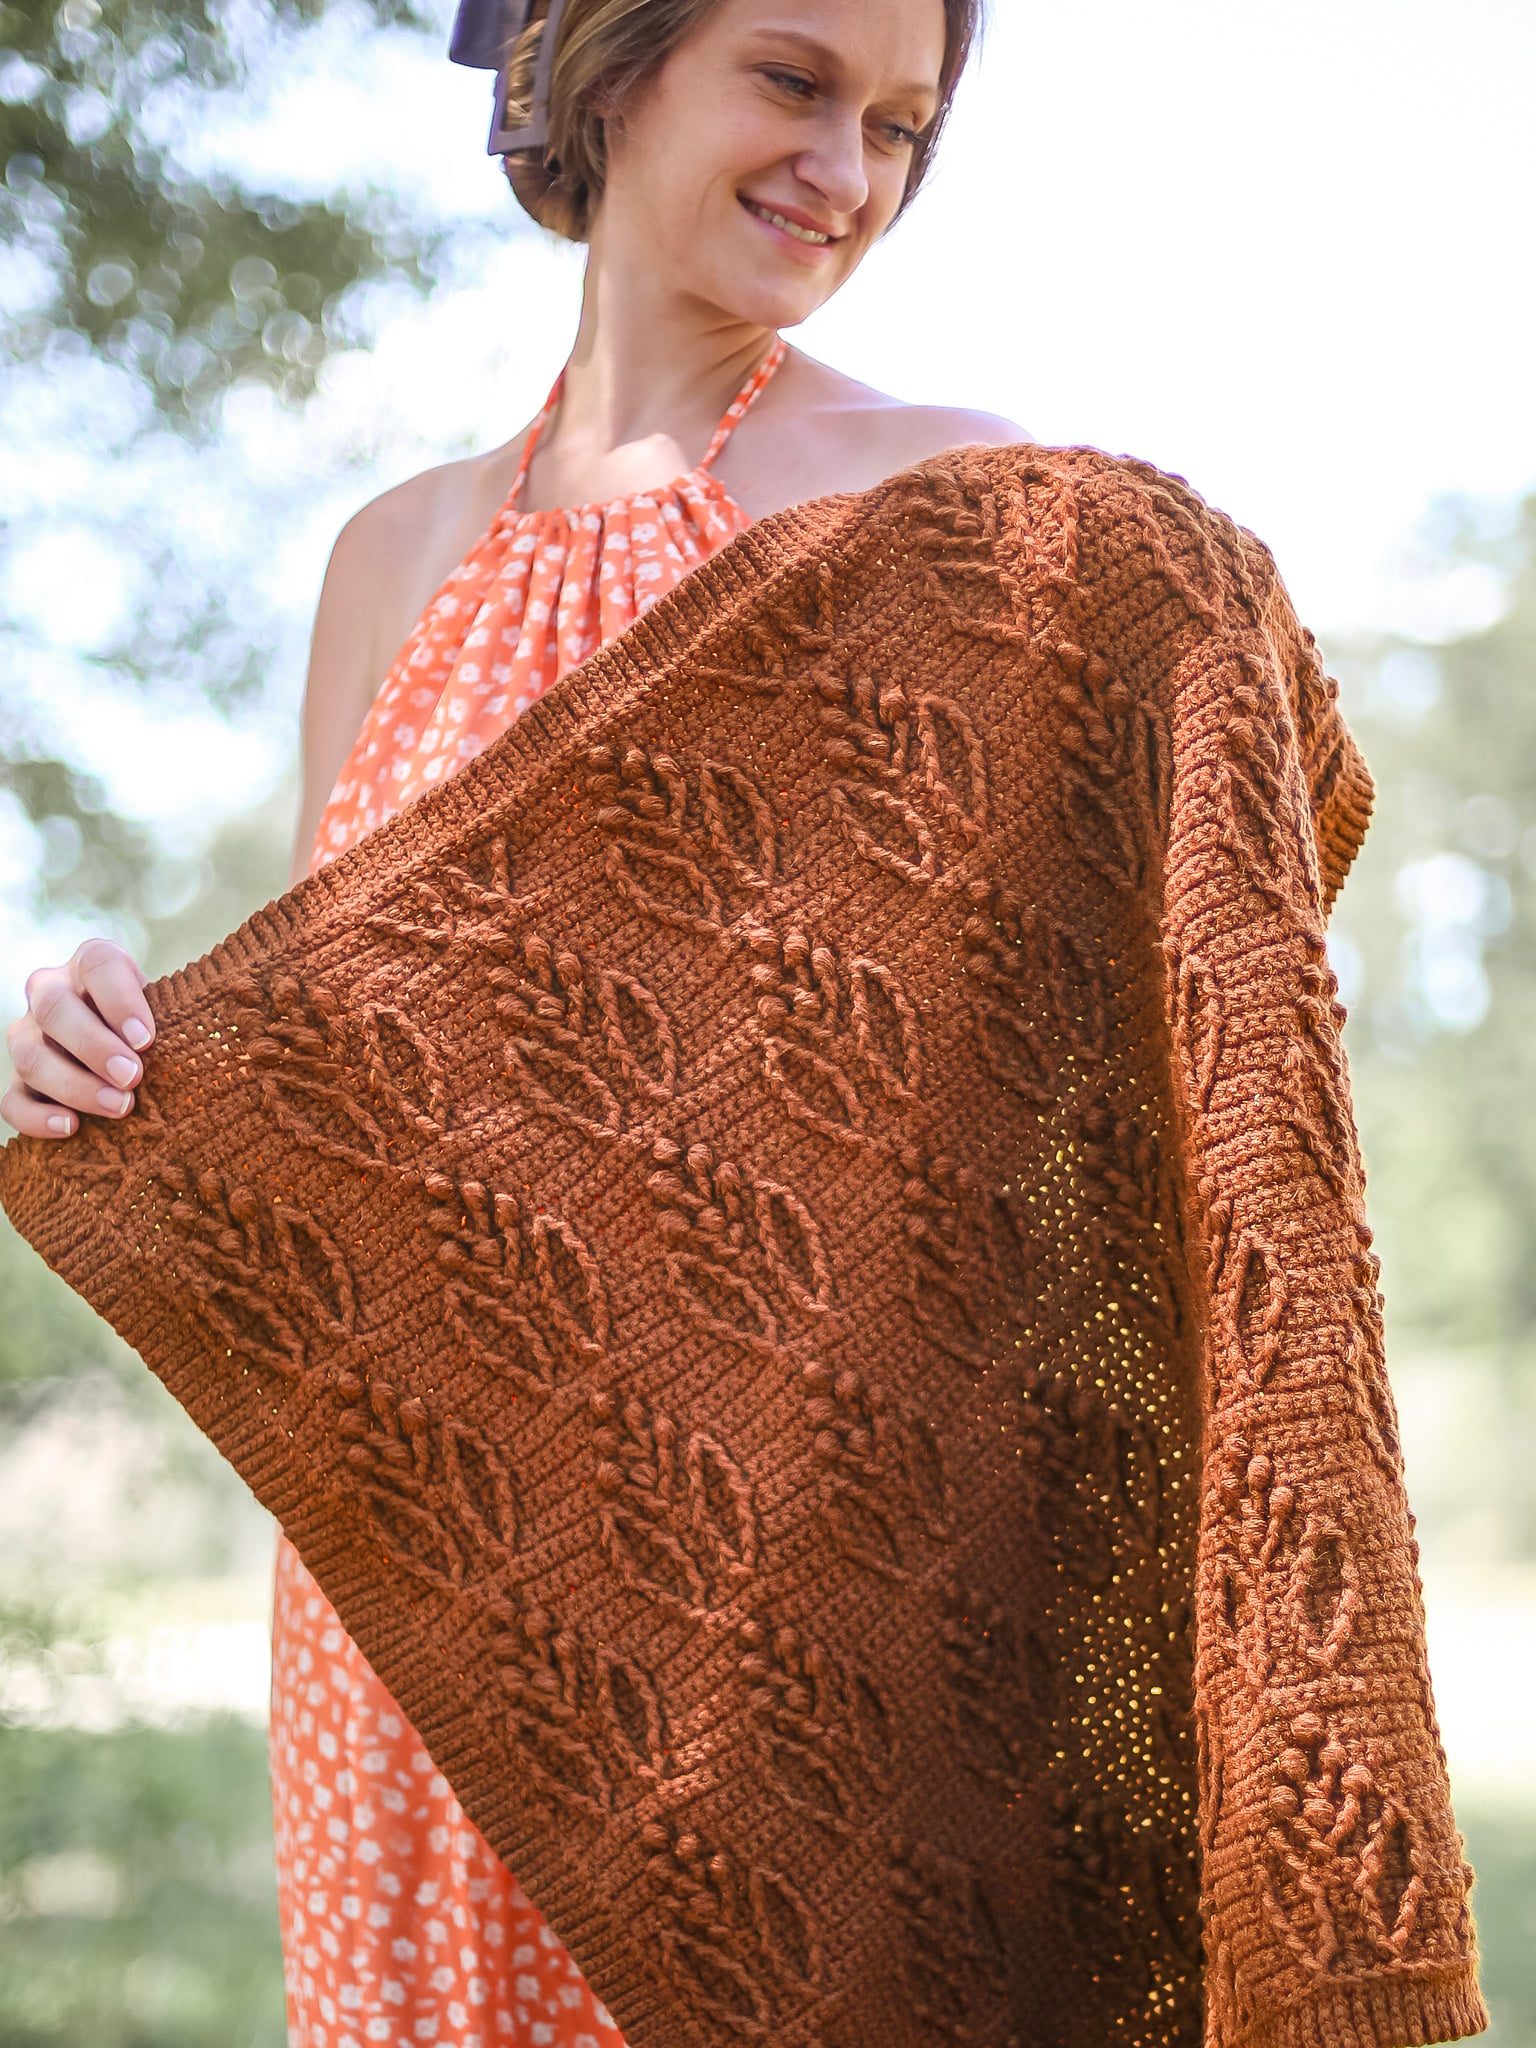
This delicate classic baby blanket crochet pattern has a beautiful texture created by a unique crochet cables that makes a floral motif.
Use the easy Table of Contents Below to read more about this modern classic baby blanket crochet pattern, get your materials and start using the written instructions and crochet stitch diagram in this blog post, Happy Crocheting!
Best Bang for your Buck, get a Kit From Lion Brand includes a printable PDF ad-free pdf version of this pattern and Yarn!
Get a PDF Pattern on in my Etsy Shop or Ravelry!
About this Beautiful Baby Blanket
This perfect baby blanket is an Advanced Skill Level Pattern that uses basic crochet stitches with advanced stitch placement and techniques to create the cables.
The right side of this blanket creates a beautiful flower motif using cables. These cables are unique because we are not just using front post double crochet but also a front post puff stitch!
That puff stitch makes a wonderful texture that babies will love on this crochet blanket, especially when used for tummy time!
To add the ribbed knit look crochet border you will continue from the final row so that you add the ribbing seamlessly so that there are no separate pieces in this crochet project.
If you want to make more blankets check out these free patterns!
Created for a Collection
This crochet snuggly blanket free pattern was created in collaboration with Lion Brand to bring you a collection of heirloom quality crochet pieces!
I believe crochet is meant to help you slow down, create with intention and help you to disconnect to reconnect. Yarn crafts have been experiencing some sort of a revival, especially among a younger generation searching for a tangible hobby.
I designed these 4 pieces to take my grandma hobby to the next level creating yet more advanced crochet patterns that allow my brain to stretch. I hope you enjoy all of them as much as I enjoyed creating them!
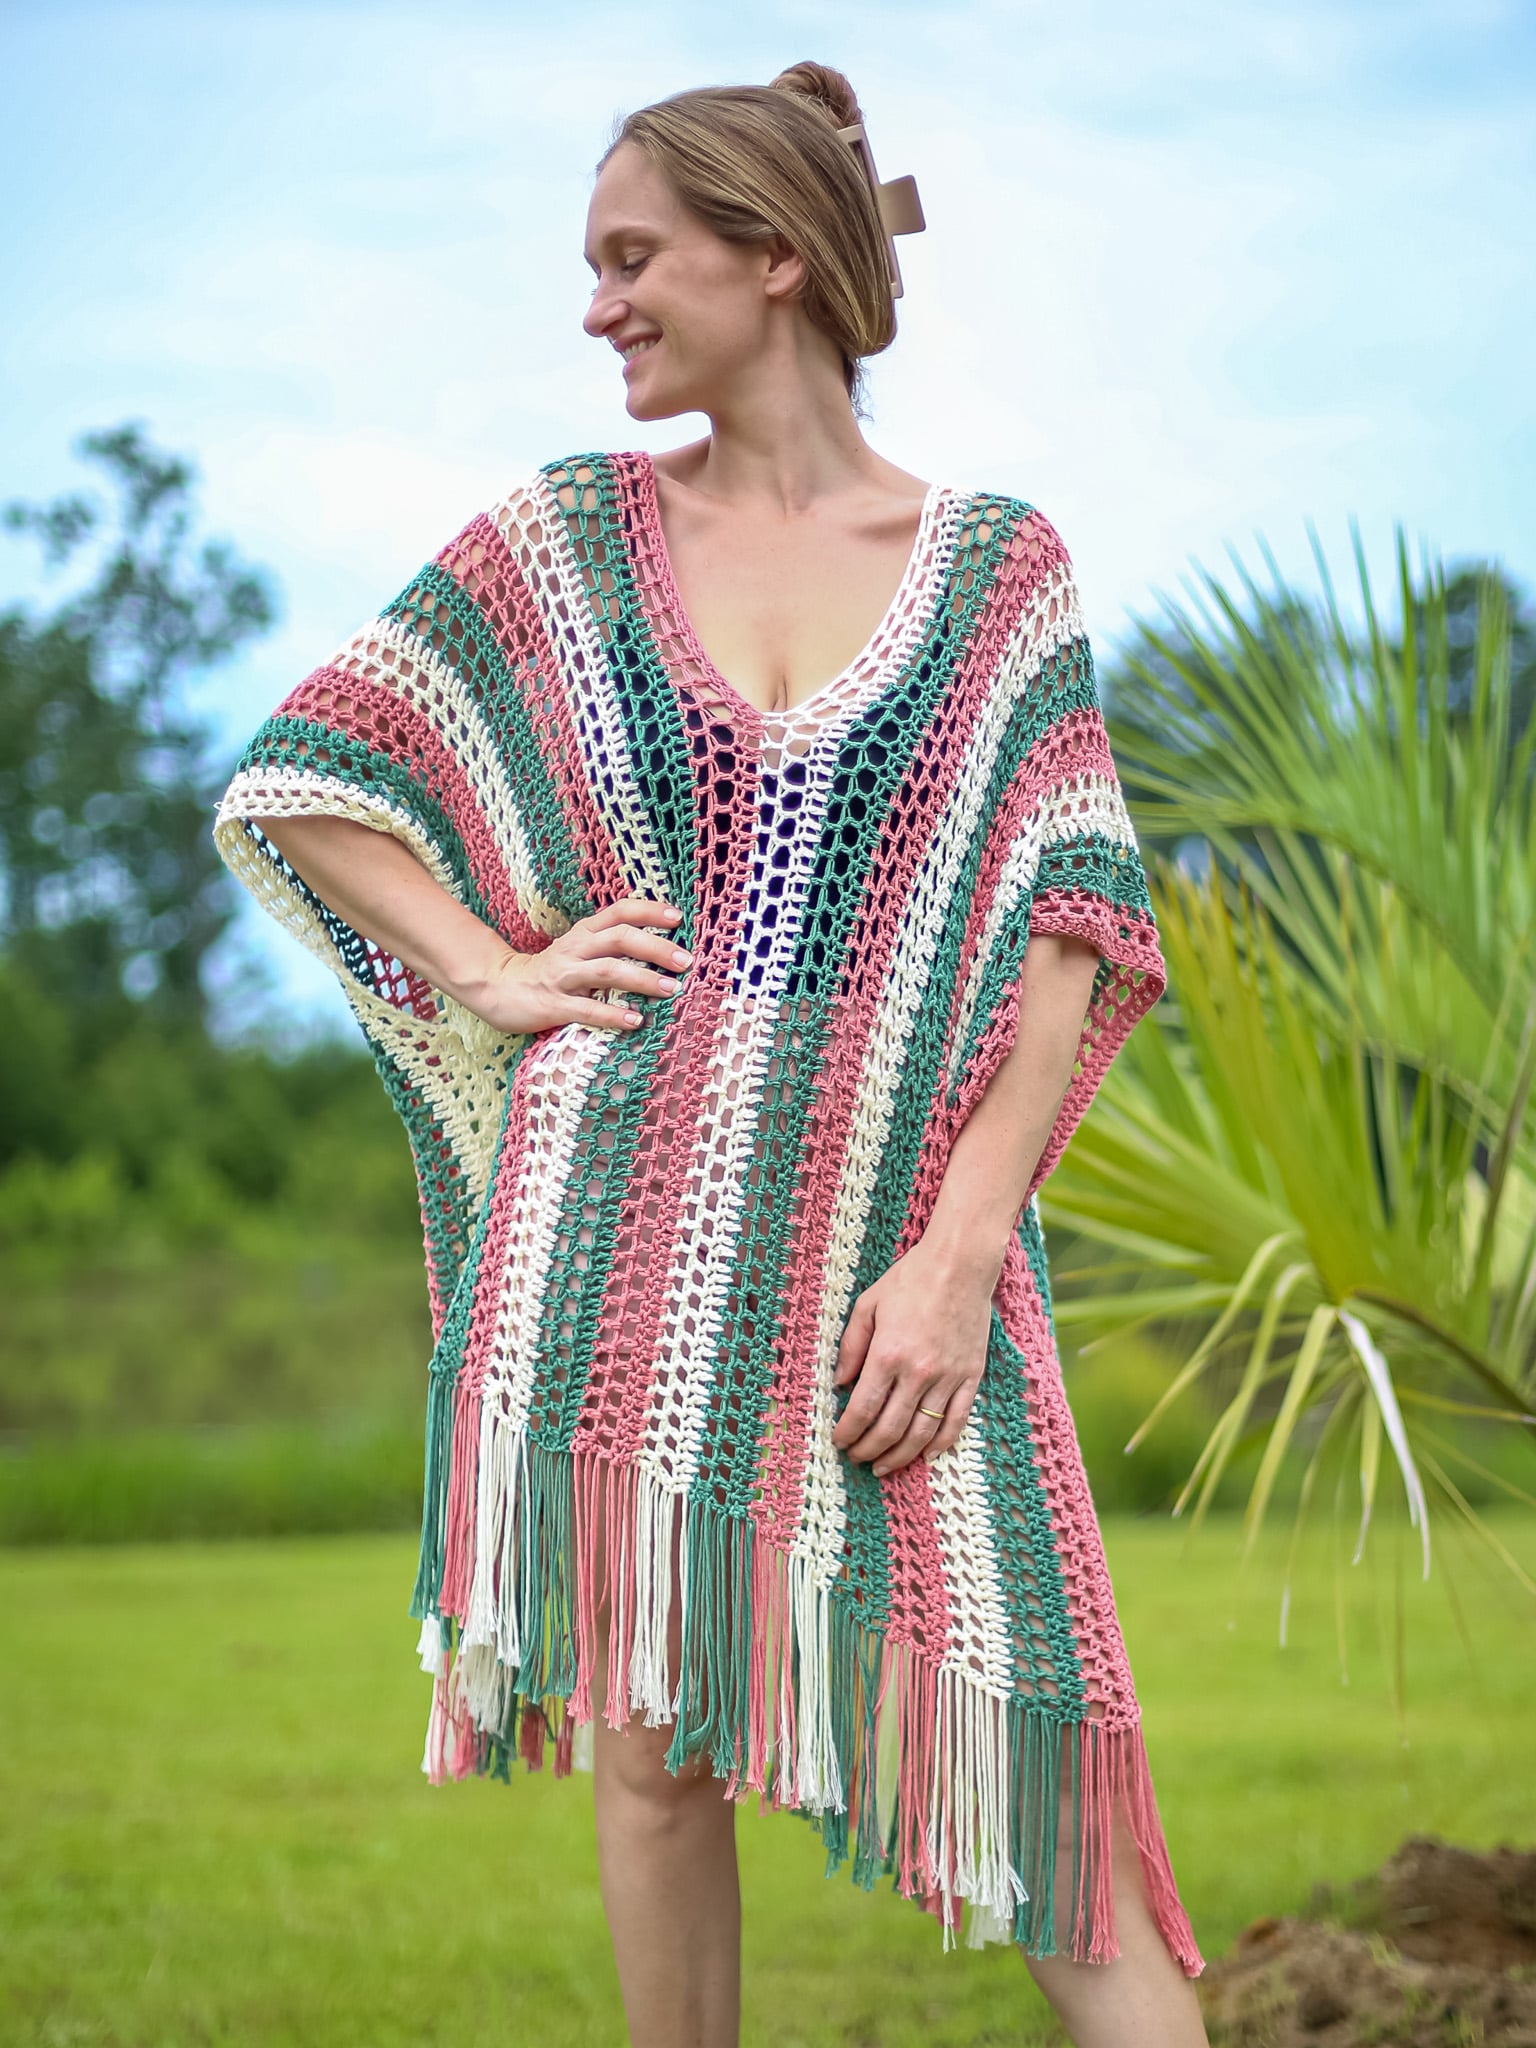
- Diamond Trellis Heirloom Blanket Wrap
- Garden Heirloom Baby Blanket (that’s this one)
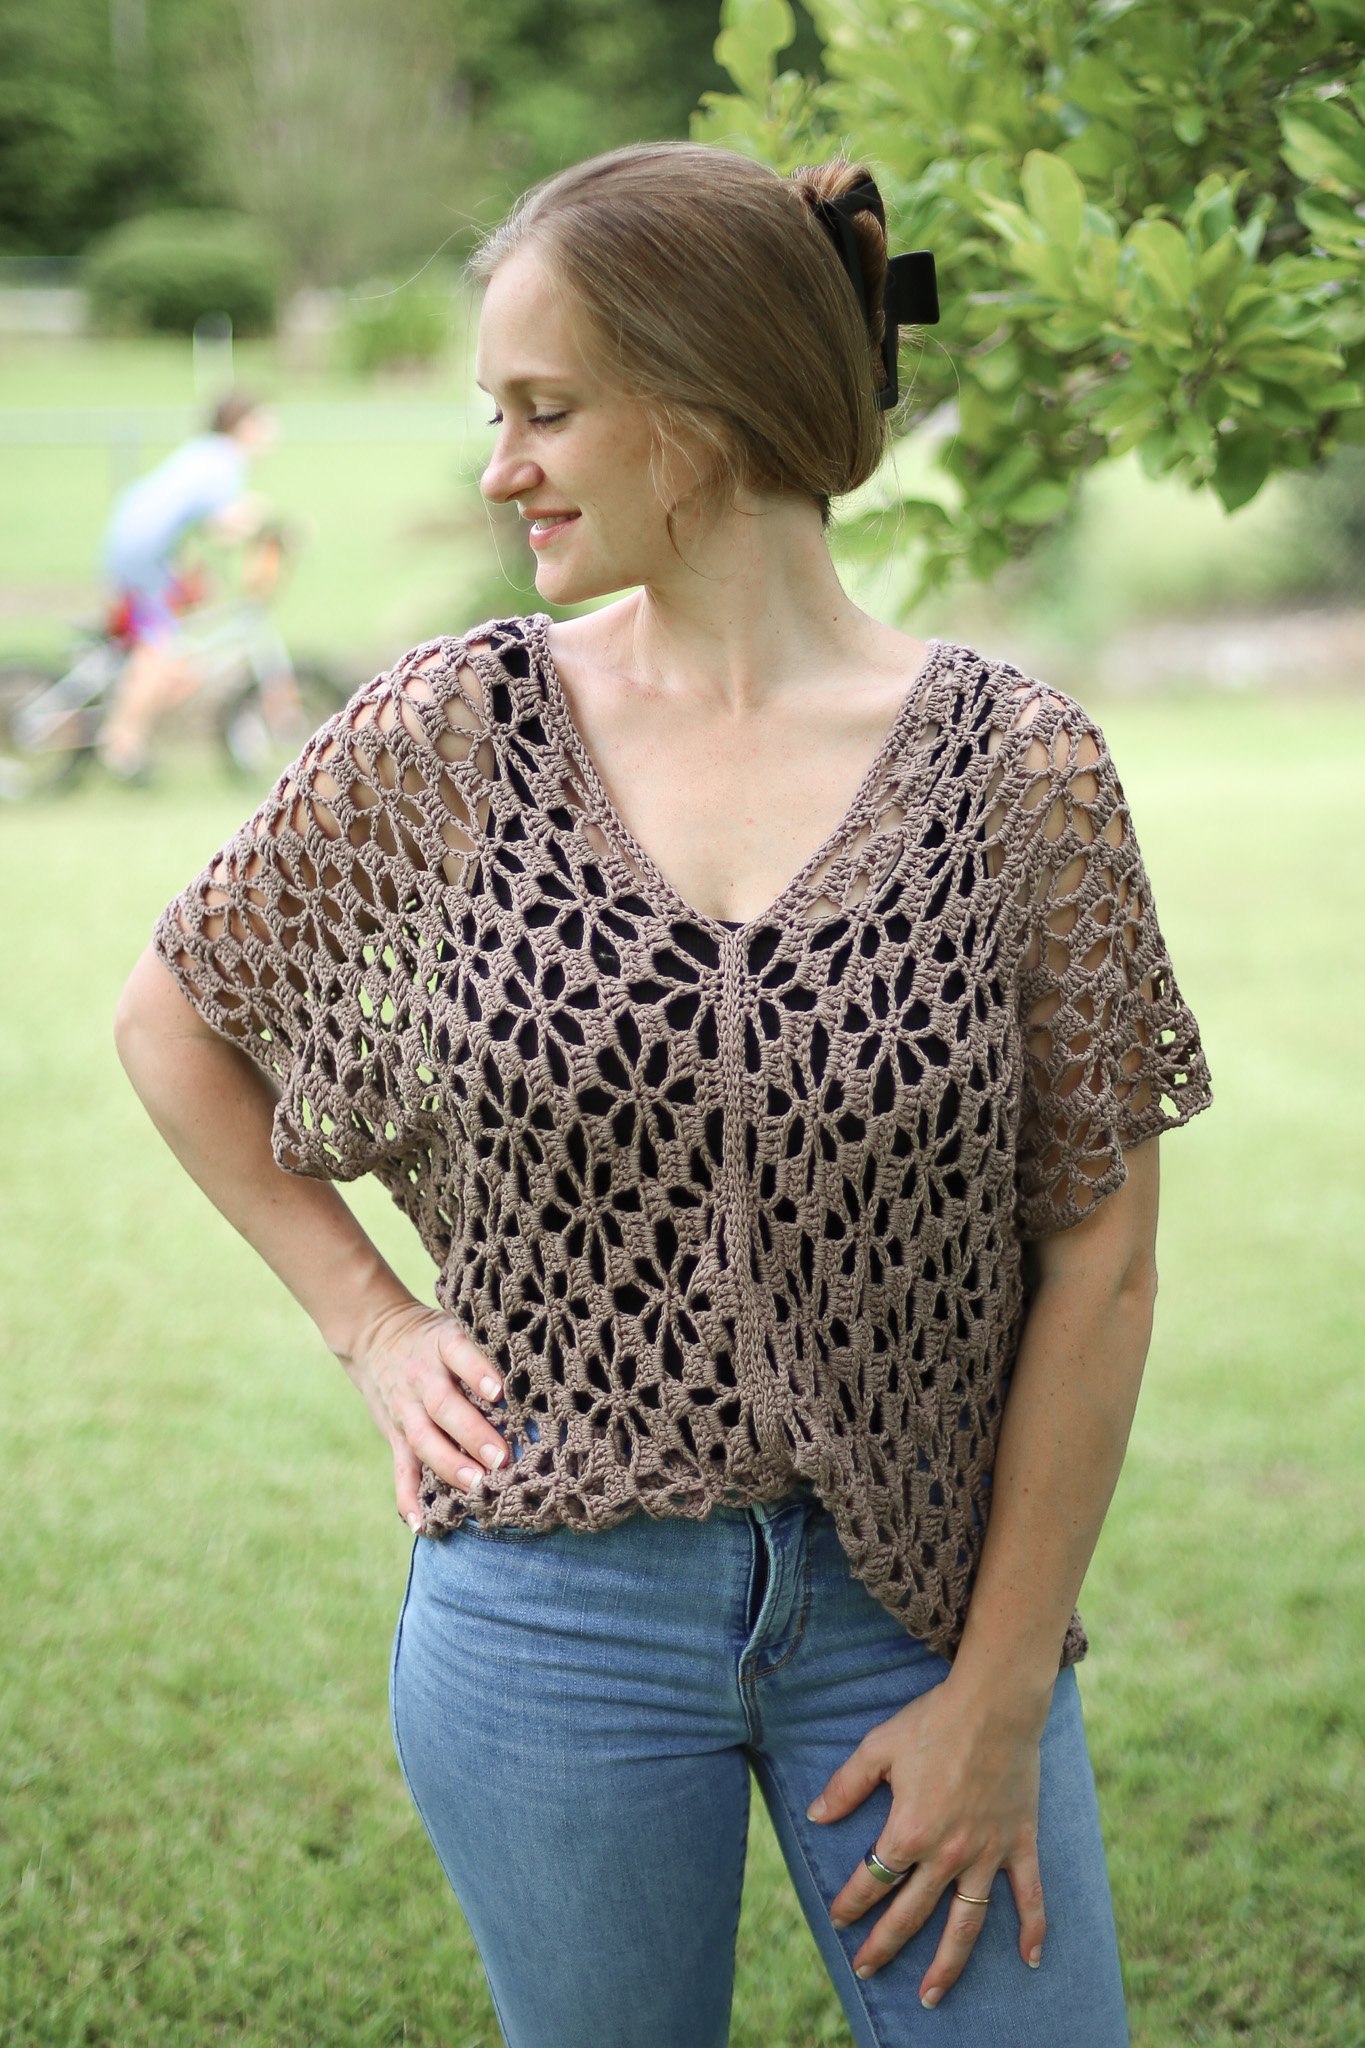
- Woven Tiles Heirloom Throw
- Simple Diamond Heirloom Poncho
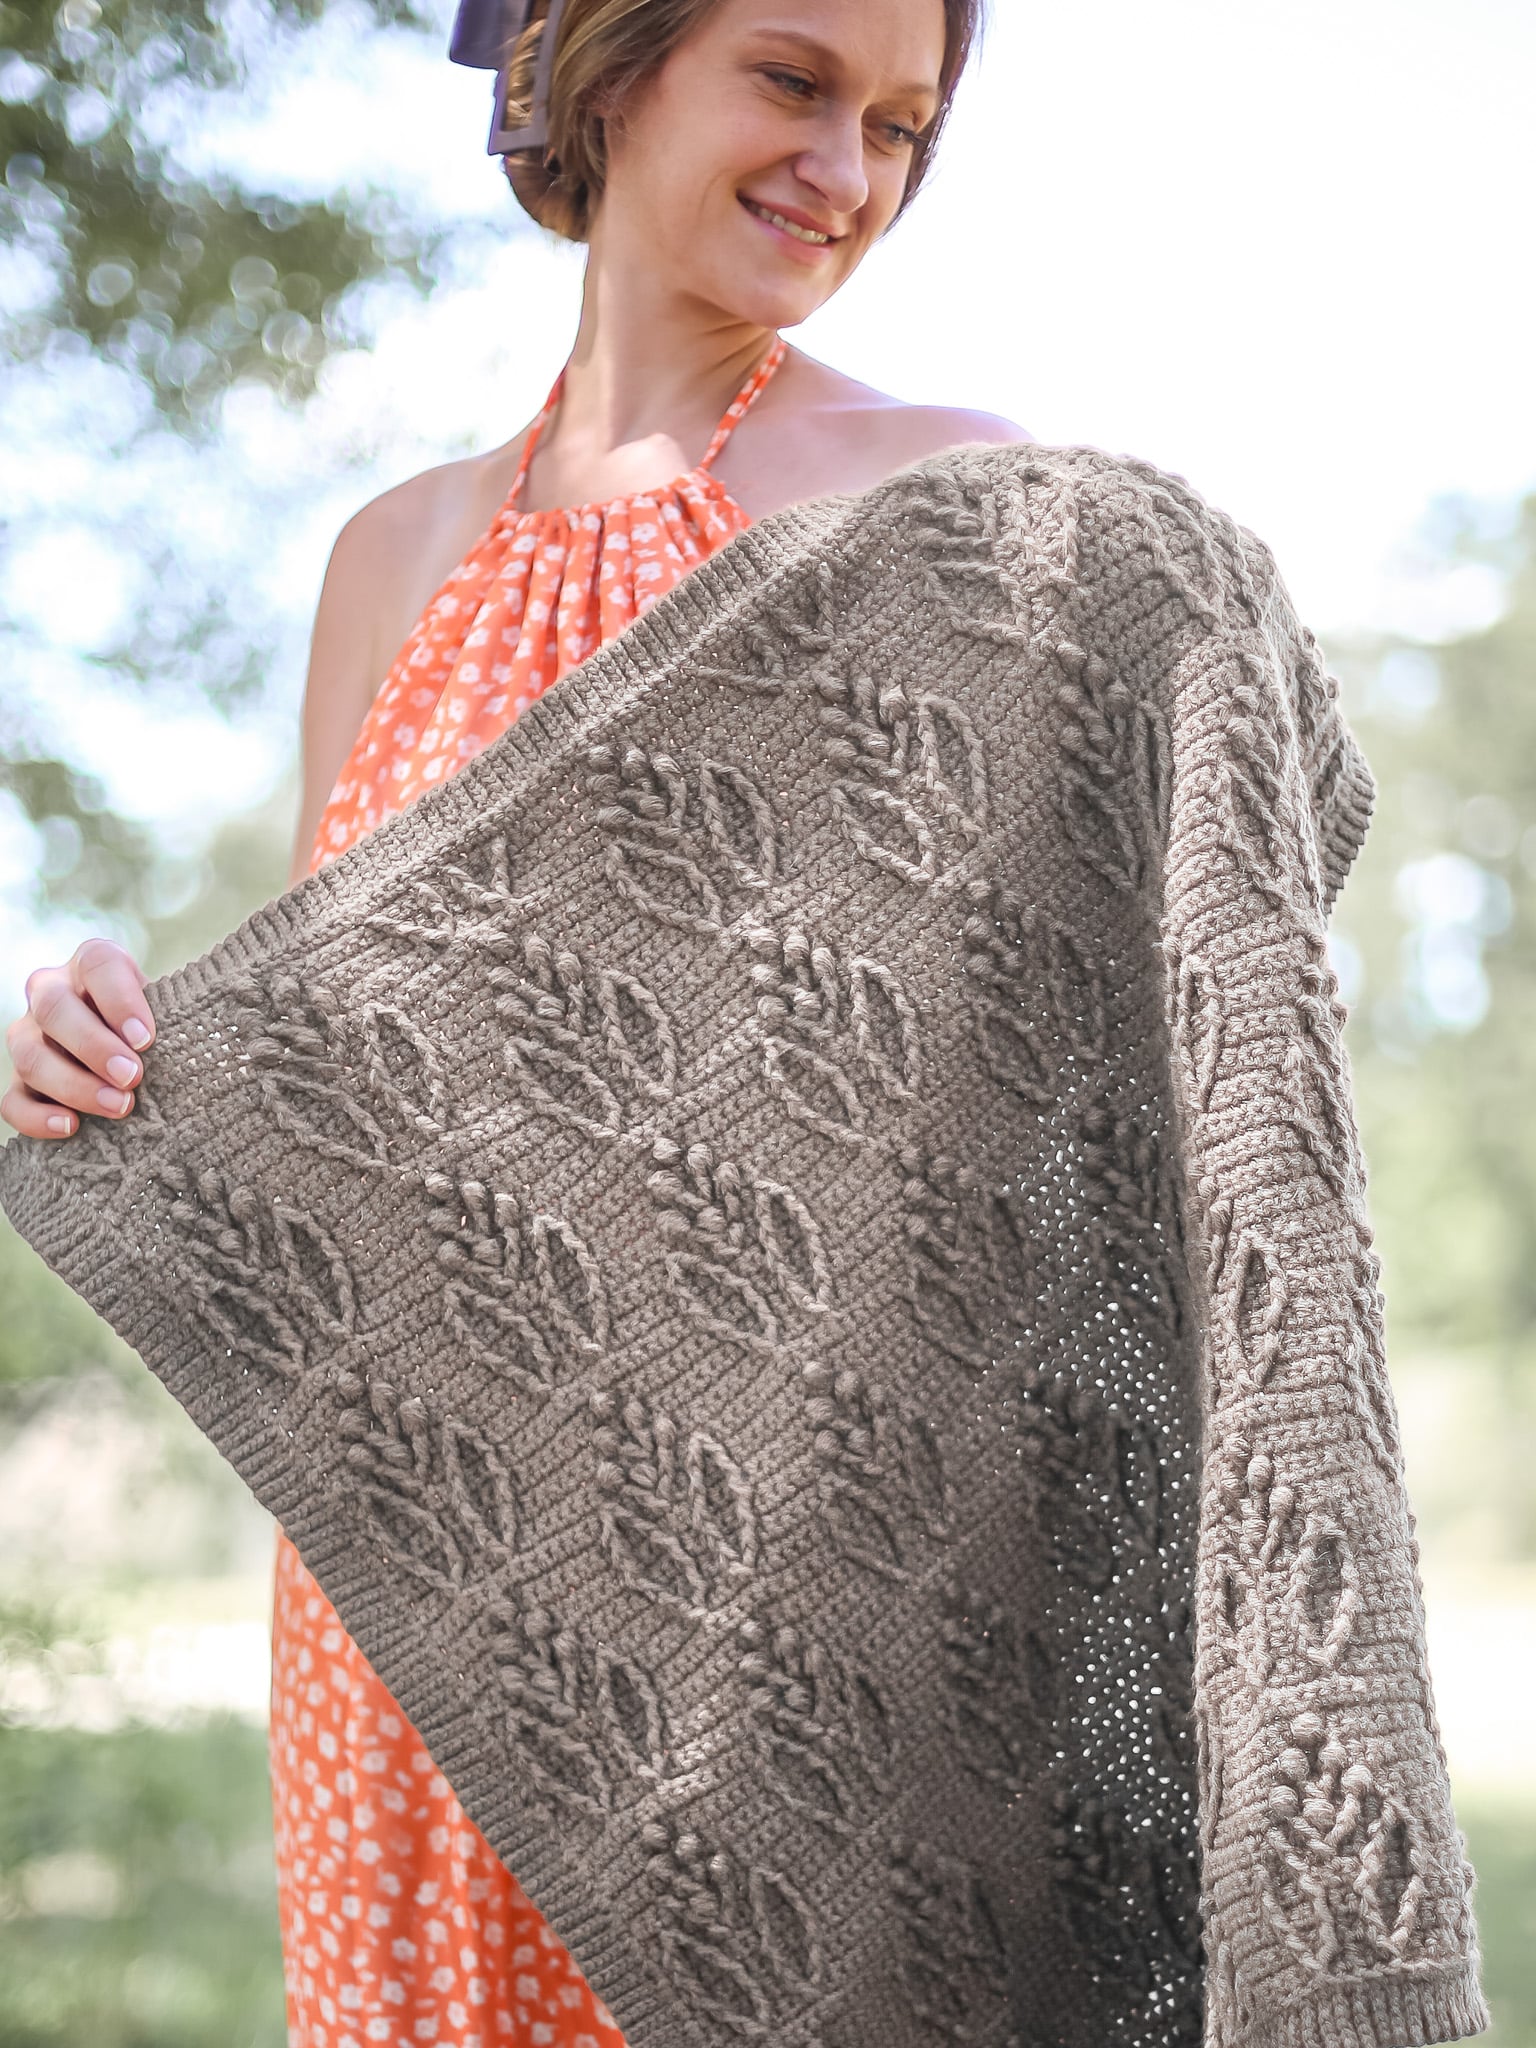
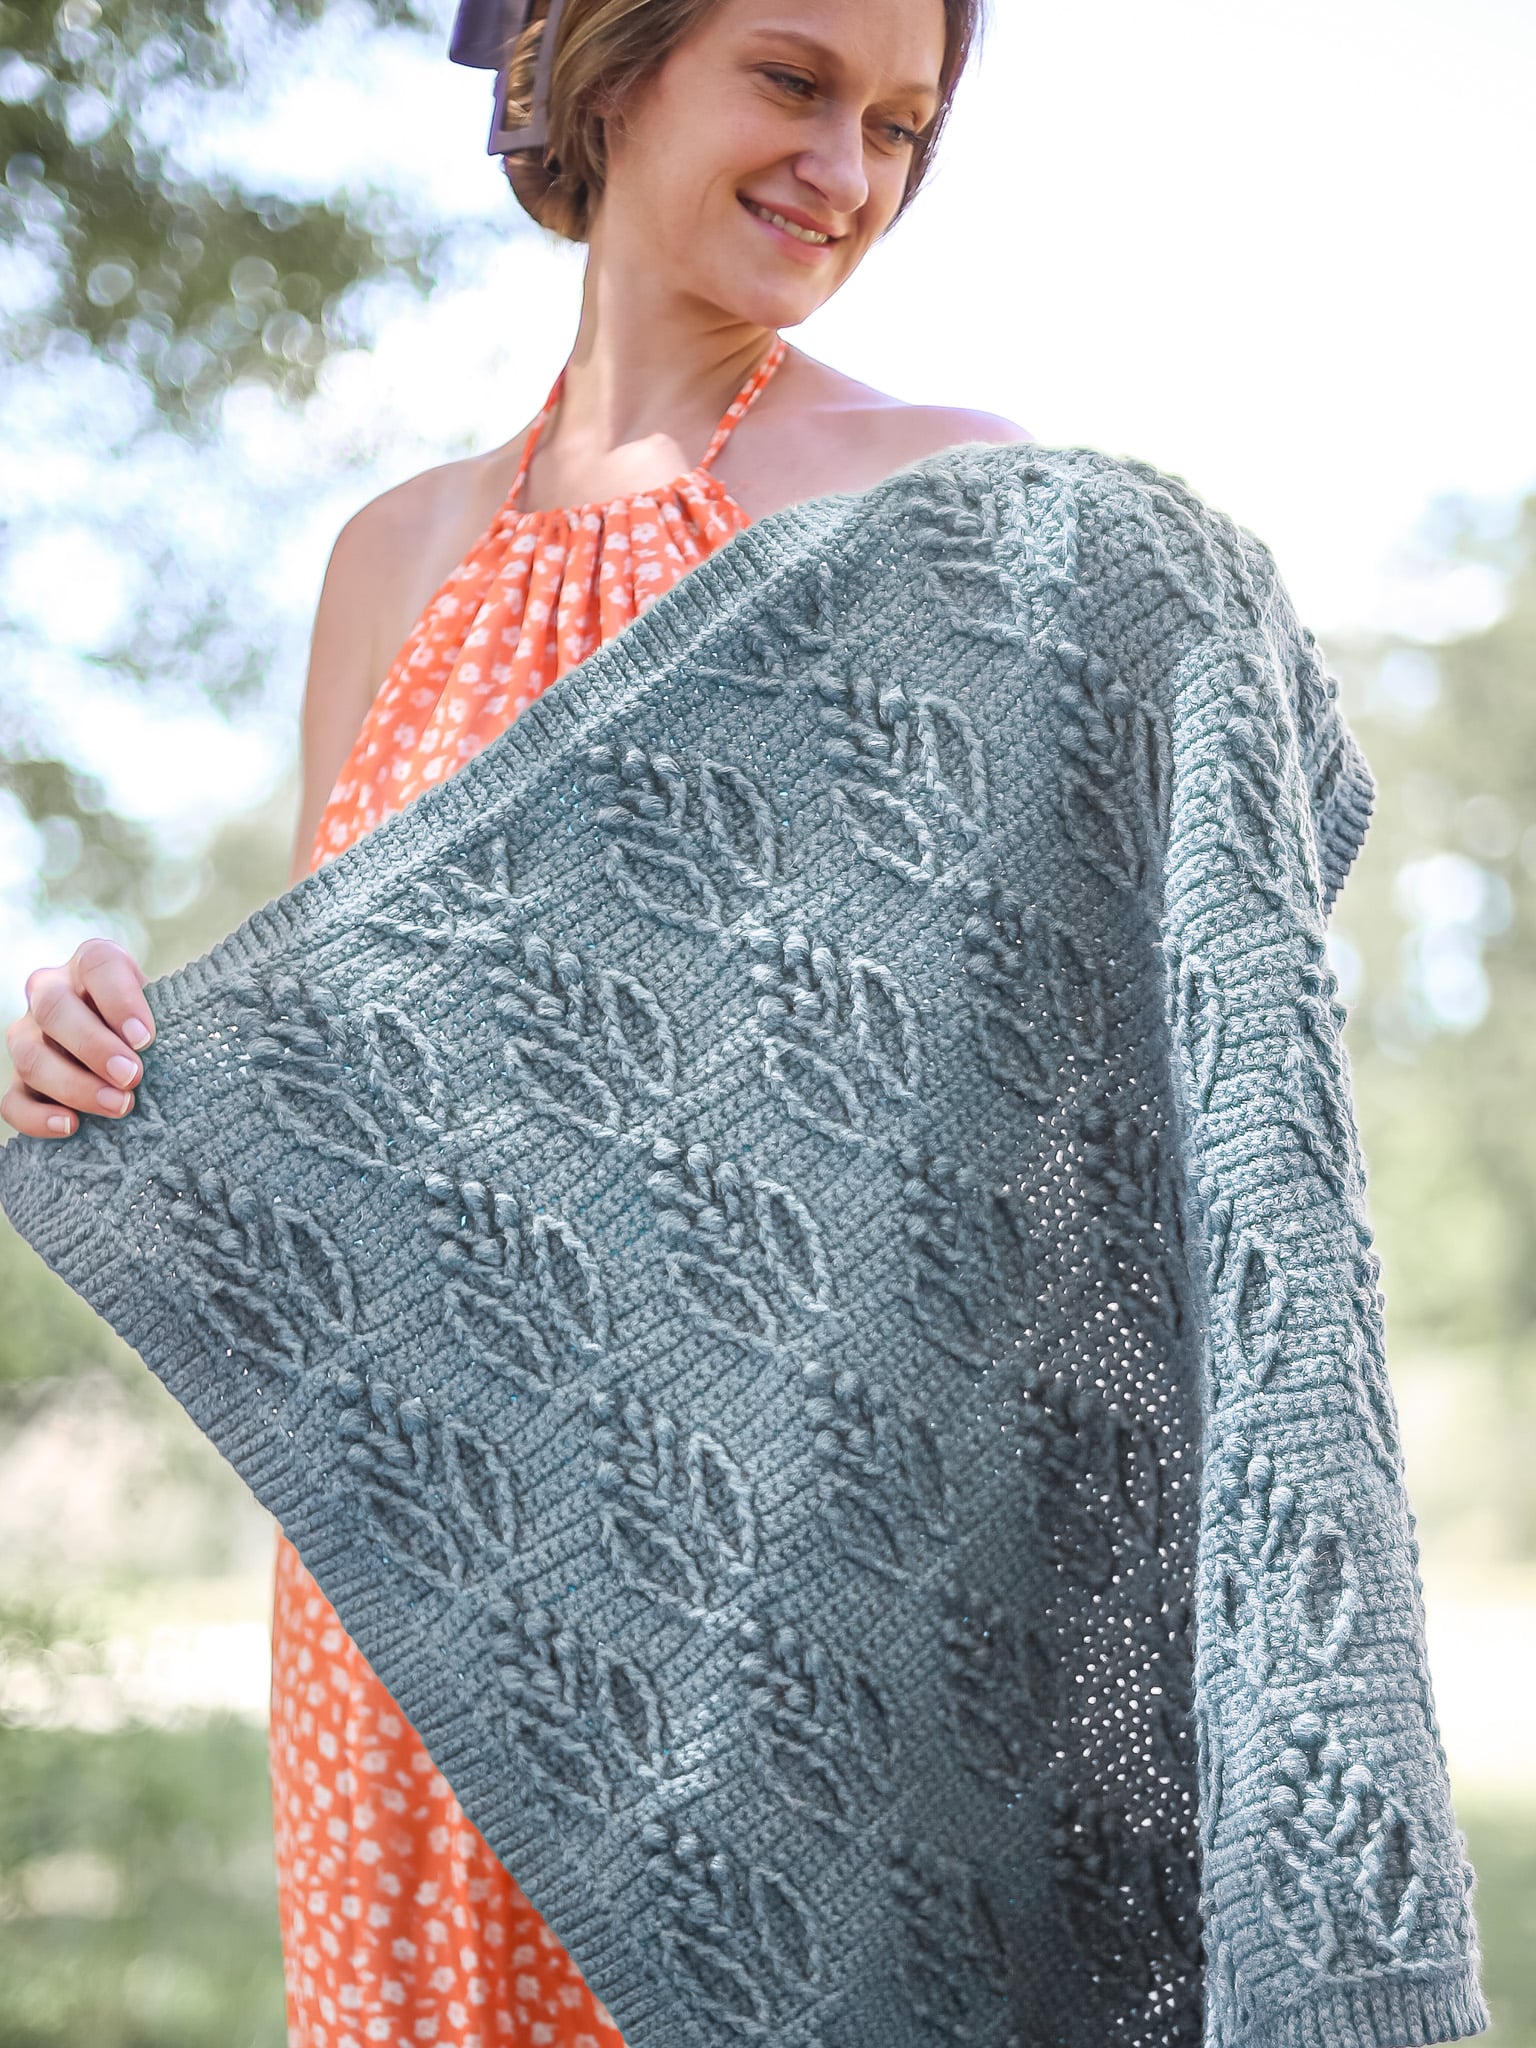
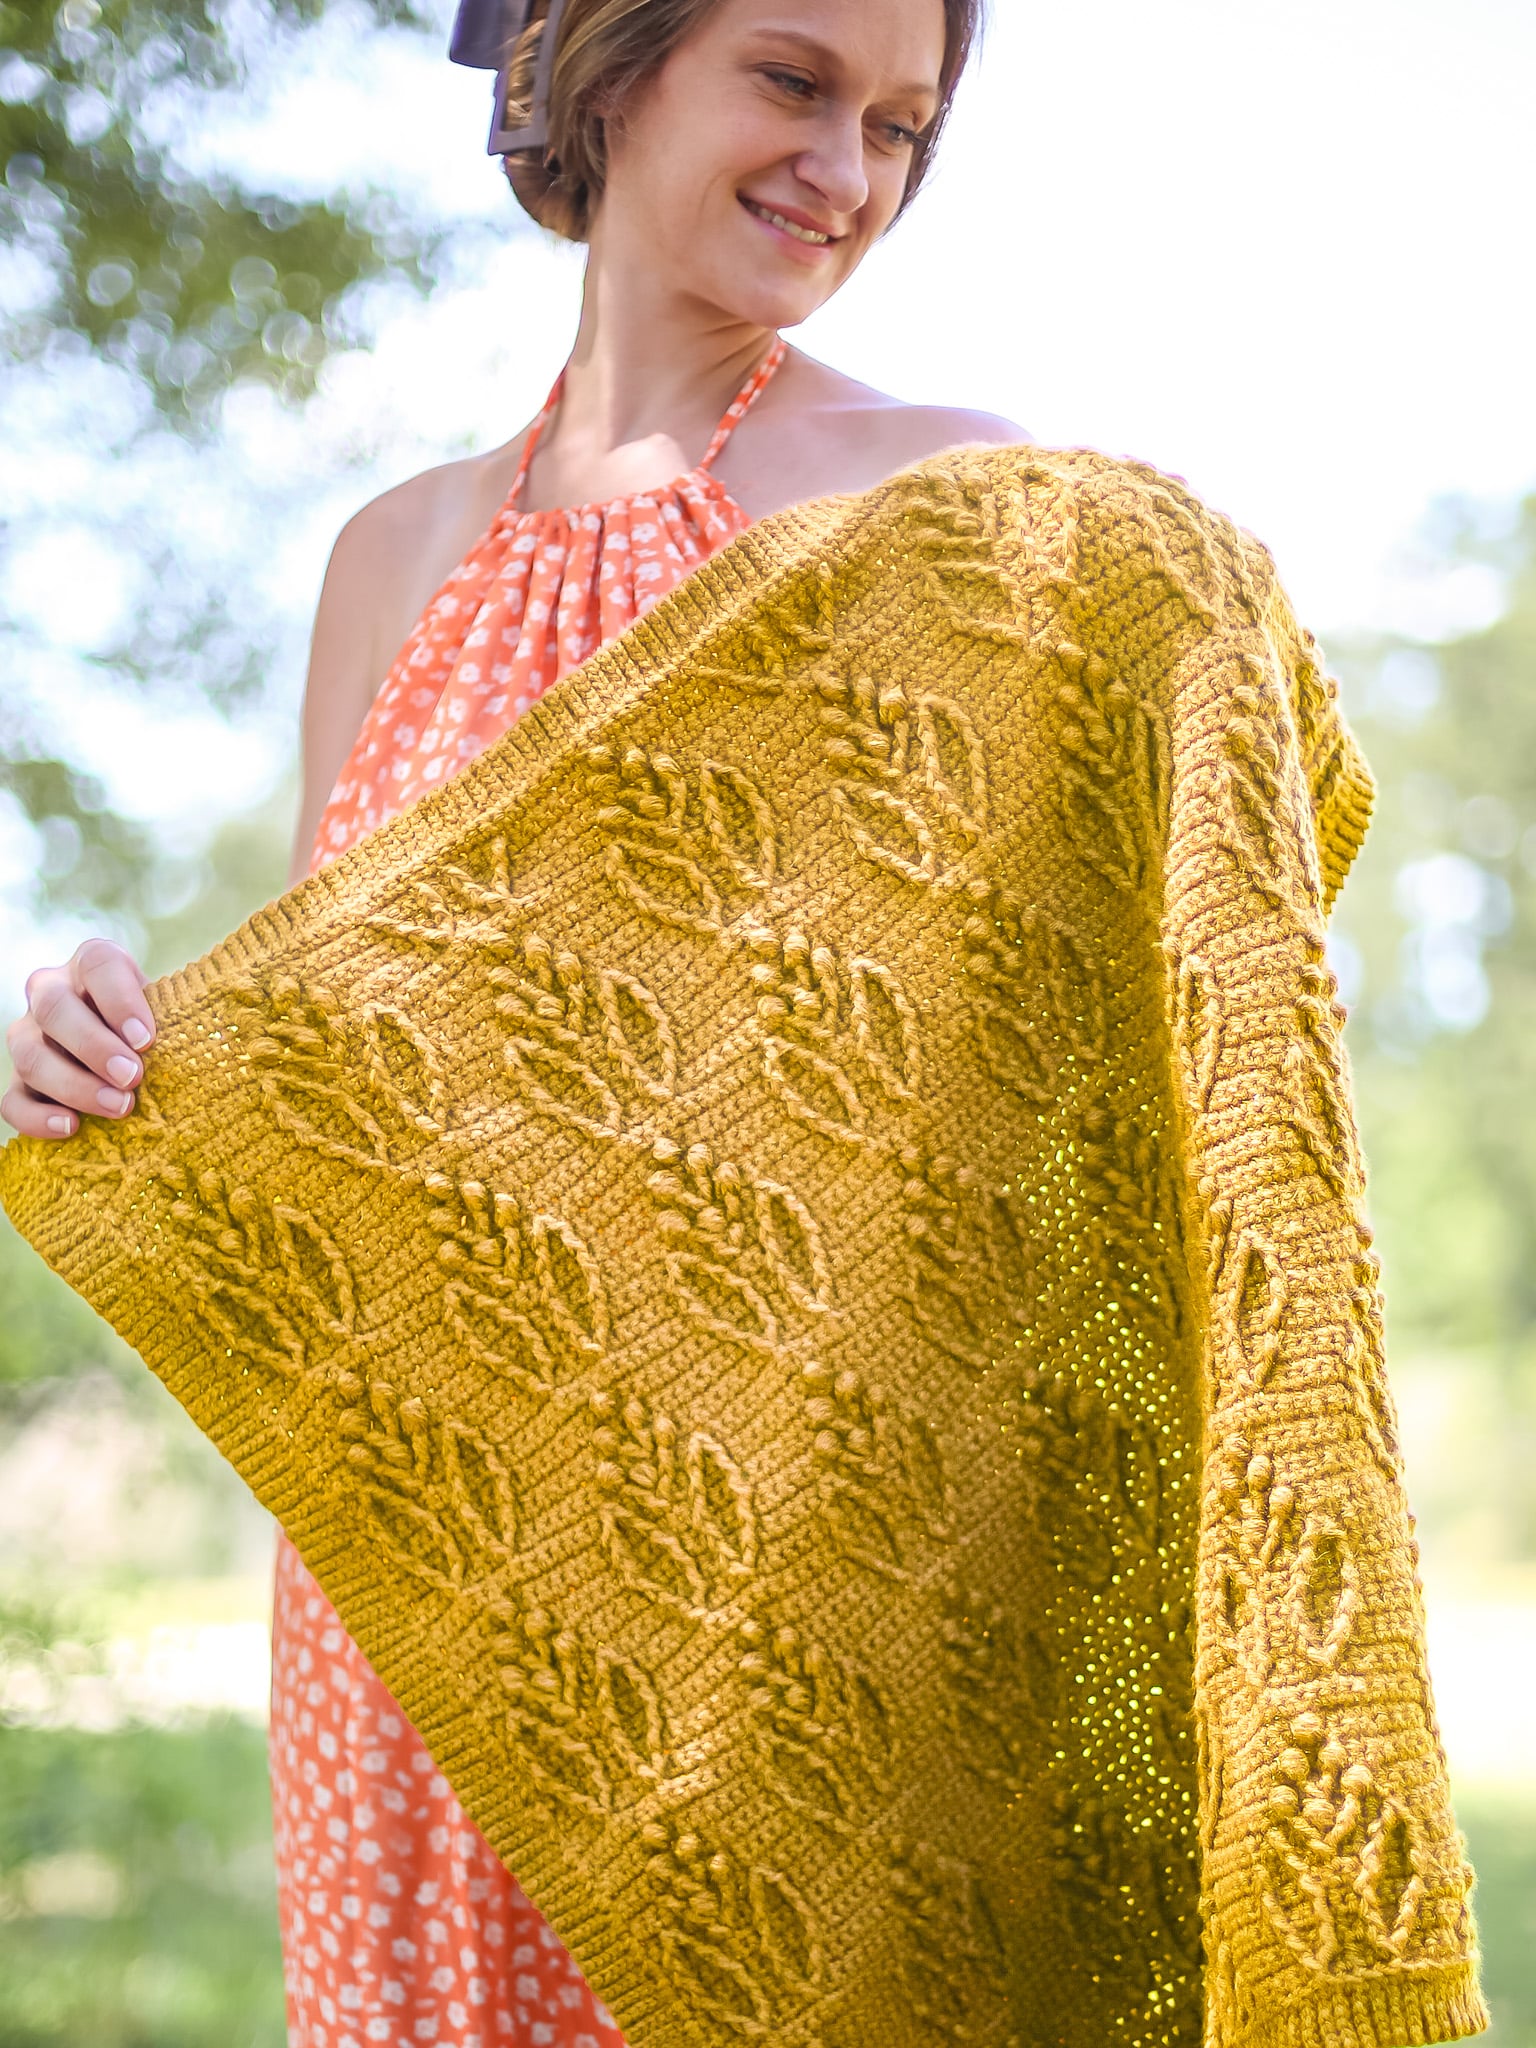
Color Choices for Any Season
This crochet project was created with Wool-Ease DK, a lightweight member of the Wool-Ease family and blends the classic 80% acrylic and 20% wool to deliver warmth and softness with a finer gauge.
This blend ensures durability while maintaining a cozy, comfortable feel. Machine washable and dryable for hassle-free care making it a perfect choice for baby blanket patterns!
This cozy yarn comes in 18 colors so you can definitely match it to any nursery decor. Choose a more feminine or masculine color to make this for a baby girl or baby boy. Going gender neutral? There’s plenty of options too!
Yarn Substitutes
- Cottino – a perfect cotton wool blend if you want an all natural fiber.
- Mandala – to make it interesting if you want some easy color changes without the hassle of color work.
- 24/7 Cotton DK – perfect for summer babies!
- Coboo –
- Pound of Love, although a worsted weight would be great for this snuggly gift!
Come find me on…
- Like my Facebook Page
- Join my Facebook group!
- Subscribe to my YouTube Channel for Free Crochet Tutorials
- Get PDFs on Etsy
- Get PDFs on Ravelry
- Sign Up for the Life and Yarn Newsletter for more free modern crochet patterns!
- Please Note: Some links may be affiliate links that help to support the Life + Yarn Blog with a small commission at no added cost to you, thank you!
- Copyright 2026, Life and Yarn, Brianna Iaropoli. Pattern contents are NOT to be re-shared, DIRECT LINKS ONLY to this post for the pattern.
Materials
- Size 4.50mm crochet hook
- 4 Skeins of Lion Brand Wool-Ease DK Hickory [636-122AA]
- Dk Weight No. 3 – 928 yards
- Stitch Markers (optional)
- Yarn Needle
Gauge
- 18 sts by 18 rows in sc is 4 by 4 inches
- Read in depth about gauge below.
- Wether you are working with the recommended yarn, a yarn of similar fiber content or something different, gauge for this pattern along side your preferred blocking method is EXTREMELY important to make sure your blanket is the right size and you have enough yardage.
- Lion Brand’s Wool-Ease does/can block out significantly while other fibers might not.
- My PREBLOCKED and BLOCKED gauge is 18 stitches by 18 rows is 4” by 4” in single crochet using a 4.50 mm hook.
- For this pattern I only did a light steam blocking to relax the fabric and straighten my edges. However, a characteristic of this yarn is that with heavy blocking it can grow significantly, so be mindful of that when blocking.
- If using a different fiber, like wool or cotton for example, you may need to change your hook and/or blocking method to reach the same Blocked/Finished Gauge.
Sizing
- One Size: 26 by 27 inches with trim.
Stitch Descriptions and Abbreviations
- Chain Stitch – ch
- Stitch(es) – st(s)
- Skip – sk
- Slip Stitch – sl st
- Single Crochet – sc
- Back Loop Only – blo – Work the designated stitch as you normally would but only use the Back Loop on the top of the stitch.
- Foundation Single Crochet – Fsc – Chain 2, insert hook into 2nd chain from hook, yarn over and pull up a loop (2 loops on hook), yarn over, draw through 1 loop, (2 loops on hook with 1 ch created), yarn over, draw through all loops (1 loop on hook, 1 foundation single crochet with chain at the bottom). *Insert hook to the bottom of the stitch you just made, it will look like the top or “V” of a stitch, yarn over, pull up 1 loop (2 loops on hook), yarn over, draw through 1 loop (2 loops on hook with 1 ch created), yarn over, draw through all loops;* repeat from * to * for desired amount of stitches.
- Front Post Double Crochet – FPdc -Work a double crochet as you normally would by placing your hook from front to back to front around the post of the designated stitch.
- Front Post Double Crochet Puff Stitch – FPdcPS – (Yarn over, insert hook into front to back to front around the post of the designated stitch and pull up a loop) 4 times in same stitch or space, yarn over, pull through all loops on hook.
- Front Post Double Double Crochet 2 Together – FPdc2tog -Work two FPdc stitches together to create one stitch for a decrease. Take note of which stitches are called out to be worked together within the row instructions as this may vary.
Pattern Notes
- * Designates a repeat.
- One Size: 26 by 27 inches with trim.
- “sc 1” means to single crochet in the next stitch.
- “sc 2” means to single crochet in each of the next 2 stitches.
- “2 sc” means to single crochet twice in the next stitch to create an increase.
- There are NO chain 1’s in the cable section but there ARE chain 1’s in the trim rows/rounds.
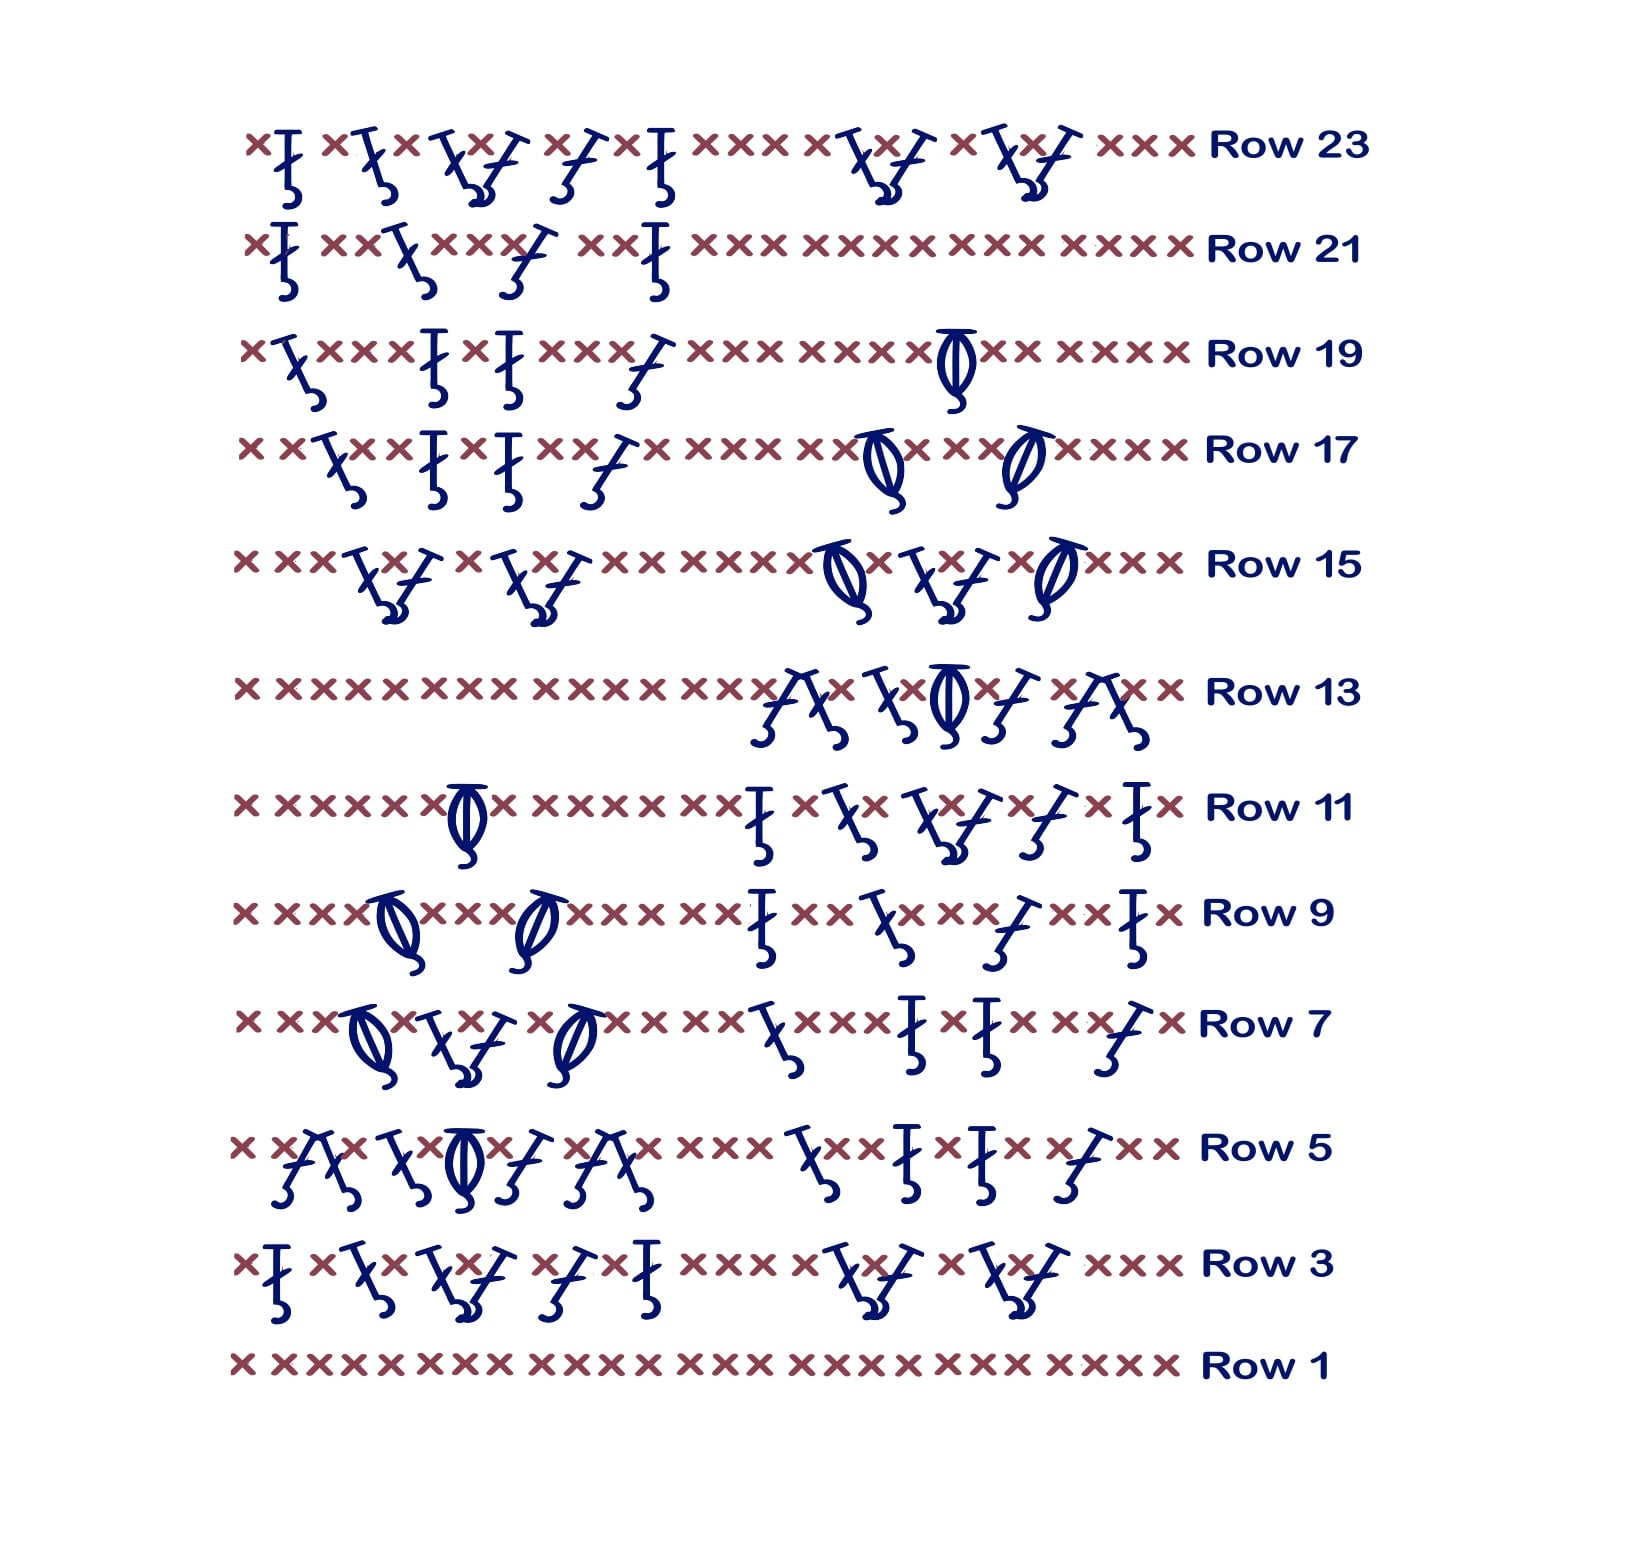
- Watch the Video Tutorial for a cable stitch tutorial and trim tutorial.
Advanced Crochet Cable Information
- Be mindful of when it is noted to work behind or in front of a FPdc when crossing sts.
- When a FPdc is created make sure to skip the single crochet stitches behind.
- You will have the same number of stitches in all cable rows as single crochet rows.
- To create the Row 3 FPdc sts you will work them in the Fsc Row. Each next cable row will work its FPdc sts in FPdc sts of the previous row.
- Rows 5, 11, 13, 15, 19 and 23 are exceptions and have FPdc(PS) sts worked in single crochet stitches so be mindful of your stitch placement in the rows and when to work in a single crochet. Use the stitch diagram for clarity.
- Reference the stitch diagram for the repeats and proper stitch placement, note that FPdc sts are worked in FPdc sts but for clarity the diagram does NOT show the overlap.
- NOTE: The Stitch Diagram shows 2 sets of repeats.
- The Stitch Diagram for Row Repeats has the order of the placement of the FPdc sts alphabetized if you prefer a visual. Be mindful of if you are working in FRONT or BEHIND of a FPdc.
- FPdc sts are always worked in FPdc sts with the exception of Row 3 where the FPdc sts are worked in the Foundation Single Crochet Stitches of Row 1.
- If you find that your post stitches are too tight you can try using a front post treble in place of a front post double.
Classic Baby Blanket Crochet Pattern
Important Note: Rows 5, 11, 13, 15, 19 and 23 are exceptions and have FPdc(PS) sts worked in single crochet stitches so be mindful of your stitch placement in the rows and when to work in a single crochet. Use the stitch diagram for clarity.
Row 1 – Fsc 104
Row 2 – Turn, sc across in each stitch.
Note: To create the Row 3 FPdc sts you will work them in the Fsc Row. Each next cable row will work its FPdc sts in FPdc sts of the previous row.
Row 3 – Turn, *sc 3, sk 4 Fsc, FPdc in next Fsc, sc 1, FPdc in last worked Fsc, sc 1, sk 3 Fsc, FPdc in next Fsc, sc 1, FPdc in last worked Fsc, sc 4, sk 5 Fsc, FPdc in next Fsc, sc 1, sk 2 Fsc, FPdc in next Fsc, sc 1, sk 1 Fsc, FPdc in next Fsc, sc 1, FPdc in last worked Fsc, sc 1, sk 1 Fsc, FPdc in next Fsc, sc 1, sk 2 Fsc, FPdc in next Fsc, sc 1, sk 1 Fsc, repeat from * across to end.
Row 4 – Turn, sc across in each stitch.
Row 5 – Turn, *sc 2, FPdc in next FPdc, sc 2, FPdc in next FPdc, sc 1, FPdc in next FPdc, sc 2, FPdc in next FPdc, sc 4, FPdc2tog over next 2-FPdc, sc 1, FPdc in next FPdc, sc 1, FPdcPS in sc of previous cable row, sc 1, FPdc in next FPdc, sc 1, FPdc2tog over next 2-FPdc, sc 2, repeat from * across to end.
Row 6 – Turn, sc across in each stitch.
Row 7 – Turn, *sc 1, FPdc in next FPdc, sc 3, FPdc in next FPdc, sc 1, FPdc in next FPdc, sc 3, FPdc in next FPdc, sc 4, sk-FPdc2tog, FPdcPS in next FPdc, sc 1, FPdc in FPdcPs, sc 1, FPdc in last worked st, sc 1, FPdcPS in next FPdc, sc 3, repeat from * across to end.
Row 8 – Turn, sc across in each stitch.
Row 9 – Turn, *sc 1, FPdc in next FPdc, sc 2, FPdc in next FPdc, sc 3, FPdc in next FPdc, sc 2, FPdc in next FPdc, sc 5, sk-FPdcPS, FPdcPS in next FPdc, sc 3, FPdcPS in next FPdc, sc 4, repeat from * across to end.
Row 10 – Turn, sc across in each stitch.
Row 11 – Turn, *sc 1, FPdc in next FPdc, sc 1, FPdc in next FPdc, sc 1, FPdc in center-sc bet 3-sc of previous cable row, sc 1, FPdc in last worked st, sc 1, FPdc in next FPdc, sc 1, FPdc in next FPdc, sc 7, FPdcPS in center-sc bet FPdcPS of previous row, sc 6, repeat from * across to end.
Row 12 – Turn, sc across in each stitch.
Row 13 – Turn, *sc 2, FPdc2tog over next 2-FPdc, sc 1, FPdc in next FPdc, sc 1, FPdcPS in sc of previous cable row, sc 1, FPdc in next FPdc, sc 1, FPdc2tog over next 2-FPdc, sc 15, repeat from * across to end.
Row 14 – Turn, sc across in each stitch.
Row 15 – Turn, *sc 3, sk next FPdc2tog, FPdcPS in next FPdc, sc 1, FPdc in FPdcPs, sc 1, FPdc in last worked st, sc 1, FPdcPS in next FPdc, sc 6, sk 6-sc of previous row, FPdc in next sc of previous cable row, sc 1, FPdc in last worked st, sc 1, sk 3-sc of previous row, FPdc in next sc of previous row, sc 1, FPdc in last worked st, sc 3, repeat from * across to end.
Row 16 – Turn, sc across in each stitch.
Row 17 – Turn, *sc 4, sk-FPdcPS, FPdcPS in next FPdc, sc 3, FPdcPs in next FPdc, sc 6, FPdc in next FPdc, sc 2, FPdc in next FPdc, sc 1, FPdc in next FPdc, sc 2, FPdc in next FPdc, sc 2, repeat from * across end.
Row 18 – Turn, sc across in each stitch.
Row 19 – Turn, *sc 6, FPdcPS in center-sc bet FPdcPSs of previous row, sc 7, FPdc in next FPdc, sc 3, FPdc in next FPdc, sc 1, FPdc in next FPdc, sc 3, FPdc in next FPdc, sc 1, repeat from * across end.
Row 20 – Turn, sc across in each stitch.
Row 21 – Turn, *sc 14, FPdc in next FPdc, sc 2, FPdc in next FPdc, sc 3, FPdc in next FPdc, sc 2, FPdc in next FPdc, sc 1, repeat from * across to end.
Row 22 – Turn, sc across in each stitch.
Row 23 – Turn, *sc 3, sk 4-sc of previous row, FPdc in next sc of previous row, sc 1, FPdc in last worked st, sc 1, sk 3-sc of previous row, FPdc in next sc of previous row, sc 1, FPdc in last worked st, sc 4, Fpdc in next FPdc, sc 1, FPdc in next FPdc, sc 1, FPdc in center-sc bet 3-sc of previous row, sc 1, FPdc in last worked st, sc 1, FPdc in next FPdc, sc 1, FPdc in next FPdc, sc 1, repeat from * across to end.
Row 24 – Turn, sc across in each stitch.
Rows 25 to 103 Repeat Rows 4 to 23 (5 TOTAL Cable Repeats)
Row 104 to 123 Repeat Rows 2 to 20 (1 Partial Cable Repeat) Do not finish off, move to “Blanket Trim”.
Blanket Trim
- Chain 6, turn so that the wrong side of the blanket is facing you, sl st in the second chain from the hook and each next chain back to the blanket. [5 total sl sts]
Note: For Step 2 the stitches being worked are the Row Ends, - Sl st in the next st of blanket, turn, skip first sl st, sl st blo next 5 sts.
- Turn, ch 1, sl st blo in next 5 sl sts.
- Sl st in the next st of blanket, turn, skip first sl st, sl st blo next 5 sts.
- Repeat Steps 3 and 4. You should be at the edge of the trim, not the blanket side when you finish before rotating to work the next side of the blanket.
- Now repeat Steps 1 to 5 except you will be working in the Foundation Single Crochet Stitches.
- Now repeat Steps 1 to 5 except you will be working in the Row Ends not stitches.
- Now repeat Steps 1 to 5 except you will be working in the stitches of Row 123.
- Finish off.
I hope you enjoyed creating this heirloom quality blanket for the new baby in your life! However, if you want an easy crochet baby blanket, try this Rainbow Ripple Blanket that uses lots of different colors for a perfect baby shower gift!