Free Easy Crochet Cabled Ruana Wrap Pattern + PDF
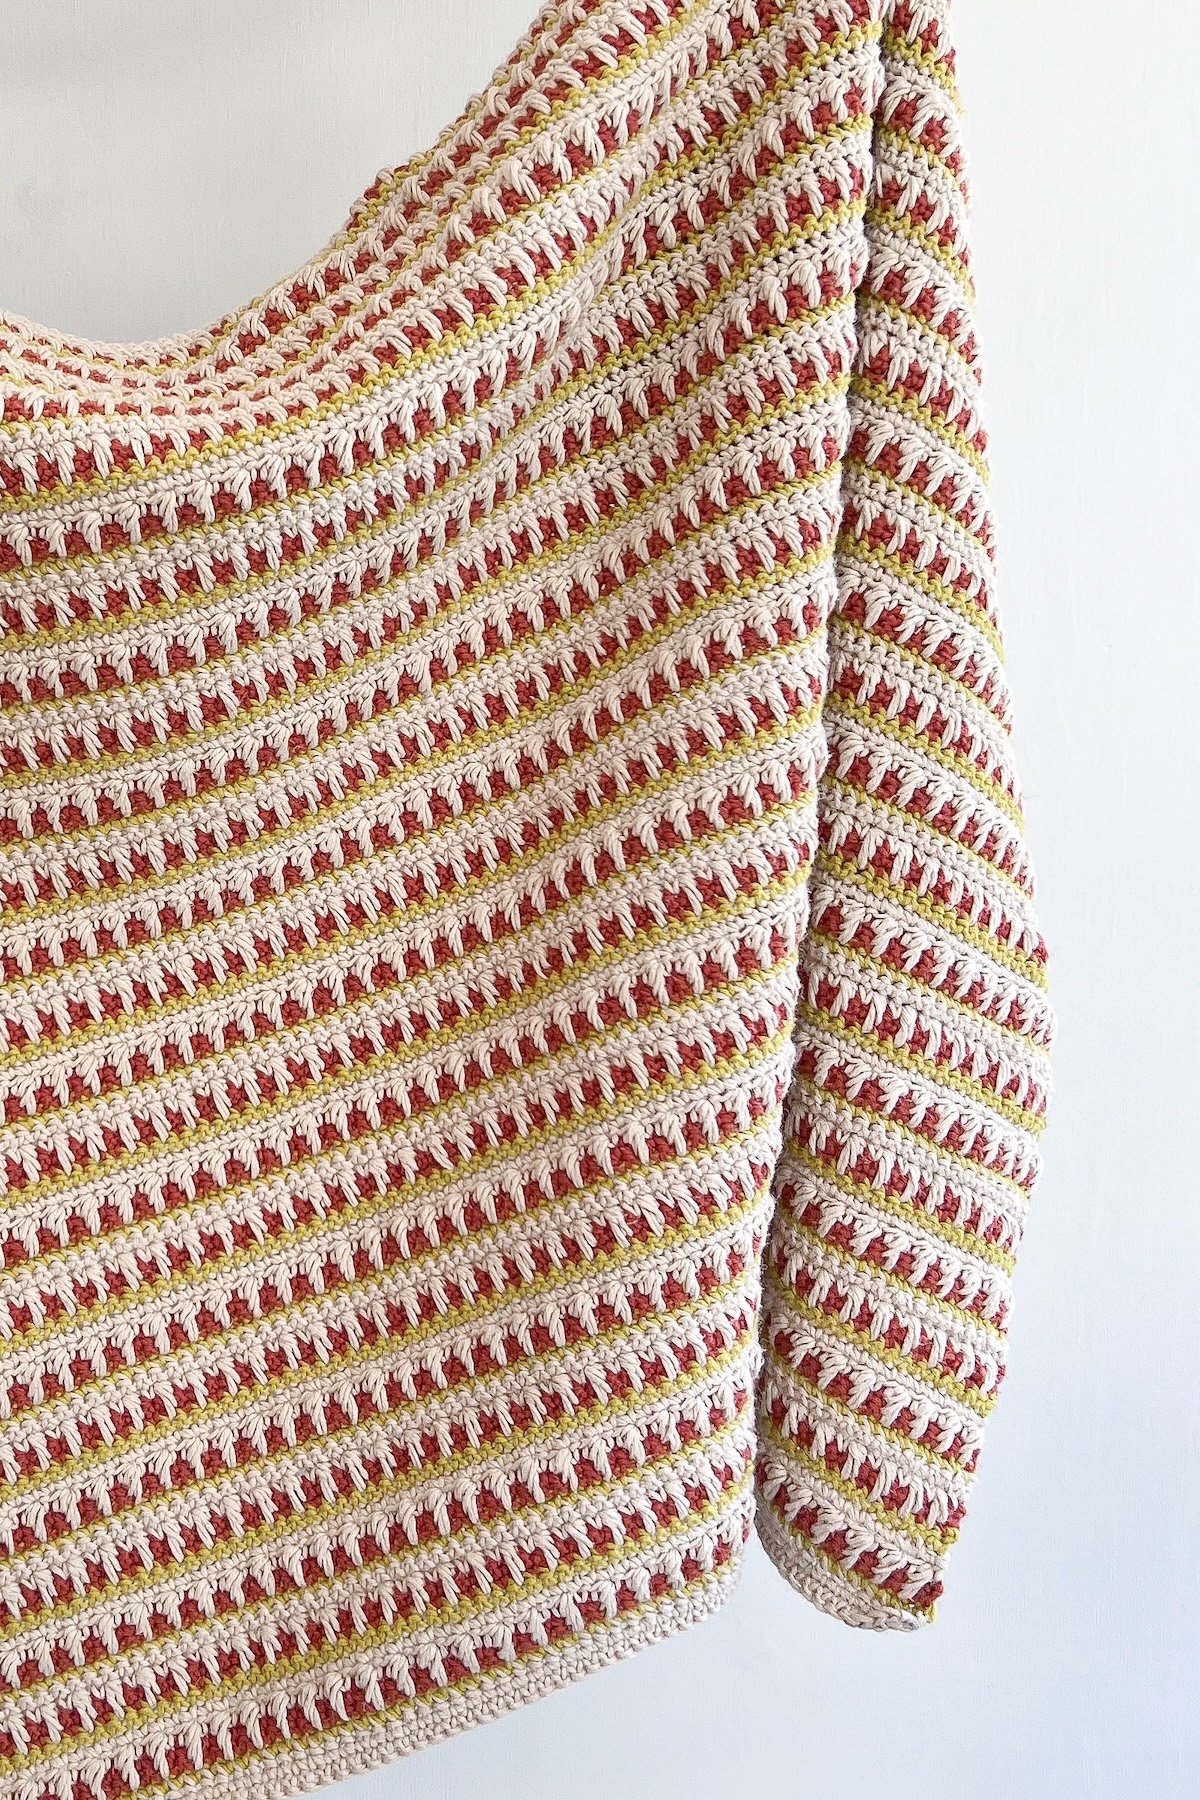
Make this Beautiful Crochet Ruana Pattern with Easy Cables in worsted weight yarn. I made my sample with Wool-Ease Recycled from Lion Brand Yarn. This new yarn is from their sustainable stitching line and is a recycled blend of acrylic yarn and wool yarn.
Keep scrolling to use the Free Crochet Ruana Pattern below or use the links for a printable pdf version!
Best Bang for your Buck, get a Kit From Lion Brand includes PDF and Yarn!
Get an Ad-Free Version PDF on Etsy or Ravelry!

How to Make a Ruana Pattern?
A Crochet Ruana is easy to make and is basically a large rectangular shape or square. It has a slit in the middle of one side to the center to form the front opening. Generally they are flat and worked in back and forth rows. Ruanas are sometimes made as one piece and other times with a first and second panel seamed together like this one I designed.
What is a Ruana?
A ruana is a large layering piece made from a simple rectangle or from two rectangular panels seamed together. I did some digging to find out the history of a Ruana and seems that its origin is mostly unknown but is a piece worn in many different cultures throughout history. They are commonly made out of wool and are a heavier garment seen a lot in the the mountains of Colombia. Ruanas have also been documented in Ireland and Scotland. Wherever their origin, one thing is for sure, this poncho-like garment is definitely a wardrobe staple with great functionality!

Pattern Description
For this Cabled Ruana I have included the written instructions below in the free pattern blog post. There are links to the pdf format option above as well as a kit. A video tutorial will also be available soon! I am slowly adding video tutorials to all of my patterns!
This Cabled Ruana is similar to a Crochet Poncho except that the front is left open. If you wanted you could seam the first panel to the second panel on the front to wear it like a poncho if you prefer.
This stitch pattern consists of a few simple stitches. The main stitches are single crochet and front post double crochet stitches. This is an intermediate skill level pattern with a simple pattern repeat.
I designed this crocheted ruana using a worsted weight that at first glance I thought might be thinner yarn and more of a classic dk yarn weight. However, after working my gauge swatch I realized that this yarn does work up as a true CYC 4.

Different crocheters may be able to meet gauge with a CYC 3 however, a bulky yarn will be too large so I would not try using a larger yarn. If you can get it to work with gauge, a cotton dk would be a wonderful swap!
The panels may seem small at first, but this specific yarn opens up quite a bit once steam blocked. You MUST block before seaming so that your back panel seam does not pinch.
You will make two of the same panels that will be seamed together about half way up on the long side.
There are not ch 1’s at the end of each row to create a cleaner finished edge. Be mindful when placing your last stitch since we are not using a ch 1 at the first st. You may use a ch 1 if having chain spaces make it easier to complete you end of row or use stitch markers.
If this is your first time creating cables I would recommend using stitch markers between the sections on the pattern repeat to keep you stitch count accurate.
This crocheted ruana is written for three size fits. To choose the right size look at the measurements provided below in the Pattern Notes Section.
Yarn Substitutions
Come find me on…
- Like my Facebook Page
- Join my Facebook group!
- Get PDFs on Etsy
- Get PDFs on Ravelry
- Sign Up for the Life and Yarn Newsletter
Materials
- 6.00 mm Crochet Hook
- 8 (8, 9) Skeins of Lion Brand Wool-Ease Recycled in Charcoal [632-149T]
- #4 Worsted Weight Yarn – 1500 (1565, 1600) yards
Gauge
14 sts x 19 rows is 4”x4” in sc. (Pre-blocked)
Stitch Descriptions and Abbreviations
- Chain Stitch – ch
- Slip Stitch – sl st
- Stitch(es) – st(s)
- Skip(ped) – sk’d
- Single Crochet – sc
- Double Crochet – dc
- Single Crochet Two Together – sc2tog
- Double Crochet Two Together – dc2tog
- Previous – prev
- Front Post Double Crochet – FPdc -Work a double crochet as you normally would by placing your hook from front to back to front around the post of the designated stitch.
- Foundation Single Crochet – Fsc – Chain 2, insert hook into 2nd chain from hook, yarn over and pull up a loop (2 loops on hook), yarn over, draw through 1 loop, (2 loops on hook with 1 ch created), yarn over, draw through all loops (1 loop on hook, 1 foundation single crochet with chain at the bottom). *Insert hook to the bottom of the stitch you just made, it will look like the top or “V” of a stitch, yarn over, pull up 1 loop (2 loops on hook), yarn over, draw through 1 loop (2 loops on hook with 1 ch created), yarn over, draw through all loops;* repeat from * to * for desired amount of stitches.
Pattern Notes
- Sizes – Petite (Standard, Plus)
- * Designates a repeat.
- “sc 1” means to single crochet in the next stitch.
- “sc 2” means to single crochet in each of the next 2 stitches.
- “2 sc” means to single crochet twice in the next stitch to create an increase.
- Be mindful of when it is noted to work behind or in front of a FPdc when crossing sts.
- When a FPdc is created you must make sure to skip the stitches behind in the round you are working. For Example: When you “FPdc 2” you must skip 2 sc sts in the previous row leaving them unworked, so each row has the same number of sts,this is NOT noted in the row instructions.
- You will have the same number of stitches in all cable rows as single crochet rows.
- When skipping single crochet stitches in Row 3 to create the Cable Foundation you will be counting forward from the corresponding single crochet stitch created in Row 1 (noted as ‘prev row’).
- Reference the stitch diagram for the repeats and proper stitch placement, note that FPdc sts are working in FPdc sts but for clarity the diagram does NOT show the overlap.
- Stitch Diagrams for Row Repeats have the order of the placement of the FPdc sts numbered if you prefer a visual. Be mindful of if you are working in FRONT or BEHIND of a FPdc.
- FPdc sts are always worked in FPdc sts with the exception of Row 3 where the FPdc sts are worked in Single Crochet Stitches of Row 1 to set up the Foundation FPdc sts.
- It is HIGHLY recommended to block before seaming and is also necessary to achieve the final look of this piece.
Crochet Ruana Pattern
Row 1 – Fsc 136 (140, 148)
Row 2 – Turn, sc across.
Row 3 – Turn, sc 4 (5, 7) *sc, FPdc 2 in corresponding next 2-sc sts of prev row, sc 3, sk 4 sc of prev row, FPdc in next sc of prev row, sc 2, FPdc in next sc of prev row, sc 8, sk 10 sc of prev row, FPdc in next sc of prev row, sc 2, FPdc in next sc of prev row, sc 8, sk 10 sc of prev row, FPdc in next sc of prev row, sc 2, FPdc in next sc of prev row, sc 3, sk 4 sc of prev row, FPdc 2 in corresponding next 2-sc sts of prev row, sc*, sc 4 (5, 7), repeat from * to *, sc 4 (5, 7), repeat from * to *, sc 4 (5, 7).
Row 4 – Turn, sc across.
Row 5 – Turn, sc 4 (5, 7), *sc, FPdc 2 in each of next 2-FPdc, sc 2, FPdc in next FPdc, sc, FPdc in last worked FPdc, FPdc in next FPdc, sc, FPdc in last worked FPdc, sc 6, FPdc in next FPdc, sc, FPdc in last worked FPdc, FPdc in next FPdc, sc, FPdc in last worked FPdc, sc 6, FPdc in next FPdc, sc, FPdc in last worked FPdc, FPdc in next FPdc, sc, FPdc in last worked FPdc, sc 2, FPdc 2 in each of next 2-FPdc, sc*, sc 4 (5, 7), repeat from * to *, sc 4 (5, 7), repeat from * to *, sc 4 (5, 7).
Row 6 – Turn, sc across.
Row 7 – Turn, sc 4 (5, 7), *sc, FPdc 2 in each of next 2-FPdc, sc 2, FPdc in next FPdc, sc, sk next FPdc, FPdc in next FPdc, FPdc back in sk’d FPdc working in FRONT of last worked FPdc, sc, FPdc in next FPdc, sc 5, FPdc in next FPdc, sc, FPdc in last worked FPdc, sk next FPdc, FPdc in next FPdc, FPdc back in sk’d FPdc working in FRONT of last worked FPdc, FPdc in next FPdc, sc, FPdc in last worked FPdc, sc 5, FPdc in next FPdc, sc, sk next FPdc, FPdc in next FPdc, FPdc back in sk’d FPdc working in FRONT of last worked FPdc, sc, FPdc in next FPdc, sc 2, FPdc 2 in each of next 2-FPdc, sc*, sc 4 (5, 7), repeat from * to *, sc 4 (5, 7), repeat from * to *, sc 4 (5, 7).
Row 8 – Turn, sc across.
Row 9 – Turn, sc 4 (5, 7), *sc, FPdc 2 in each of next 2-FPdc, sc 3, FPdc2tog in next 2 FPdc, sc 2, FPdc2tog in next 2 FPdc, sc 5, FPdc in next FPdc, sc, FPdc in last worked FPDc, sk next FPdc, FPdc in next FPdc, FPdc back in sk’d FPdc working BEHIND last worked FPdc, sk next FPdc, FPdc in next FPdc, FPdc back in sk’d FPdc working in FRONT of last worked FPdc, FPdc in next FPdc, sc, FPdc in last worked FPdc, sc 5, FPdc2tog in next 2 FPdc, sc 2, FPdc2tog in next 2 FPdc, sc 3, FPdc 2 in each of next 2-FPdc, sc*,
sc 4 (5, 7), repeat from * to *, sc 4 (5, 7), repeat from * to *, sc 4 (5, 7).
Row 10 – Turn, sc across.
Row 11 – Turn, sc 4 (5, 7), *sc, FPdc 2 in each of next 2-FPdc, sc 4, FPdc 2 in each of next 2-FPdc2tog, sc 5, FPdc in next FPdc, sc, FPdc in last worked FPdc, (sk next FPdc, FPdc in next FPdc, FPdc back in sk’d FPdc working BEHIND last worked FPdc) repeat 2 more times, FPdc in next FPdc, sc, FPdc in last worked FPdc, sc 5, FPdc 2 in each of next 2-FPdc2tog, sc 4, FPdc 2 in each of next 2-FPdc, sc*, sc 4 (5, 7), repeat from * to *, sc 4 (5, 7), repeat from * to *, sc 4 (5, 7).
Row 12 – Turn, sc across.
Row 13 – Turn, sc 4 (5, 7), *sc, FPdc 2 in each of next 2-FPdc, sc 4, sk next FPdc, FPdc in next FPdc, FPdc back in sk’d FPdc working in FRONT of last worked FPdc, sc 5, FPdc in next FPdc, sc, sk next FPdc, FPdc in next FPdc, FPdc back in sk’d FPdc working BEHIND last worked FPdc, (sk next FPdc, FPdc in next FPdc, FPdc back in sk’d FPdc working in FRONT of last worked FPdc), repeat 2 more times, sc, FPdc in next FPdc, sc 5, sk next FPdc, FPdc in next FPdc, FPdc back in sk’d FPdc working in FRONT of last worked FPdc, sc 4, FPdc 2 in each of next 2-FPdc, sc*, sc 4 (5, 7), repeat from * to *, sc 4 (5, 7), repeat from
* to *, sc 4 (5, 7).
Row 14 – Turn, sc across.
Row 15 – Turn, sc 4 (5, 7), *sc, FPdc 2 in each of next 2-FPdc, sc 3, FPdc in next FPdc, sc 2 , FPdc in next FPdc, sc 5, FPdc2tog in next 2 FPdc, sc, (sk next FPdc, FPdc in next FPdc, FPdc back in sk’d FPdc working in FRONT of last worked FPdc), repeat once more, sk next FPdc, FPdc in next FPdc, FPdc back in sk’d FPdc working BEHIND last worked FPdc, sc, FPdc2tog in next 2 FPdc, sc 5, FPdc in next FPdc, sc 2 , FPdc in next FPdc, sc 3, FPdc 2 in each of next 2-FPdc, sc*, sc 4 (5, 7), repeat from * to *, sc 4 (5, 7), repeat from * to *, sc 4 (5, 7).
Row 16 – Turn, sc across.
Row 17 – Turn, sc 4 (5, 7), *sc, FPdc 2 in each of next 2-FPdc, sc 2, FPdc in next FPdc, sc, FPdc in last worked FPdc, FPdc in next FPdc, sc, FPdc in last worked FPDc, sc 5, FPdc2tog in next 2 FPdc, sc, sk next FPdc, FPdc in next FPdc, FPdc back in sk’d FPdc working in FRONT of last worked FPdc, sk next FPdc, FPdc in next FPdc, FPdc back in sk’d FPdc working BEHIND last worked FPdc, sc, FPdc2tog in next 2 FPdc, sc 5, FPdc in next FPdc, sc, FPdc in last worked FPdc, FPdc in next FPdc, sc, FPdc in last worked FPdc,
sc 2, FPdc 2 in each of next 2-FPdc, sc*, sc 4 (5, 7), repeat from * to *, sc 4 (5, 7), repeat from * to *,
sc 4 (5, 7).
Row 18 – Turn, sc across.
Row 19 – Turn, sc 4 (5, 7), *sc, FPdc 2 in each of next 2-FPdc, sc 2, FPdc in next FPdc, sc, sk next FPdc, FPdc in next FPdc, FPdc back in sk’d FPdc working in FRONT of last worked FPdc, sc, FPdc in next FPdc, sc 6, FPdc2tog in next 2 FPdc, sc, sk next FPdc, FPdc in next FPdc, FPdc back in sk’d FPdc working in FRONT of last worked FPdc, sc, FPdc2tog in next 2 FPdc, sc 6, FPdc in next FPdc, sc, sk next FPdc, FPdc in next FPdc, FPdc back in sk’d FPdc working in FRONT of last worked FPdc, sc, FPdc in next FPdc, sc 2, FPdc 2 in each of next 2-FPdc, sc*, sc 4 (5, 7), repeat from * to *, sc 4 (5, 7), repeat from * to *,
sc 4 (5, 7).
Row 20 – Turn, sc across.
Row 21 – Turn, sc 4 (5, 7), *sc, FPdc 2 in each of next 2-FPdc, sc 3, FPdc2tog in next 2 FPdc, sc 2, FPdc2tog in next 2 FPdc, sc 8, FPdc2tog in next 2 FPdc, sc 2, FPdc2tog in next 2 FPdc, sc 8, FPdc2tog in next 2 FPdc, sc 2, FPdc2tog in next 2 FPdc, sc 3, FPdc 2 in each of next 2-FPdc, sc*, sc 4 (5, 7), repeat from * to *, sc 4 (5, 7), repeat from * to *, sc 4 (5, 7).
Row 22 – Turn, sc across.
Row 23 – Turn, sc 4 (5, 7), *sc, FPdc 2 in each of next 2-FPdc, sc 4, FPdc 2 in each of next 2-FPdc2tog, sc 10, FPdc 2 in each of next 2-FPdc2tog, sc 10, FPdc 2 in each of next 2-FPdc2tog, sc 4, FPdc 2 in each of next 2-FPdc, sc*, sc 4 (5, 7), repeat from * to *, sc 4 (5, 7), repeat from * to *, sc 4 (5, 7).
Row 24 – Turn, sc across.
Row 25 – Turn, sc 4 (5, 7), *sc, FPdc 2 in each of next 2-FPdc, sc 4, sk next FPdc, FPdc in next FPdc, FPdc back in sk’d FPdc working in FRONT of last worked FPdc, sc 10, sk next FPdc, FPdc in next FPdc, FPdc back in sk’d FPdc working in FRONT of last worked FPdc, sc 10, sk next FPdc, FPdc in next FPdc, FPdc back in sk’d FPdc working in FRONT of last worked FPdc, sc 4, FPdc 2 in each of next 2-FPdc, sc*, sc 4 (5, 7), repeat from * to *, sc 4 (5, 7), repeat from * to *, sc 4 (5, 7).
Row 26 – Turn, sc across.
Row 27 – Turn, sc 4 (5, 7), *sc, FPdc 2 in each of next 2-FPdc, sc 3, FPdc in next FPdc, sc 2 , FPdc in next FPdc, sc 8, FPdc in next FPdc, sc 2 , FPdc in next FPdc, sc 8, FPdc in next FPdc, sc 2 , FPdc in next FPdc, sc 3, FPdc 2 in each of next 2-FPdc, sc*, sc 4 (5, 7), repeat from * to *, sc 4 (5, 7), repeat from * to *,
sc 4 (5, 7).
Rows 28 to 51 – Repeat Rows 4 to 27
Rows 52 to 73 – Repeat Rows 4 to 25, finish off.

Assembly
- Steam or wet block both panels BEFORE seaming, this yarn opens up significantly.
- With Right Sides facing up and Final Rows together, use a flat zipper seam to join 64 (66, 70) sts.
- Finish off and weave in all ends, steam block for a second time if needed.
Free Crochet Patterns for Ruanas and Ponchos
Click on the photos below to see my other ruanas or check out my Ruanas + Ponchos Category for more free Crochet Patterns!