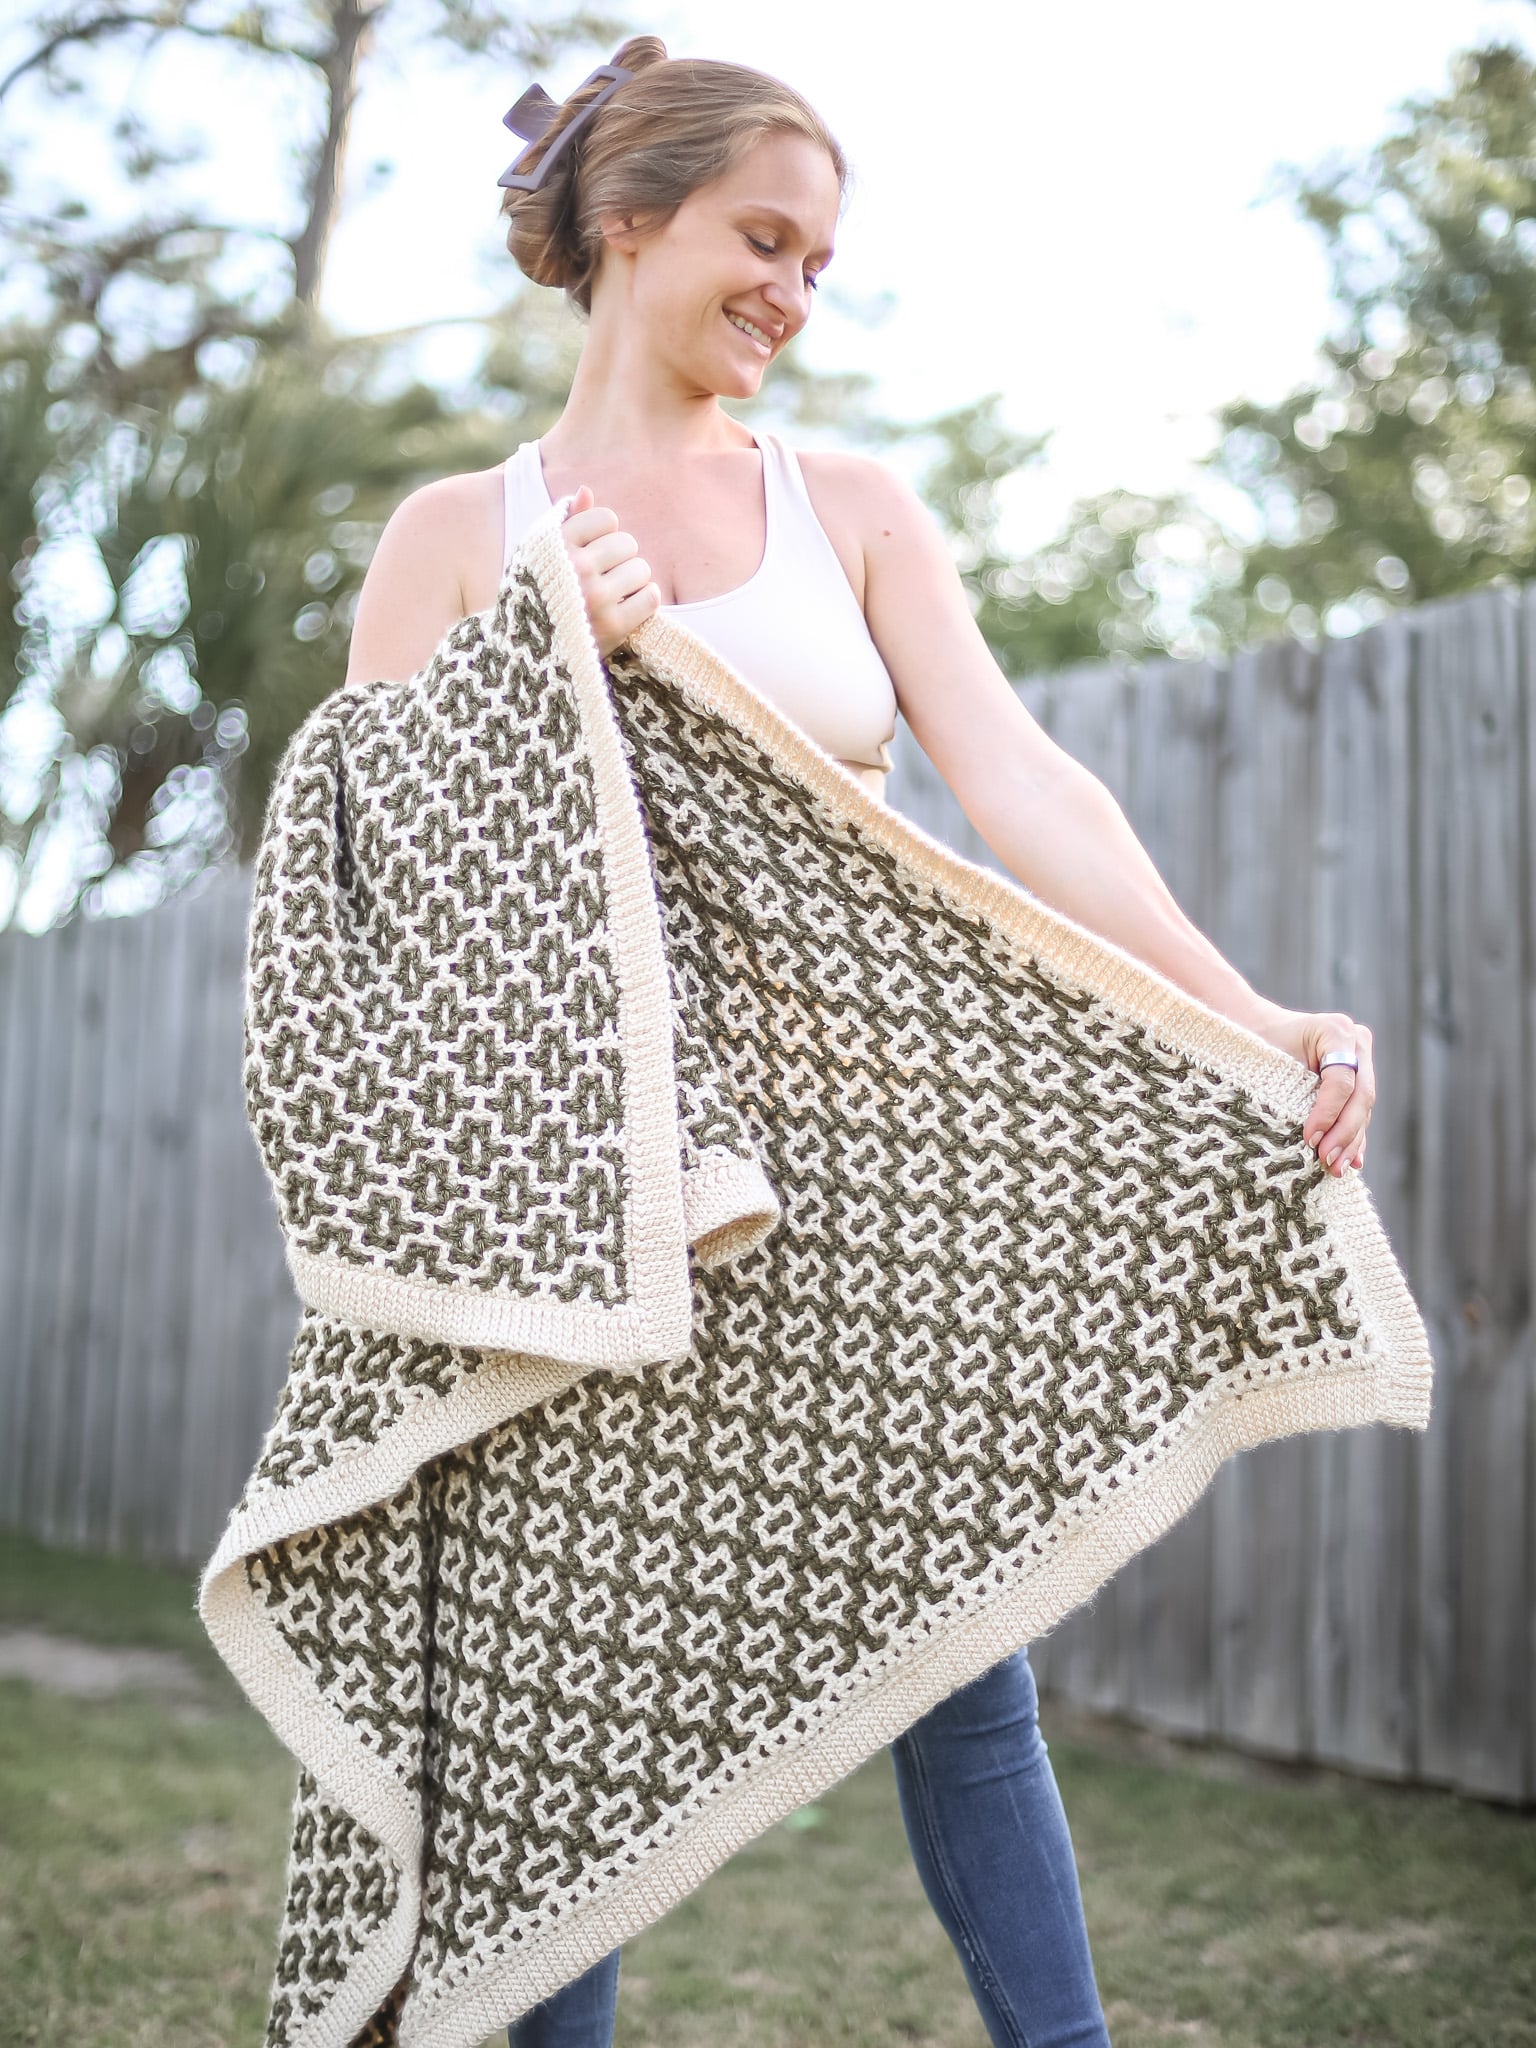
Free Cropped Crochet Cardigan Pattern – Simple Slightly Oversized
This slightly oversized, comfy and modern cropped crochet cardigan pattern is the next project you have to make and add to your handmade wardrobe! Use the free crochet pattern below to make a cropped cardigan using just a few basic crochet stitches!
This cute Almond Stitch Cardigan is the perfect piece to pull together any outfit. Happy Crocheting while you make your Fern Cropped Cardi!
Best Bang for your Buck, get a Kit From Lion Brand includes an ad-free printable PDF and Yarn!
Get a PDF Pattern on in my Etsy Shop or Ravelry!


Reviews and Finished Photos from Makers like YOU!

Crochet Cardigan Pattern Description
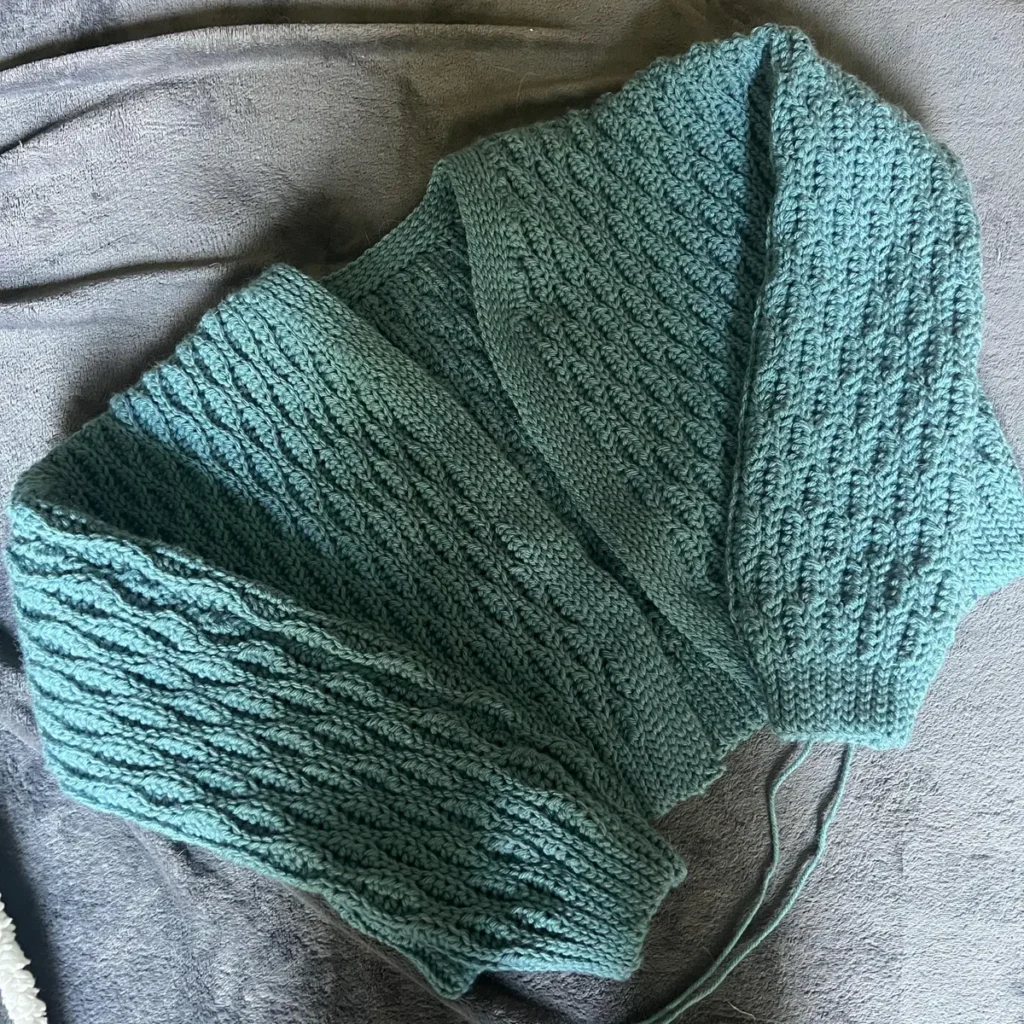
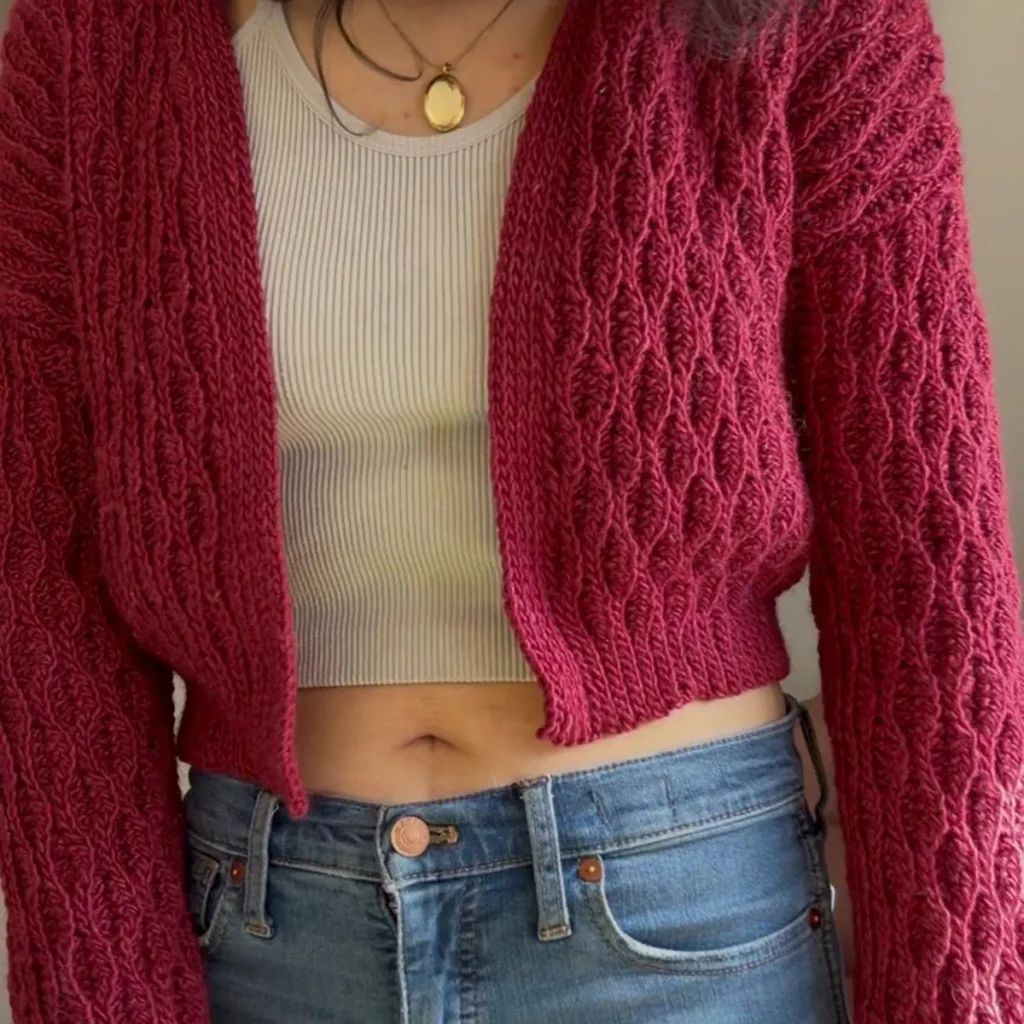
This Free Cropped Crochet Cardigan Pattern is written in US Crochet Terms using basic stitches such as slip stitch and half double crochet. The knit look ribbing and textures are created by working in the back loops only!
This easy crochet cardigan pattern ranges from extra small to larger sizes including 5X.
There is minimal shaping in this crochet sweater pattern. The use of short rows in the bottom ribbing of the waistband help the keep the cardigan from pinching too much. More simple short rows and extension rows are used to create a fitted neckline.
For this pattern I used drop sleeve construction, you may adjust as needed to customize you Cropped Crochet Cardigan Pattern.
Be sure to pay attention to your rows because there is a very obvious right side and wrong side with the almond stitch.
As a beginner crocheter, you can make this free crochet cardigan pattern with a few simple stitches but be very mindful of your gauge to ensure a proper fit.
Stitch markers may be a good way to mark the slip stitches for the ribbing on the cuffs and waist so that you know where the almond stitch begins and ends visually.
Leaving a long tail on your panels will be helpful when seaming to make your cropped cardigan more uniform and reduce the number of ends to weave in.
If you have never made the almond stitch you can check out this step-by-step video tutorial from when I used it on my modern retro throw.
Love this cropped cardi? Try this knit-look button up cardigan or browse my entire category of crochet cardigans for women!

Yarn Substitutes
- Wool Ease Classic
- Vanna’s Choice
- Color Theory
Come find me on…
- Like my Facebook Page
- Join my Facebook group!
- Subscribe to my YouTube Channel for Free Crochet Tutorials
- Get PDFs on Etsy
- Get PDFs on Ravelry
- Sign Up for the Life and Yarn Newsletter for more free crochet patterns!
Materials
- 5.50 mm Crochet Hook
- 5 (6, 6, 7, 7) (9, 9, 10, 11) Skeins of Wool-Ease Recycled in Olive [632-172T]
- #4 Worsted Weight Yarn – 980 (1075, 1150, 1275, 1372) (1690, 1764, 1960, 2156) Yards
Gauge
- 17 sts x 16 rows = 4 by 4 inches in Almond Stitch
- When creating you gauge swatch if it is too big you will need to go down a hook size to create smaller stitches. If your swatch is too small you will need to go up a hook size to create larger stitches.
Sizing for this Women’s Cardigan
- Sizes – XS (S, M, L, XL) (2XL, 3XL, 4XL, 5XL)
- See chart for size specifics to choose your best fit for this slightly oversized cardigan.
- Pattern is designed with 2-4” positive ease.

Stitch Descriptions and Abbreviations
- Chain Stitch – ch
- Slip Stitch – sl st
- Stitch(es) – st(s)
- HalfDouble Crochet – hdc
- Back Loop Only – blo
Pattern Notes
- Sizes – XS (S, M, L, XL) (2XL, 3XL, 4XL, 5XL)
- Compare the “Fits Bust” to “Actual Bust Circumference” to your bust measurement to choose your best fit.
- See chart for size specifics.
- Pattern is designed with 2-4” positive ease.
- Skill Level: Intermediate
- * Designates a repeat.
Cropped Crochet Cardigan Pattern
Back Panel
NOTE: Pattern was updated on January 23rd, 2025. There were adjustments made to repeats for some sizes and notes added to clarify waist and cuff short rows.
First Back Shoulder Section
Chain 69 (69, 69, 77, 77) (77, 85, 85, 85)
Row 1 – (Waist Trim Edge) Sl st in 2nd ch from hook, sl st 11, *hdc 4, sl st 4, repeat from * to end. [68 (68, 68, 76, 76) (76, 84, 84, 84) total sts]
Note: Use the back bump of your chain for a more finished edge.
Note: One side has a set of 8 sl st worked for the waist trim before the Almond Stitch pattern begins.
Note: Odd Rows start with on the Waist Trim side and Even Rows start on the Neck/Shoulder side where you will create a seam.
Note: Row 8 has a Waist Trim Short Row.
Row 2 – (Neck and Shoulder Edge) Ch 1, turn, *sl st 4 in blo, hdc 4 blo, repeat from * until 12 sts remain, sl st 12 in blo.
Row 3 – Ch 1, turn, sl st 8 blo, *hdc 4 blo, sl st 4 in blo, repeat from * until 4 sts remain, hdc 4 in blo.
Row 4 -Ch 1, turn, *hdc 4 blo, sl st 4 in blo, repeat from * until 12 sts remain, hdc 4 in blo, sl st 8 in blo.
Row 5 – Ch 1, turn, sl st 8 blo, *sl st 4 in blo, hdc 4 blo, repeat from * until 4 sts remain, sl st 4 in blo.
Row 6 – Ch 1, turn, *sl st 4 in blo, hdc 4 blo, repeat from * until 12 sts remain, sl st 12 in blo.
Row 7 – Ch 1, turn, sl st 8 blo, *hdc 4 blo, sl st 4 in blo, repeat from * until 4 sts remain, hdc 4 in blo.
Row 8 –Waist Trim Short Row -Ch 1, turn, *hdc 4 blo, sl st 4 in blo, repeat from * until 12 sts remain, hdc 4 in blo, sl st 8 in blo, ch 1, turn, sl st 7 in blo, ch 1, turn, sl st 7 in blo.
Row 9 – Ch 1, turn, sl st 7 blo, sl st in blo in sk’d sl st of previous row, *sl st 4 in blo, hdc 4 blo, repeat from * until 4 sts remain, sl st 4 in blo.
Row 10 – Ch 1, turn, *sl st 4 in blo, hdc 4 blo, repeat from * until 12 sts remain, sl st 12 in blo.
Rows 11 to 22 (26, 30, 34, 38) (42, 46, 50, 54) – Repeat Rows 3 to 10 ending on a Row 6 (10, 6, 10, 6) (10, 6, 10, 6) repeat. Note that the Waist Trim Short Row is part of the Row 8 instructions.
Short Row To Create Back of Neck
Rows 23 (27, 31, 35, 39) (43, 47, 51, 55) – Ch 1, turn, sl st 8 blo, *hdc 4 blo, sl st 4 in blo, repeat from * until 12 sts remain, hdc 4 in blo leaving 8 sts unworked.
Row A -Ch 1, turn, *hdc 4 blo, sl st 4 in blo, repeat from * until 12 sts remain, hdc 4 in blo, sl st 8 in blo.
Row B– Ch 1, turn, sl st 8 blo, *sl st 4 in blo, hdc 4 blo, repeat from * until 4 sts remain, sl st 4 in blo.
Row C – Ch 1, turn, *sl st 4 in blo, hdc 4 blo, repeat from * until 12 sts remain, sl st 12 in blo.
Row D– Ch 1, turn, sl st 8 blo, *hdc 4 blo, sl st 4 in blo, repeat from * until 4 sts remain, hdc 4 in blo.
Row E – Waist Trim Short Row – (Final Row in Repeat) -Ch 1, turn, *hdc 4 blo, sl st 4 in blo, repeat from * until 12 sts remain, hdc 4 in blo, sl st 8 in blo, ch 1, turn, sl st 7 in blo, ch 1, turn, sl st 7 in blo.
Row F – Ch 1, turn, sl st 7 blo, sl st in blo in sk’d sl st of previous row, *sl st 4 in blo, hdc 4 blo, repeat from * until 4 sts remain, sl st 4 in blo.
Row G – Ch 1, turn, *sl st 4 in blo, hdc 4 blo, repeat from * until 12 sts remain, sl st 12 in blo.
Row H– Ch 1, turn, sl st 8 blo, *hdc 4 blo, sl st 4 in blo, repeat from * until 4 sts remain, hdc 4 in blo.
Repeat Rows A through H for a total of 21 Rows ending on a Row E Repeat.
Extension Row to Create Second Back Shoulder
Row 45 (49, 53, 57, 61) (65, 69, 73, 77) – Ch 1, turn, sl st 8 blo, *sl st 4 in blo, hdc 4 blo, repeat from * until 4 sts remain, sl st 4 in blo, ch 9.
Row 46 (50, 54, 58, 62) (66, 70, 74, 78) -Turn, sl sl in 2nd ch from hook, sl st 3, hdc 4, *sl st 4 in blo, hdc 4 blo, repeat from * until 12 sts remain, sl st 12 in blo.
Row A – (Starting at Waist Trim Edge)– Ch 1, turn, sl st 8 blo, *hdc 4 blo, sl st 4 in blo, repeat from * until 4 sts remain, hdc 4 in blo.
Row B – Waist Trim Short Row – (Final Row in Repeat)-Ch 1, turn, *hdc 4 blo, sl st 4 in blo, repeat from * until 12 sts remain, hdc 4 in blo, sl st 8 in blo, ch 1, turn, sl st 7 in blo, ch 1, turn, sl st 7 in blo.
Row C – Ch 1, turn, sl st 7 blo, sl st in blo in sk’d sl st of previous row, *sl st 4 in blo, hdc 4 blo, repeat from * until 4 sts remain, sl st 4 in blo.
Row D – Ch 1, turn, *sl st 4 in blo, hdc 4 blo, repeat from * until 12 sts remain, sl st 12 in blo.
Row E – Ch 1, turn, sl st 8 blo, *hdc 4 blo, sl st 4 in blo, repeat from * until 4 sts remain, hdc 4 in blo.
Row F -Ch 1, turn, *hdc 4 blo, sl st 4 in blo, repeat from * until 12 sts remain, hdc 4 in blo, sl st 8 in blo.
Row G – Ch 1, turn, sl st 8 blo, *sl st 4 in blo, hdc 4 blo, repeat from * until 4 sts remain, sl st 4 in blo.
Row H – Ch 1, turn, *sl st 4 in blo, hdc 4 blo, repeat from * until 12 sts remain, sl st 12 in blo.
Repeat Row A through H ending on a Row B repeat to a Final Row Count of 64 (72, 80, 88, 96) (104, 112, 120, 128) across the whole back panel. You should have the same number of rows on each side pf the Short Row Neck Opening to Create the Back, finish off.
Front Panel A – Left
Chain 69 (69, 69, 77, 77) (77, 85, 85, 85)
Row 1 – Sl st in 2nd ch from hook, sl st 11, *hdc 4, sl st 4, repeat from * to end.[68 (68, 68, 76, 76) (76, 84, 84, 84) total sts]
Note: Use the back bump of your chain for a more finished edge.
Note: One side has a set of 8 sl st worked for the waist trim before the Almond Stitch pattern begins.
Note: Odd Rows start with on the Waist Trim side and Even Rows start on the Neck/Shoulder side where you will create a seam.
Note: Row 8 has a Waist Trim Short Row.
Row 2 -Ch 1, turn, *sl st 4 in blo, hdc 4 blo, repeat from * until 12 sts remain, sl st 12 in blo.
Row 3 – Ch 1, turn, sl st 8 blo, *hdc 4 blo, sl st 4 in blo, repeat from * until 4 sts remain, hdc 4 in blo.
Row 4 -Ch 1, turn, *hdc 4 blo, sl st 4 in blo, repeat from * until 12 sts remain, hdc 4 in blo, sl st 8 in blo.
Row 5 – Ch 1, turn, sl st 8 blo, *sl st 4 in blo, hdc 4 blo, repeat from * until 4 sts remain, sl st 4 in blo.
Row 6 – Ch 1, turn, *sl st 4 in blo, hdc 4 blo, repeat from * until 12 sts remain, sl st 12 in blo.
Row 7 – Ch 1, turn, sl st 8 blo, *hdc 4 blo, sl st 4 in blo, repeat from * until 4 sts remain, hdc 4 in blo.
Row 8 – Waist Trim Short Row -Ch 1, turn, *hdc 4 blo, sl st 4 in blo, repeat from * until 12 sts remain, hdc 4 in blo, sl st 8 in blo, ch 1, turn, sl st 7 in blo, ch 1, turn, sl st 7 in blo.
Row 9 – Ch 1, turn, sl st 7 blo, sl st in blo in sk’d sl st of previous row, *sl st 4 in blo, hdc 4 blo, repeat from * until 4 sts remain, sl st 4 in blo.
Row 10 – Ch 1, turn, *sl st 4 in blo, hdc 4 blo, repeat from * until 12 sts remain, sl st 12 in blo.
Rows 11 to 24 (28, 32, 36, 40) (44, 48, 52, 56) – Repeat Rows 3 – 10 ending on a Row 8 (4, 8, 4, 8) (4, 8, 4, 8) repeat. Note that the Waist Trim Short Row is part of the Row 8 instructions.
Short Rows To Create Neck
Row A – Ch 1, turn, sl st 8 blo, *sl st 4 in blo, hdc 4 in blo, repeat from * to end leaving 4 sts unworked.
Row B – Ch 1, turn, hdc 4 blo *sl st 4 in blo, hdc 4 blo, repeat from * until 12 sts remain, sl st 12 in blo.
Row C – Ch 1, turn, sl st 8 blo, *hdc 4 blo, sl st 4 in blo, repeat from * until 8 sts remain, hdc 4 in blo, leave 4 sts unworked.
Row D -Ch 1, turn, *hdc 4 blo, sl st 4 in blo, repeat from * until 12 sts remain, hdc 4 in blo, sl st 8 in blo.
Next 4 Rows – Repeat Rows A through D, finish off. [52 (52, 52, 60, 60) (60, 68, 68, 68) total stitches]
Front Panel B – Right
Chain 53 (53, 53, 61, 61) (61, 69, 69, 69)
Row 1 – Sl st in 2nd ch from hook, sl st 11, *hdc 4, sl st 4, repeat from * to end. [52 (52, 52, 60, 60) (60, 68, 68, 68) total stitches]
Note: Use the back bump of your chain for a more finished edge.
Note: One side has a set of 8 sl st worked for the waist trim before the Almond Stitch pattern begins.
Note: Odd Rows start with on the Waist Trim side and Even Rows start on the Neck/Shoulder side where you will create a seam.
Note: Waist Trim Short Rows are created on Even Rows at the end of the Row.
Row 2 -Ch 1, turn, *sl st 4 in blo, hdc 4 blo, repeat from * until 12 sts remain, sl st 12 in blo.
Row 3 – Extension Row – Ch 1, turn, sl st 8 blo, *hdc 4 blo, sl st 4 in blo, repeat from * until 4 sts remain, hdc 4 in blo, ch 5.
Row 4 -Turn, sl st in 2nd chain from hook, sl st 3, *hdc 4 blo, sl st 4 in blo, repeat from * until 12 sts remain, hdc 4 in blo, sl st 8 in blo.
Row 5 – Extension Row – Ch 1, turn, sl st 8 blo, *sl st 4 in blo, hdc 4 blo, repeat from * to end, ch 5.
Row 6 – Turn, sl st in 2nd chain from hook, sl st 3, * hdc 4 blo, sl st 4 in blo, repeat from * until 8 sts remain, sl st 8 in blo.
Row 7 – Extension Row– Ch 1, turn, sl st 8 blo, *hdc 4 blo, sl st 4 in blo, repeat from * until 4 sts remain, hdc 4 in blo, ch 5.
Row 8 -Turn, sl st in 2nd chain from hook, sl st 3, *hdc 4 blo, sl st 4 in blo, repeat from * until 12 sts remain, hdc 4 in blo, sl st 8 in blo.
Row 9 – Extension Rows – Ch 1, turn, sl st 8 blo, *sl st 4 in blo, hdc 4 blo, repeat from * to end, ch 5.
Row 10 – Turn, sl st in 2nd chain from hook, sl st 3, *hdc 4 blo, sl st 4 in blo, repeat from * until 8 sts remain, sl st 8 in blo. [68 (68, 68, 76, 76) (76, 84, 84, 84) total sts]
Row 11 – Ch 1, turn, sl st 8 blo, *hdc 4 blo, sl st 4 in blo, repeat from * until 4 sts remain, hdc 4 in blo.
Row 12 -Ch 1, turn, *hdc 4 blo, sl st 4 in blo, repeat from * until 12 sts remain, hdc 4 in blo, sl st 8 in blo.
Row 13 – Ch 1, turn, sl st 8 blo, *sl st 4 in blo, hdc 4 blo, repeat from * until 4 sts remain, sl st 4 in blo.
Row 14 – Ch 1, turn, *sl st 4 in blo, hdc 4 blo, repeat from * until 12 sts remain, sl st 12 in blo.
Row 15 – Ch 1, turn, sl st 8 blo, *hdc 4 blo, sl st 4 in blo, repeat from * until 4 sts remain, hdc 4 in blo.
Row 16 – Waist Trim Short Row -Ch 1, turn, *hdc 4 blo, sl st 4 in blo, repeat from * until 12 sts remain, hdc 4 in blo, sl st 8 in blo, ch 1, turn, sl st 7 in blo, ch 1, turn, sl st 7 in blo.
Row 17 – Ch 1, turn, sl st 7 blo, sl st in blo in sk’d sl st of previous row, *sl st 4 in blo, hdc 4 blo, repeat from * until 4 sts remain, sl st 4 in blo.
Row 18 – Ch 1, turn, *sl st 4 in blo, hdc 4 blo, repeat from * until 12 sts remain, sl st 12 in blo.
Rows 19 to 32 (36, 40, 44, 48) (52, 56, 60, 64) – Repeat Rows 11 – 18 ending on a Row 16 (12, 16, 12, 16) (12, 16, 12, 16) repeat. Note that the Waist Trim Short Row is part of the Row 16 instructions, finish off.
Sleeves – Make 2
Chain 69 (69, 69, 69, 61) (61, 61, 61, 53)
Row 1 – Sl st in 2nd ch from hook, sl st 11, *hdc 4, sl st 4, repeat from * to end. [68 (68, 68, 68, 60) (60, 60, 60, 52) total stitches]
Note: Use the back bump of your chain for a more finished edge.
Note: One side has a set of 8 sl st worked for the cuff trim before the Almond Stitch pattern begins.
Note: Odd Rows start with on the Cuff Trim side and Even Rows start on the Shoulder side where you will create a seam.
Row 2 -Ch 1, turn, *sl st 4 in blo, hdc 4 blo, repeat from * until 12 sts remain, sl st 12 in blo.
Row 3 – Ch 1, turn, sl st 8 blo, *hdc 4 blo, sl st 4 in blo, repeat from * until 4 sts remain, hdc 4 in blo.
Row 4 -Ch 1, turn, *hdc 4 blo, sl st 4 in blo, repeat from * until 12 sts remain, hdc 4 in blo, sl st 8 in blo.
Row 5 – Ch 1, turn, sl st 8 blo, *sl st 4 in blo, hdc 4 blo, repeat from * until 4 sts remain, sl st 4 in blo.
Row 6 – Ch 1, turn, *sl st 4 in blo, hdc 4 blo, repeat from * until 12 sts remain, sl st 12 in blo.
To Rows 40 (44, 48, 52, 56) (64, 68, 72, 72) – Repeat Rows 3 – 6, finish off.
Assembly
- Seam your Front Panels to your Back Panels to create the shoulder seams using your yarn needle.
- Seam from the Wrist Cuff to the Arm Pit on both sleeves.
- Align your sleeves to your body panels and mark the arm holes.
- Seam from the Waist Trim on the Body Panels to where you marked for the arm openings.
- Seam your Arms to your Body.
- Finish off and weave in all ends.
Collar Trim
Reattach your yarn at the bottom of your front panel in the first Slip St.
Row 1 – Ch 1, sl st in blo in every stitch until you reach the Row Ends of the Neck, sc evenly across the Row ends, sl sl in blo down the other body panel in every stitch.
Row 2 – Ch 1, turn, sl st in blo in every stitch around.
Row 3 – Ch 1, turn, sl st in blo in every stitch around but placing 2 slst2tog in each inside corner.
Rows 4 to 7 – Repeat Rows 2 and 3.
Row 8 – Repeat Row 2, finish off and weave in ends.
Check out more of my Modern Cardigans!