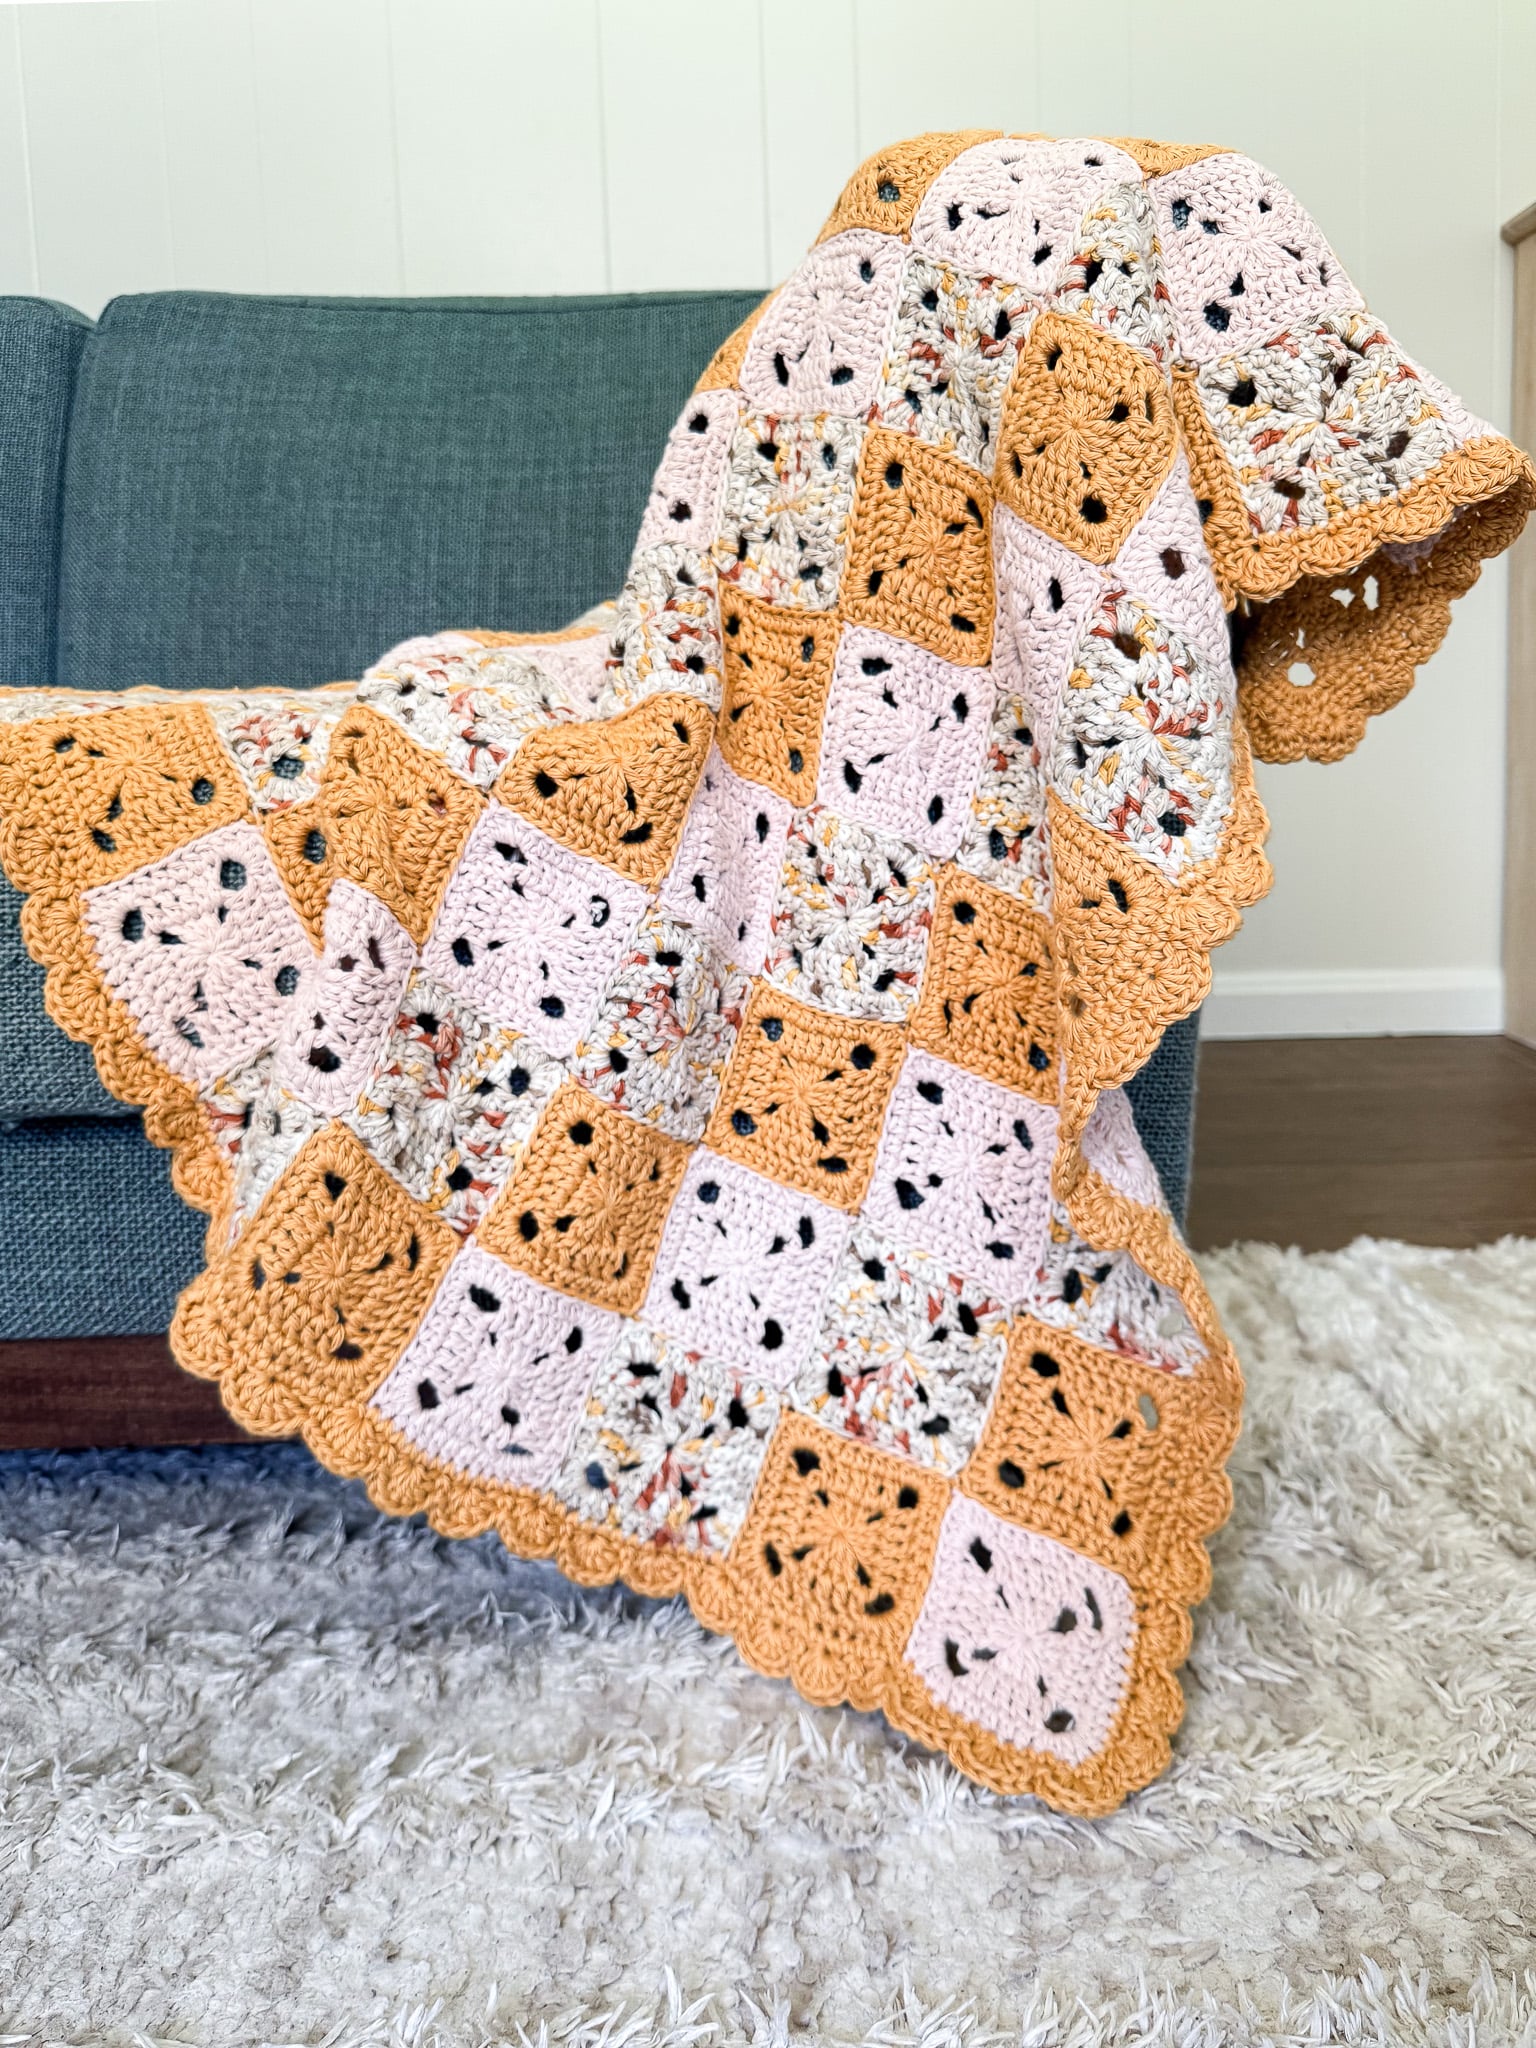
Free and Easy Crochet Blanket Pattern for Baby and More!
This simple pattern makes an easy to crochet blanket that is sure to be loved! Granny squares are a great way to use up scrap yarn or as an excuse to browse the yarn aisle to put together a perfectly curated color pallet and make a cozy blanket for a baby shower!
This pattern is slightly different from a classic granny and perfect for a beginner crocheter that wants something a bit different but still easy to make! So make some squares, seam them together, add a simple border of shells and make a special baby gift for a new bundle of joy!
Best Bang for your Buck, get a Kit From Lion Brand includes a printable PDF ad-free pdf version of this pattern and Yarn!
Get a PDF Pattern on in my Etsy Shop or Ravelry!
Make this Easy to Crochet Blanket
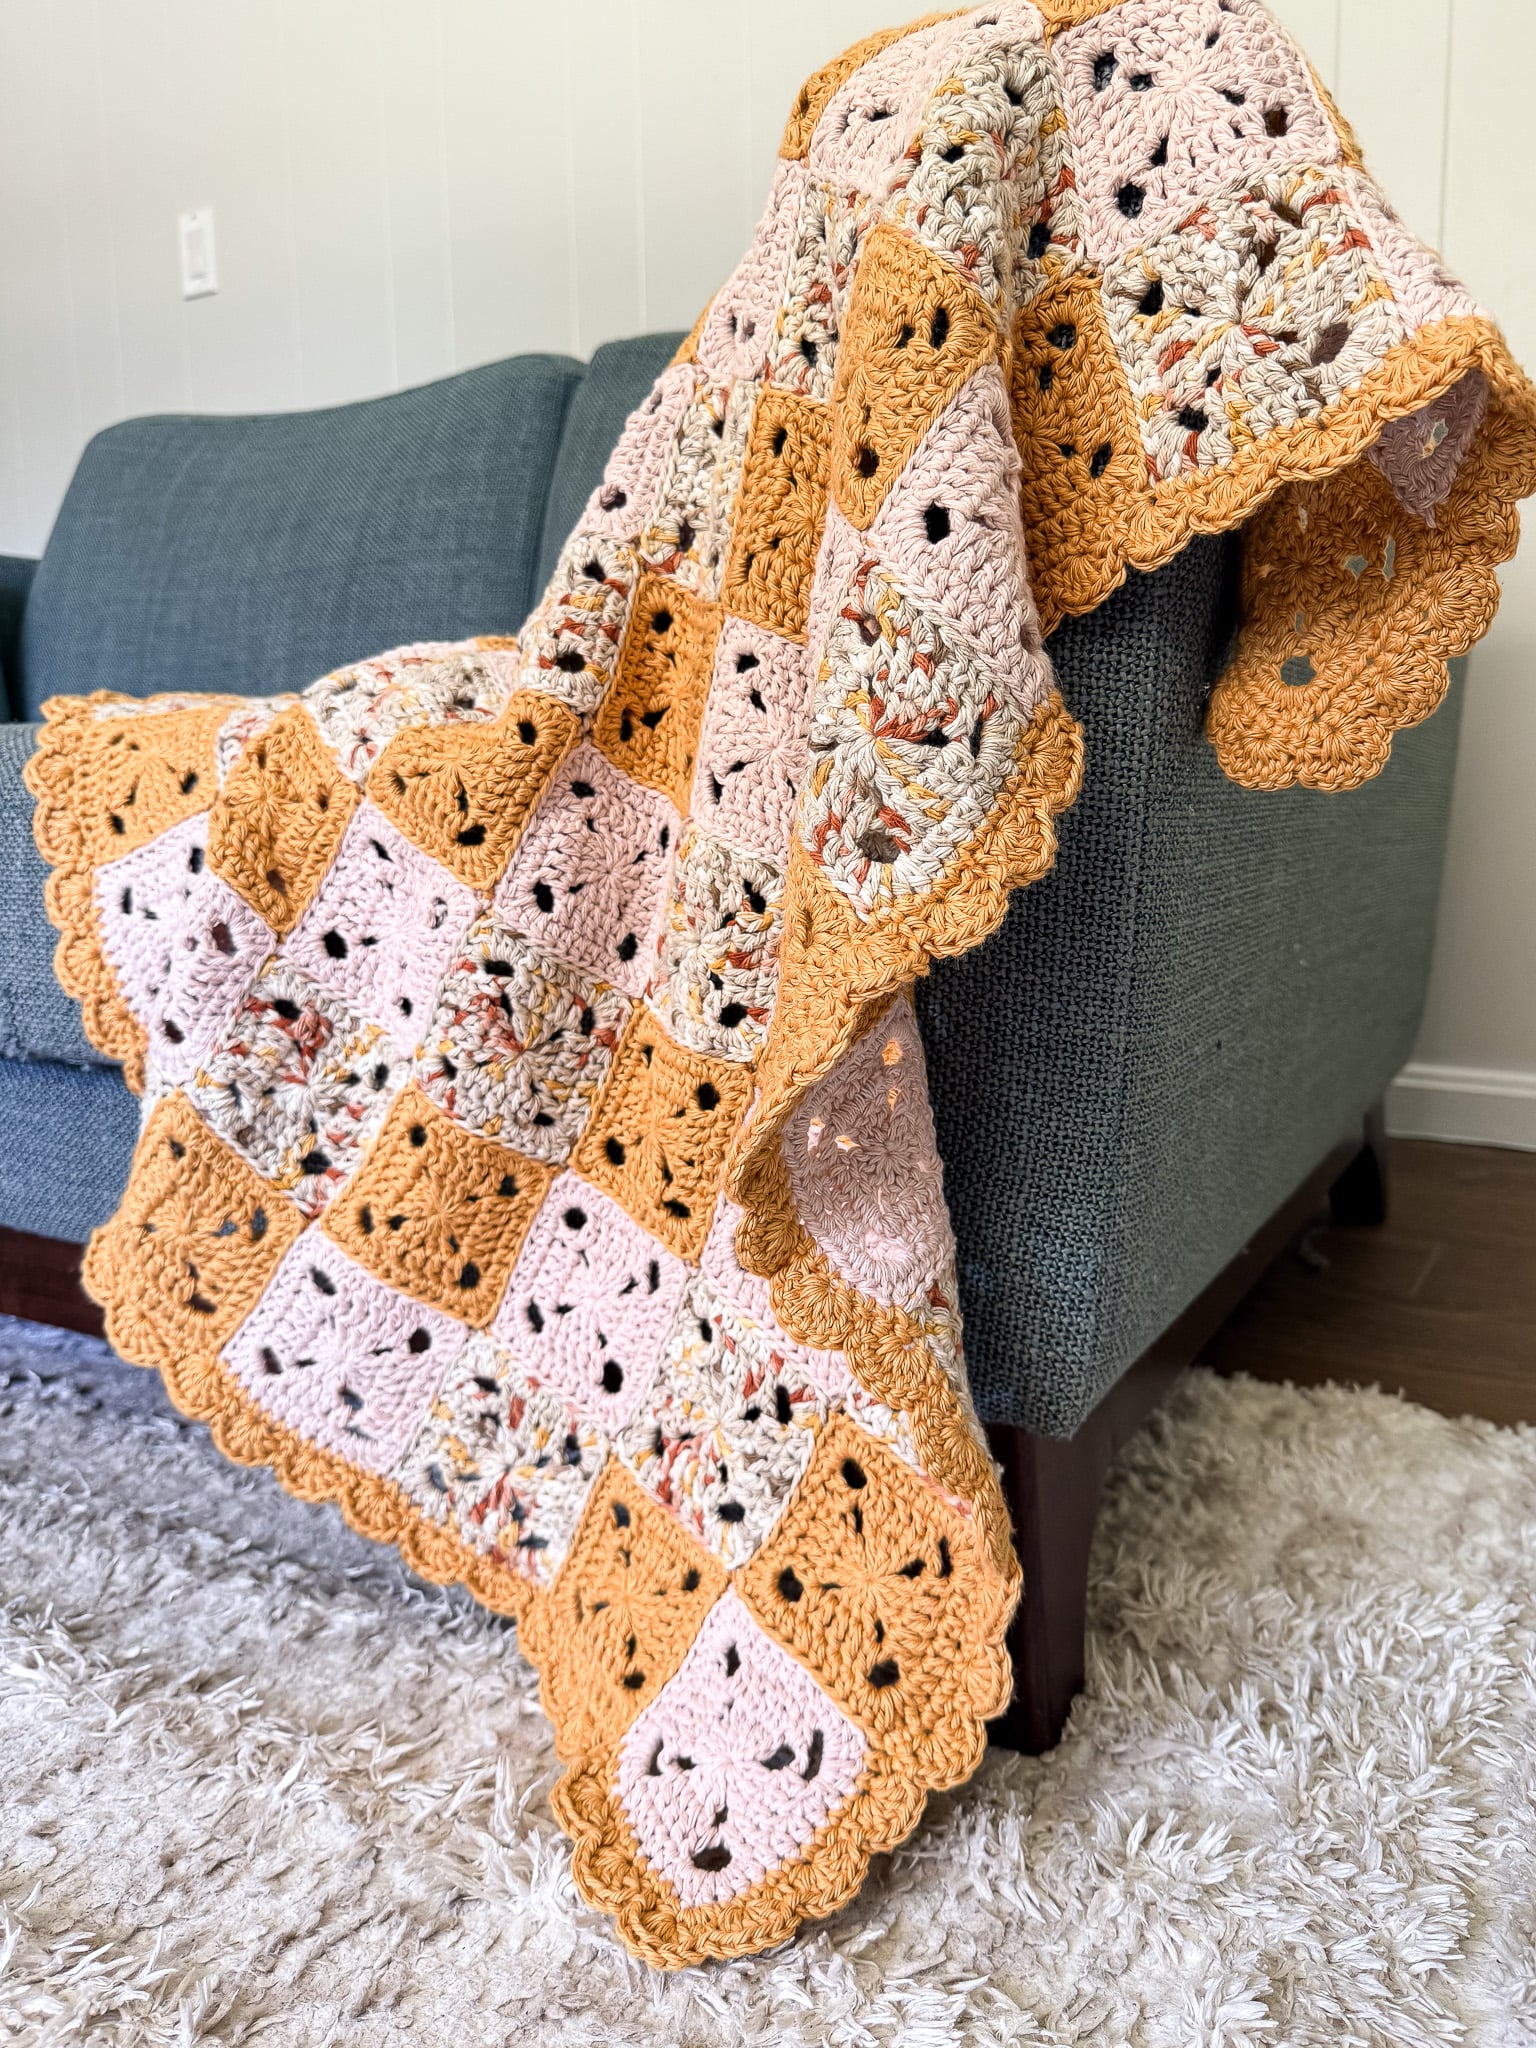
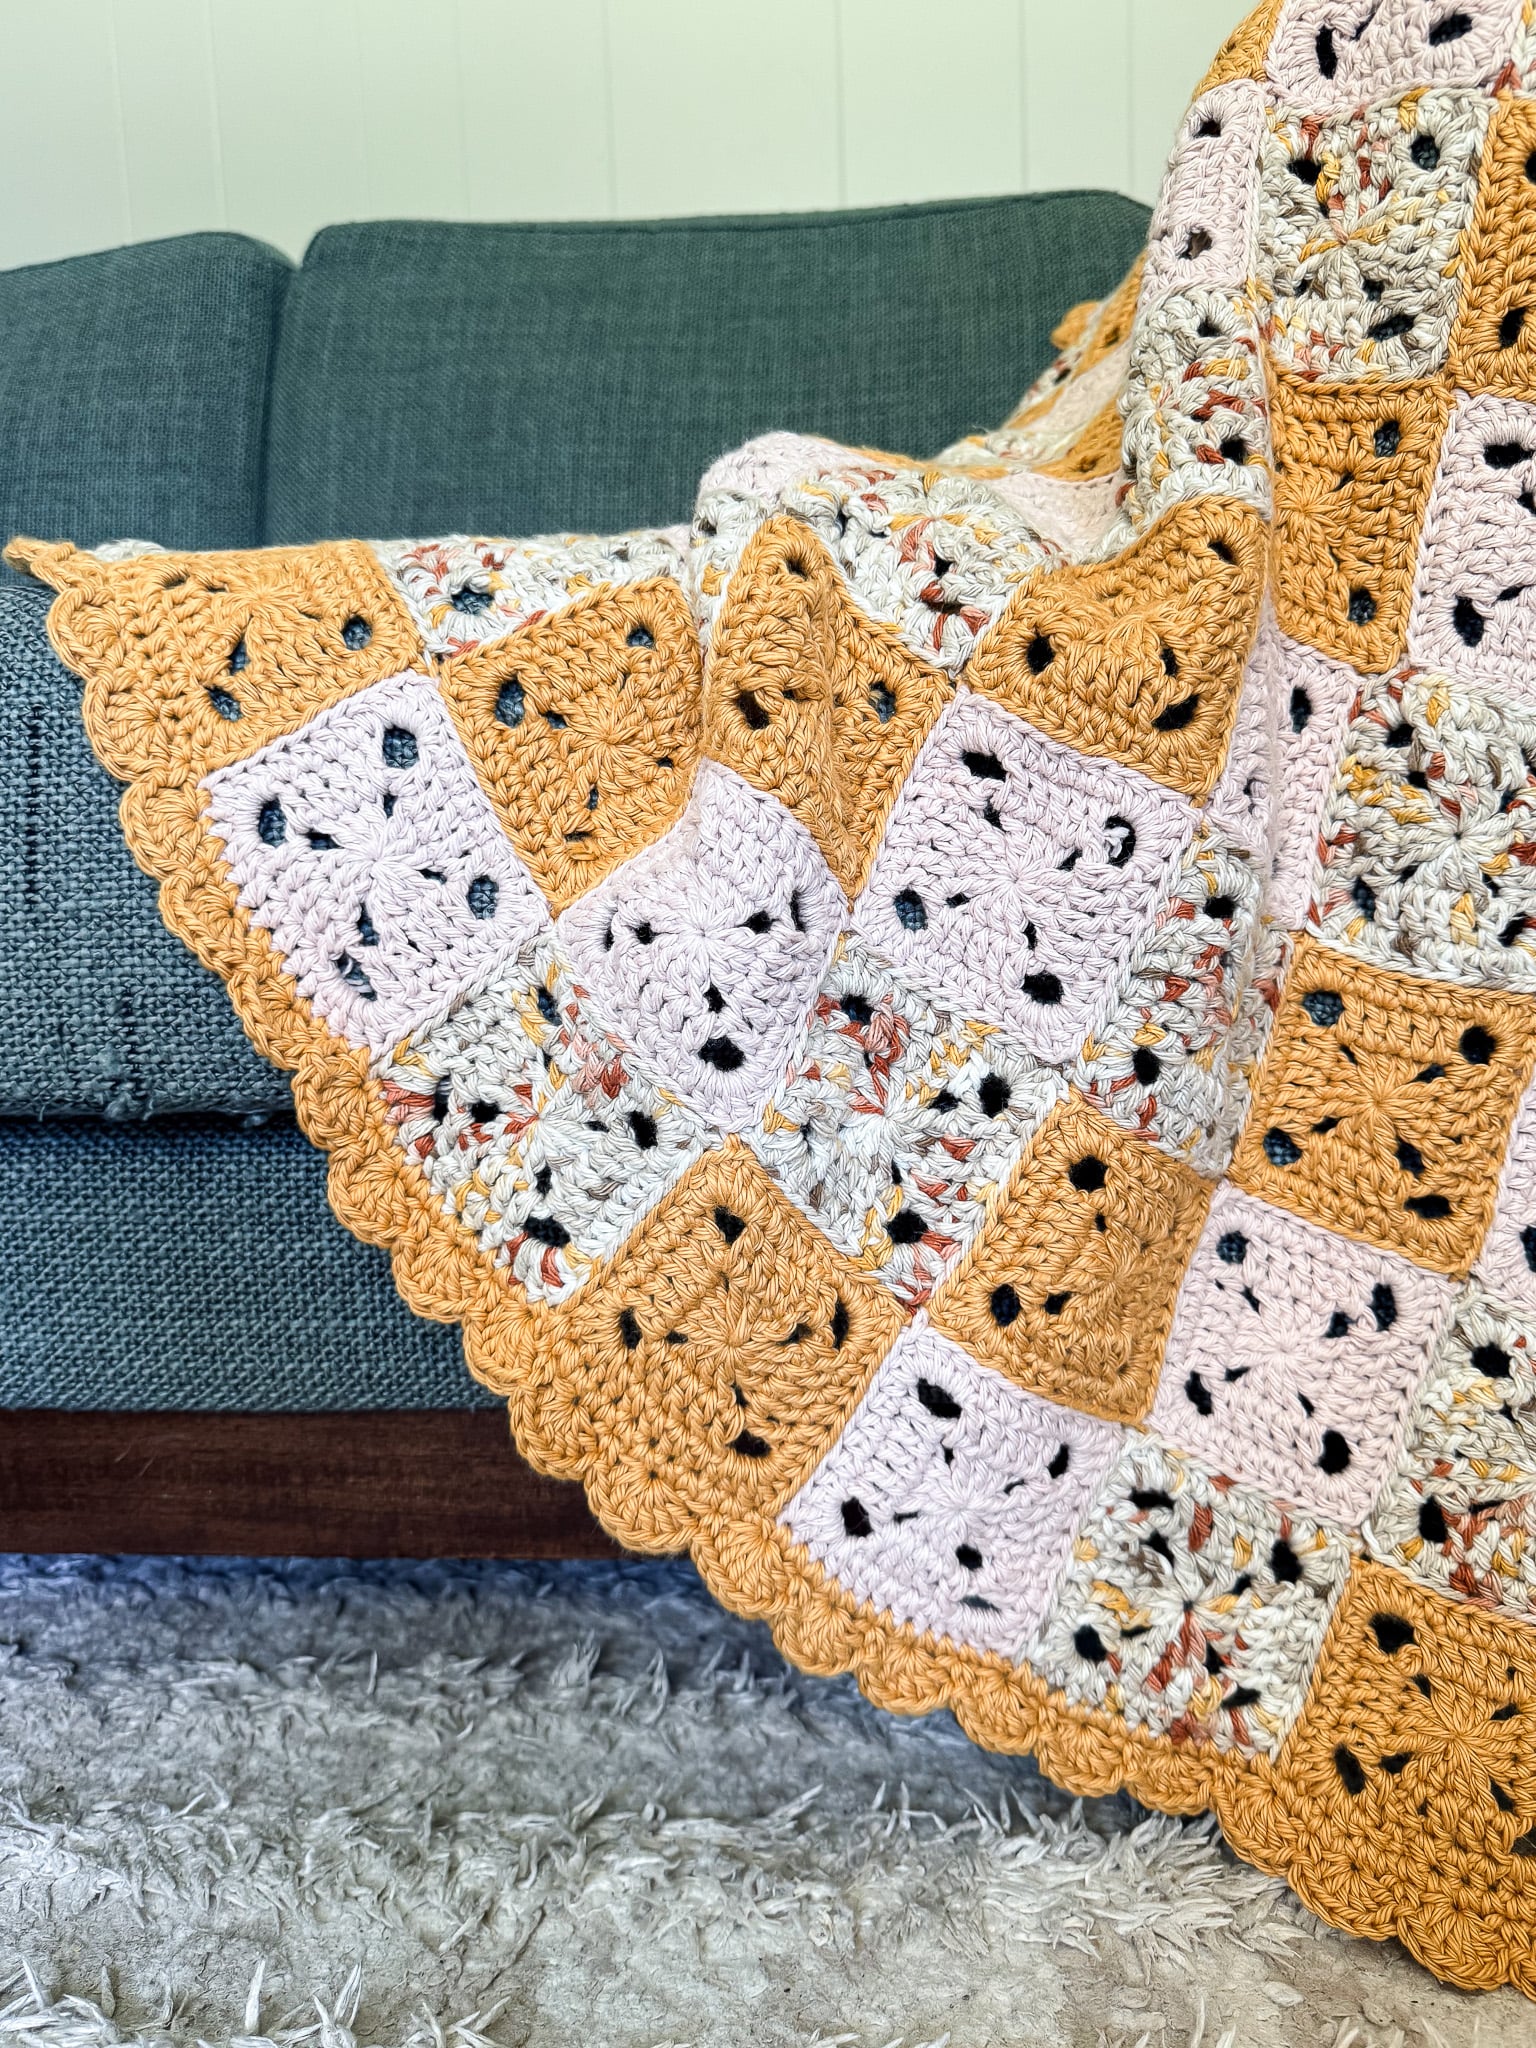
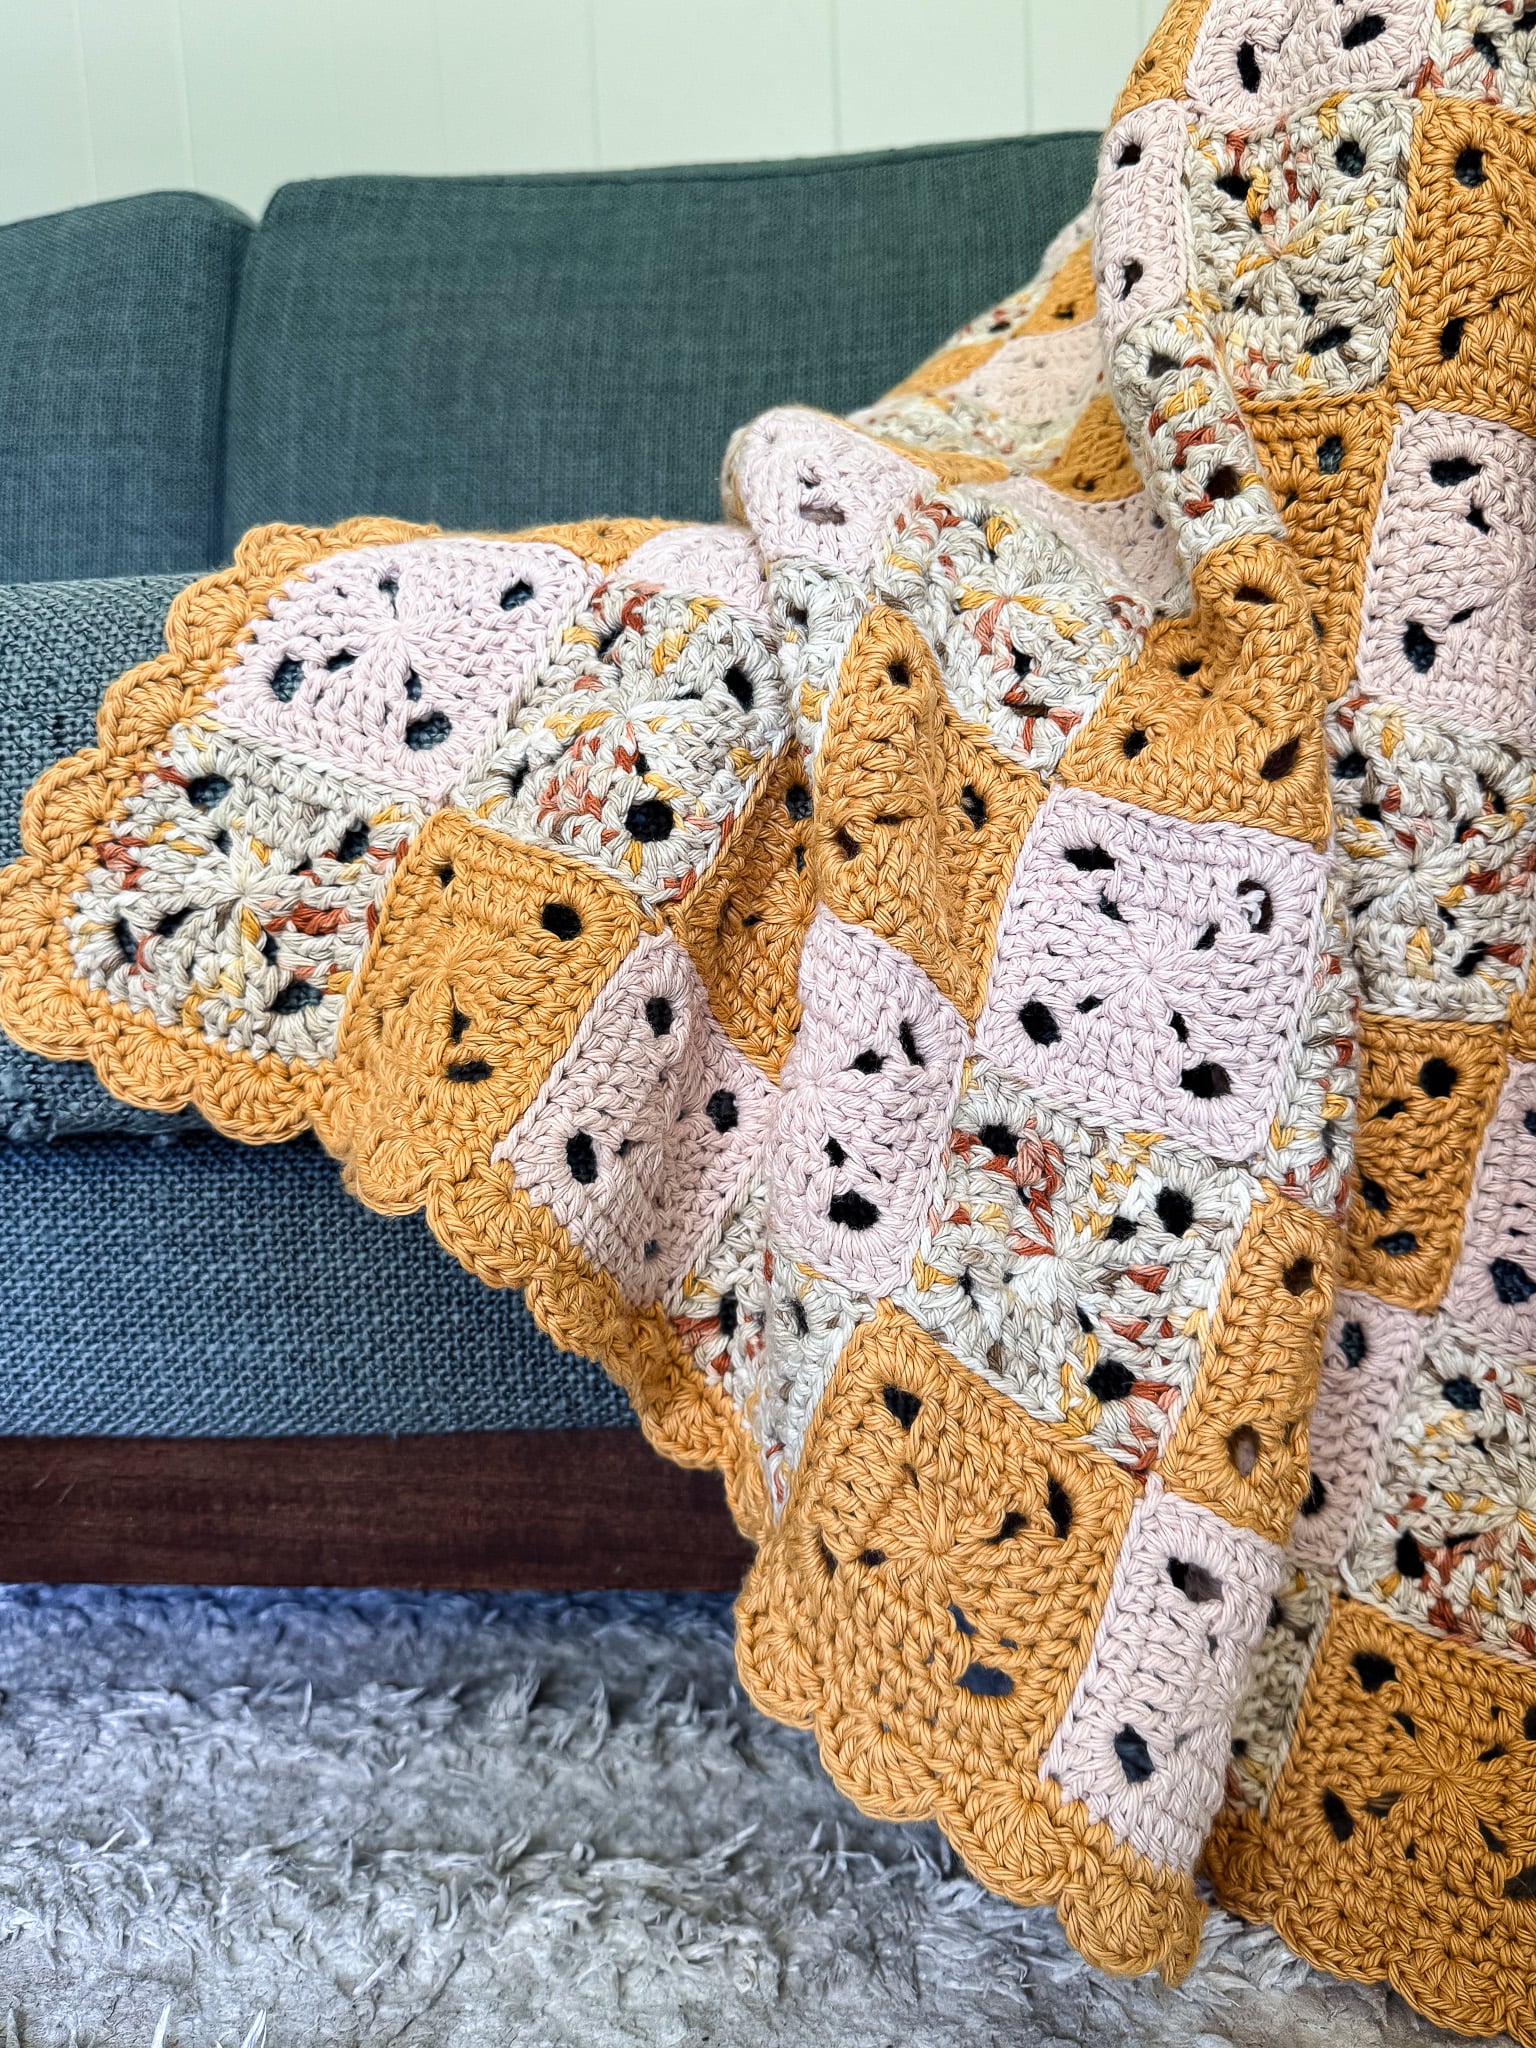
This beautiful blanket uses basic stitches to make a simple square patterns reminiscent of a classic granny square!
When making this simple square blanket you will not turn between rounds to keep the right side of the stitches all on the same side. This will give a clean and great texture on your squares.
While I have written this as a baby blanket you can make as many squares as you want and make any of the most common crocheted blanket sizes.
Since these squares are small you can achieve a range os sizes which also make this a perfect project to do some stash busting using leftover yarn!
This simple blanket would look wonderful with more than 3 colors, self-striping yarn or any unique and different color combo you come up with. Make a ton of squares with your favorite yarns and do no pattern at all for a scrappy looking throw blanket!
If you are a new crocheter use stitch markers to find the beginning and end of each round to make sure this stays an easy crochet pattern.
Yarn Substitutes
- Mix it up and use chunky yarns, or a bulky yarn or even super bulky yarn! Or go smaller and use a lightweight dk!
- If you prefer acrylic yarns, Color Theory would be a great worsted weight yarn to meet my gauge.
- If you want a blended wool yarn I would suggest Wool-Ease.
- Be sure to check your yarn label for care instructions.
Come find me on…
- Instagram to see all of my current crochet projects!
- Like my Facebook Page
- Join my Facebook group!
- Subscribe to my YouTube Channel for Free Crochet Tutorials
- Get PDFs on Etsy
- Get PDFs on Ravelry
- Sign Up for the Life and Yarn Newsletter for more great projects and never miss new free patterns!
- Please Note: Some links may be affiliate links that help to support the Life + Yarn Blog with a small commission at no added cost to you, thank you!
- Copyright 2026, Life and Yarn, Brianna Iaropoli. Pattern contents are NOT to be re-shared, DIRECT LINKS ONLY to this post for the pattern.
Materials
- Size 5.00 mm crochet hook
Color A – (Squares and Trim)
3 skeins of Pima Cotton in Mineral Yellow [762-159S] - Color B – (Squares Only)
2 skeins of Pima Cotton in Seaglass [762-505S] - Color C – (Squares Only)
2 skeins of Pima Cotton in Mademoiselle [762-184P] - #4 Worsted Weight Yarn
Color A – 450 yds
Color B – 310 yds
Color C – 310 yds - Tapestry Needle
Gauge
- Blocked: 3 by 3 inch completed square.
- Gauge is given as Blocked for one finished square. If your square is too small go up a hook size, if it is too big go down a hook size.
- Your method of blocking will also affect the size of your finished piece, wet vs steamed, ect.
- I used steam blocking for my sample.
Sizing
- One Size: 27 x 33 inches without trim
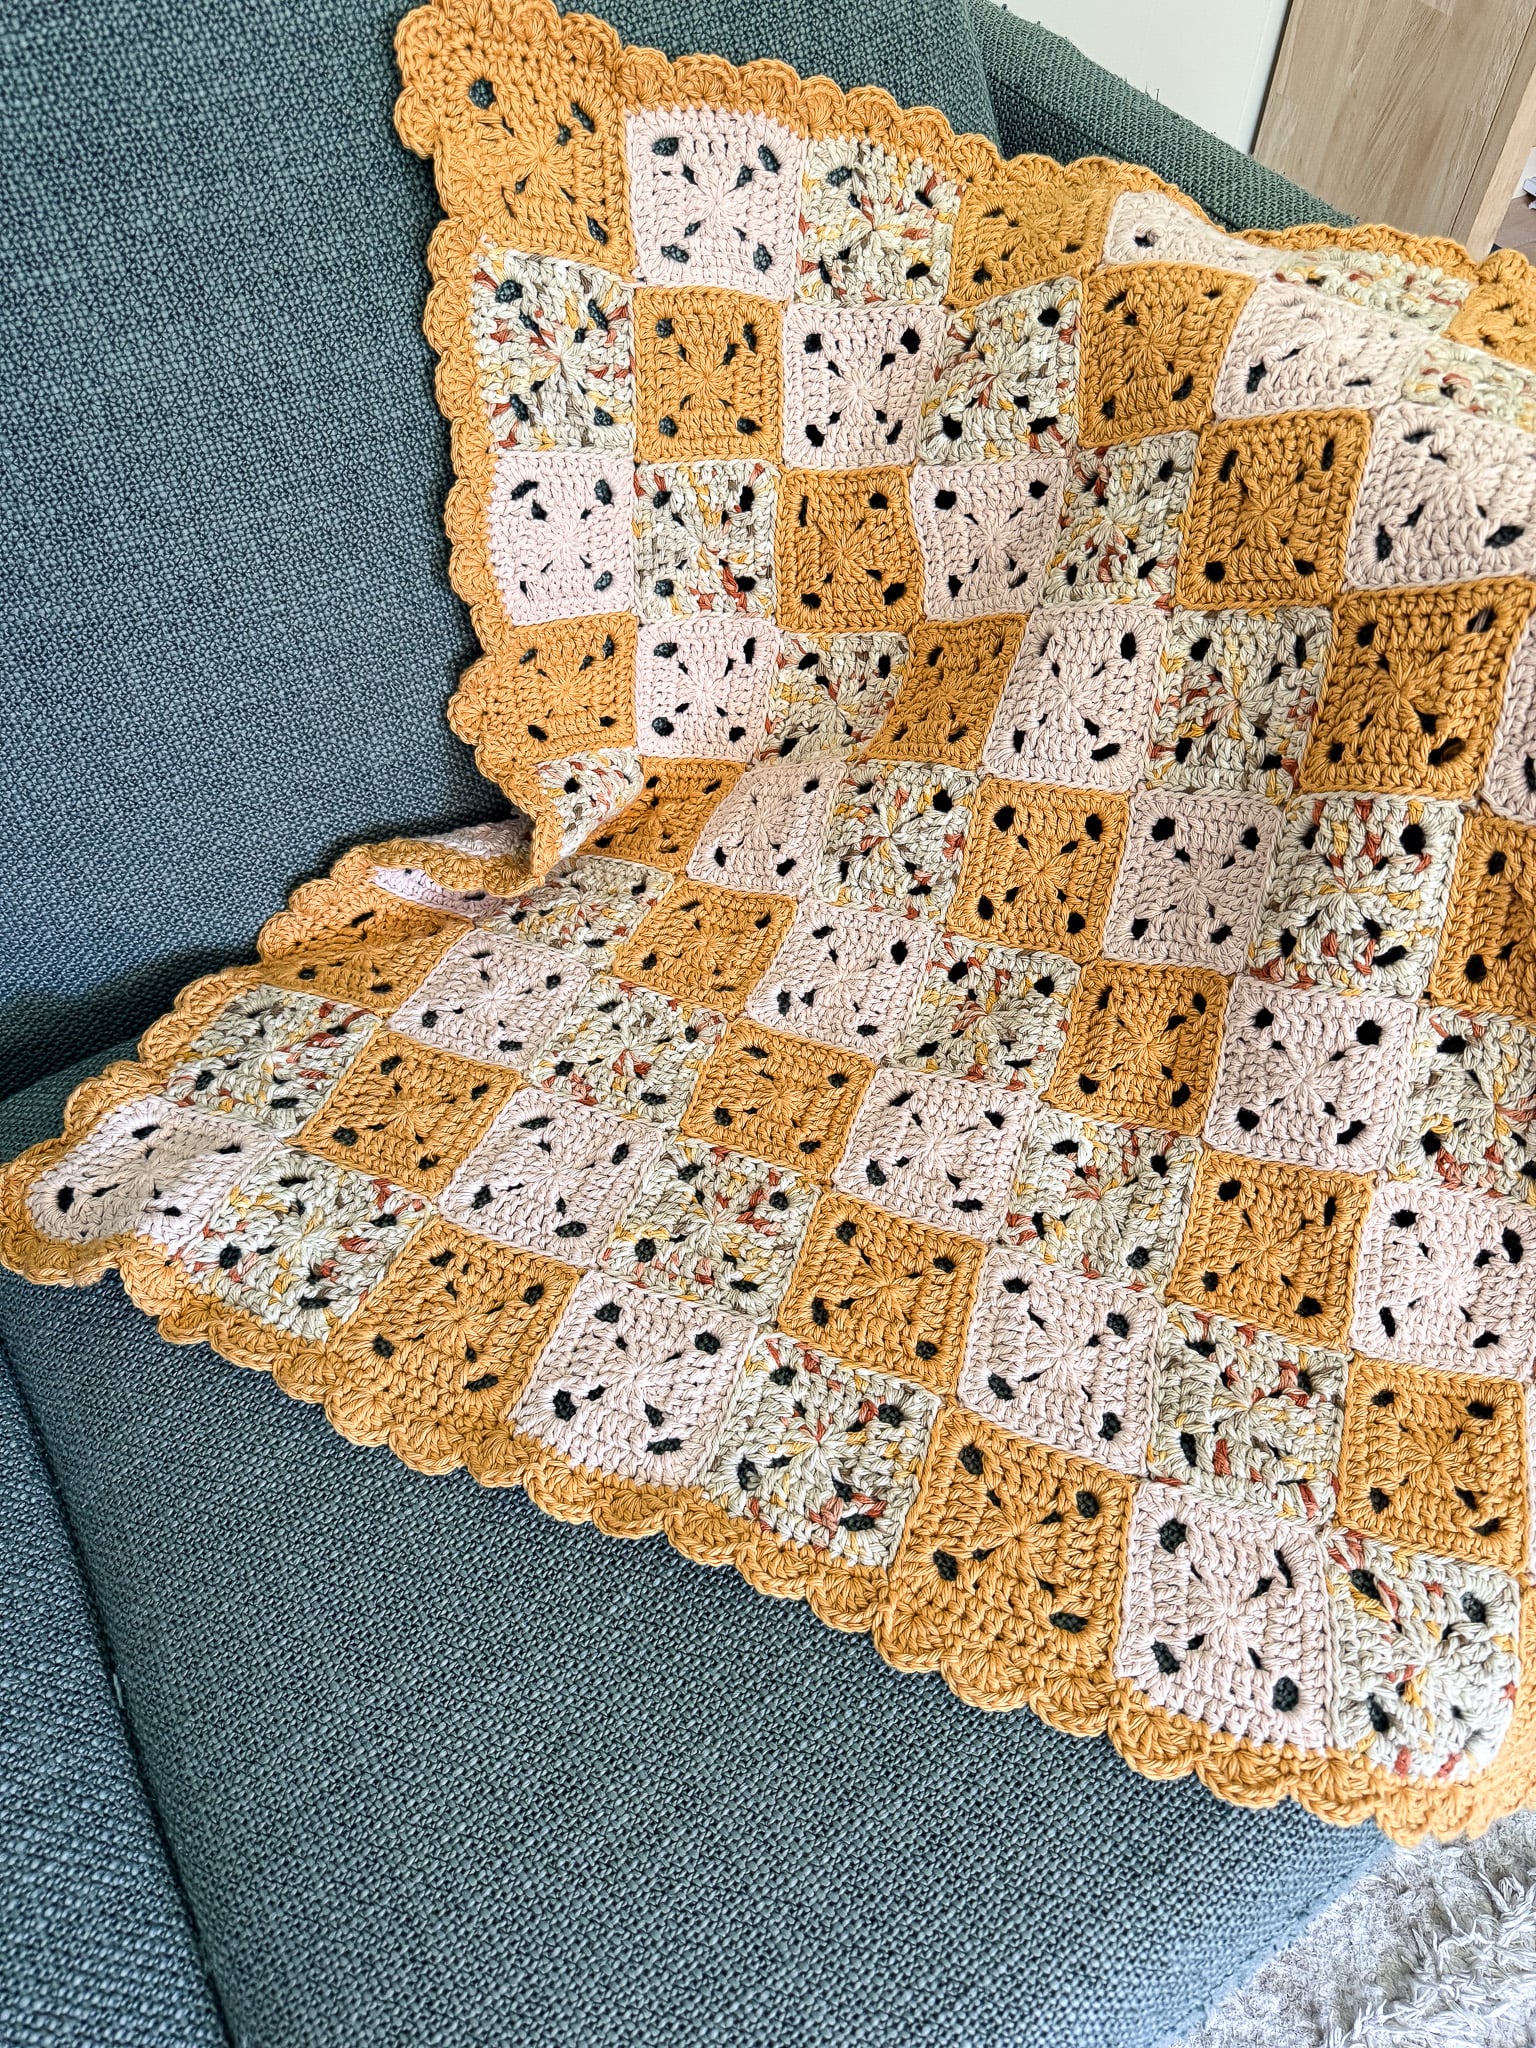
- Assembled blanket is in a 9 x 11 rectangular grid.
- Easily customize the size of the blanket my making more squares.
Stitch Descriptions and Abbreviations
- Chain Stitch – ch
- Stitch(es) – st(s)
- Skip – sk
- Single Crochet – sc.
- HalfDouble Crochet – hdc
- Double Crochet – dc
- Magic Ring – MR – Wrap your yarn around your left pointer and middle finger starting from your palm side around and then cross the yarn over the top of your fingers to create an “X”, bring your under the yarn from the top of your fingers, yarn over and pull up a loop to begin your stitch.
- Stacked Single Crochet as hdc – STsc/hdc – insert your hook into the designated stitch, yarn over, pull up a loop, yarn over, pull through both loops, insert your hook into the second vertical bar on the stitch you just created, yarn over, pull up a loop, yarn over, pull though all loops.
- Stacked Single Crochet as dc – STsc/dc – insert your hook into the designated stitch, yarn over, pull up a loop, yarn over, pull through both loops, *insert your hook into the second vertical bar on the stitch you just created, yarn over, pull up a loop, yarn over, pull though all loops, repeat from * one more time.
Pattern Notes
- * Designates a repeat.
- “sc 1” means to single crochet in the next stitch.
- “sc 2” means to single crochet in each of the next 2 stitches.
- “2 sc” means to single crochet twice in the next stitch to create an increase.
- NO TURNS between rounds.
- NO Joining between rounds, STsc’s act as the joins.
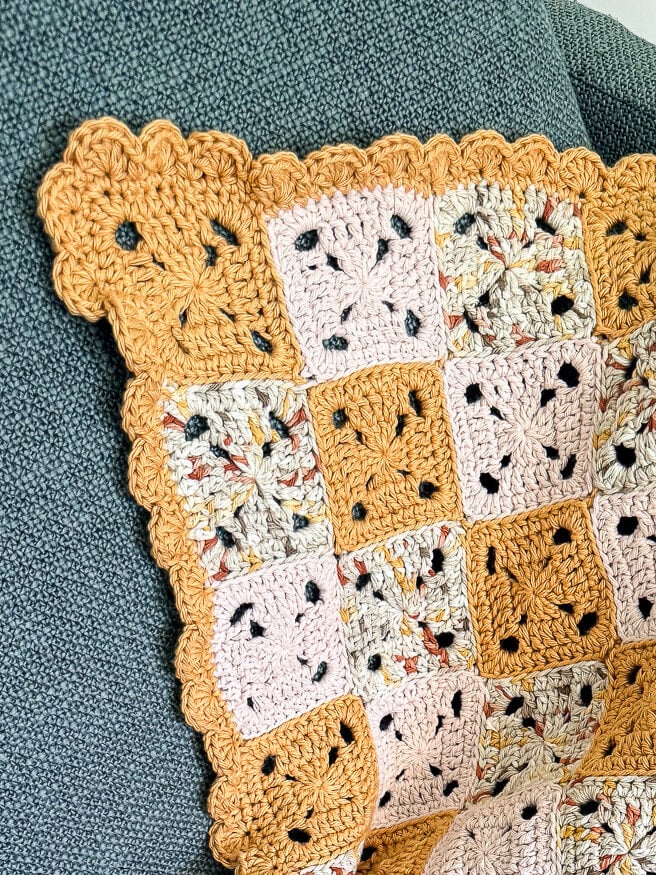
- Pattern is designed to alternate each of the 3 colors to create a diagonal checkered pattern.
Free Modern Crochet Blanket Pattern
Sunny Morning Squares Pattern
MAKE: Color A: 33 Squares, Color B: 33 Squares, Color C: 33 Squares.
Round 1 – MR, STsc/dc in MR, 2 dc in MR, *(ch 3, 3 dc) in MR, rep from * 2 more times, ch 3.
Round 2 – STsc/dc in top of prev STsc, dc 2, *(dc, ch 3, dc) in ch-3 sp, dc 3, rep from * 2 more times, (dc, ch 3, dc) in ch-3 sp.
Round 3 – STsc/hdc in prev. STsc, hdc 3, *(2 hdc, 2 dc, 2 hdc) in ch-3, hdc 5, rep from * 2 more times, (2 hdc, 2 dc, 2 hdc) in ch-3, hdc in last dc of prev. round, sl st to join, finish off weave in ends.
You may reference my photo to create the same pattern as mine or follow my process to create your own unique pattern!
Assembling Your Squares
Assemble your squares in a checkerboard pattern using your preferred seaming method. I used the mattress stitch, full tutorial available on the Life and Yarn YouTube Channel Here: https://bit.ly/4eUnIcv
Adding Trim
- Start 4 stitches from any of your corners, reattach your yarn using Color A, with the Right Side facing, single crochet around your blanket in every stitch. Place 3 single crochet in each corner.
- Sl St to join in your first sc-st, do not turn.
- With your Right Side still facing, sc in the joined stitch, *sk 1 sc, 6 sc in next st, sk 1 sc, sc in next, repeat from * around all sides, slip stitch to join, finish off and weave in your ends!
Looking for free baby blanket patterns? Check out my Category for Crochet Blankets that use simple stitches and many have a video tutorial!