FREE Chic Crochet Purse Pattern – Modern Handbag
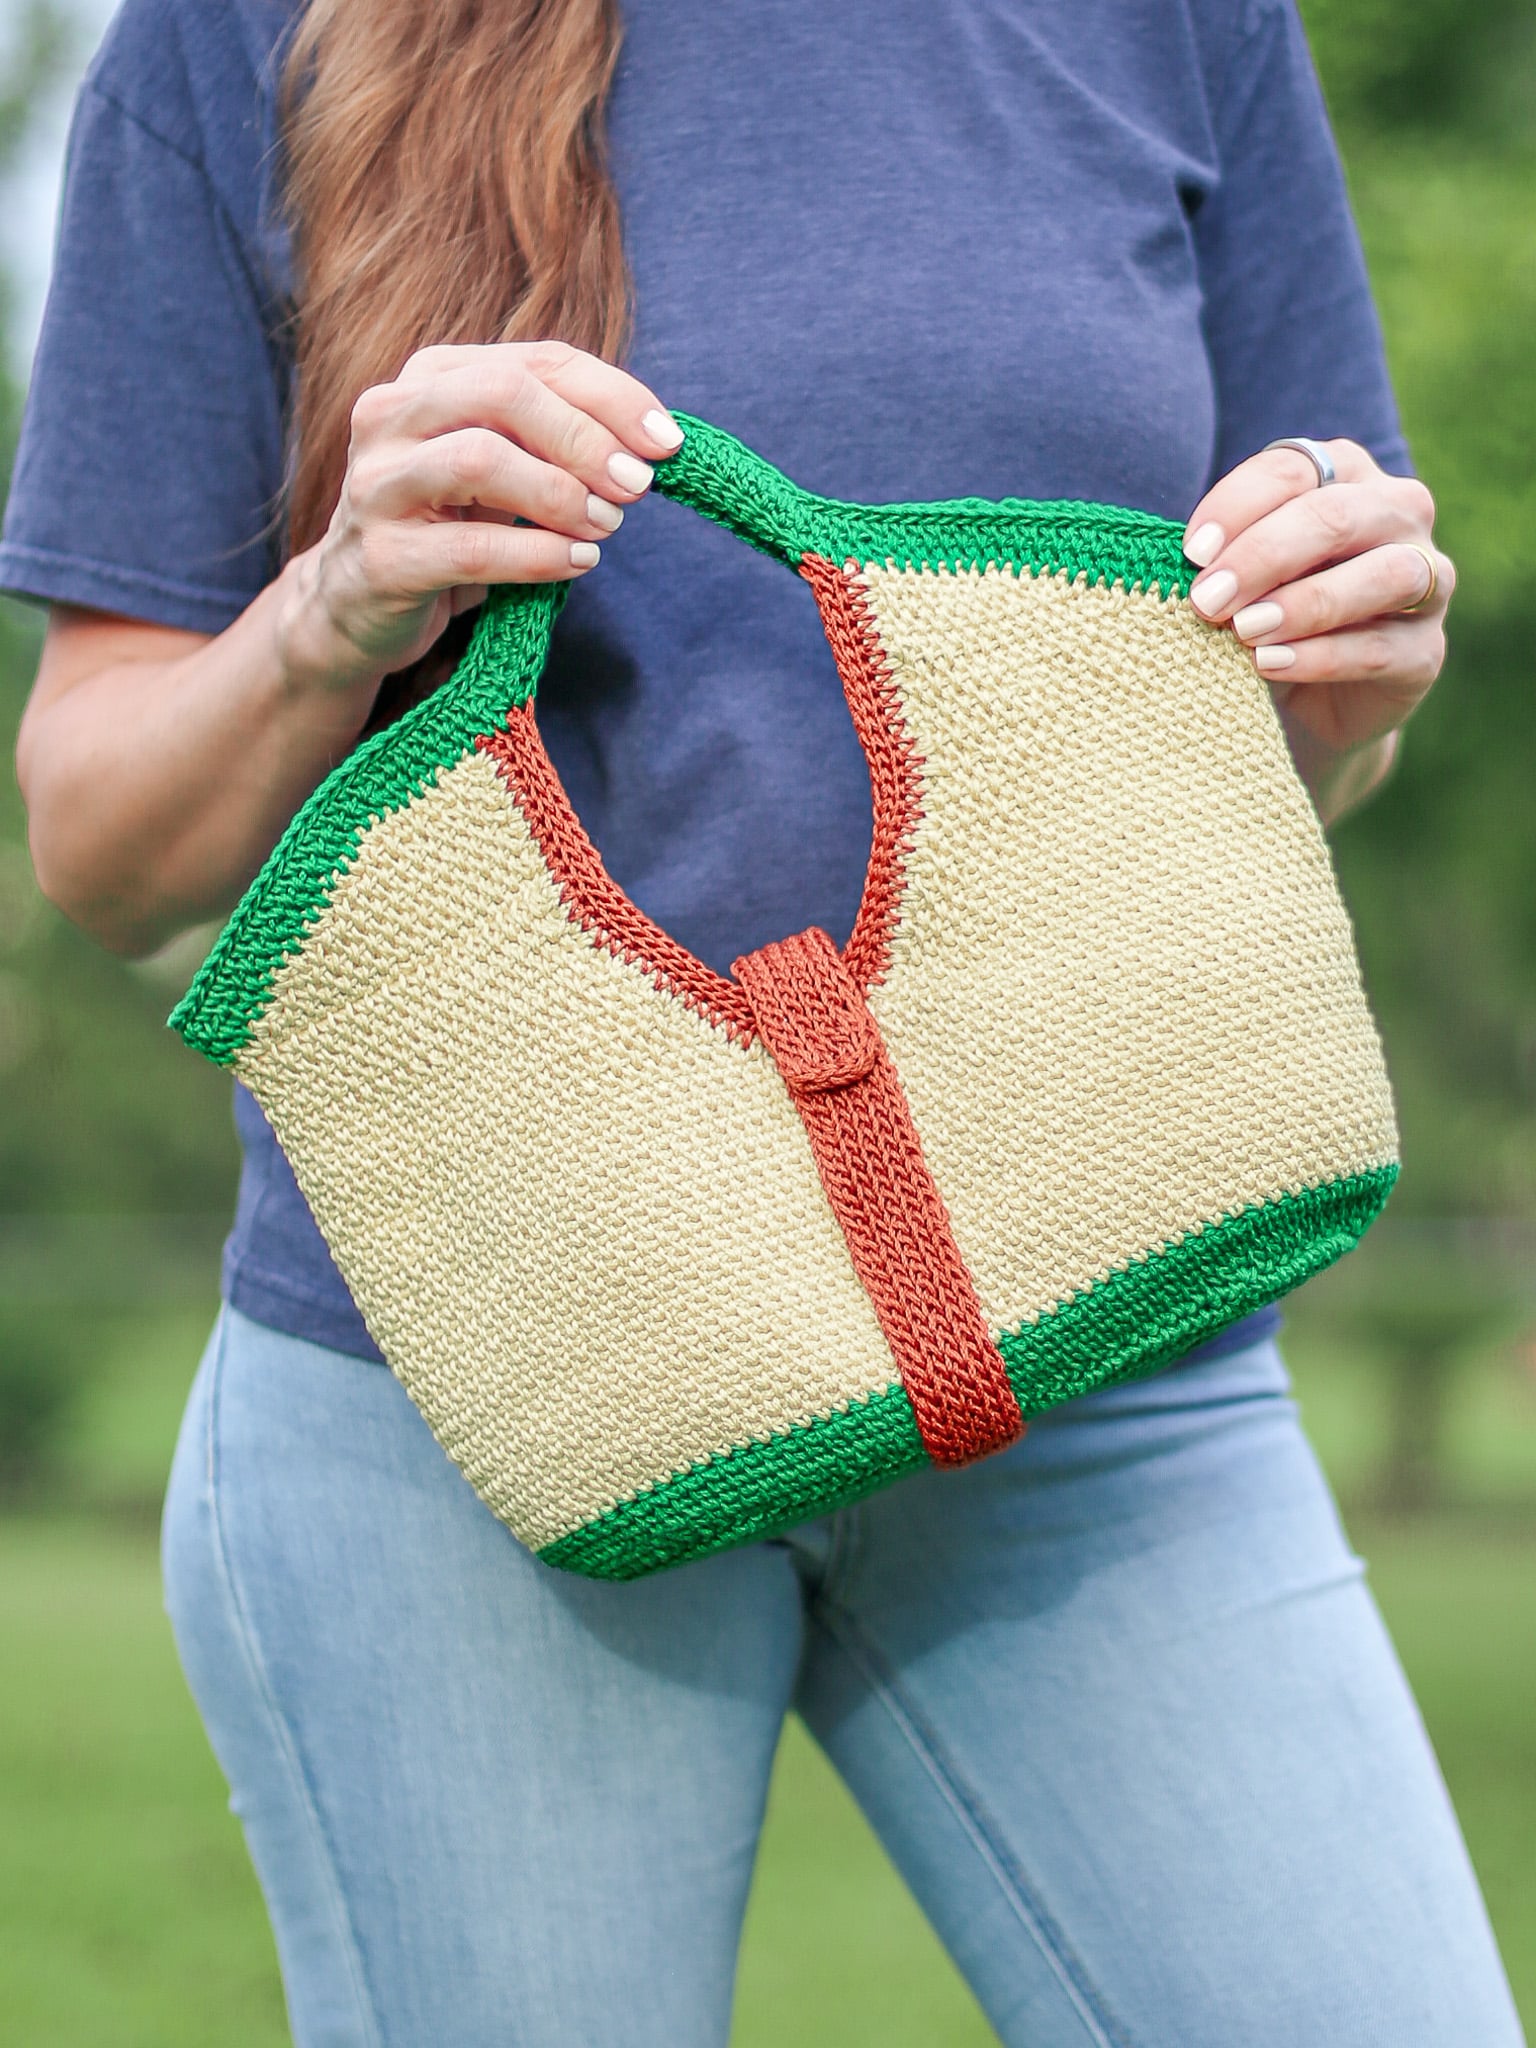
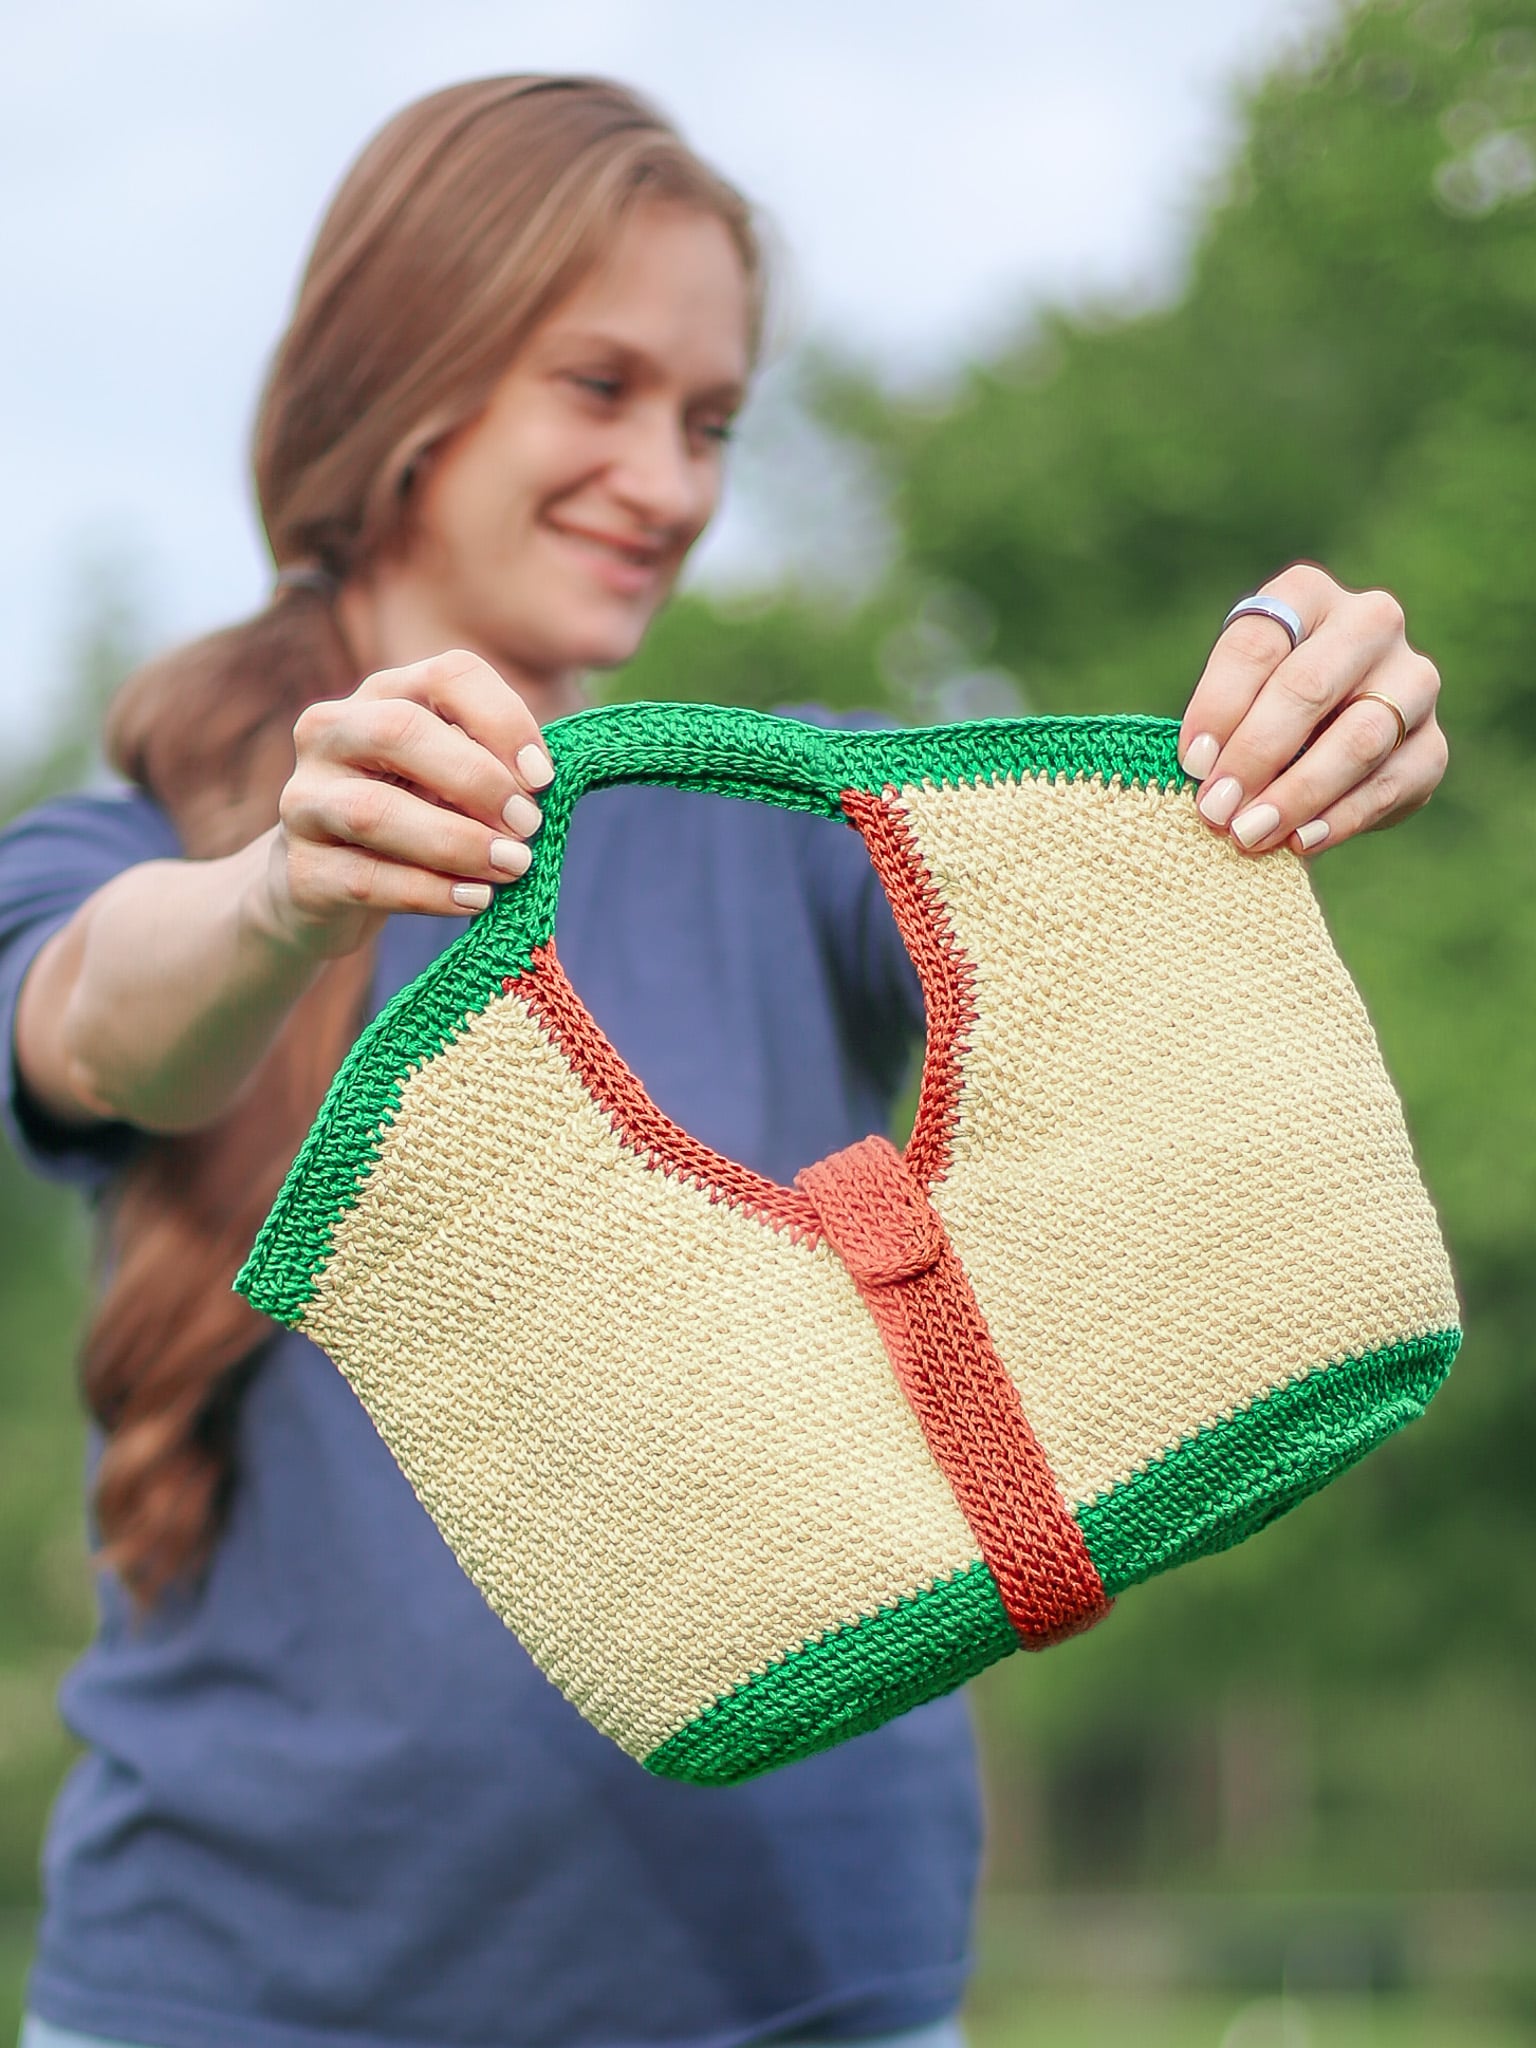
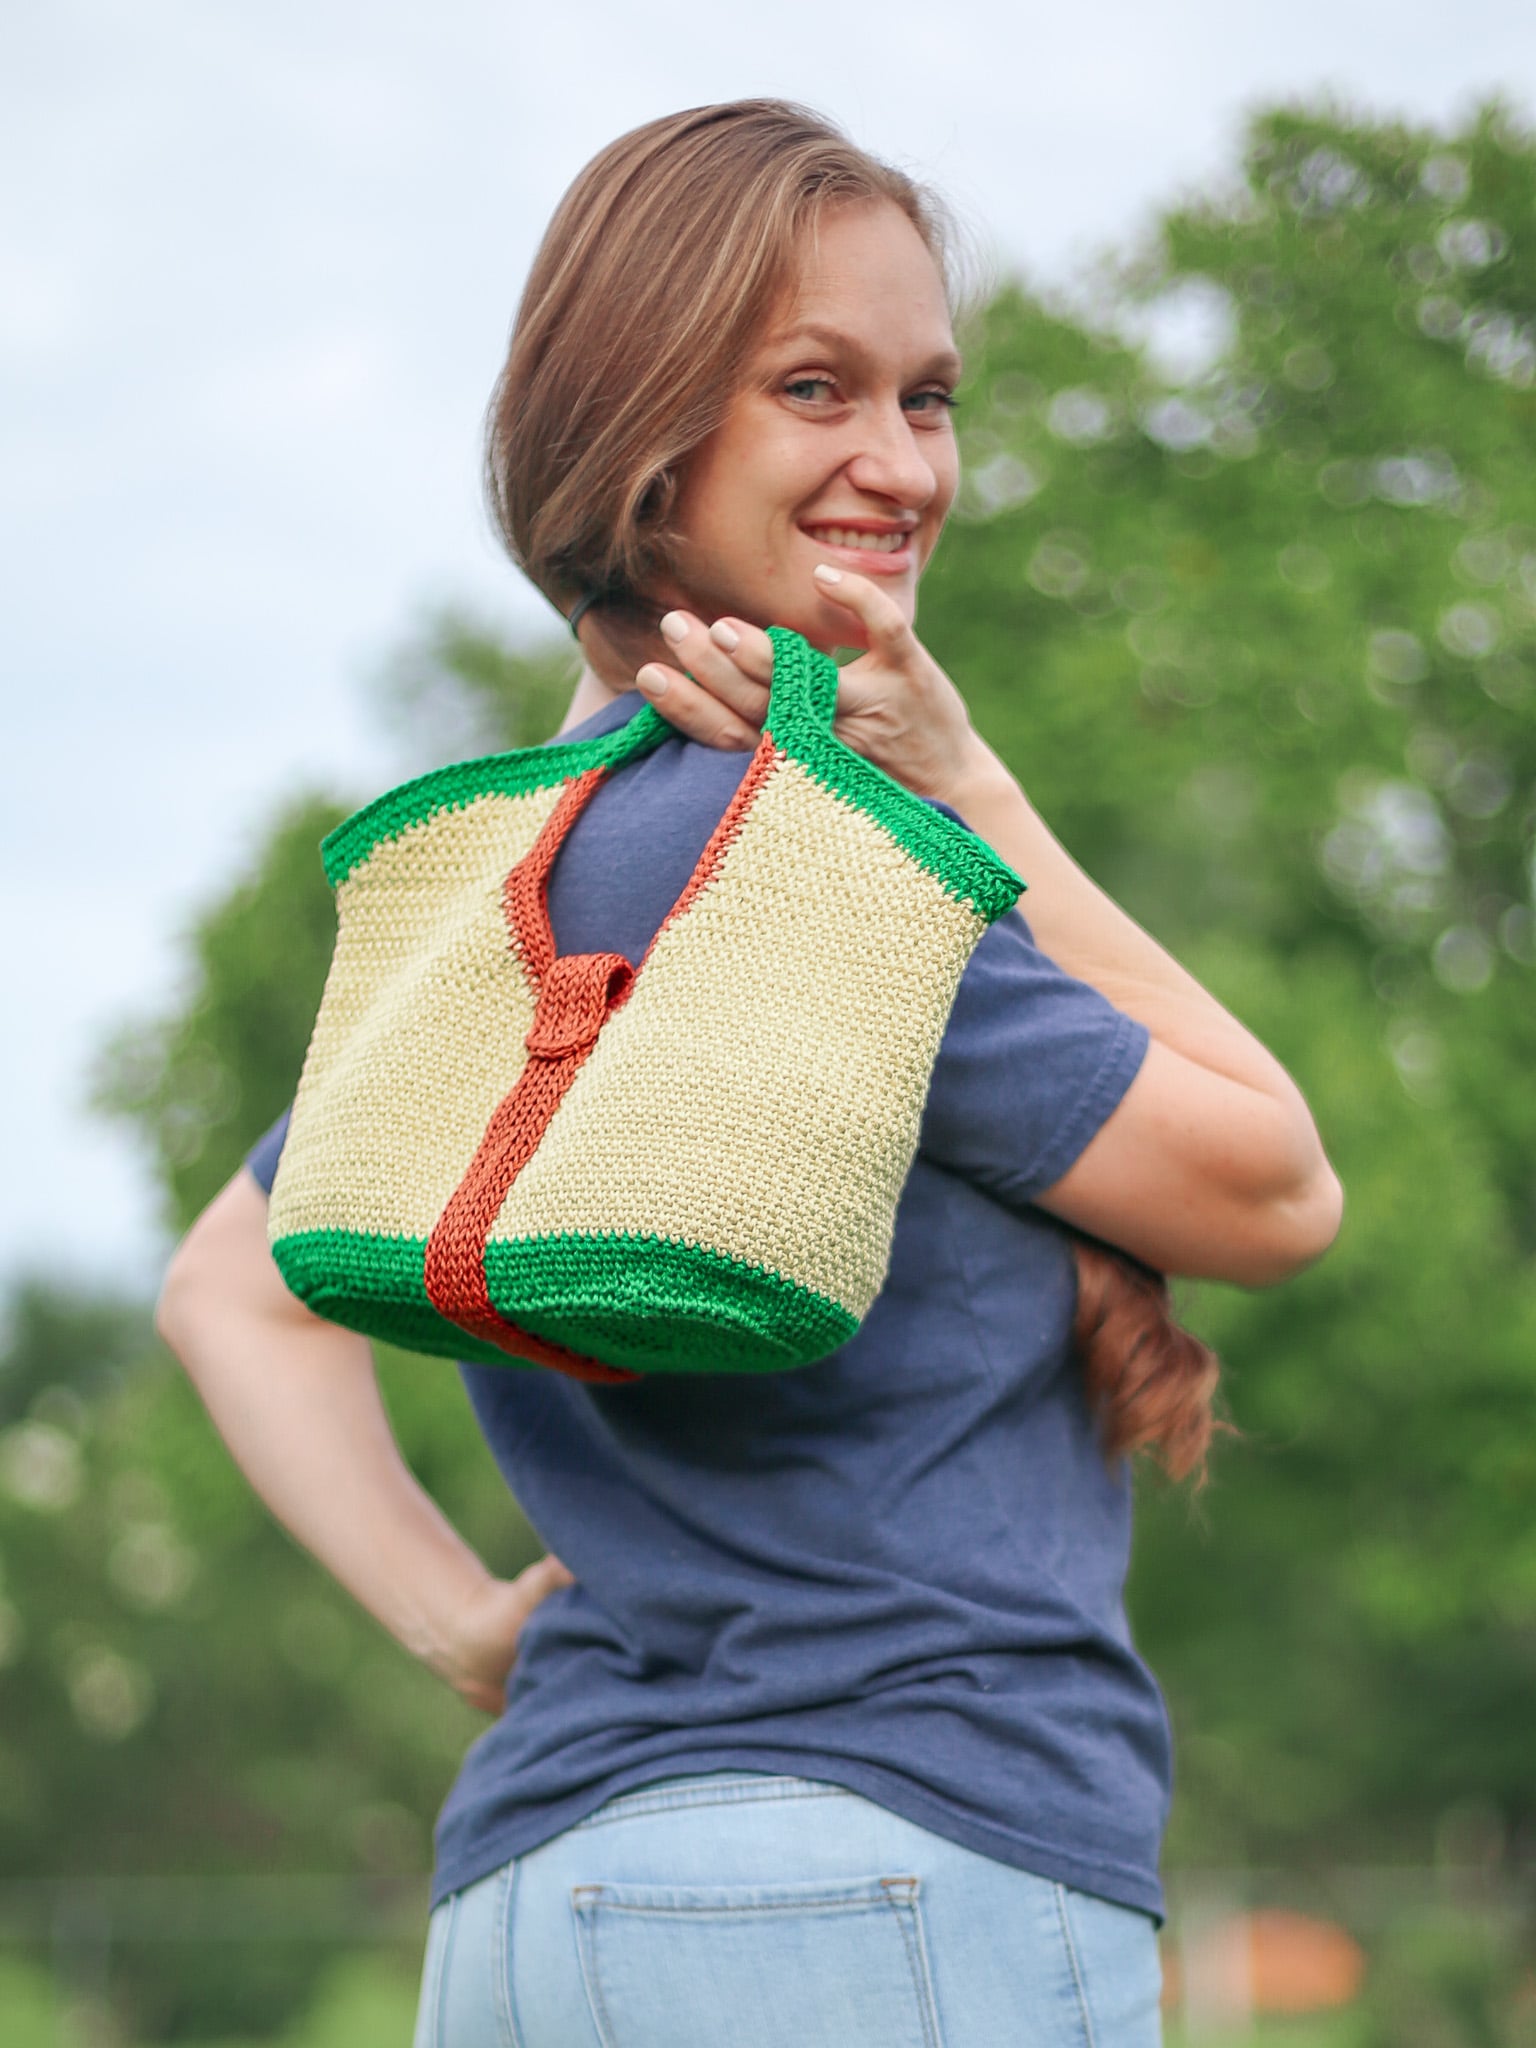
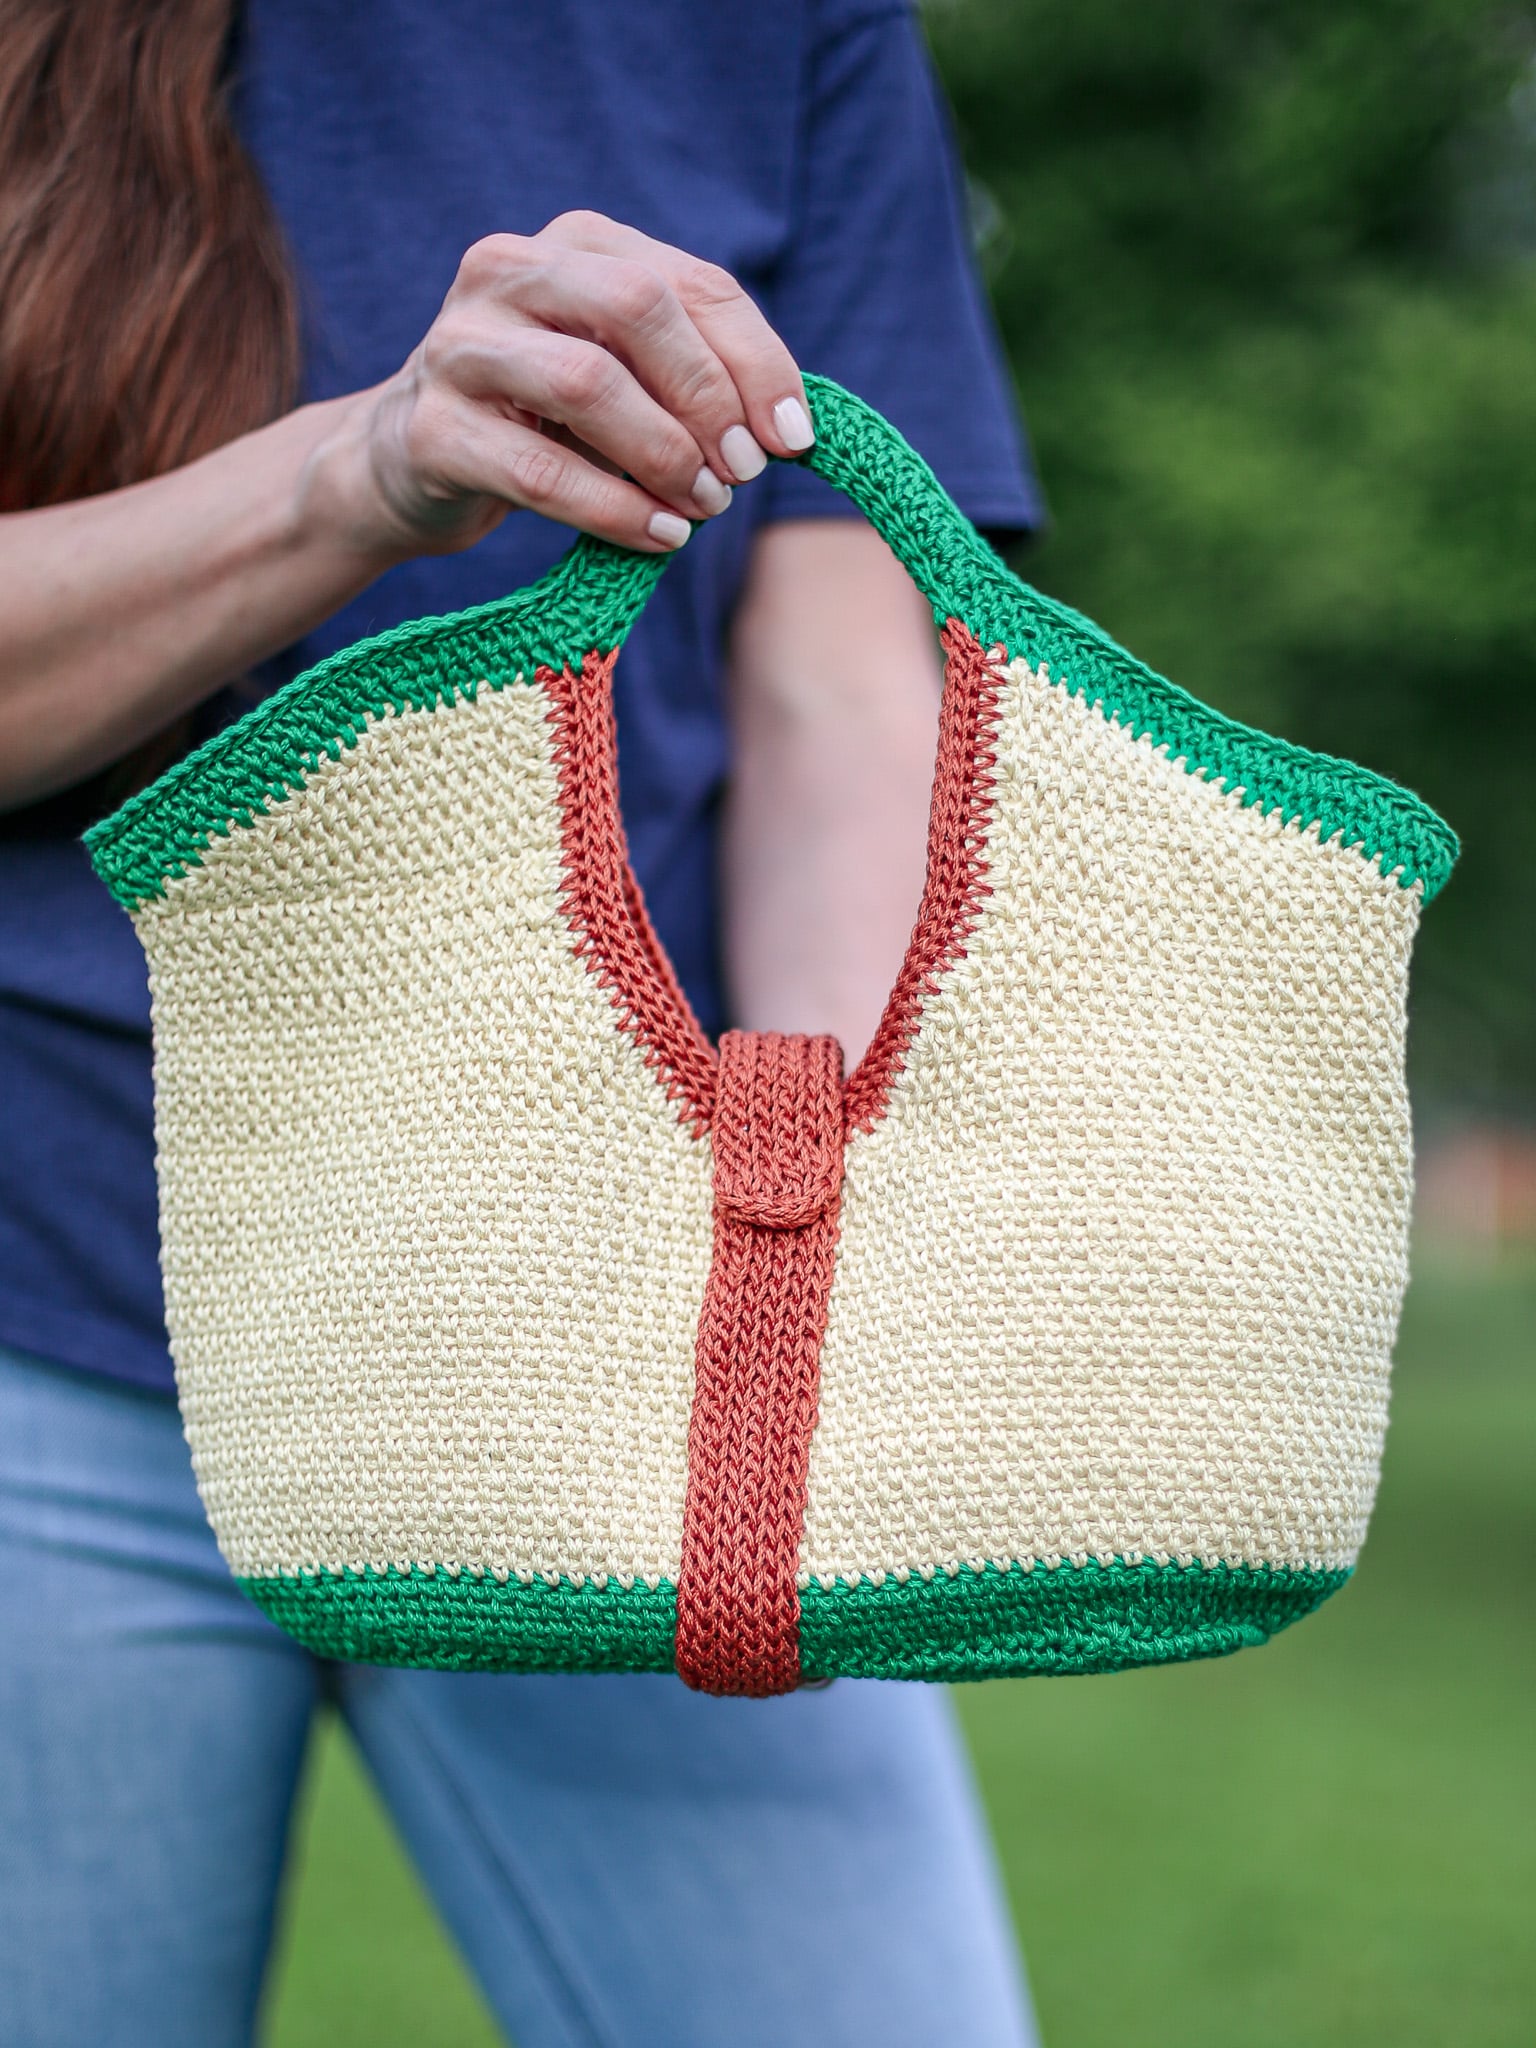
Love the look of luxury but not the price tag? Make this Chic Crochet Purse Pattern with an elevated style mixed with a handmade touch that can be used for any occasion!
Using a few basic stitches, cotton yarn and creative construction you can make this perfect bag to add to your collection of handmade accessories!
Best Bang for your Buck, get a Kit From Lion Brand includes printable PDF and Yarn! Or get an ad-free PDF Version on Etsy or Ravelry to print and make this chic crochet purse pattern!
Making this Functional Crochet Purse
First things first, this crochet bag is made with 24/7 cotton, a super durable yarn and features a double thick solid base with instructions on how to add a stabilizer!
This intermediate pattern is worked in the round and back and forth rows from the bottom up so that you have options available to create custom sizing.
This free Chic Crochet Purse Pattern is perfect for those looking to create a stylish accessory.
The center single crochet, sometimes called a waistcoat stitch, creates a beautiful texture that looks knit. It is also very sturdy making it a great choice for a strong crochet bag.
If you are looking for a bag that is unique and doesn’t just use the basic construction methods you see on popular styles like a reusable bag, crochet market bags to replace plastic bags or classic granny squares then you will love making this free crochet bag pattern!
To create this bag we will begin by creating two flat ovals that are seamed together, work up in the round and then split to work back and forth rows before joining again o create the handles!
If you love this pattern check out all of my free crochet bag patterns but especially the modern Japanese knot bag!
Notes on Sizing this Chic Crochet Purse Pattern
While I think this luxurious crocheted handbag is the perfect size you may want it larger, smaller, taller or shorter, here’s how to do that.
The base of this chic crochet purse pattern will dictate how big the bag is around. SO if you wanted this crochet purse to be more of a clutch you would made the base smaller, so less rounds.
If you wanted to make this bag into a crochet tote you would add more rounds to the base. This will use more yarn, so have extra skeins handy!
If you want the bag deeper or more shallow you will do more or less rounds in the bag body (color b section)
Now, if you change any of the stitch counts you will have to adjust your bag handle placements and decrease stitches, so take crochet notes along the way!
Lastly, if you wanted to make this in to a sholder bag of sorts, or even a sling bag or crossbody you would want to add stitches to the Foundation Single Crochet Extension.
However, I would suggest adding loops on the outermost edge of the bag and either making a second strap with clips or getting a leather strap!
Yarn Substitutes
- Vanna’s Choice
- Color Theory
- Pima Cotton
Come find me on…
- Like my Facebook Page
- Join my Facebook group!
- Subscribe to my YouTube Channel for Free Crochet Tutorials
- Get PDFs on Etsy
- Get PDFs on Ravelry
- Sign Up for the Life and Yarn Newsletter for more free modern crochet patterns!
- Please Note: Some links may be affiliate links that help to support the Life + Yarn Blog with a small commission at no added cost to you, thank you!
- Copyright 2026, Life and Yarn, Brianna Iaropoli. Pattern contents are NOT to be re-shared, DIRECT LINKS ONLY to this post for the pattern.
Materials
- Size 4.00 mm crochet hook
Color A – 1 skein of 24/7 Cotton in Ivy League [761-179AA] - Color B – 2 skeins of 24/7 Cotton in Buttercream [761-155AA]
- Color C – 1 skein of 24/7 Cotton in Heatwave [761-137AA]
- 4 Stitch Markers
- T-Pins
- Plexiglass or other stiff surface to cut of bag base (optional)
1mm thick craft (https://amzn.to/4gHIgYp) - #4 Worsted Weight Yarn
Color A – 185 yds
Color B – 730 yds
Color C – 100 yds
Gauge
- 17 sts by 26 rows is 4 x 4 inches in csc.
- Fsc 20 and make 30 rows.
Sizing
- One Size: 14 wide x 12 tall in inches.
Stitch Descriptions and Abbreviations
- Chain Stitch – ch
- Stitch(es) – st(s)
- Skip – sk
- Single Crochet – sc
- Back Loop Only – blo – Work the designated stitch as normal but only use the back loop.
- Foundation Single Crochet – Fsc – Chain 2, insert hook into 2nd chain from hook, yarn over and pull up a loop (2 loops on hook), yarn over, draw through 1 loop, (2 loops on hook with 1 ch created), yarn over, draw through all loops (1 loop on hook, 1 foundation single crochet with chain at the bottom). *Insert hook to the bottom of the stitch you just made, it will look like the top or “V” of a stitch, yarn over, pull up 1 loop (2 loops on hook), yarn over, draw through 1 loop (2 loops on hook with 1 ch created), yarn over, draw through all loops;* repeat from * to * for desired amount of stitches.
- Extended Foundation Single Crochet – ExFsc – Work a Fsc as described above starting from the * repeat indicated.
- Center Single Crochet – csc – To create a csc, you will work your stitch under the front and back loop between the two posts of the stitch. (Also known as the waistcoat stitch.)
- Surface Slip Stitch – Surface Sl St – Pull up a loop in the designated stitch with working yarn on backside of piece, one loop on hook, *insert your hook into the next stitch or space, pull up a loop through stitch or space and through loop on hook, one loop on hook, repeat from * to end creating your sl st on the surface of your previously created stitches.
Pattern Notes
- * Designates a repeat.
- “sc 1” means to single crochet in the next stitch.
- “sc 2” means to single crochet in each of the next 2 stitches.
- “2 sc” means to single crochet twice in the next stitch to create an increase.
- NO TURNS between rounds on Bag Base, you may omit the Ch 1 if it is too bulky.
- When moving on to the “Tote Body” section you will turn at the end of rounds.
Chic Crochet Purse Pattern
Bag Base Panel – Make 2 – Color A
Round 1 – Fsc 25, place SM in first and 25th st, 4 sc in base of last Fsc, place SM in 4th sc st just made, sc 24 by working in every base of Fsc across, place SM in last sc made, 3 sc in same st as last st, sl st to first Fsc. [56 total stitches]
- There should be 25 sts from SM to SM on both sides and 3 sc between both sets of SM’s to create a half circle at each end.
- Move SM up to first and last stitch on both sides to mark your place before and after the half circles.
- Cut your yarn, finish off and weave in your ends on ONE of your bag base panels.
- Do NOT cut your yarn on your second bag base panel, we will be continuing from the second panel to create the double thick base.
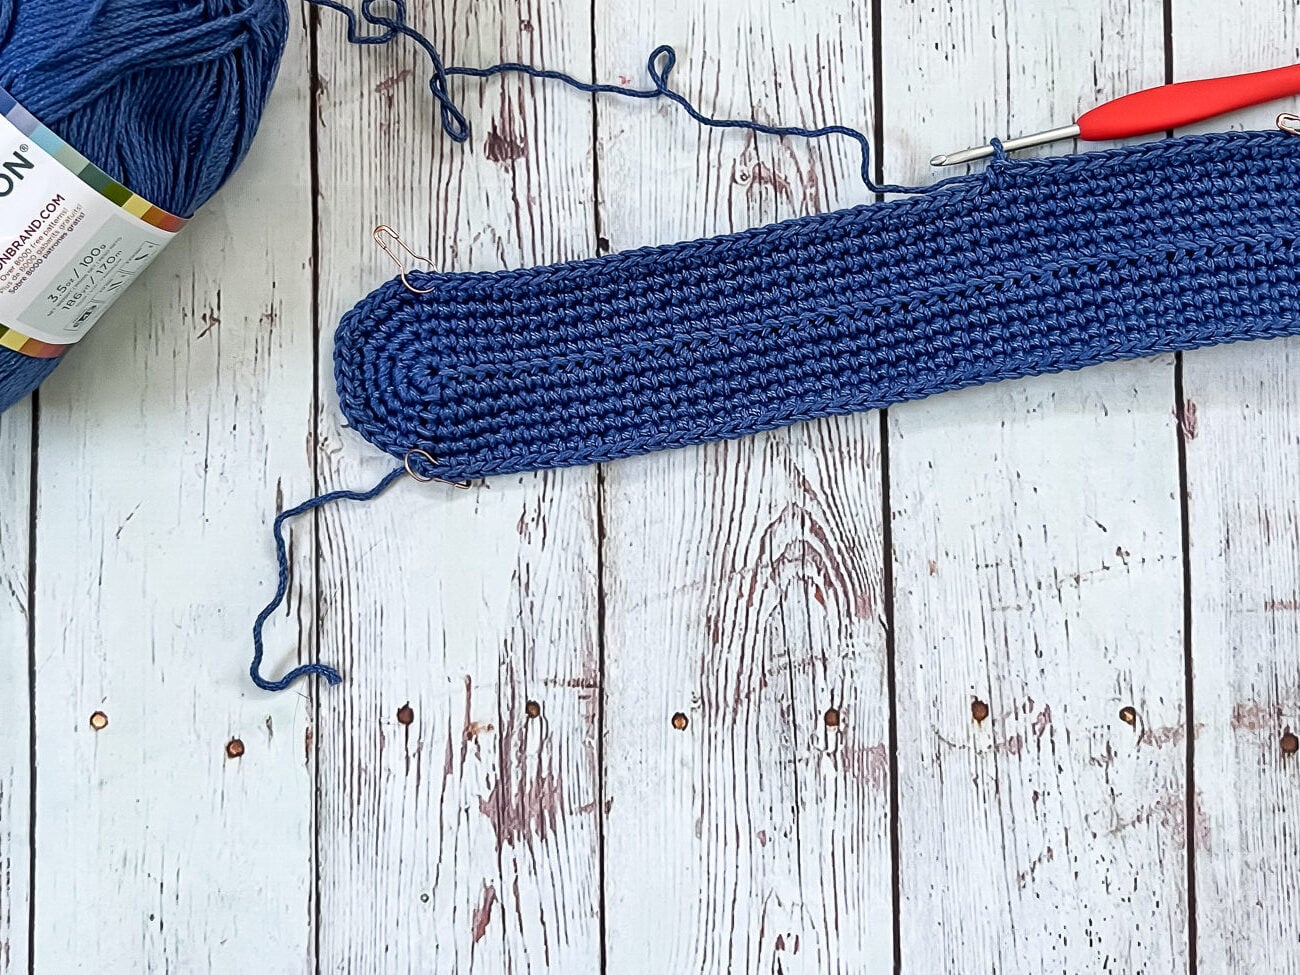
Round 2 – Ch 1, sc 25, 2 sc in next 3 sts, sc 25, 2 sc in next 3 sts, sl st to first stitch in round.
[62 total stitches]
Round 3 – Ch 1, sc 25, (2 sc, sc 1) over next 6 sts, sc 25, (2 sc, sc 1) over next 6 sts, sl st to first stitch in round. [68 total stitches]
Round 4 – Ch 1, sc 25, (2 sc, sc 2) over next 9 sts, sc 25, (2 sc, sc 2) over next 9 sts, sl st to first stitch in round. [74 total stitches]
Round 5 – Ch 1, sc 25, (2 sc, sc 3) over next 12 sts, sc 25, (2 sc, sc 3) over next 12 sts, sl st to first stitch in round. [80 total stitches]
Round 6 – Ch 1, sc 25, (2 sc, sc 4) over next 15 sts, sc 25, (2 sc, sc 4) over next 15 sts, sl st to first stitch in round. [86 total stitches]
Round 7 – Ch 1, sc 25, (2 sc, sc 5) over next 18 sts, sc 25, (2 sc, sc 5) over next 18 sts, sl st to first stitch in round. [92 total stitches]
Round 8 – Ch 1, sc 25, (2 sc, sc 6) over next 21 sts, sc 25, (2 sc, sc 6) over next 21 sts, sl st to first stitch in round. [98 total stitches]
Round 9 – Ch 1, sc 25, (2 sc, sc 7) over next 24 sts, sc 25, (2 sc, sc 7) over next 24 sts, sl st to first stitch in round. [104 total stitches]
NOTE Reminder: Cut your yarn on first Bag Base Panel, start second Bag Base Panel and do NOT cut your yarn so that you may continue with Round 10 instructions below.
NEXT: Take your first Bag Base Panel and use it as a template to trace your Base Stabilizer, cut out Base Stabilizer and set aside.
NEXT: Bring your completed Bag Base Panels together with wrong sides facing, align your stitches and work the two Bag Base Panels Together using the “Round 10” instructions below.
NOTE: You will insert your Bag Base Stabilizer before completing “Round 10” below.
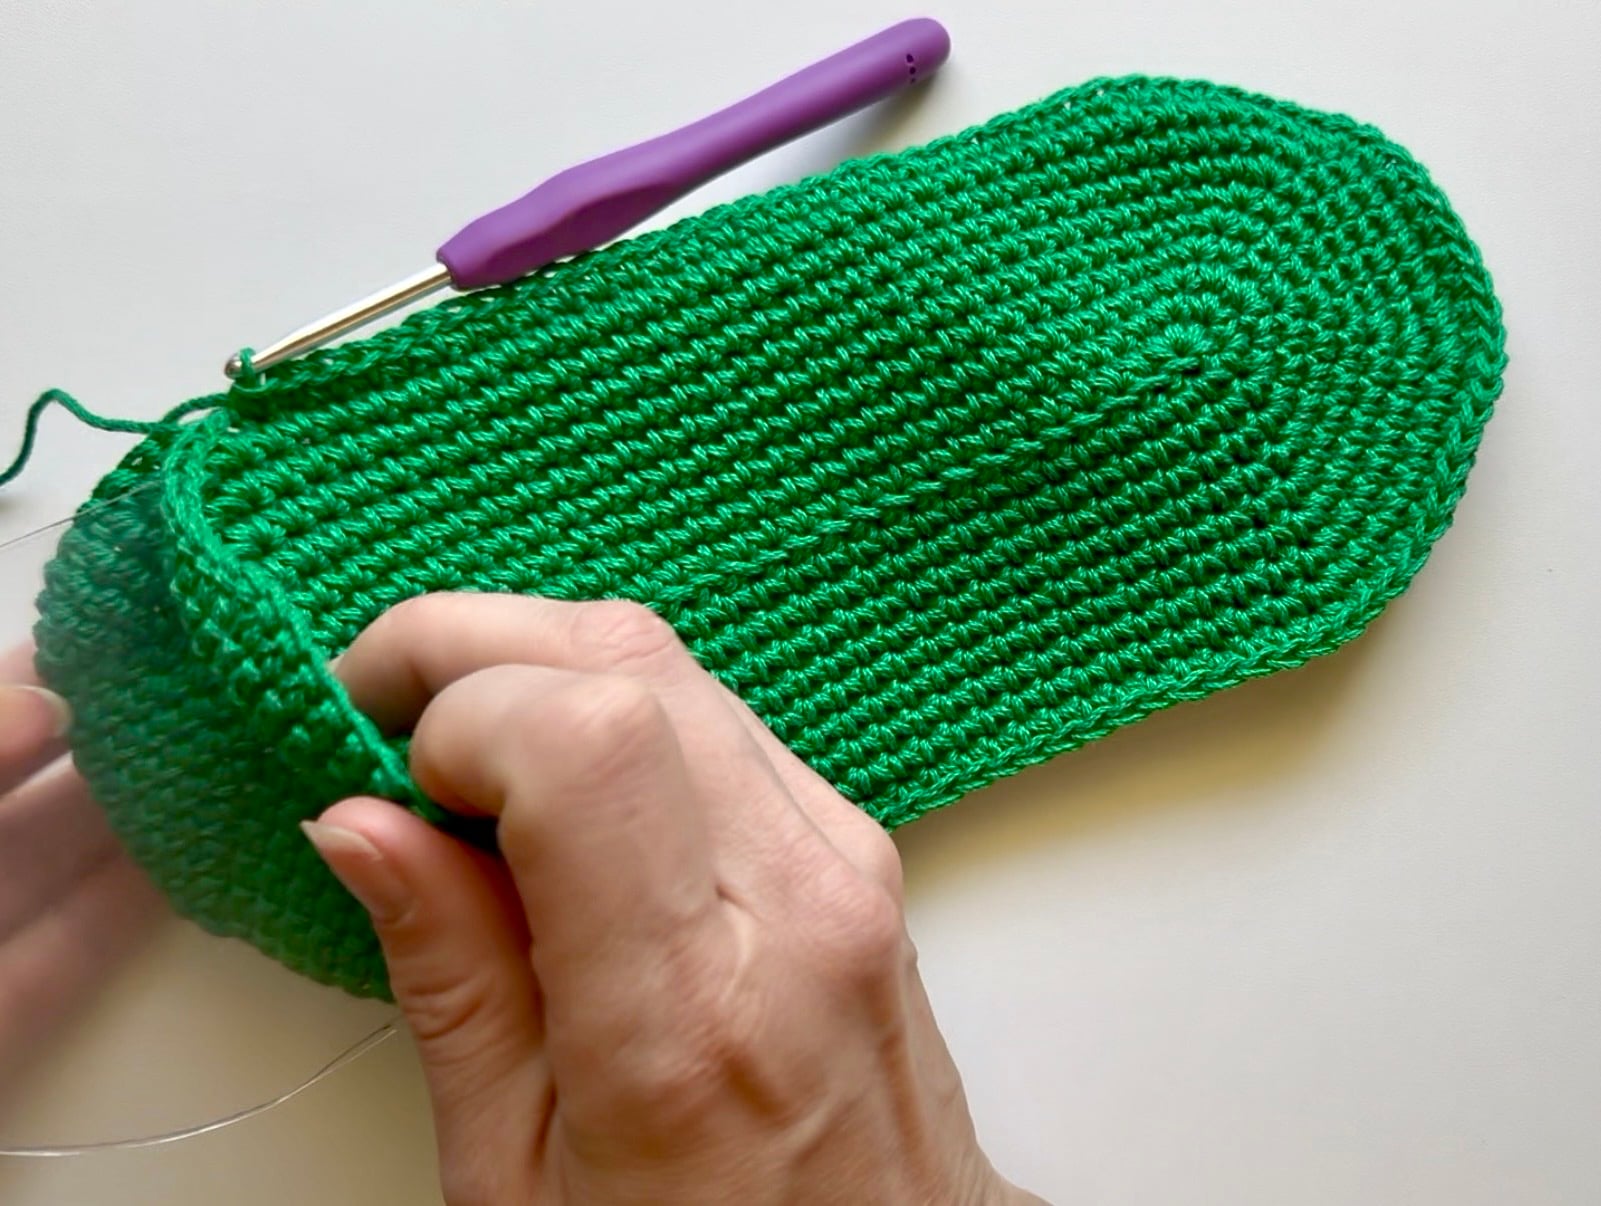
Round 10 – Ch 1, now working though stitches on both Bag Base Panels, sc 25, (2 sc, sc 8) over next 27 sts, sc 25, insert Bag Base Stabilizer, (2 sc, sc 8) over next 27 sts, sl st to first stitch in round.
[110 total stitches] Continue to “Tote Body” instructions below.
Tote Body
NOTE: This portion of the pattern will now turn at the beginning of Rounds and switch to using Center Single Crochet (csc) EXCEPT Round 5 for the color change.
NOTE: The total stitch count will remain at 110 stitches for this section.
Rounds 1 to 4 – Continuing with Color B – Turn, csc in every stitch around, sl st to first stitch in round. [110 total stitches]
Round 5 – Switch to Color B – Turn, sc in every stitch around, sl st to first stitch in round.
Next 28 Rounds – Turn, csc in every stitch around, sl st to first stitch in round, finish off and weave in ends on final round.
NOTE: Make sure you have 110 stitches in your final round otherwise you will need to adjust the numbers in this section.
NOTE: Use your best judgment for centering your handles, use the instructions below.
Tote Body Split – How to Center Your Handles
- Find the Center St from Fsc of Row 1 (13th stitch).
- Using a straight edge (ruler, book) come perpendicular up the Tote Base and Tote Body to find the Center Stitch in the front of the bag, NOT the side with the join.
- Place a Stitch Marker in that stitch.
- From the Marked Stitch count around 55 stitches to find the Center Stitch on the back of the bag (join side) and place a Stitch Marker.
- From the Marked Center Stitches on each side count over 3 additional stitches, place a Stitch Marker. You will now have 7 Stitches from SM to SM. These stitches will remain unworked until each split is completed.
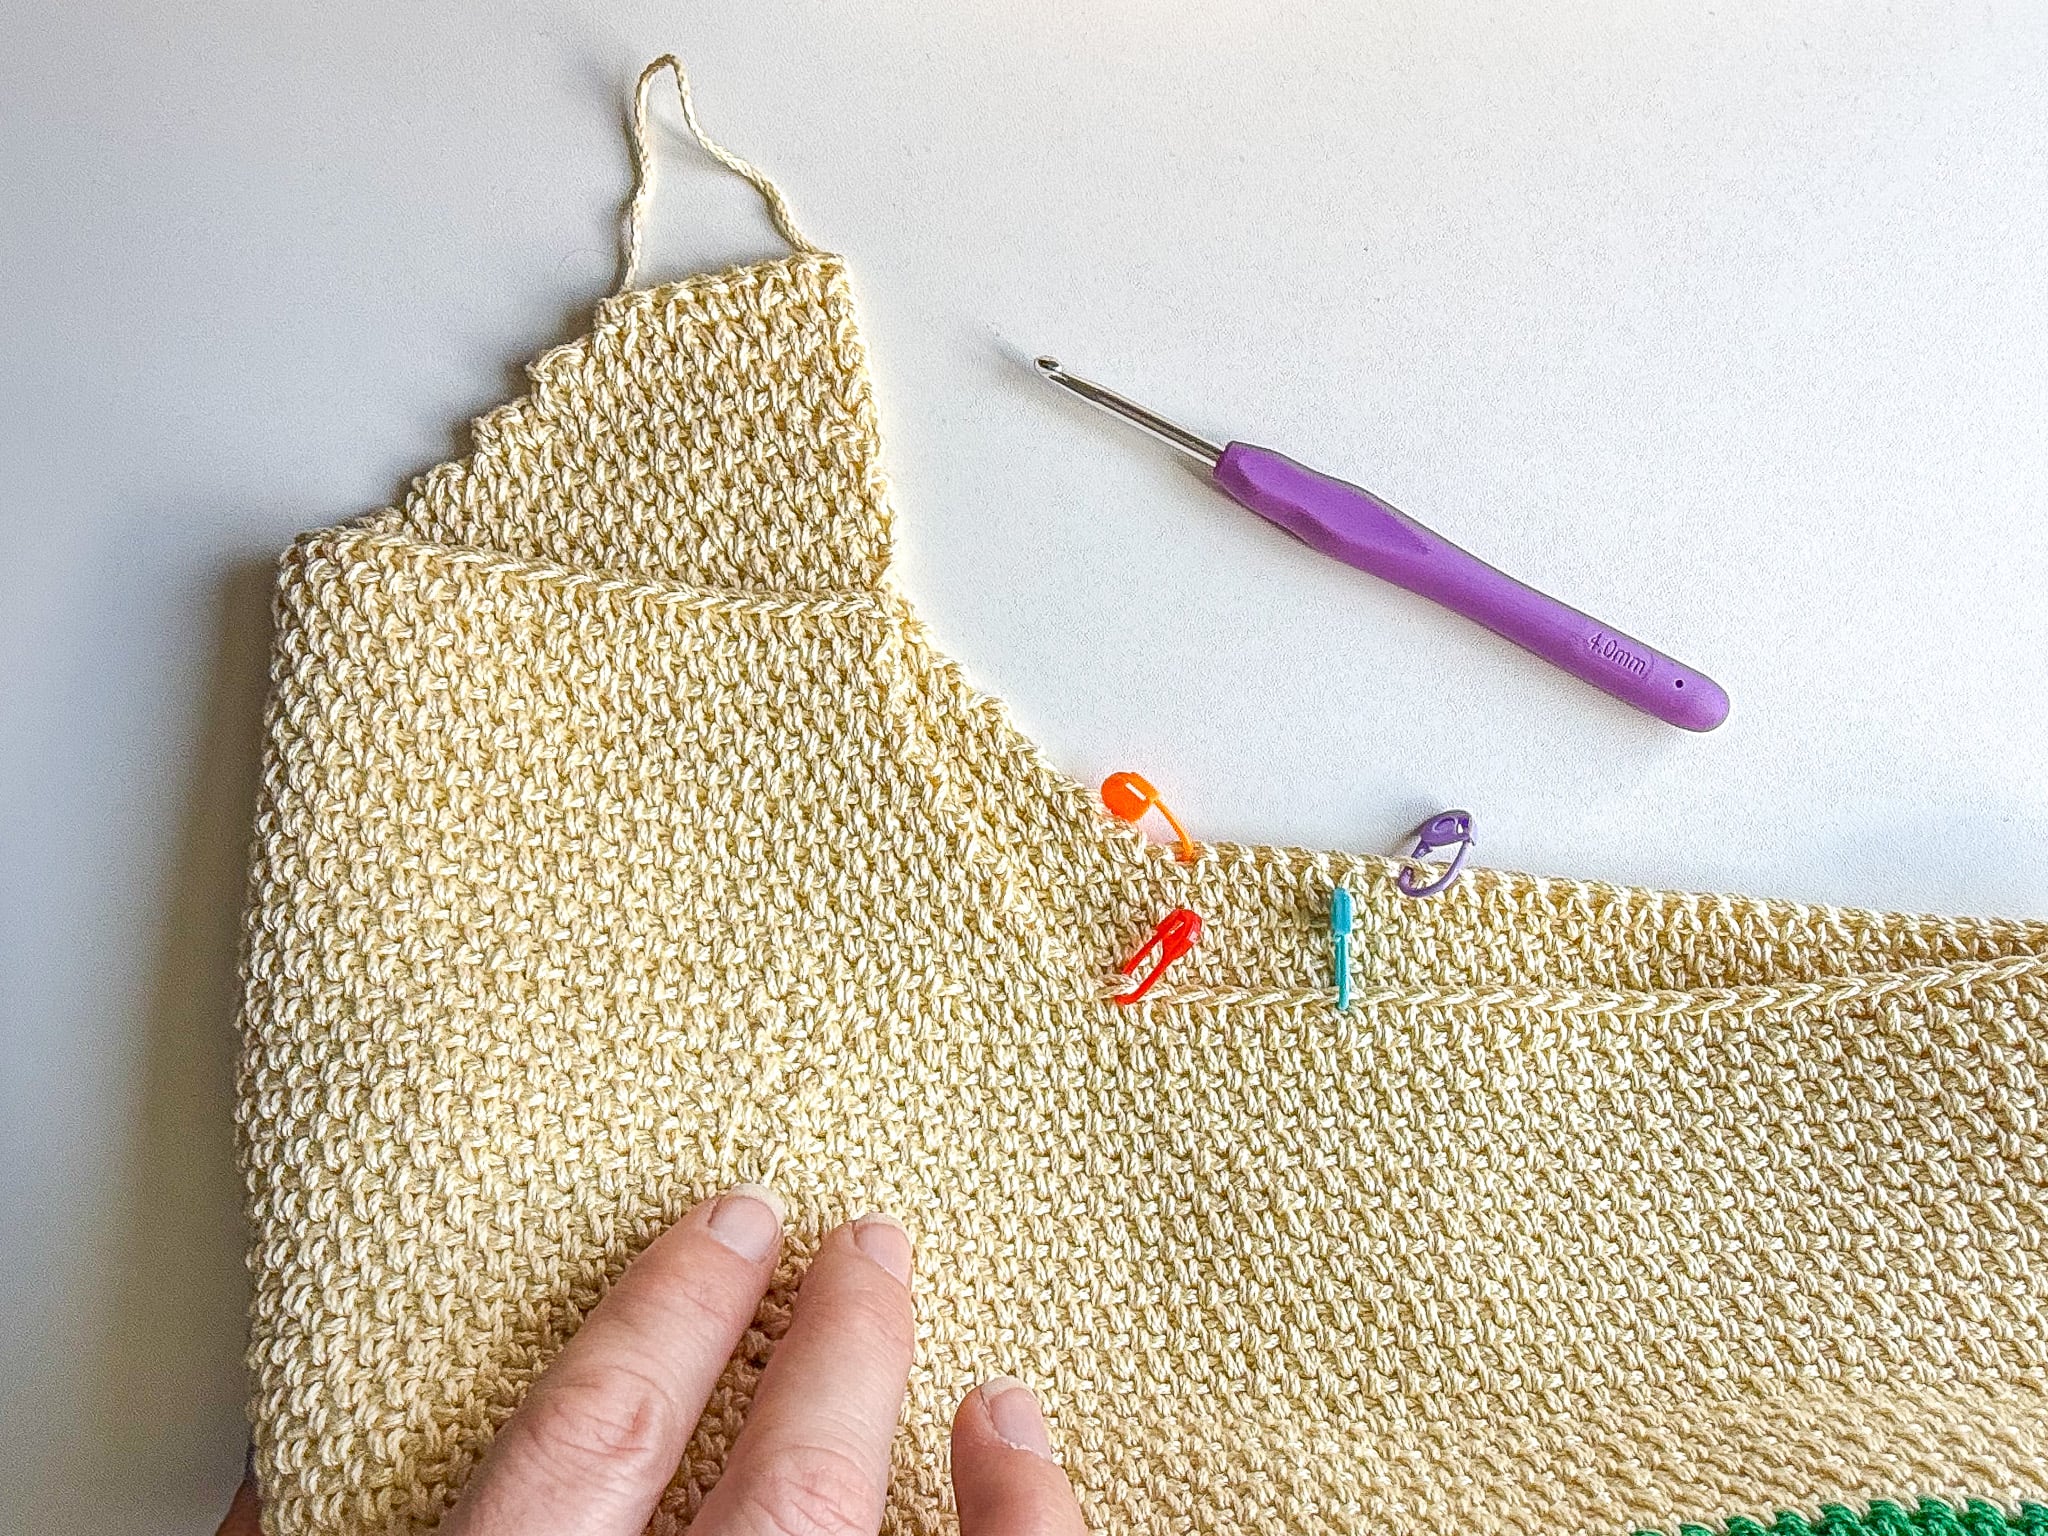
Creating Handles
Reattach your yarn (continuing with Color B) in the next stitch next to your Stitch Marker on either side of your choosing so that you can continue working in the proper direction, you should be working with the inside of the bag facing you.
NOTE: Remember the 7 sts between the SM are not going to be used for this portion.
Row 1 – Continuing with Color B – Csc 48 sts. [48 total stitches]
Row 2 – Turn, sk first st, csc across, [47 total stitches]
Rows 3 to 12 – Turn, sk first st, csc across. Each row will decrease by 1 stitch to achieve a final stitch count of [37 total stitches]
Next 4 Rows – Turn, do NOT sk first st, csc across. [37 total stitches]
Short Rows
NOTE: It is important that you are not skipping the first stitch on the designated rows to keep the inside of your Bag Handle Opening edge straight.
Next Row – Turn, do NOT sk first st, csc 17 sts.
Next Row – Turn, sk first st, csc across, [16 total stitches]
Next Row – Turn, do NOT sk first st, csc 15 sts leaving the last stitch unworked.
Next Row – Turn, sk first st, csc across, [14 total stitches]
Next Row – Turn, do NOT sk first st, csc 13 sts leaving the last stitch unworked.
Next Row – Turn, sk first st, csc across, [12 total stitches]
Next Row – Turn, do NOT sk first st, csc 11 sts leaving the last stitch unworked.
Next Row – Turn, sk first st, csc across, [10 total stitches]
Next Row – Turn, do NOT sk first st, csc 9 sts leaving the last stitch unworked.
Next Row – Turn, sk first st, csc across, finish off. [8 total stitches]
NEXT: You will now create the Short Rows on the other side. Reattach your yarn on the opposite side of your Bag Handle Opening.
NOTE: When doing this you will be working your stitches in the same direction as the previous row created, that is correct, just be sure to create a create the Center Single Crochets to match the look of the stitches.
NOTE: Follow the “Short Rows” instructions as written above omitting the instruction for the first “turn” since it is achieved by reattaching your yarn.
NEXT: After creating your handle for the first side, create the second side by repeating all the steps in this section again, HOWEVER do NOT Finish off on the Second Short Row on the Second Handle, See “Bag Opening Trim” below.
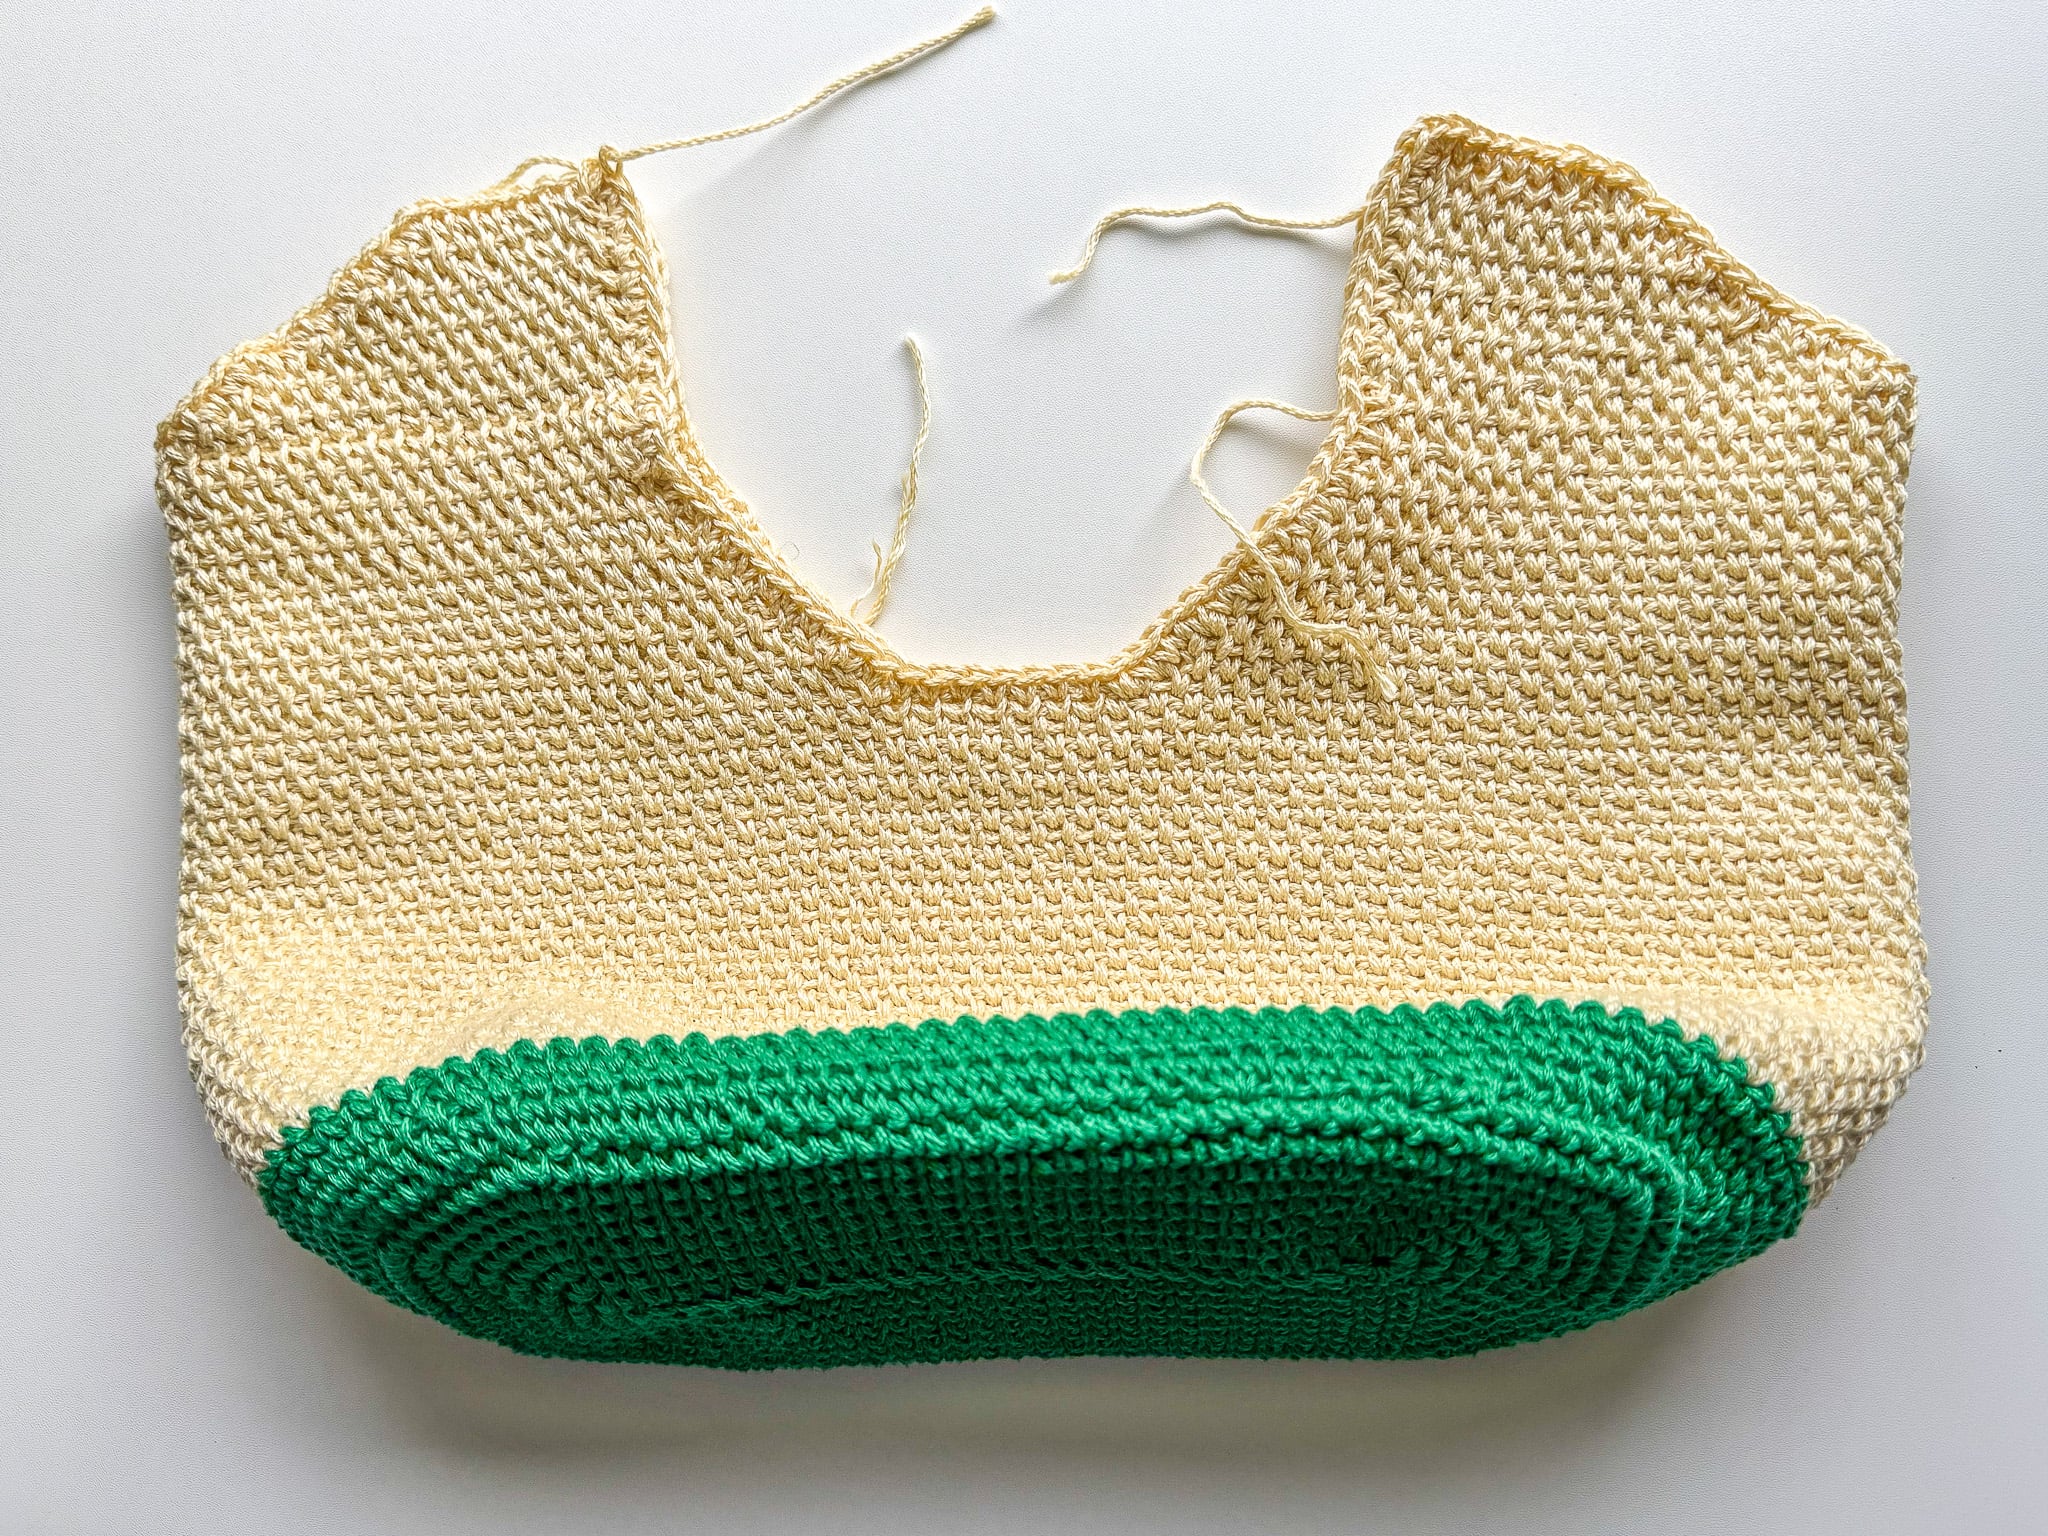
Bag Opening Trim
Continuing with Color A, csc evenly around the entire opening of the top of your bag in stitches and row ends to the best of your judgment, finish off weave in all ends.
Inside Bag Handle Trim
NEXT: Before we can close up the bag handle we need to add some trim to the inside edge.
NEXT: Using Color C, with wrong sides facing, reattach your yarn and begin Row 1 instructions.
Row 1 – Csc in each stitch around inside edge of Bag Handle Opening.
Row 2 – Ch 1, turn, sl st blo in every stitch to end, placing a slst2tog in each of the two bottom inside corners in the area where the 7 csc were left unworked previously.
Row 3 – Ch 1, turn, sl st blo in every stitch to end.
Row 4 – Ch 1, turn, sl st blo in every stitch to end, placing a slst2tog again in the general area of the previously created slst2tog.
Row 5 – Ch 1, turn, sl st blo in every stitch to end, finish off.
NEXT: Repeat on other side.
Adding Top Handle Connection
NEXT: Using Color A, with wrong sides facing, reattach your yarn on the back of your bag and begin Row 1 instructions.
NOTE: Total stitch count in this section may vary as you may have needed to add or subtract stitches in the “Bag Opening Trim” section above.
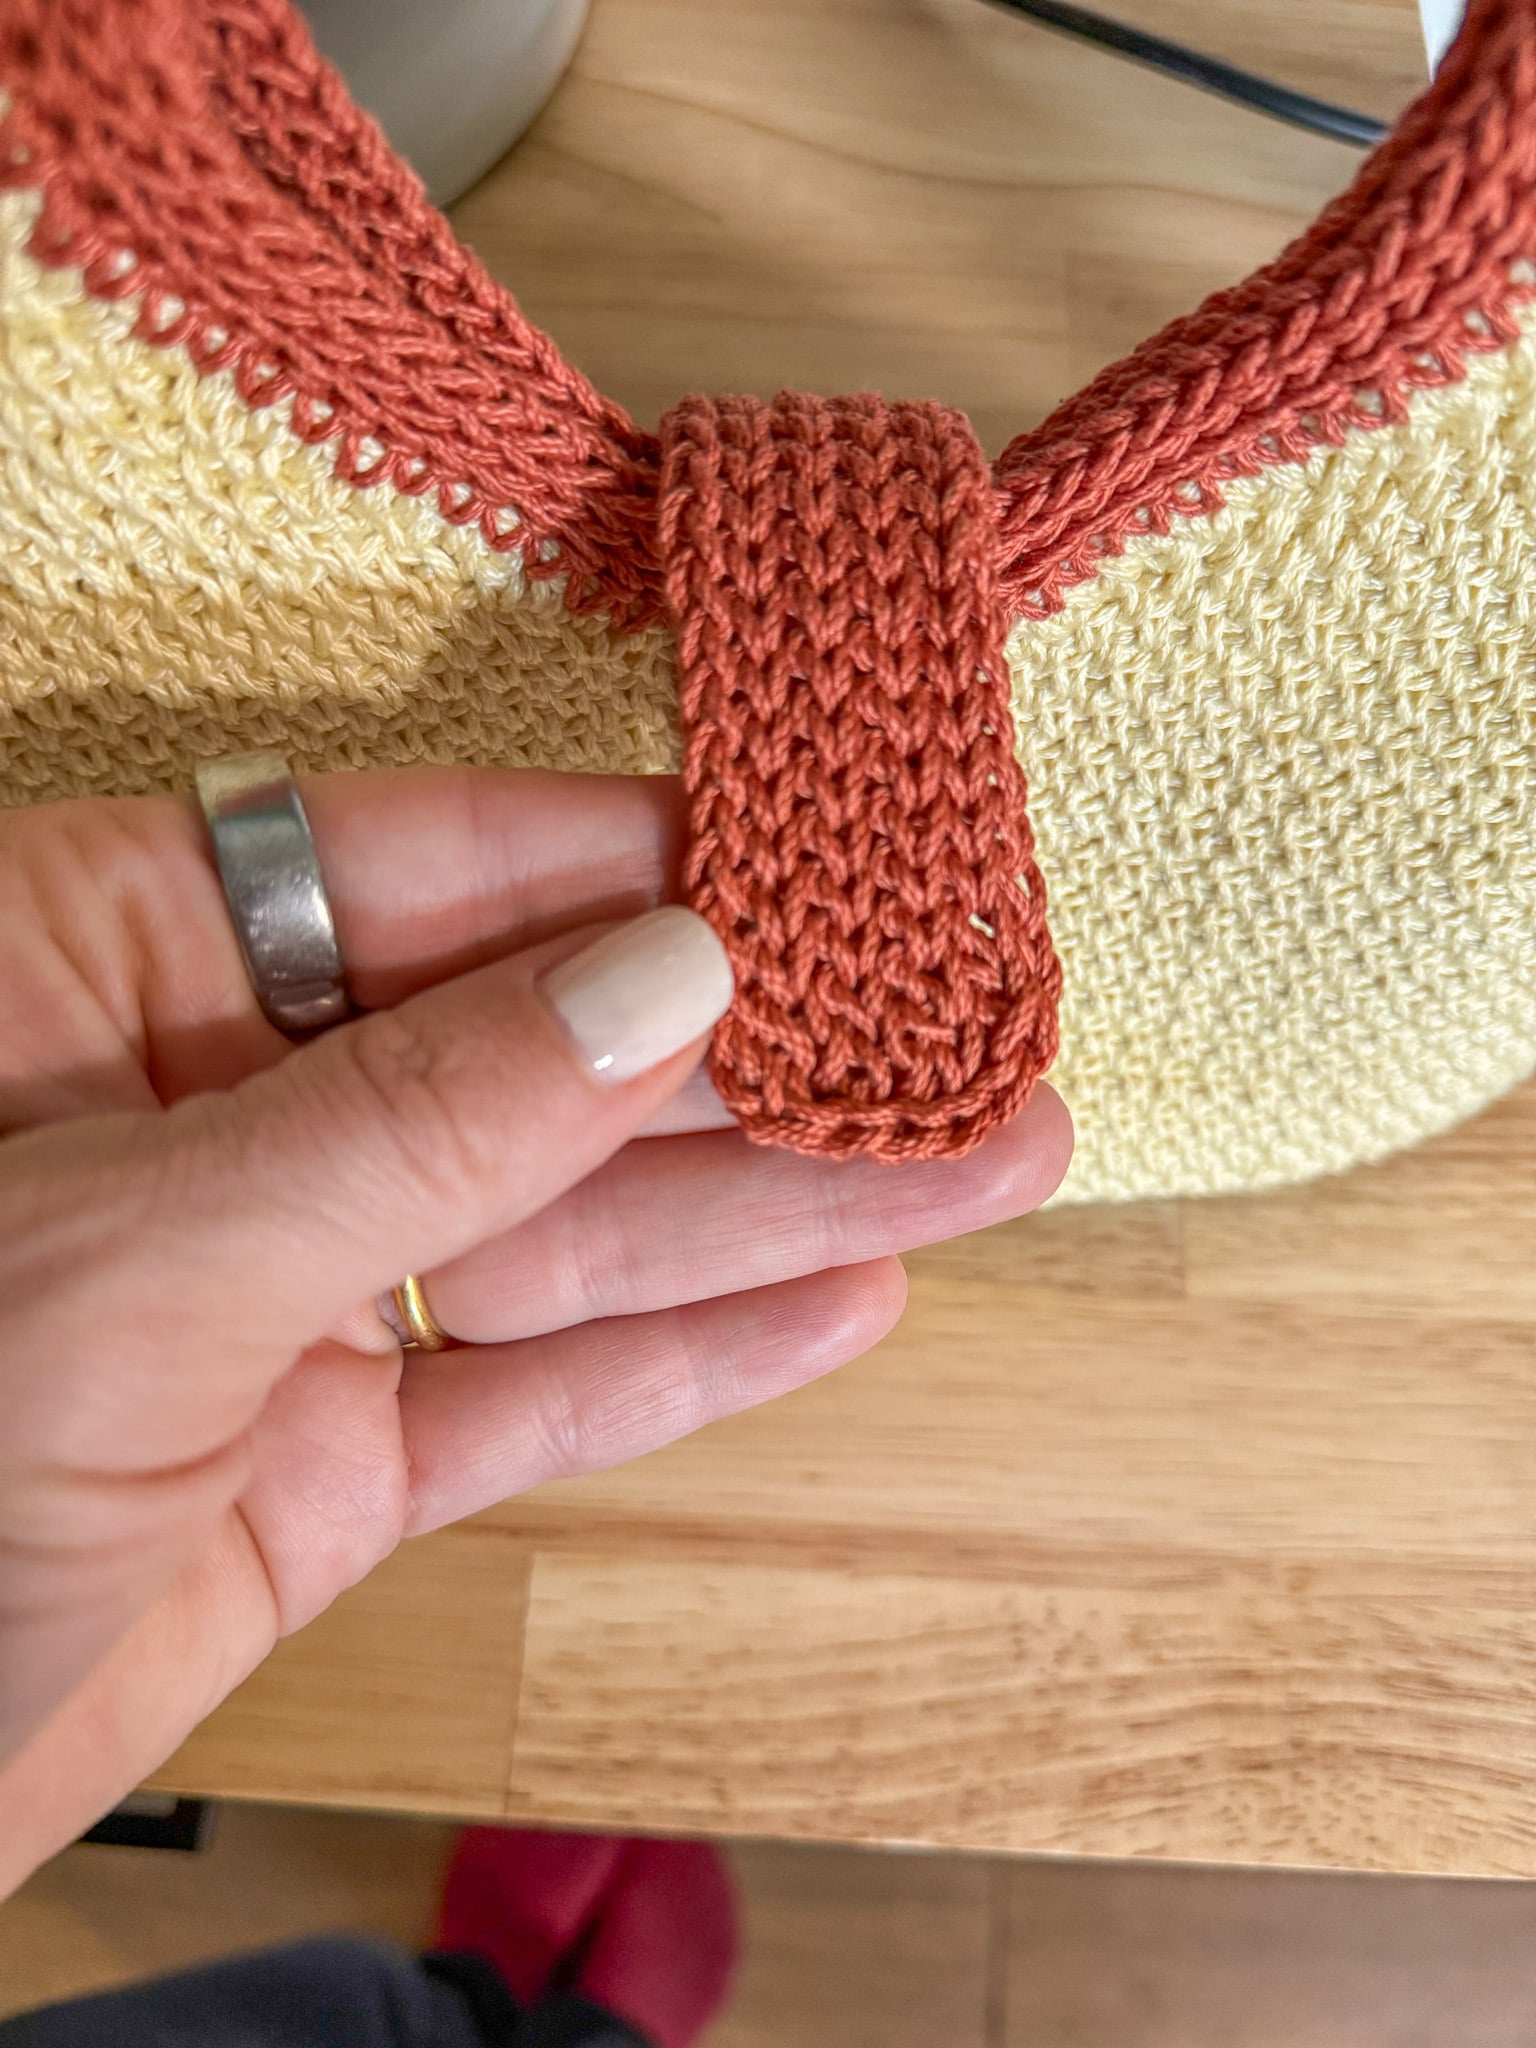
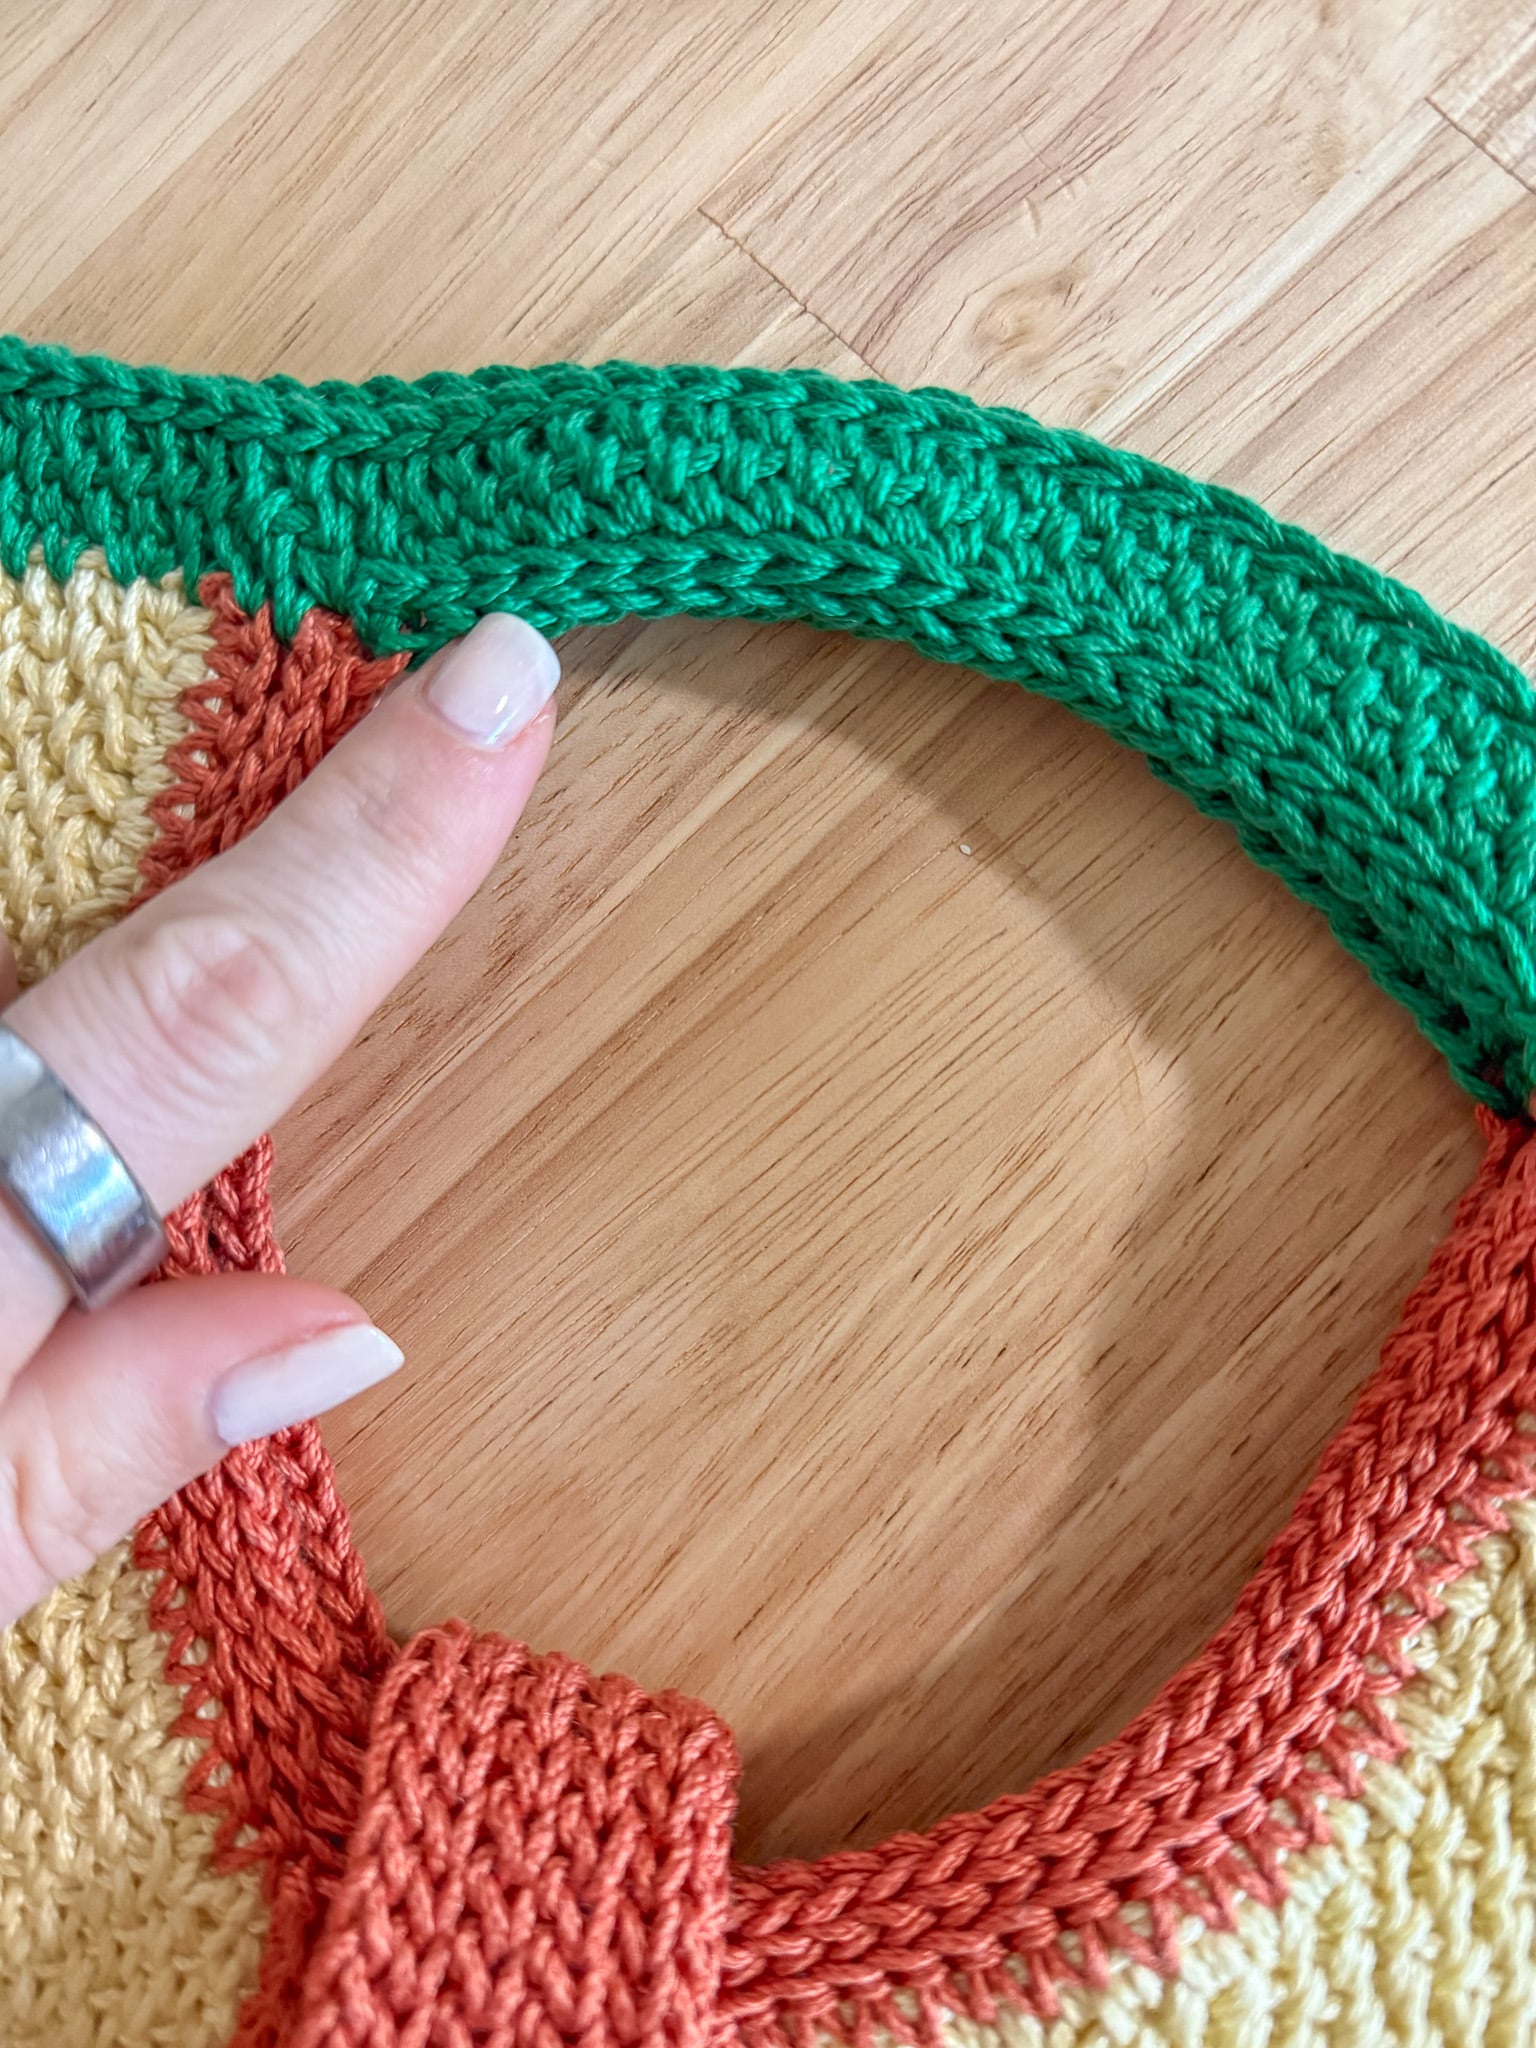
Row 1 – Csc in each stitch around until you reach the end of the Inside Bag Handle Trim, ExFsc 21, reconnect to the other edge of the Inside Bag Handle Trim, csc in each stitch until you reach the next Inside Bag Handle Trim, ExFsc 21, reconnect to the other edge of the Inside Bag Handle Trim, csc to end, sl st to first stitch.
Rows 2 to 4 – Turn, csc in every stitch around, sl st to first stitch in round.
Row 5 – Do not turn, continuing in the same direction as the previous row create a Surface Slip Stitch in the previous row, slip stitch to join, finish off and weave in ends.
Bag Body Strap
NEXT: Using Color C, you will create the bag body strap separately and then attach.
Chain 101
Row 1 – Sl St in 2nd chain from the hook using the back bumps to end. [100 total stitches]
Row 2 – Ch 1, sl st in blo to end.
Row 3 – Ch 1, sl st in blo until 2 sts remain, 2 sl st in next st, sl st in last st. [101 total stitches]
Row 4 – Ch 1, sl st in blo to end.
Row 5 – Ch 1, sl st in blo until 2 sts remain, 2 sl st in next st, sl st in last st. [102 total stitches]
Row 6 – Ch 1, sl st in blo to end.
Row 7 – Ch 1, sl st in blo until 3 sts remain, slst2tog, sl st in last stitch. [101 total stitches]
Row 8 – Ch 1, sl st in blo to end.
Row 9 – Ch 1, sl st in blo until 3 sts remain, slst2tog, sl st in last stitch. [100 total stitches]
Row 10 – Ch 1, sl st in blo to end, finish off, leave long tail to attach to bag body.
Attaching Bag Body Strap
NEXT: Thread the end of your strap onto your darning needle and position the flat edge of the row ends where Color B meets Color C centered on the back of the bag.
NEXT: Attach your strap to the bag body, once secure bring the strap around the bag body, across the base, and back up the other side keeping it centered. Use T-Pins to secure the strap to hold in place while seaming.
NEXT: Using your darning needle seam along the edge working through the bag body to the base to attach the strap on one side.
NEXT: Continue seaming the strap to the base, if you have a piece of plexiglass or other hard surf between your Bag base Panels you will only be working through the outermost panel.
NEXT: Continue seaming up the other side of the Bag Body. If you still have yarn work across your strap to come down the other side to go back to the beginning of the strap.
NEXT: Once Completely attached, finish off and weave in your ends.
Optional Trim Edges
OPTIONAL: Using Color A (or an other color) add a Surface Slip Stitch to the Extension Foundation Single Crochet that was created for the straps.
OPTIONAL: Using Color C add a Surface Slip Stitch to the rounded edge on you bag strap. My edge was a bit wonky from the chain 1’s, a surface slip stitch cleaned it right up!
OPTIONAL: I did not do this but using your scraps make a matching key chain or tassel!