Modern Granny Square Blanket in Alpine Stitch
This Modern Crocheted Granny Square Blanket is made with the beautiful Alpine Stitch! Using these oversized crochet granny squares this blanket works up fast and would make a great gift! Crochet any size blanket by making more or less granny squares!
Get a Kit from Mary Maxim!
Get a PDF on Etsy or Ravelry!

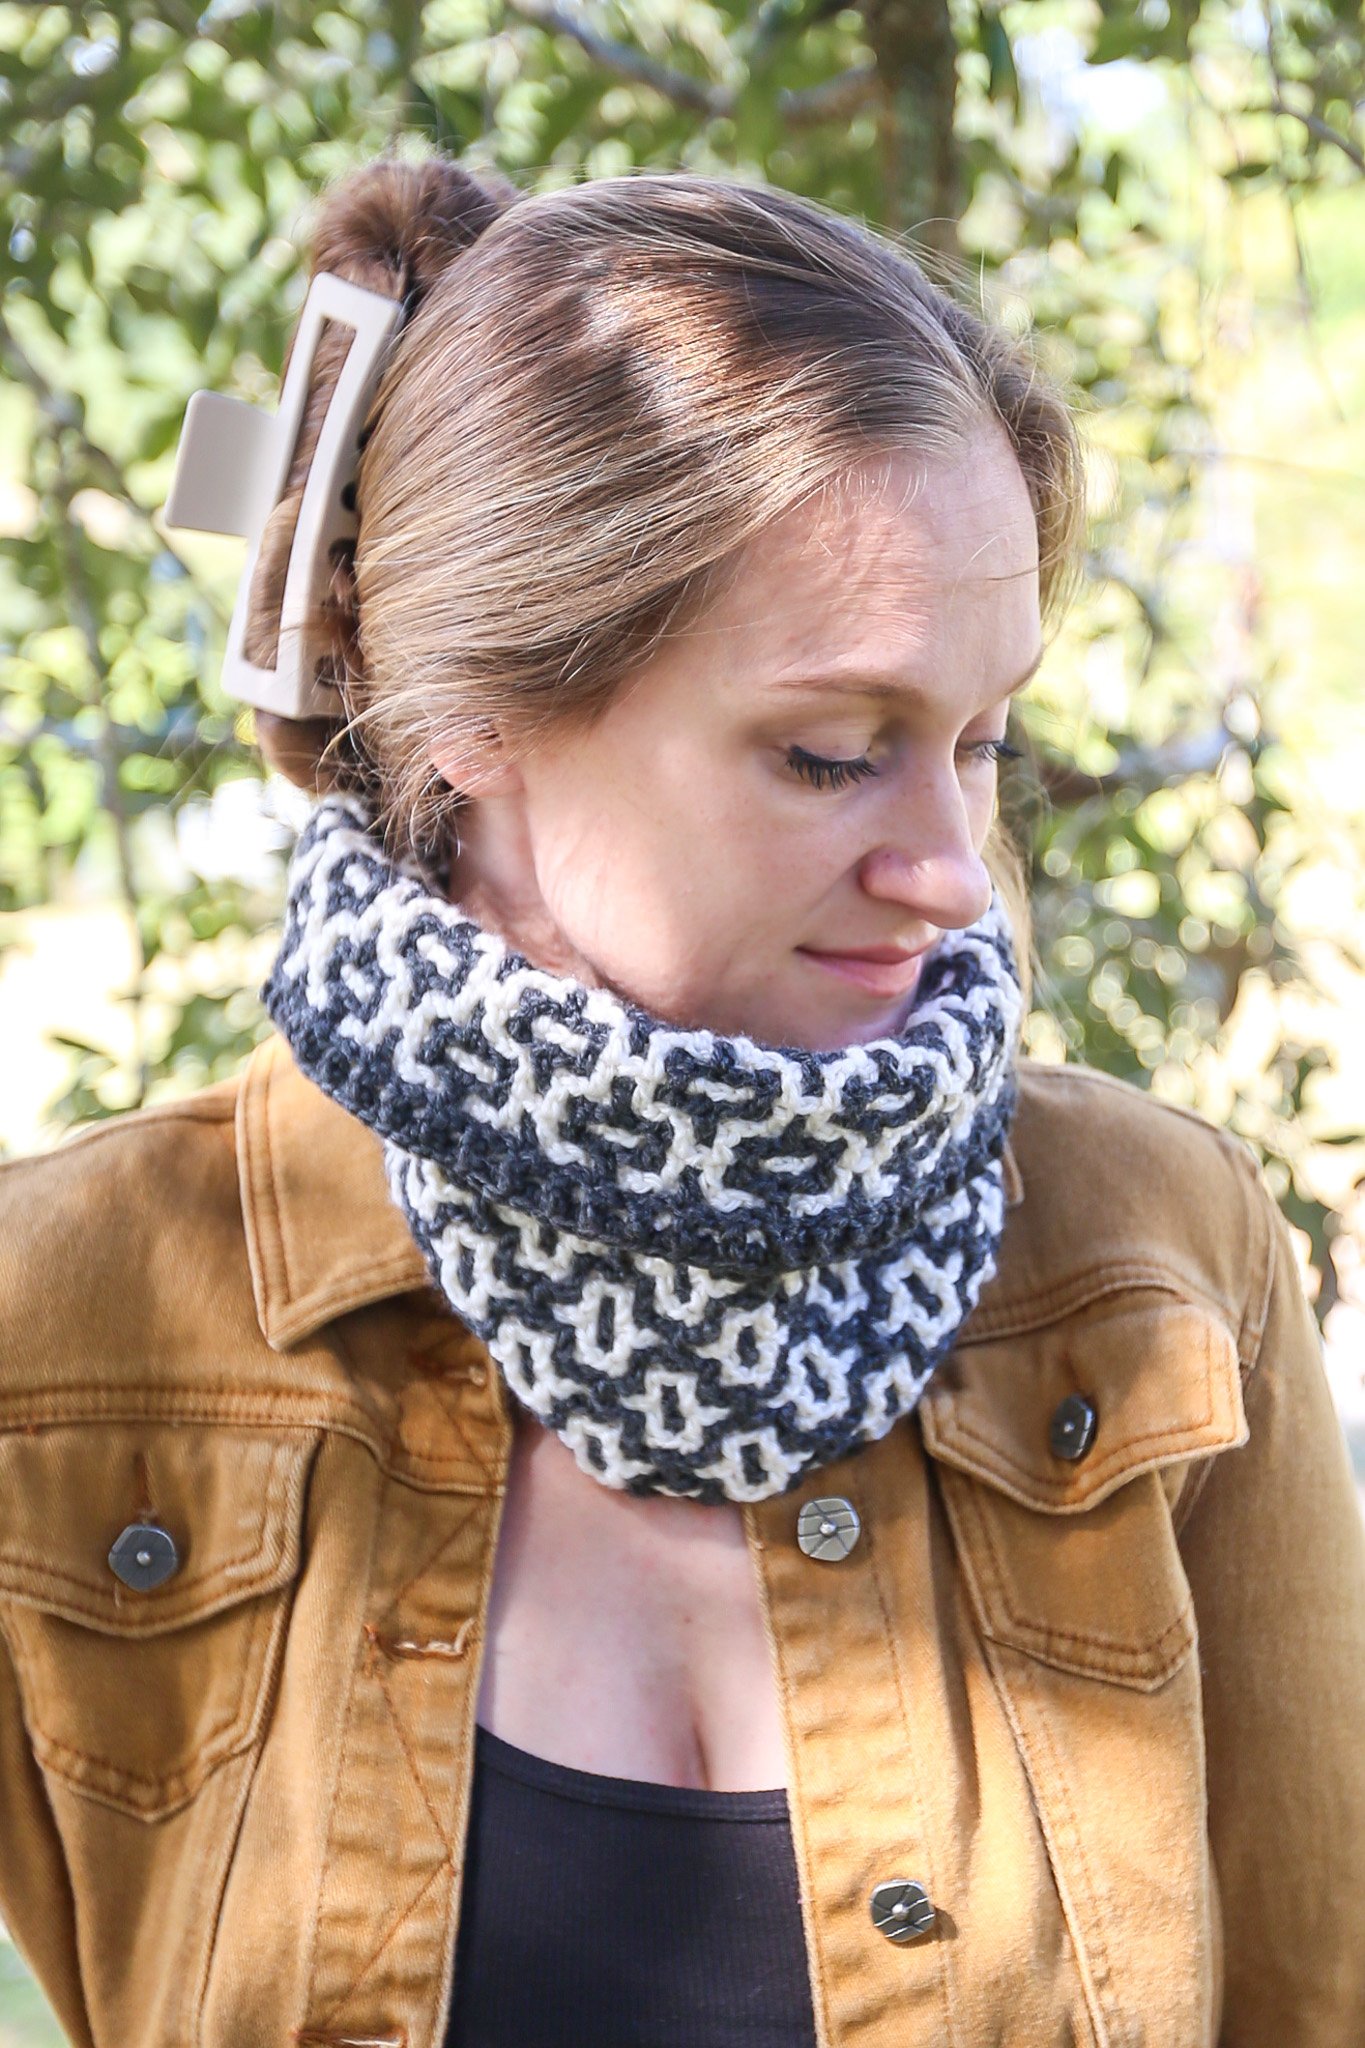
How to Crochet the Alpine Stitch in the Round.
The Alpine Stitch is a normally 4 row repeat where rows of front post double crochet stitches are alternated with rows of single crochet stitches to create a beautiful textured diamond like pattern on one side. However, crocheting the Alpine Stitch in the Round, although still a 4 row repeat, you also have to increase. I have made it simple by crocheting the extra stitches in the corners on the single crochet rows! So no confusing stitch placement on the alternating front post double crochet rounds!
How to Crochet a Modern Granny Square Blanket.
Crocheting a Modern Granny Square Blanket is simple! Just choose a pattern and start making! Just kidding, kind of. The beautiful thing about using a crocheted square to make a blanket is that you can make as many or a few squares as needed.
So for example, one of these squares is 10″ by 10″. This blanket is 40″ by 50″ because I used 20 squares in a 4 by 5 pattern. You could make yours 50″ by 60″ by making 30 squares in a 5 by 6 pattern. Just be sure to multiply out how much extra yarn you will need.

Come find me on…
- Like my Facebook Page
- Join my Facebook group!
- Get PDFs on Etsy
- Get PDFs on Ravelry
- Sign Up for the Life and Yarn Newsletter
Materials
- Size 5.50 mm crochet hook
- #4 Worsted Weight Yarn
- Per Square -175 yards per sq or 1.5 ounces.
- Blanket – 3500 yards or 30 ounces total
- Sample: Mary Maxim Natural Alpaca Tweed
- 2 Skeins – Cool Stream
- 2 Skeins – Thistle
- 2 Skeins – Sand Dune
- 2 Skeins – Denim
- 2 Skeins – Blue Stone
- Get a Kit from Mary Maxim!
Gauge
- One Square is 10 x 10 inches, pre-blocked.
Stitch Descriptions and Abbreviations
- Chain Stitch – ch
- Slip Stitch – sl st
- Stitch(es) – st(s)
- Single Crochet– sc
- Double Crochet – dc
- Front Post Treble Crochet – FPtr – Work a tr as you normally would however, insert hook from front to back to front around the dc of the previous row to complete your stitch.
- Alpine Stitch Explanation– This pattern is worked in alternating rounds of sc and FPtr/dc. The Alpine stitch is worked with an alternating dc and FPtr round, with the FPtr worked in the dc stitch two rounds down and skipping its corresponding sc. The dc is worked in its corresponding sc stitch. You will also skip one dc between each FPtr on the previous dc round.
Pattern Notes
- One Size: 40” Wide by 50” long pre-blocked.
- Skill Level: Easy
- * Designates a repeat.
- Ch 1 and Ch 3 do not count as stitches.
- FPtr stitches are worked in the previous dc rounds of the corresponding stitch.
- Each Skein makes 2 squares for a total of 4 in each color with a combined total of 20 squares for the blanket.

Alpine Granny Square
Round 1 – Ch 3, *dc 3 in 3rd chain from hook, ch 3, repeat from * 3 more times, sl sl to first dc. [12 sts]
Round 2 – Ch 1, turn, *sc 4 in ch-3 loop, sc in each dc, repeat from * 3 more times, sl st to first sc.
[28 sts]
Round 3 – Ch 3, turn, dc, FPtr, 3 dc, ch 3, *dc 3, FPtr, dc 3, ch 3, repeat from * 2 more times, dc 2, sl st to first dc. [28 sts]
Round 4 – Ch 1, turn, sc 2, *sc 4 in ch-3 loop, sc in each dc and FPtr, repeat from * 3 more times, sl st to first sc. [44 sts]
Round 5 – Ch 3, turn, (FPtr, dc) repeat 2 more times, dc, ch 3, *dc 2, (FPtr, dc), repeat 3 more times, dc, ch 3, repeat from * 2 more times, dc 2, FPtr, dc, sl st to first dc. [44 sts]
Round 6 – Ch 1, turn, sc 4, *sc 4 in ch-3 loop, sc in each dc and FPtr, repeatfrom * 3 more times, sl st to first sc. [60 sts]
Round 7 – Ch 3, turn, (dc, FPtr) 2 more times, 3 dc, ch 3, *dc 3, (FPtr, dc) 4 more times, dc 2, ch 3, repeat from * 2 more times, dc 3, FPtr, dc, FPtr, sl st to first dc. [60 sts]
Round 8 – Ch 1, turn, sc 6, *sc 4 in ch-3 loop, sc in each dc and FPtr,, repeat from * 3 more times, sl st to first sc. [76 sts]
Round 9 – Ch 3, turn, (FPtr, dc) repeat 4 more times, dc, ch 3, *dc 2, (FPtr, dc), repeat 7 more times, dc, ch 3, repeat from * 2 more times, dc 2, (FPtr, dc) 2 more times, sl st to first dc. [76 sts]
Round 10 – Ch 1, turn, sc 8, *sc 4 in ch-3 loo
p, sc in each dc and FPtr,, repeat from * 3 more times, sl st to first sc. [92 sts]Round 11 – Ch 3, turn, (dc, FPtr) 4 more times, 3 dc, ch 3, *dc 3, (FPtr, dc) 8 more times, dc 2, ch 3, repeat from * 2 more times, dc 3, (FPtr, dc) 2 more times, FPtr, sl st to first dc. [92 sts]
Round 12 – Ch 1, turn, sc 10, *sc 4 in ch-3 loop, sc in each dc and FPtr,, repeat from * 3 more times, sl st to first sc. [108 sts]
Round 13 – Ch 3, turn, (FPtr, dc) repeat 6 more times, dc, ch 3, *dc 2, (FPtr, dc), repeat 11 more times, dc, ch 3, repeat from * 2 more times, dc 2, (FPtr, dc) 4 more times, sl st to first dc. [108 sts]
Round 14 – Ch 1, turn, sc 12, *sc 4 in ch-3 loop, sc in each dc and FPtr,, repeat from * 3 more times, sl st to first sc. [124 sts]
Round 15 – Ch 3, turn, (dc, FPtr) 6 more times, 3 dc, ch 3, *dc 3, (FPtr, dc) 12 more times, dc 2, ch 3, repeat from * 2 more times, dc 3, (FPtr, dc) 4 more times, FPtr, sl st to first dc. [124 sts] Finish off.
- Arrange your squares as you would like.
*Optional: Block Squares, highly recommended. - Using your yarn scraps and a darning needle or crochet hook, seam your squares together with your chosen method.
*Sample is seamed with a darning needle and a mattress stitch. - When Complete, steam your blanket.
Assembly
- Steam block all pieces before assembling. (Optional but HIGHLY recommended)
- Lay your Front Panel on your Back Panel with Right Sides facing.
- Seam along Row 1 from the outermost corners in to create the shoulder seam to leave a 10” head opening or adjust to your liking.
- Repeat Step 2 on other side, neck opening has now been created.
- Fold each Arm in half with Right Sides facing.
- Seam from Final Row to Row 1 along Row Ends to create Sleeves.
- Place end of Sleeve Seam to properly locate armpit on Body Panels, reference chart for measurements.
- Use a stitch marker to attach each Sleeve at the sides of the Body Panels (arm pit) and a second stitch marker at the half way point of Sleeve (shoulder).
- Seam from arm pit around sleeve (Row 1) to Body Panels (Row Ends) back to armpit.
- 10.Continue seam down Body Panels to desired location. Sample leaves last 12 Rows un-seamed for better hip fit.
- 11. Steam Block a second time (or first) focusing on seams.
More Crochet Blankets
Just click on the photos below to make some of my other beginner friendly crochet patterns!