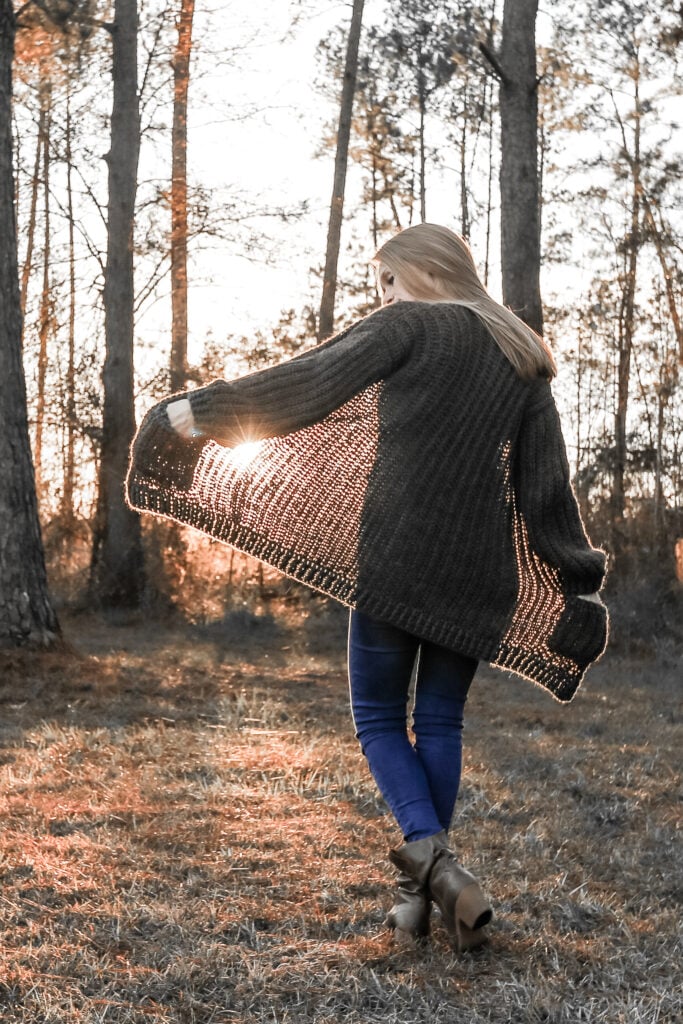
Easy & Free Long Oversized Crochet Cardigan Duster Pattern
Easy Crochet Cardigan with Pockets
Nothing is better than a cozy long crochet duster style cardigan with pockets! You can use this free crochet cardigan pattern now with worsted weight yarn and some basic crochet skills and have a cozy cardigan in no time!
Best Bang for your Buck, get a Kit From Lion Brand includes PDF and Yarn!
Get an Ad-Free PDF Version of this pattern on Etsy or Ravelry!

Can a Beginner Crochet a Cardigan?
Definitely! Learning how to make a cardigan or sweater is no different than following any other crochet pattern. The most important thing is to take your bust measurement correctly so that you crochet the right size.
The Sophia Cardigan, an oversized cardigan with cozy pockets, was one of my first designs so I wanted it to be great for beginner crocheters!
I used simple stitches and simple construction so that any skill level can make this long cardigan pattern!

Pattern Description
This long crochet cardigan pattern uses US crochet terms, basic stitches and has easy written instructions.
It is available in Sizes XS to 5XL and is very easy to customize with the construction techniques used.
To make this duster cardigan, you will have to crochet a back panel, two front panels, two sleeve panels and two pockets. You may leave a long tail for seaming.
You will then seam together these separate panels to create your easy crochet cardigan. Once seamed you will add your finishing touches.
The length of the body and sleeves is made up by the number of stitches. So if you would like to add sleeve length or body length you will need to add more stitches.
The bust and arm width are made up by the number of rows. To add width you will need more rows, to reduce with you will need fewer rows.

The majority of this written pattern is made up of basic crochet stitches like half double crochet stitches worked in the back loop only which is a great way to add texture!
The only special stitches needed for this stitch pattern are front post and back post double crochet stitched to make easy crochet ribbing.
This cozy cardigan is designed with a larger crochet hook size than is typical for a worsted weight yarn. You may try a gauge swatch with bulky yarn if you’d like a thicker cardigan.
Touch of Alpaca is the recommended yarn for this easy project, keep in mind it is a lighter worsted. That makes this cardigan light and airy so it’s a perfect summer cardigan to wear by the bonfire!
There is nothing easier to wear then an oversized sweater cardigan with pockets and long sleeves! So let’s start with some simple rectangles and get this crochet project going!

Come find me on…
- Like my Facebook Page
- Join my Facebook group!
- Get PDFs on Etsy
- Get PDFs on Ravelry
- Sign Up for the Life and Yarn Newsletter
How to Style your Cardigan with Pockets!
There is nothing easier to wear then an oversized sweater cardigan with pockets! I love pieces like this because you can dress them up or dress them down. From jeans, cowboy boots and a tank like I wore for photos to yoga pants, a tee and socks, a cardigan like this is perfect! You can dress it up with a cute top and slacks to wear to work it you would like!
Materials
- Size 7.00 mm crochet hook
- Scissors
- #4 Worsted Weight Yarn
- 5 (5, 6, 6, 6, 7, 7, 7, 7) Skeins LB Touch of Alpaca MC
- 1 (1, 1, 1, 1, 1, 2, 2, 2) Skein LB Touch of Alpaca CC
OR - 1010 (1030, 1220, 1230, 1240, 1410, 1420, 1430, 1440) Yards MC
- 160 (170, 180, 190, 200, 200, 230, 240, 250) Yards CC
Size Chart

Gauge
- 12 sts x 10 rows in hdc BLO is 4” x 4”
- Make sure to measure your gauge swatch when it is relaxed, not stretched or squished.
Stitch Descriptions and Abbreviations
- Chain Stitch – ch
- Slip Stitch – Sl St
- Stitch(es) – st(s) /
- Half Double Crochet– hdc
- Double Crochet – dc
- Back Loop Only – BLO – Work intended stitch in the back loop only of the top of the stitch.
- Foundation Half Double Crochet – Fhdc – Chain 3, yarn over, insert hook into 3rd chain from hook, yarn over and pull up loop (3 loops on hook), yarn over, pull through 1 loop on hook (3 loops on hook), yarn over and pull through all loops, (1 foundation double crochet with chain at bottom). *Yarn over, insert hook to bottom of the stitch you just made. It will look like the top or “V” of a stitch. Yarn over and pull up loop (3 loops on hook), yarn over, pull through 1 loop (3 loops on hook), yarn over and pull through all loops, repeat from * to desired count.
- Front Post Double Crochet – FPdc – work a dc as you normally would but insert your hook from front to back to front around post of indicated st.
- Back Post Double Crochet – BPdc – work a dc as you normally would but insert your hook from back to front to back around post of indicated st
- Half Double Crochet 2 Together – hdc2tog – (work next 2 sts together for a decrease stitch) – yarn over, insert into first st, yarn over, draw up a loop, yarn over, insert into second st, yarn over, draw up a loop, yarn over, draw through all 5 loops on hook.
Pattern Notes
- XS (S, M, L, XL, 2XL, 3XL, 4XL, 5XL) – Use corresponding number for your size and the size chart above.
- * Designates a repeat.
- Ch 1 and Ch 2 at beginning of Rounds and Rows do not count as stitches.
- Skill Level: Easy
- Main Color – MC
- Contrasting Color – CC
- Construction – The Rows of the front and back panels make up the width go this cardigan not the number of stitches. The front and back panels start with the same stitch count for the length of the cardigan.
- Ease – This pattern has close fitting or zero ease. The ribbing adds stretch to the material but panel measurements are actual dimensions.
- Gauge – Please note that when working in BLO the row height measurements may vary if you are stretching your material. Make sure to measure your gauge swatch when it is relaxed, not stretched or squished.
- Assembly – You may leave long tails the you complete your pieces for assembly if you prefer not to reattach your yarn.
Easy Crochet Cardigan Pattern Begins
Back Panel – Main Color
Row 1 – Fhdc 69 (72, 72, 75, 75, 78, 78, 78, 81).
Rows 2 to 35 (38, 40, 43, 44, 45, 45, 46, 46) – Ch 1, turn, hdc BLO in every stitch across, finish off.
[69 (72, 72, 75, 75, 78, 78, 78, 81) total stitches]
Front Panels – Make 2 – Main Color
Row 1 – Fhdc 69, ch 1, turn. (72, 72, 75, 75, 78, 78, 78, 81).
Rows 2 – 8 (10, 10, 12, 12, 14, 14, 16, 16) – Hdc BLO in every stitch across, ch 1, turn.
[69 (72, 72, 75, 75, 78, 78, 78, 81) total stitches]
Row 9 (11, 11, 13, 13, 15, 15, 17, 17) – Hdc BLO to last 2 sts, hdc2tog, ch 1, turn.
[68 (71, 71, 74, 74, 77, 77, 77, 80) total stitches]
Rows 10 (12, 12, 14, 14, 16, 16, 18, 18) – Hdc BLO in every stitch across, ch 1, turn.
Rows 11 (13, 13, 15, 15, 17, 17, 19, 19) – 16 (18, 18, 20, 20, 20, 22, 22, 22)
Repeat Rows Previous 2 Rows.
Row 17 (19, 19, 21, 21, 21, 23, 23, 23) – Hdc BLO to last 2 sts, hdc2tog, finish off. [64 (67, 67, 70, 70, 74, 73, 74, 77) total stitches]
Arms – Make 2 – Main Color
Row 1 – Fhdc 37, ch 1, turn. (40, 40, 40, 40, 43, 43, 43, 43)
Row 2 – Hdc BLO to next to last st, 2 hdc BLO in last st, ch 1, turn.
[41 (41, 41, 41, 41, 44, 44, 44, 44) total stitches]
Row 3- Hdc BLO in every stitch across, ch 1, turn.
[41 (41, 41, 41, 41, 44, 44, 44, 44) total stitches]
Rows 4 – 9 – Repeat Rows 2 and 3 another 3 times.
Rows 10 to 21 (21, 21, 23, 23, 25, 25, 27, 27) – Hdc BLO in every stitch across, ch 1, turn.
[44 (44, 44, 44, 44, 47, 47, 47, 47) total stitches]
Row 22 (22, 22, 24, 24, 26, 26, 28, 28)
Hdc BLO to last 2 sts, hdc2tog, ch 1, turn. [43 (43, 43, 43, 43, 46, 46, 46, 46) total stitches]
Row 23 (23, 23, 25, 25, 27, 27, 29, 29)
Hdc BLO in every stitch across, ch 1, turn. [43 (43, 43, 43, 43, 46, 46, 46, 46) total stitches]
Rows 24 (24, 24, 26, 26, 28, 28, 30, 30) – 29 (29, 29, 31, 31, 33, 33, 35, 35)
Repeat previous 2 rows another 3 times, then finish off. [40 (40, 40, 40, 40, 43, 43, 43, 43) total stitches.
Pockets – Make 2 – Main Color
Row 1 – Fhdc 16, ch 1, turn.
Rows 2 to 10 – Hdc BLO in every stitch across, ch 1, turn, then finish off. [16 total stitches]
Pockets – Trimming – Contrasting Color
Attach to a corner to work down the row ends in your contrasting color.
Row 1 – Ch 1, place 1 hdc in each row end. [10 hdc sts]
Row 2 -Ch 1, turn, *FPdc, BPdc, repeat from * to end, then finish off. Repeat on other pocket.

Assembly
- Lay your front panels on your back panels to create the shoulder seams of this easy crochet cardigan. Be sure to place the angled edge towards the top and facing inward to create the neck line.
- Attach your yarn from the outer corner and seam toward the neck 8 (10, 10, 12, 12, 14, 14, 16, 16) stitches, finish off and repeat on the other side of your crochet sweater cardigan.
- Starting from the waistline, attach your yarn and seam up until you have a 6 (6, 6.5, 7, 7.5, 8 8.5, 9.5, 10)” space to create the arm opening.
- Fold your arms in half and starting from the cuff (straight side) seam up 37 (40, 40, 40, 40, 43, 43, 43, 43) stitches towards the tapered edge.
- Attach your arms to the body of your crochet cardigan using the end of an arm seam to attach to the end of your side seam where the armpit is located.
- Seam around to attach the arms to the body of the cardigan. You may have to stretch or squish the arm and cardigan body to get the materials to align properly.
- Weave in all of your ends and continue on to the trimming instructions.
Body Trimming at Waist – Contrasting Color
Row 1 – Attach your yarn to a bottom corner and working into the row ends, work 1 hdc into each row end and each seam around waistline, hdc 71 (78, 80, 87, 88, 89, 93, 94, 94)sts .
For Rows with an EVEN Stitch Count.
Rows 2 to 5 – Ch 2, turn, *FPdc, BPdc, repeat from * to end, finish off on last row.
For Rows with an ODD Stitch Count.
Row 2 – Ch 2, turn, *FPdc, BPdc, repeat from * to end.
Row 3 – Ch 2, turn, *BPdc, FPdc, repeat from * to end.
Rows 4 and 5 – Repeat Rows 2 and 3, finish off.
Body Trimming at Sides and Neck – Contrasting Color
Row 1
Attach your yarn to a bottom corner of CC waistline and working up towards the neck in sts, row ends and shoulder seam, hdc 79 (82, 82, 85, 84, 87, 88, 87, 90) sts in the first front panel, hdc 19 (18, 20, 19, 20, 17, 17, 14, 14) in each exposed row end of the back panel, continue down the second side panel 79 (82, 82, 85, 84, 87, 88, 87, 90) sts.
[177 (182, 184, 198, 190, 191, 193, 188, 194) total stitches ]
Row 2
Ch 2, turn, *FPdc, BPdc, repeat from * to end, finish off.
Cuff Trimming – Contrasting Color
Round 1
Attach your yarn to your sleeve seam and hdc in the seam and hdc in each stitch around, sl st to 1st st. 30(30, 30, 32, 32, 34, 34, 36, 36) sts
Rounds 2 – 5 – continue in the round, do not turn.
Ch 2, *FPdc, BPdc, repeat from * to end, finish off.
Pockets
Complete your Cardigan with pockets by placing your pocket panels where they are comfortable for you. Weave in all ends.
Make these other Crochet Cardigan Free Patterns!


I just purchased this pattern. I looks awesome. I love it. I just hope mine looks half as good as yours. Thank you.
THANK YOU! That makes me so happy! I’m sure yours will be great!
This is very nice and I love your colors.
Thank you so much!
Im making this for my niece. A size M, but I’m afraid the arms will be too short. From her shoulders to wrists are 27 inches. Will the M pattern for the armada work for her? TIA!!
Hi! I’m wearing the medium in the photos. I’m not sure if the measurement off hand, I can check, but I’m about 5’-7” for reference!!! If you are meeting gauge then they should be long enough!
Arms* sorry
Ok thank you so much!! That’s about the height of my niece. So they should be long enough. :)
I love this sweater. But there are no measurements for the sizes. Would love to make this for my daughter. Thanks for any input. :)
I am going to be updating all of my blog patterns to have a sizing chart. It’s taking some time for format! But for reference, I am wearing the medium in the photos and I am 5’-7” and 125 pounds!
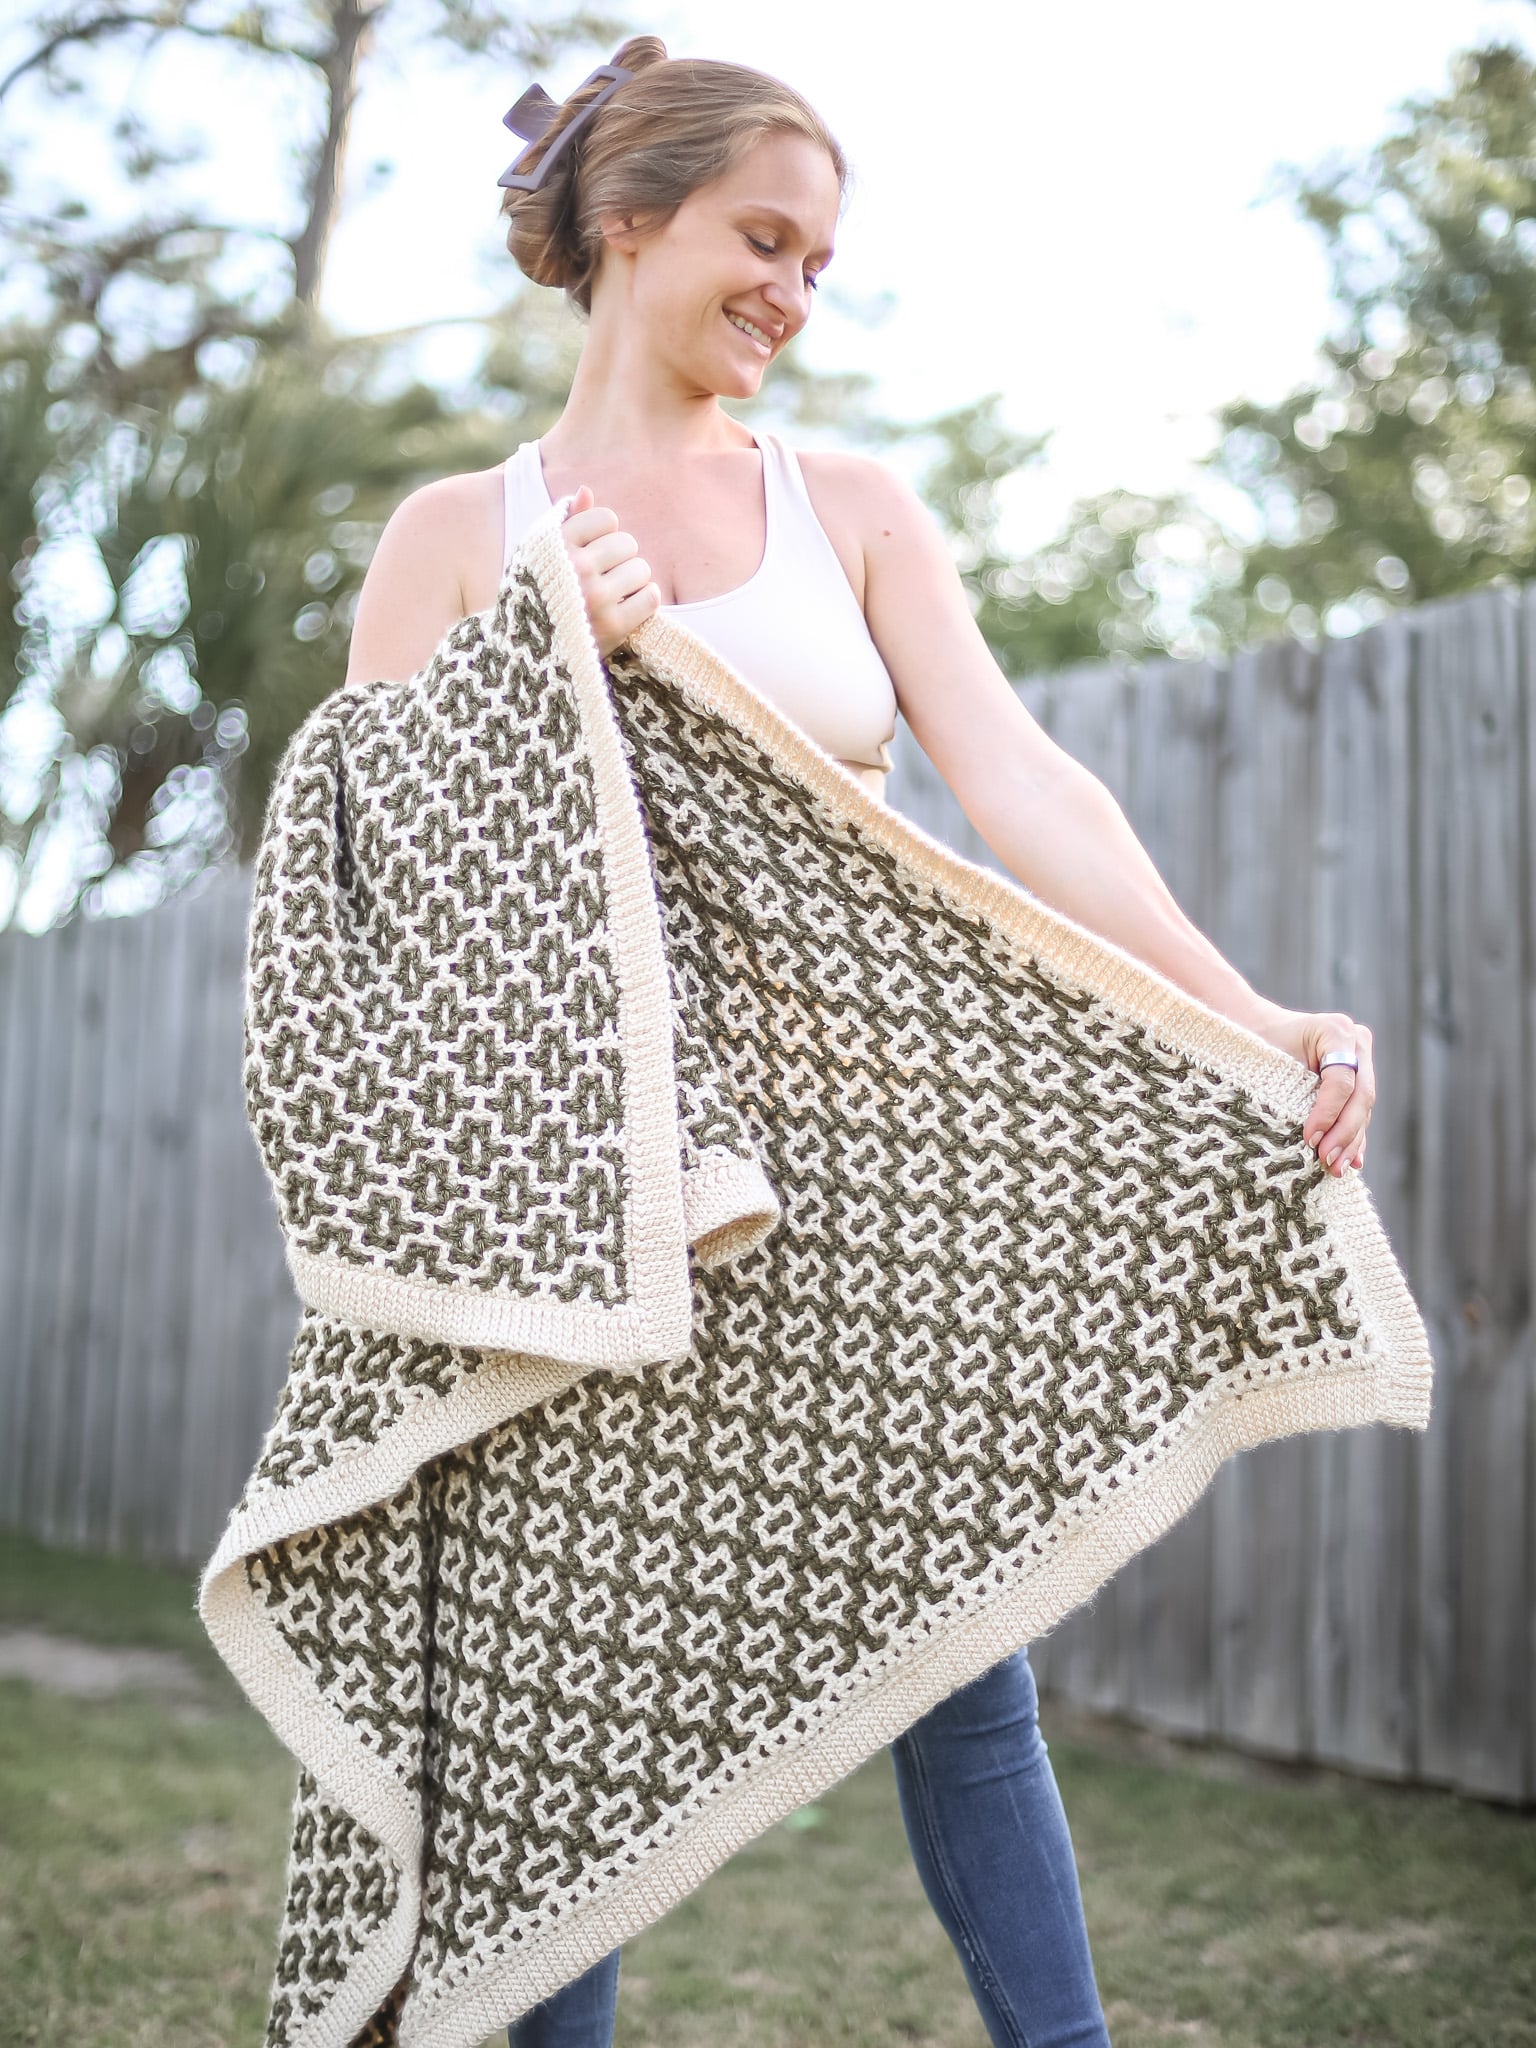
I looked at the yarn you suggested but it all seems to be self stripping and your sweater looks solid. Can you please say what color you used. Thanks again
I’m going to reach out to Lion Brand. It seems that the colors I used are no longer available, or any solids. I used Rust and Taupe in the Landscapes line…I’ll see if the solids are coming back.
Thanks so much. I usually knit my sweaters but this is a great crochet pattern. Looks comfy
It is super comfy!!!! Thank you!!!
Thanks, that’s perfect
I just finished my sleeves, and ready to start assembly. So far, so good. Wish me luck! :)
Yay! Great job!
I was wondering for the arms especially for the row from 17 – 24. Do we do all the rows the sizes or just do the one with the size chart?
You follow the number according to your size…so specifically for the arms if you no longer have a number and have an X then you should have finished off.
I am doing a size large. I was wondering which row should I stop at for the arms?
So very disappointed. Spent the last few weekends working this project in the 1X size. Struggled with the gauge and ended up with a LDC instead of the HDC to achieve gauge. Stitched it together and couldn’t wait to wear it. Only to find out that it’s so small that it fits my 13 year old who wears a junior’s size Medium/large. Which would be AWESOME if she liked anything with color. But only black will do for her wardrobe. So I now have a cardi that will never be worn. Very disappointed.
You say you struggled to meet gauge and had to use a different stitch? May I ask what yarn you are using?
I am finding that when Lion Brand Landscapes isn’t used the pattern is more difficult…I am currently working up a new sample in a different yarn to hopefully make it so that any worsted weight will work ??
Hi. This cardigan is lovely! I just have a quick question. I was wondering about the number of chains for the front panels? We’re supposed to chain 66 for the back panel but then chain 63 for each front panel? Won’t that make each front panel almost the same size as the back of the cardigan instead of being half the size? Thank you!
Correction: Chain 63 also for the back panel.
When it’s assembled the rows go up and down your body not across so it’s the number of rows not stitches that make up the width of the garment ??