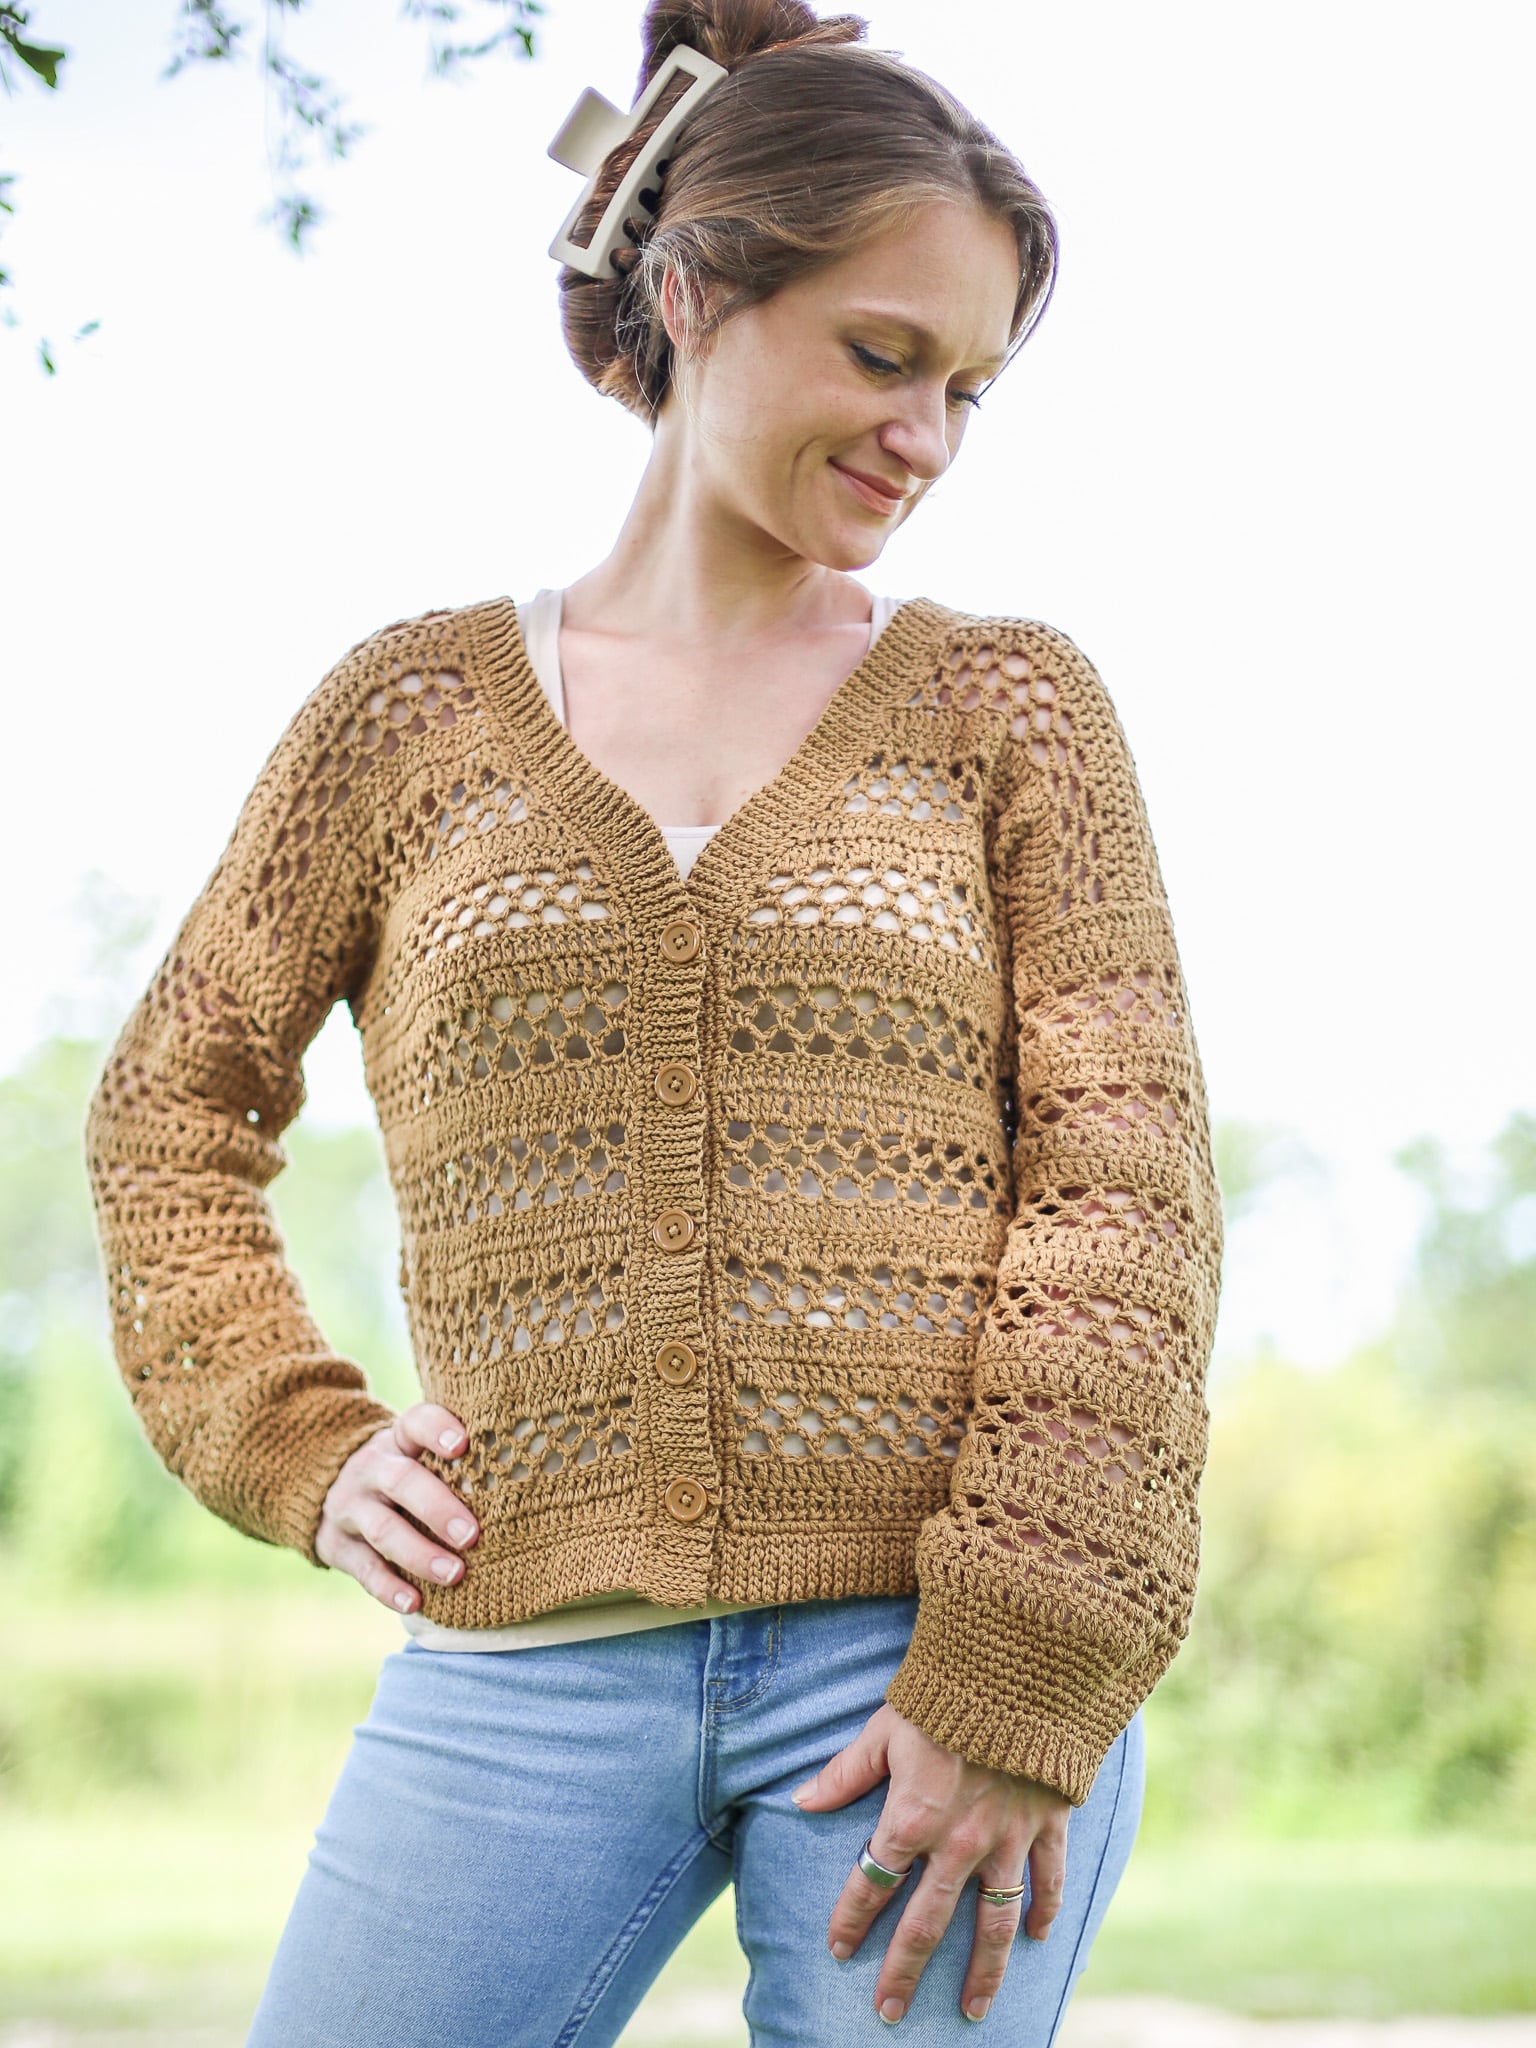
Make the BEST Lightweight Open Stitch Crochet Cardigan with Simple Stitches
I love a good cardigan that goes with everything, looks chic, polished, and it’s a bonus when it’s lightweight and airy! Living in the Florida Panhandle, I appreciate now more than ever an open stitch crochet cardigan made with natural fibers.
While designing this easy crochet cardigan pattern I was surprised at how quickly it worked up! You can easily crochet the body panels and sleeves in one weekend and do all the ribbing the next! I was also surprised that it can be unisex!
Use the Table of Contents just under the photo below for easy navigation to make this Free Crochet Cardigan Pattern and browse all the helpful information included in this blog post.
Best Bang for your Buck, get a Kit From Lion Brand includes printable PDF and Yarn! Or get an ad-free PDF Version on Etsy or Ravelry to print and make this open stitch crochet collar cardigan pattern!
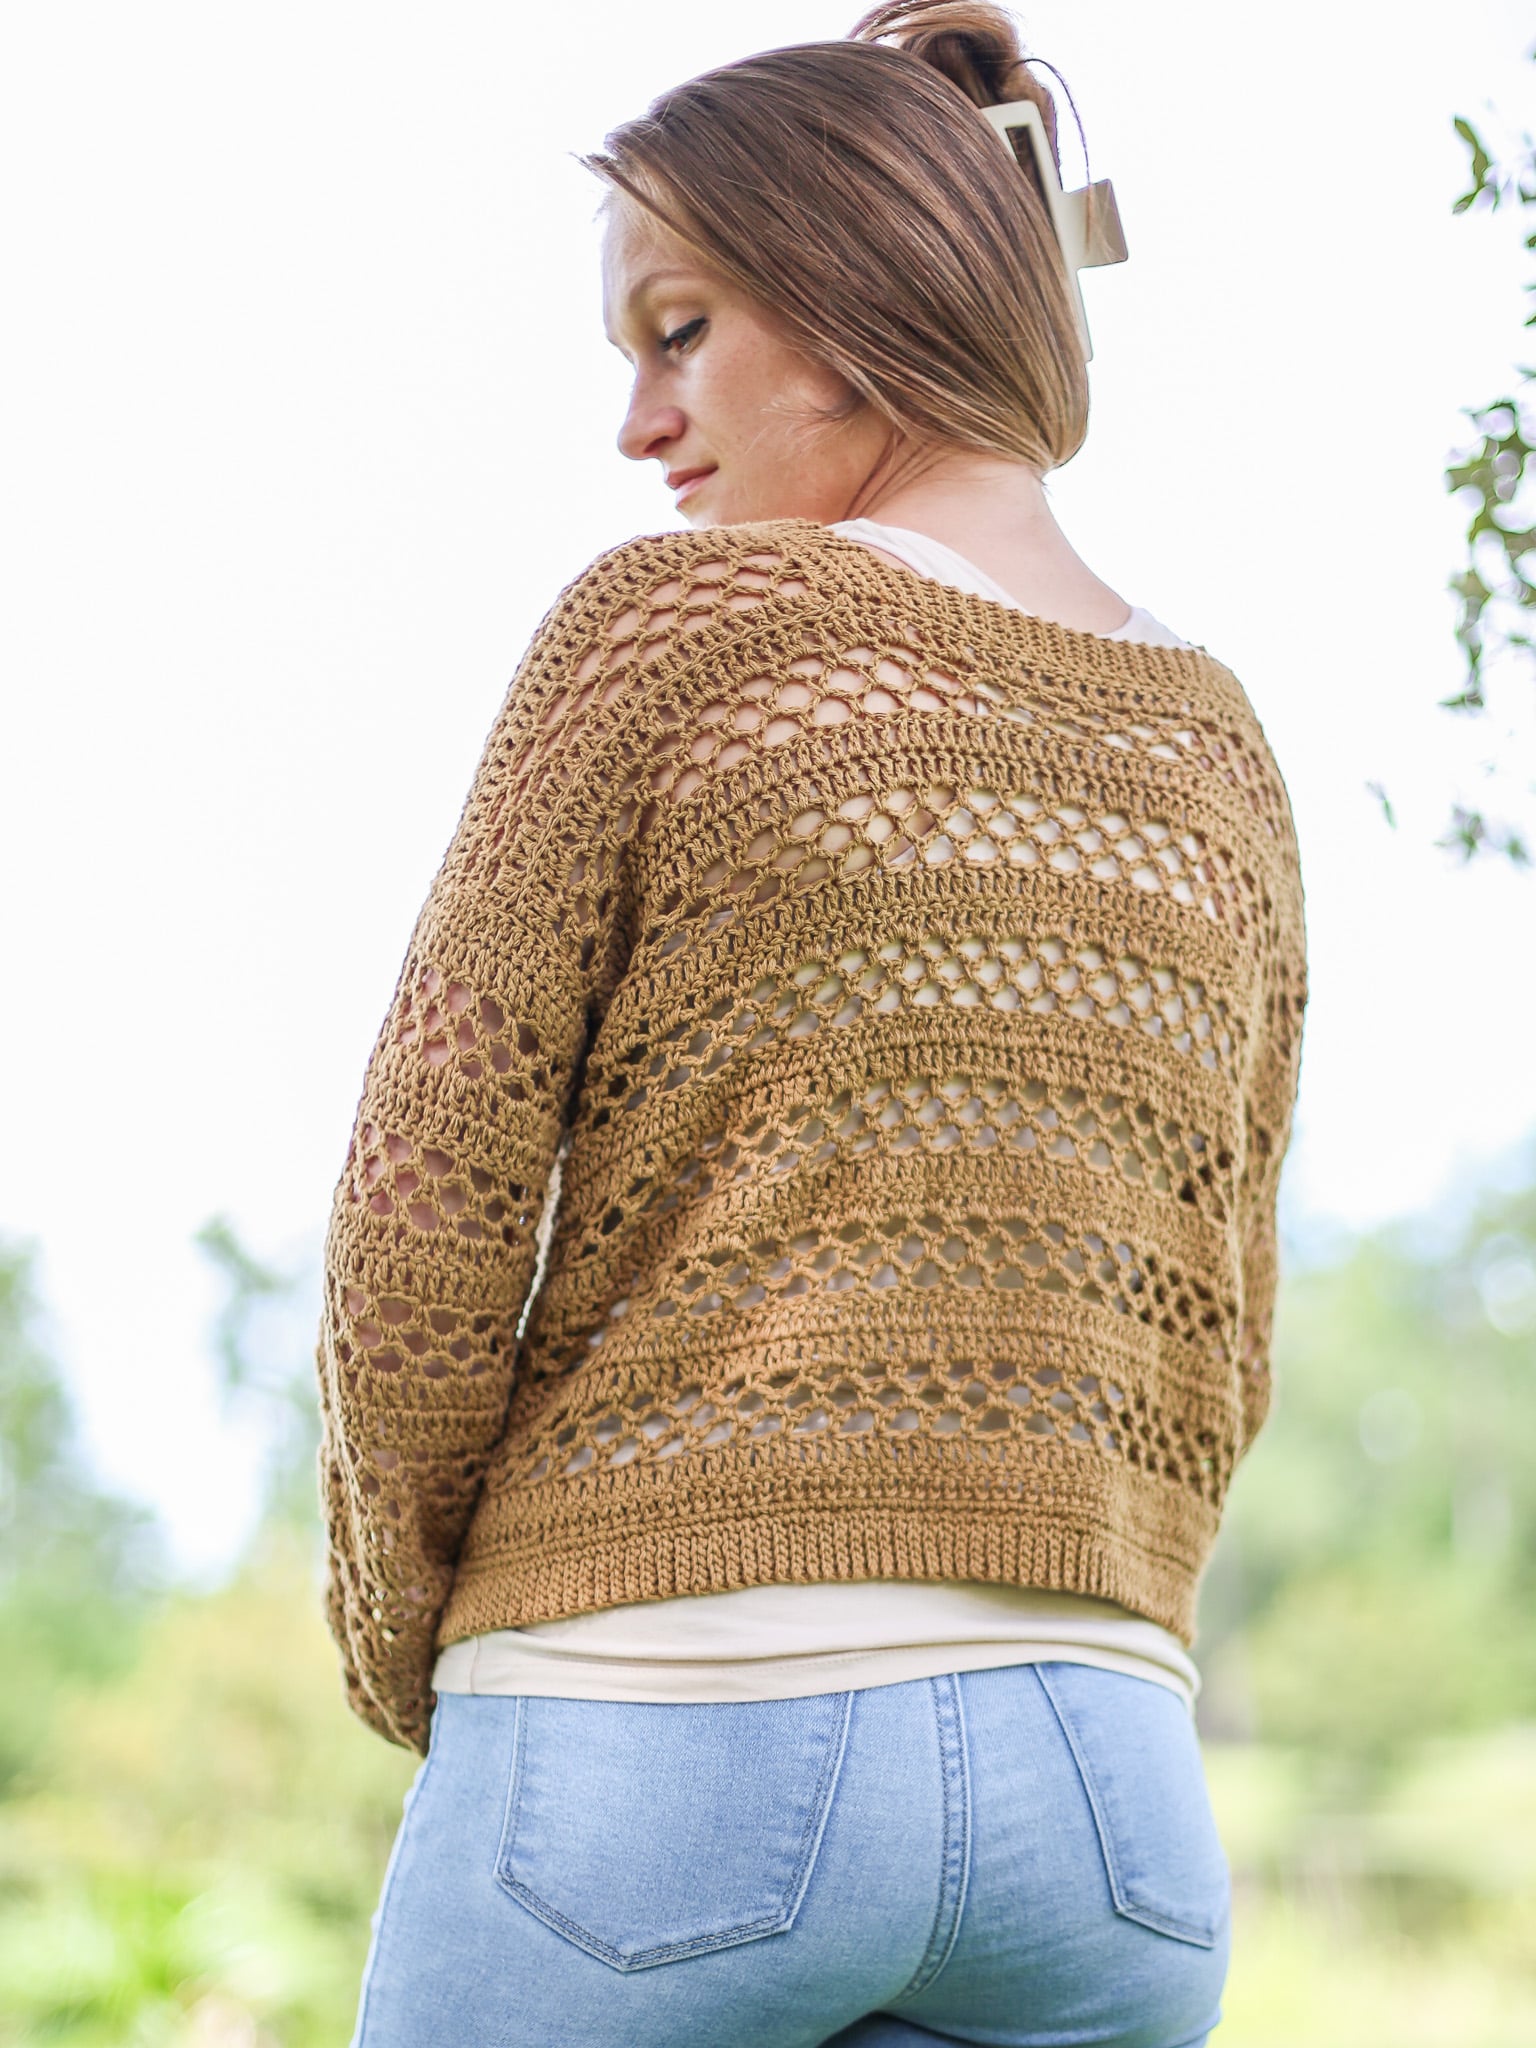
How Many Hours Does it Take to Crochet a Cardigan?
This depends on yarn weight, hook size, stitch choice and cardigan style so it can take anywhere from 3 hours to 40 plus hours! A bulky weight cardigan will be faster than a cardigan that uses worsted weight yarn and worsted will be faster than lightweight yarns.
However, the stitch pattern affects that as well! Crochet cardigan patterns that use double crochet stitches will be faster than a cardigan sweater made of single crochets.
THIS cardigan with a slightly oversized fit took me no more than 8 hours and was made over 2 weeks. That also includes my design time, there was some frogging, math involved and buttons. If I was to make it again I could probably do it in 5-6 hours for this cardigan sweater with buttons.
About this Crochet Cardigan Design
Open stitch crochet cardigans seem to be trending, they are popping up all over my Pinterest. Projects like this are fast and they work perfectly with tanks, tees, dresses, rompers and anything in between.
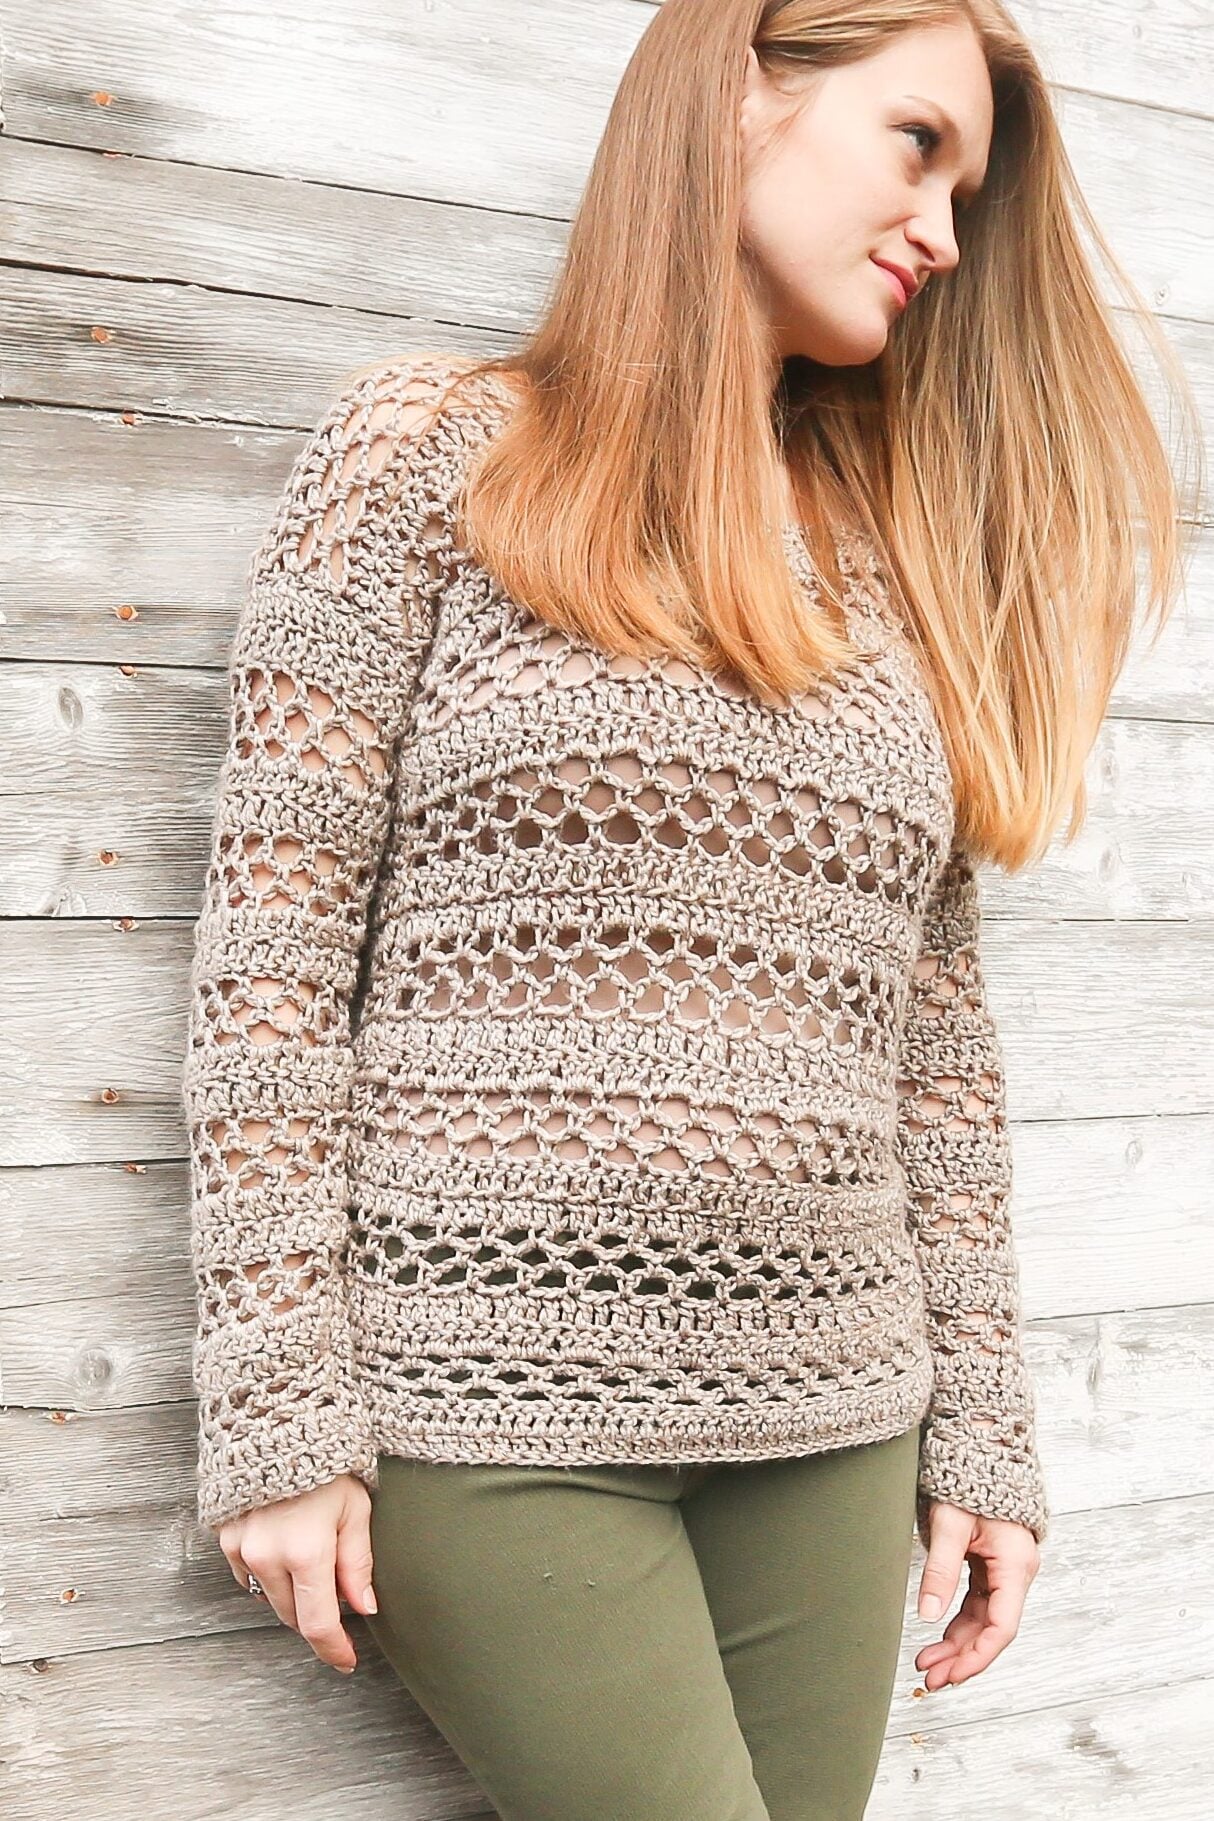
But I am seeing a lot of the same types of stitches and styles, so I wanted to make something different. So I set off to make the perfect crochet cardigan and decided to base it off of one of my original designs, The Madeline Sweater!
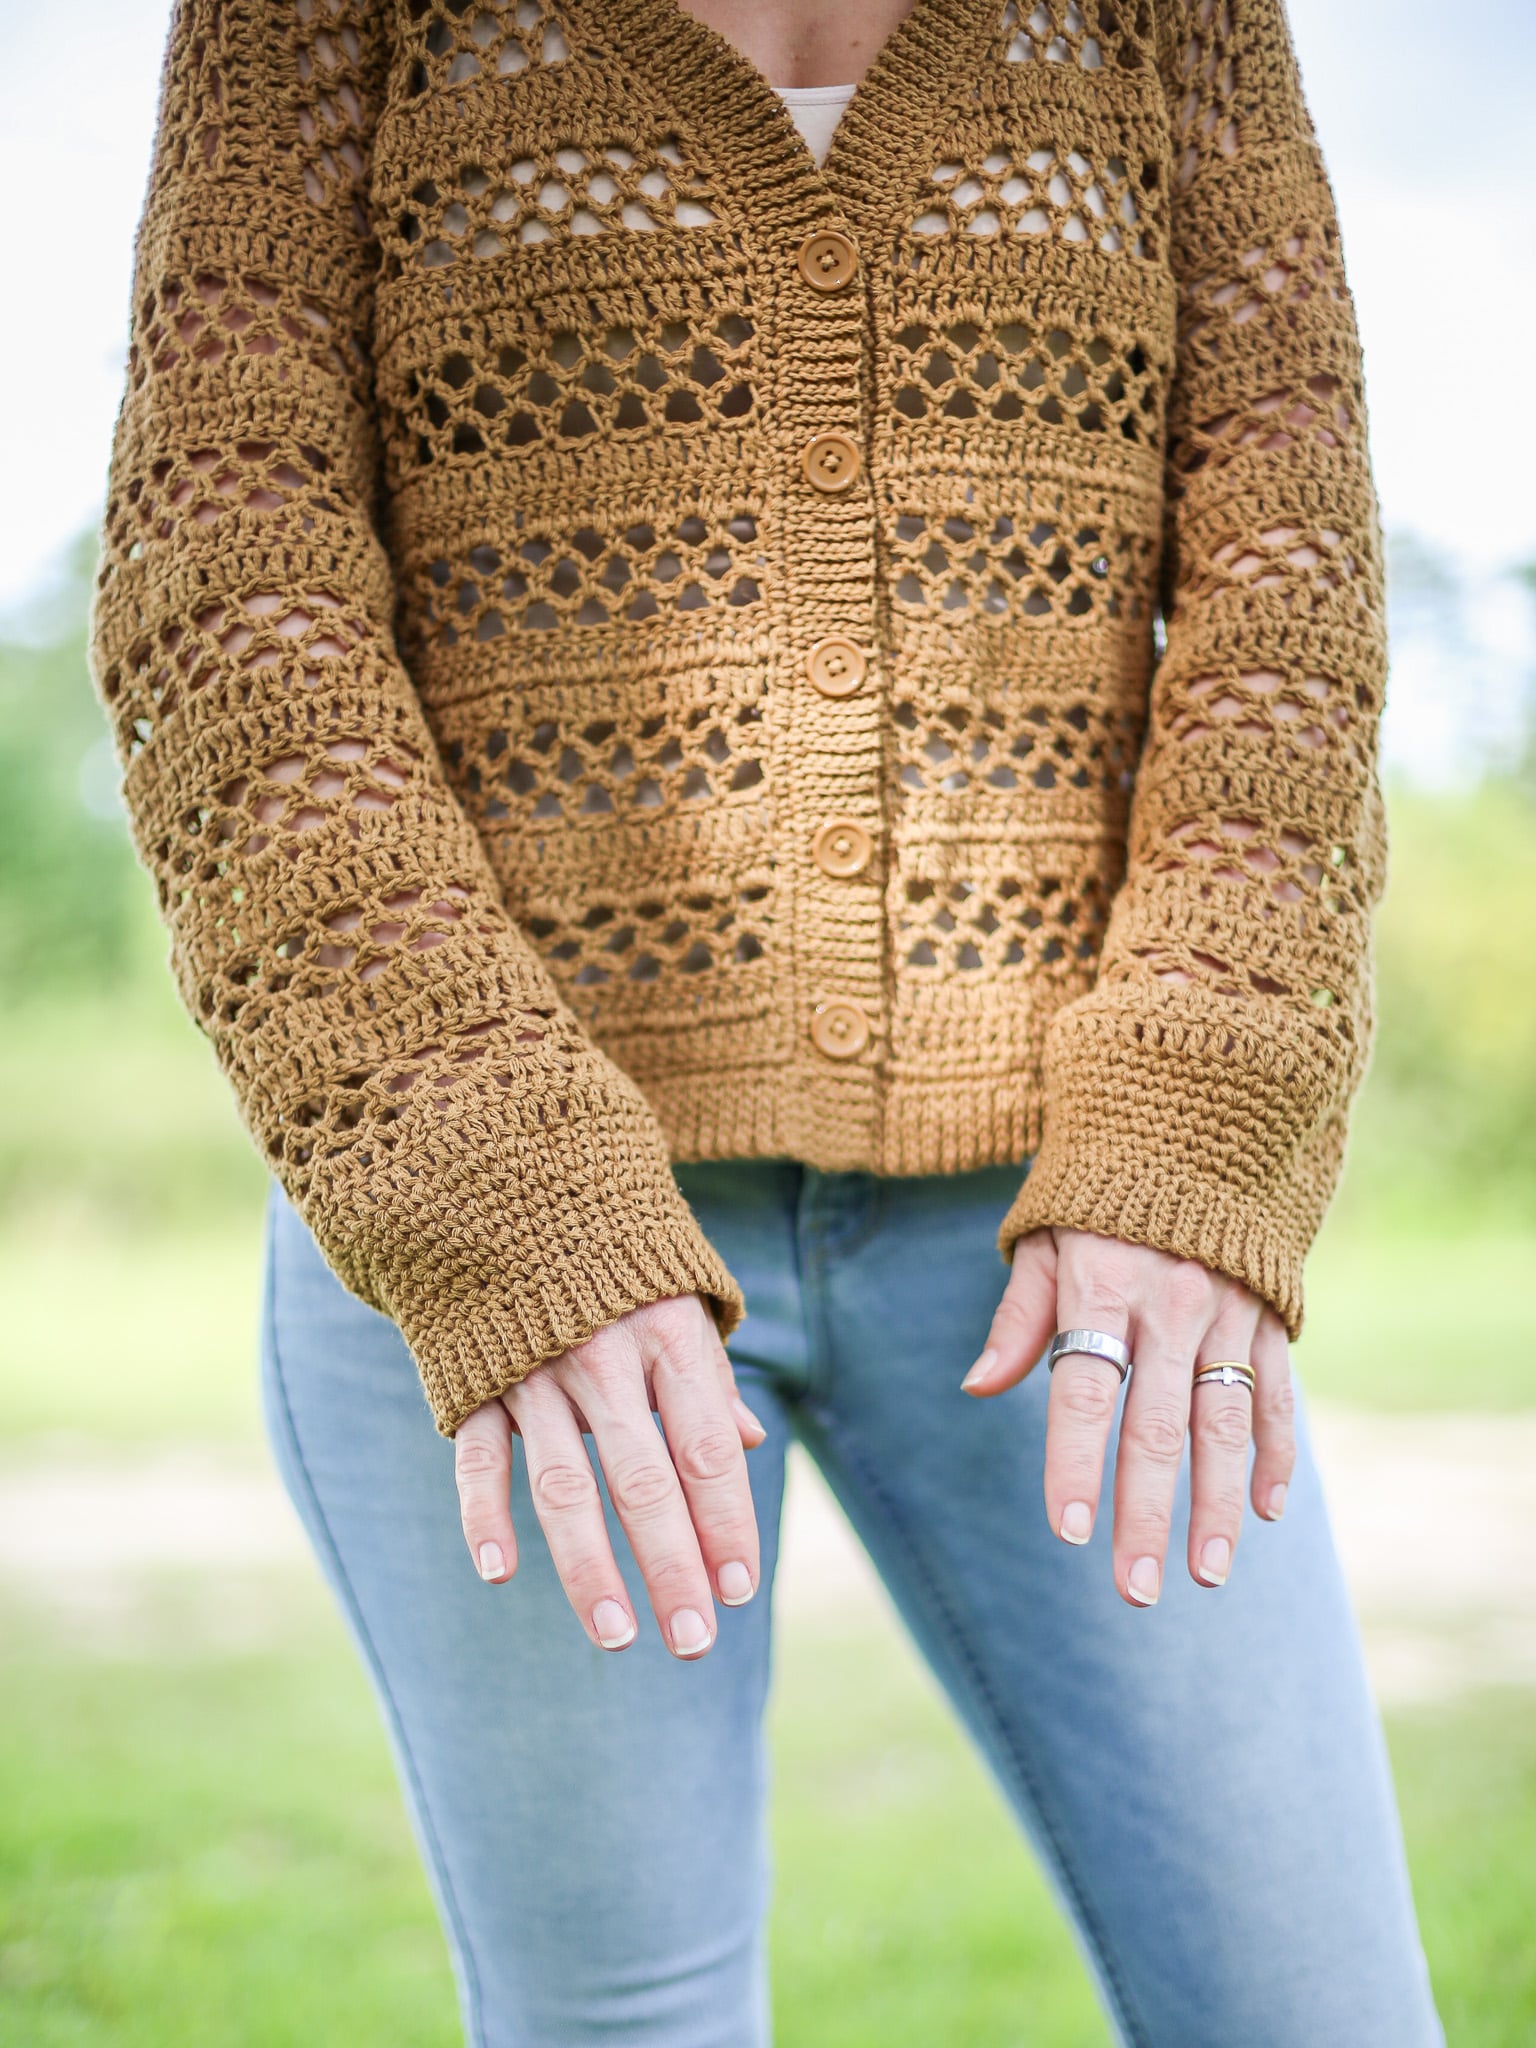
I love my Madeline Sweater, it’s a very basic lace pullover sweater. For the cardigan version I wanted to step it up a notch, is I included a delicate collar design, optional buttons and polished sleeve cuffs that make this an essential piece to you handmade wardrobe of crochet clothing!
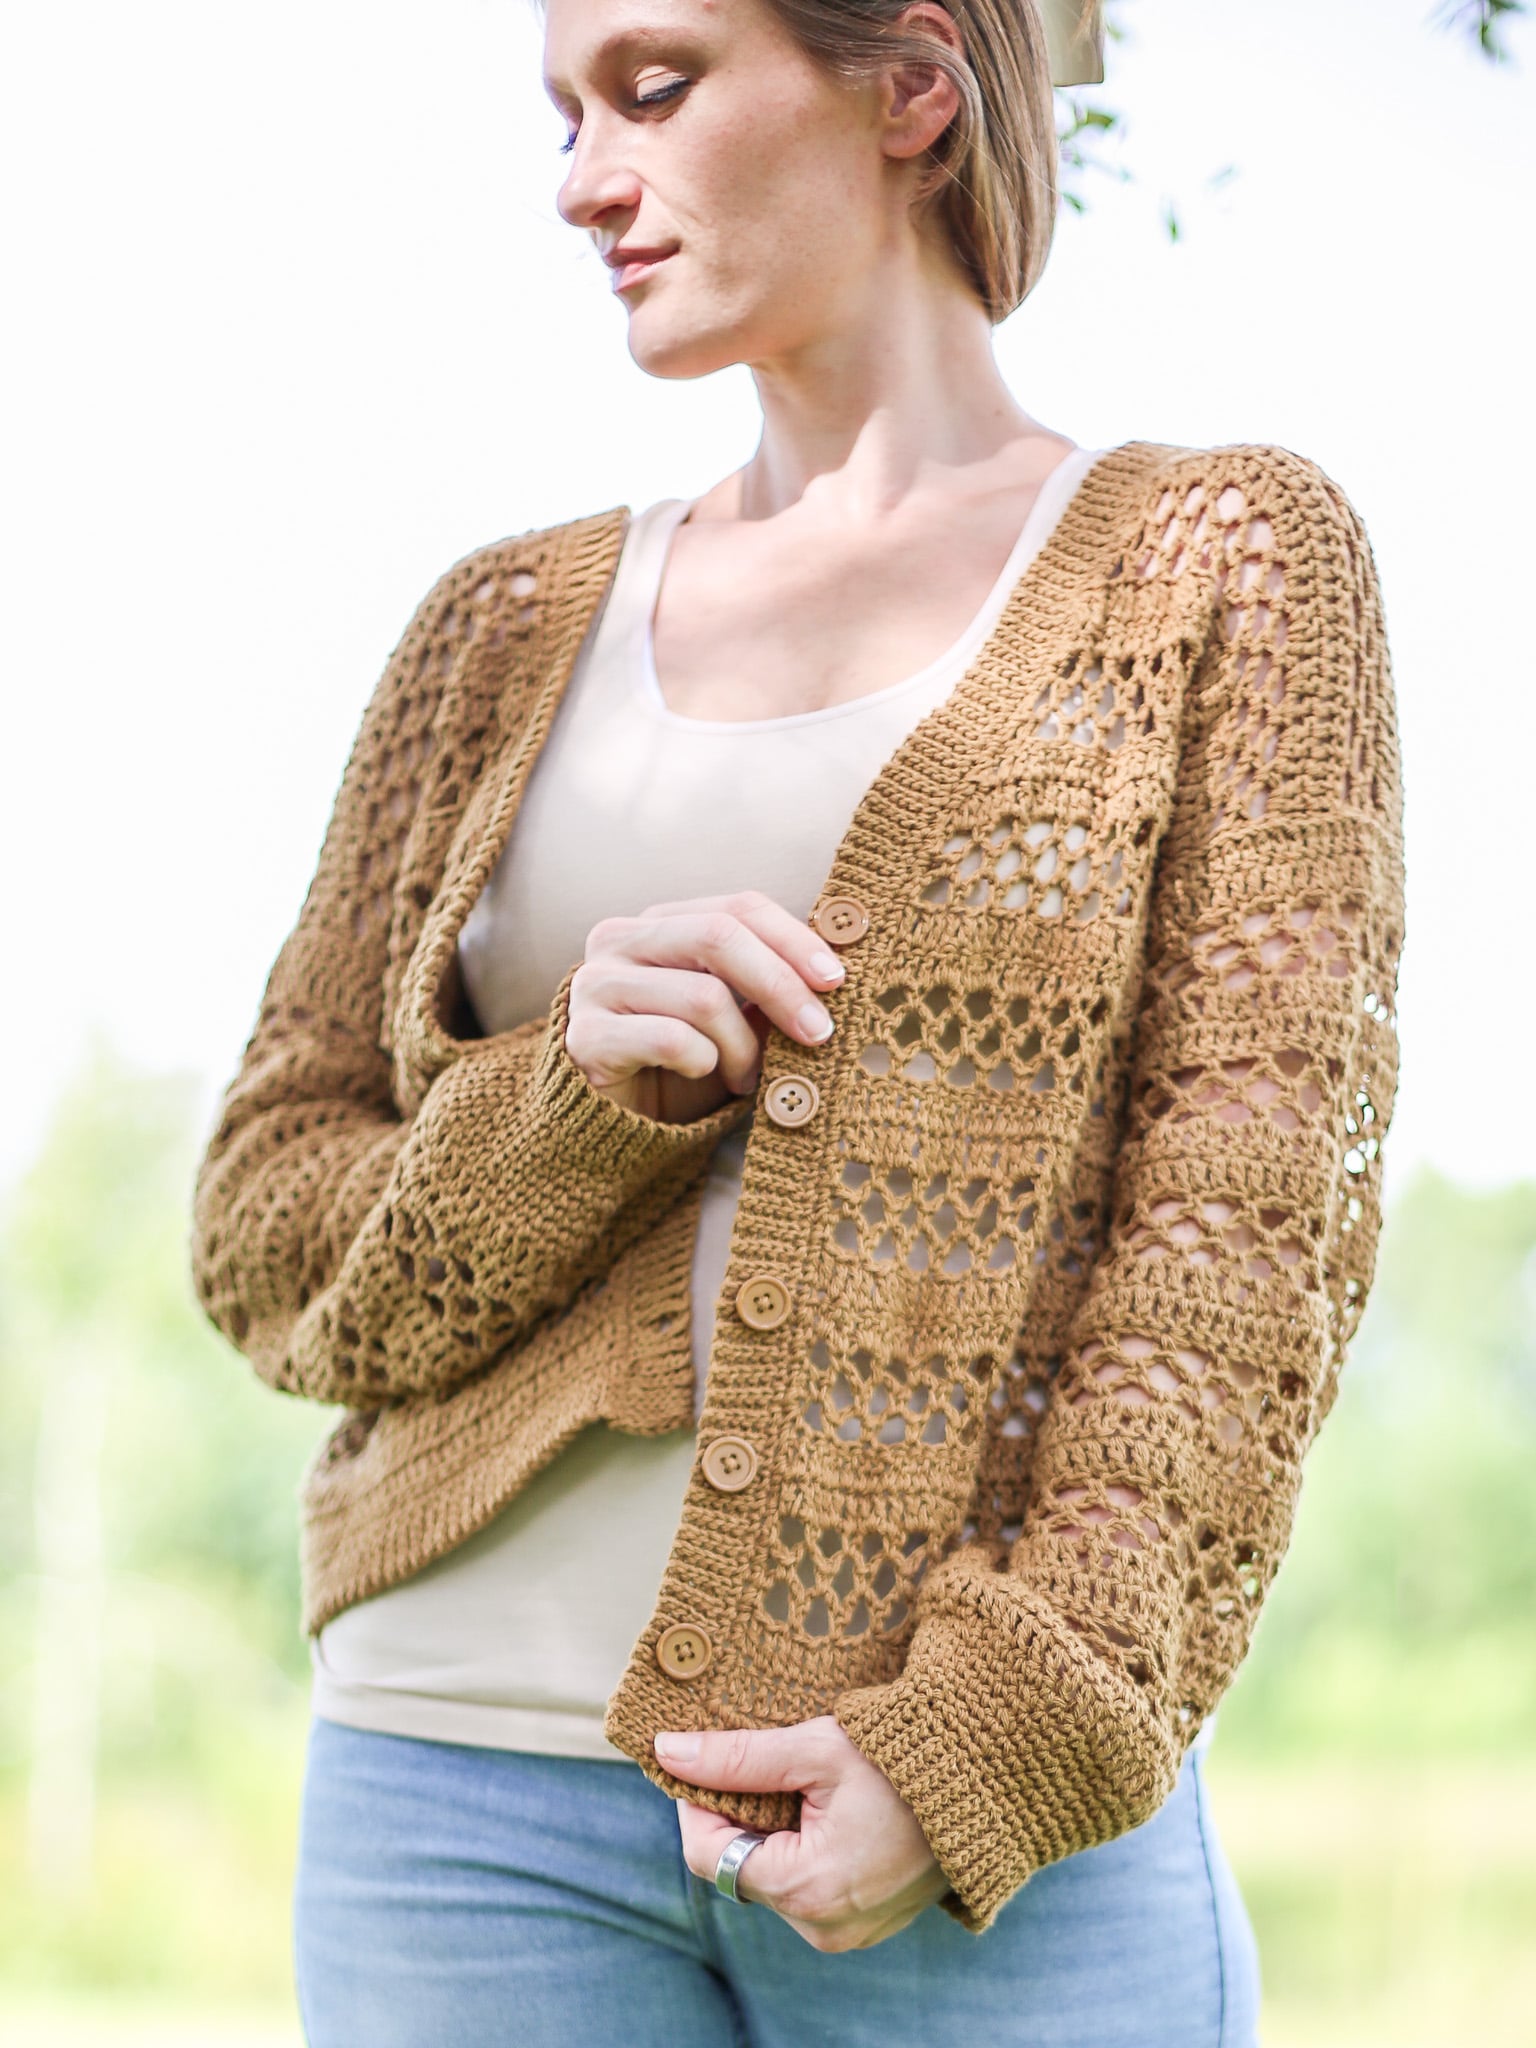
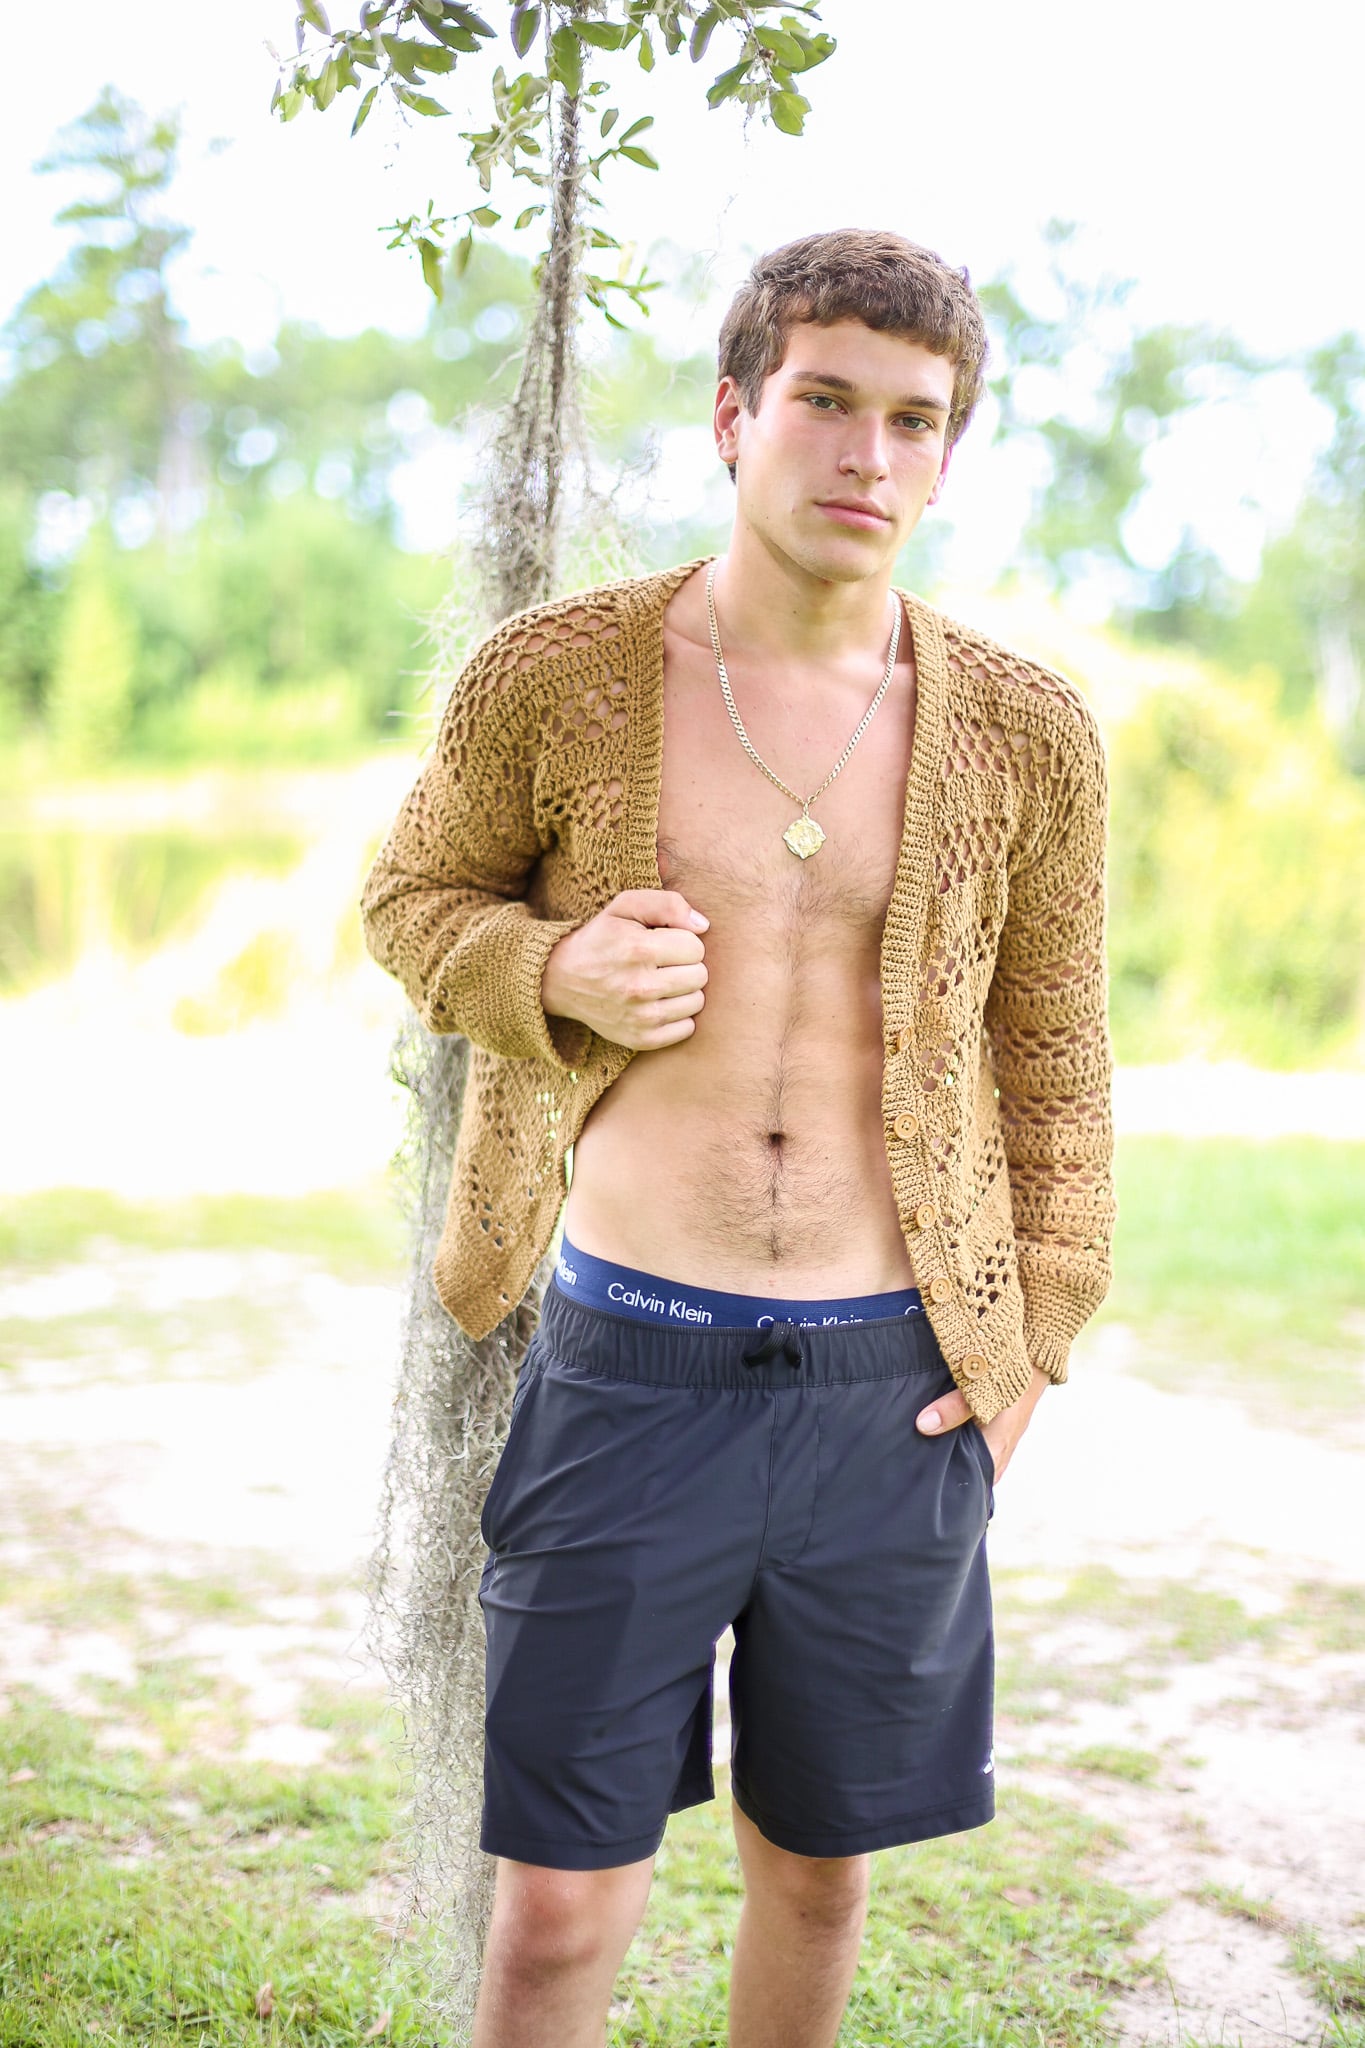
While taking photos, my brother jumped in with come convincing! After squeezing him into my cardigan it became apparent that this can be a mens cardigan too!
Just reference the size chart to pick the appropriate size and/or use the Sizing Tips below to make it fit just right!
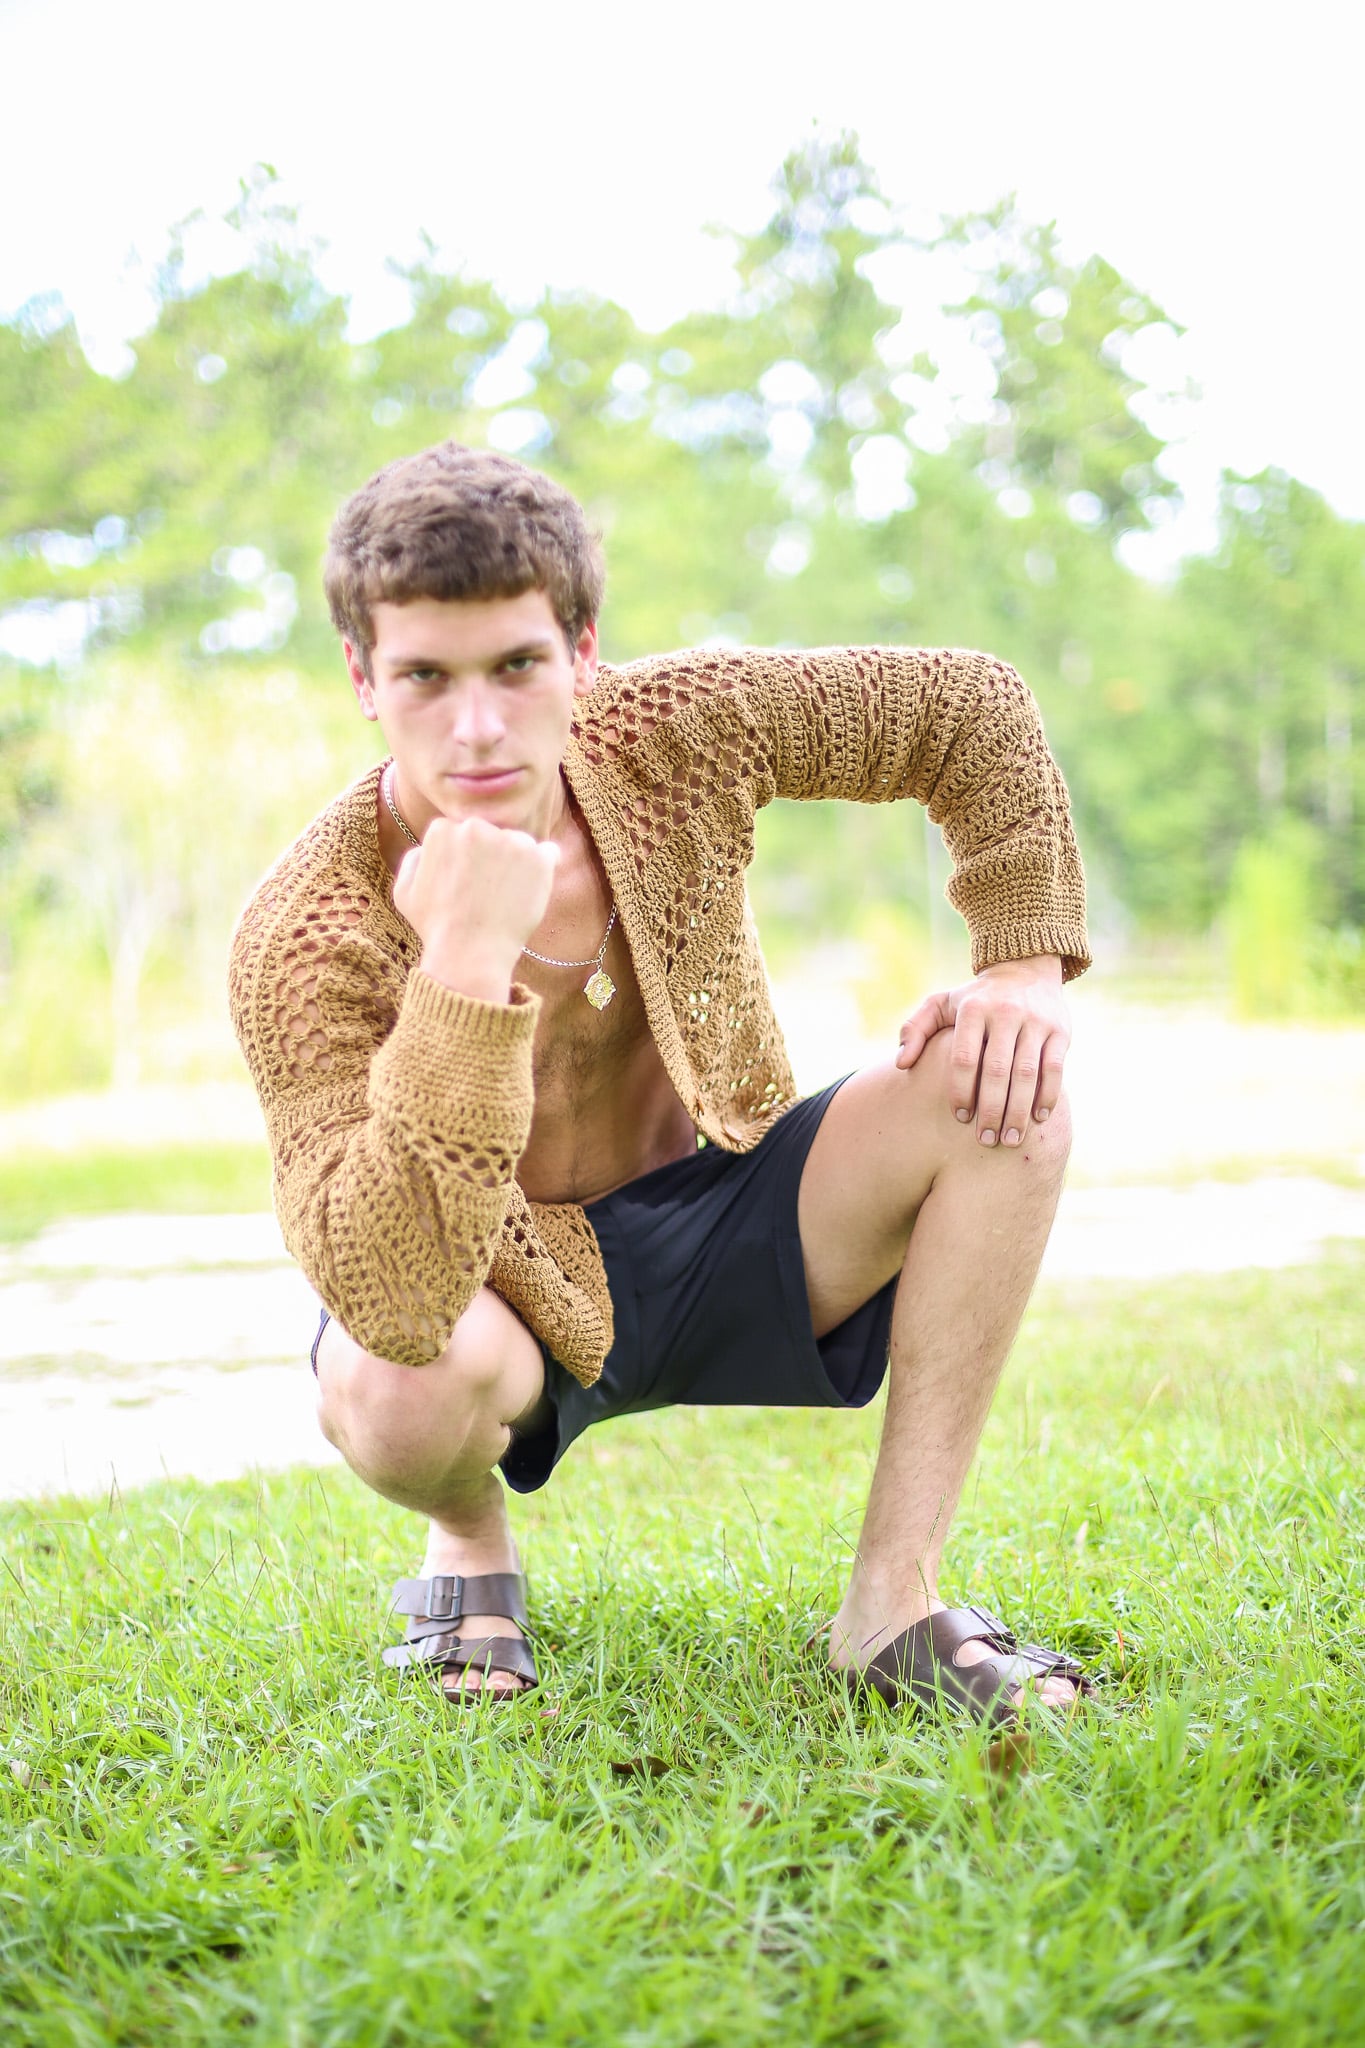
A Great Pattern You’ll LOVE to Make!
Open stitches create natural drape without the weight so they don’t feel boxy or require complicated shaping. Although on the Madeline Cardigan with Buttons I did include some decrease rows for neck shaping, but I promise it is easy!
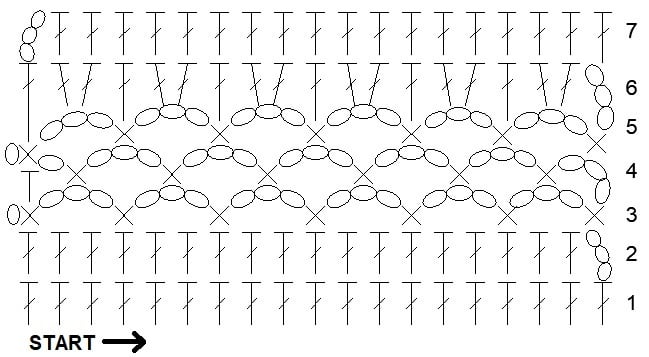
This pattern looks a bit more involved than most but the break up of double crochet rows and chain rows with single crochet make it easy to keep track of your stitches. I have included stitch count totals and chain 3 loop totals to help you avoid stitch counting panic! PLUS a Stitch Diagram!
I love getting emails and messages when one of you chooses one of my garments as your first item of crochet clothing. Most crocheters skip sweater and cardigan patterns because they look intimidating. But this open stitch design is perfect for a determined beginner.
If you make a mistake it is easy to frog and works up quickly to get back to where you were, plus the breathable fabric will hide minor inconsistencies beautifully.
Yarn Substitutes
Your yarn choice is what will make you love project. Look for a lightweight yarn that’s going to feel good on your skin and work for summer months a fall walks.
Cotton blends give you structure with breathability, bamboo allows for amazing drape, and linen creates expensive looking texture that gets better with every wash.
You will need between 775 and 1165 yards depending on the size you are making. Exact yardages for each size are included in the materials below.
I used Touch of Linen for my sample which is a CYC #4 51/49 Cotton Linen Blend. To me this is defiantly a lighter weight worsted so I think a DK weight yarn will work well too. Just check and adjust gauge as necessary.
Here are some color edits of available colors in Touch of Linen and below the photos is a list of there yarn options!
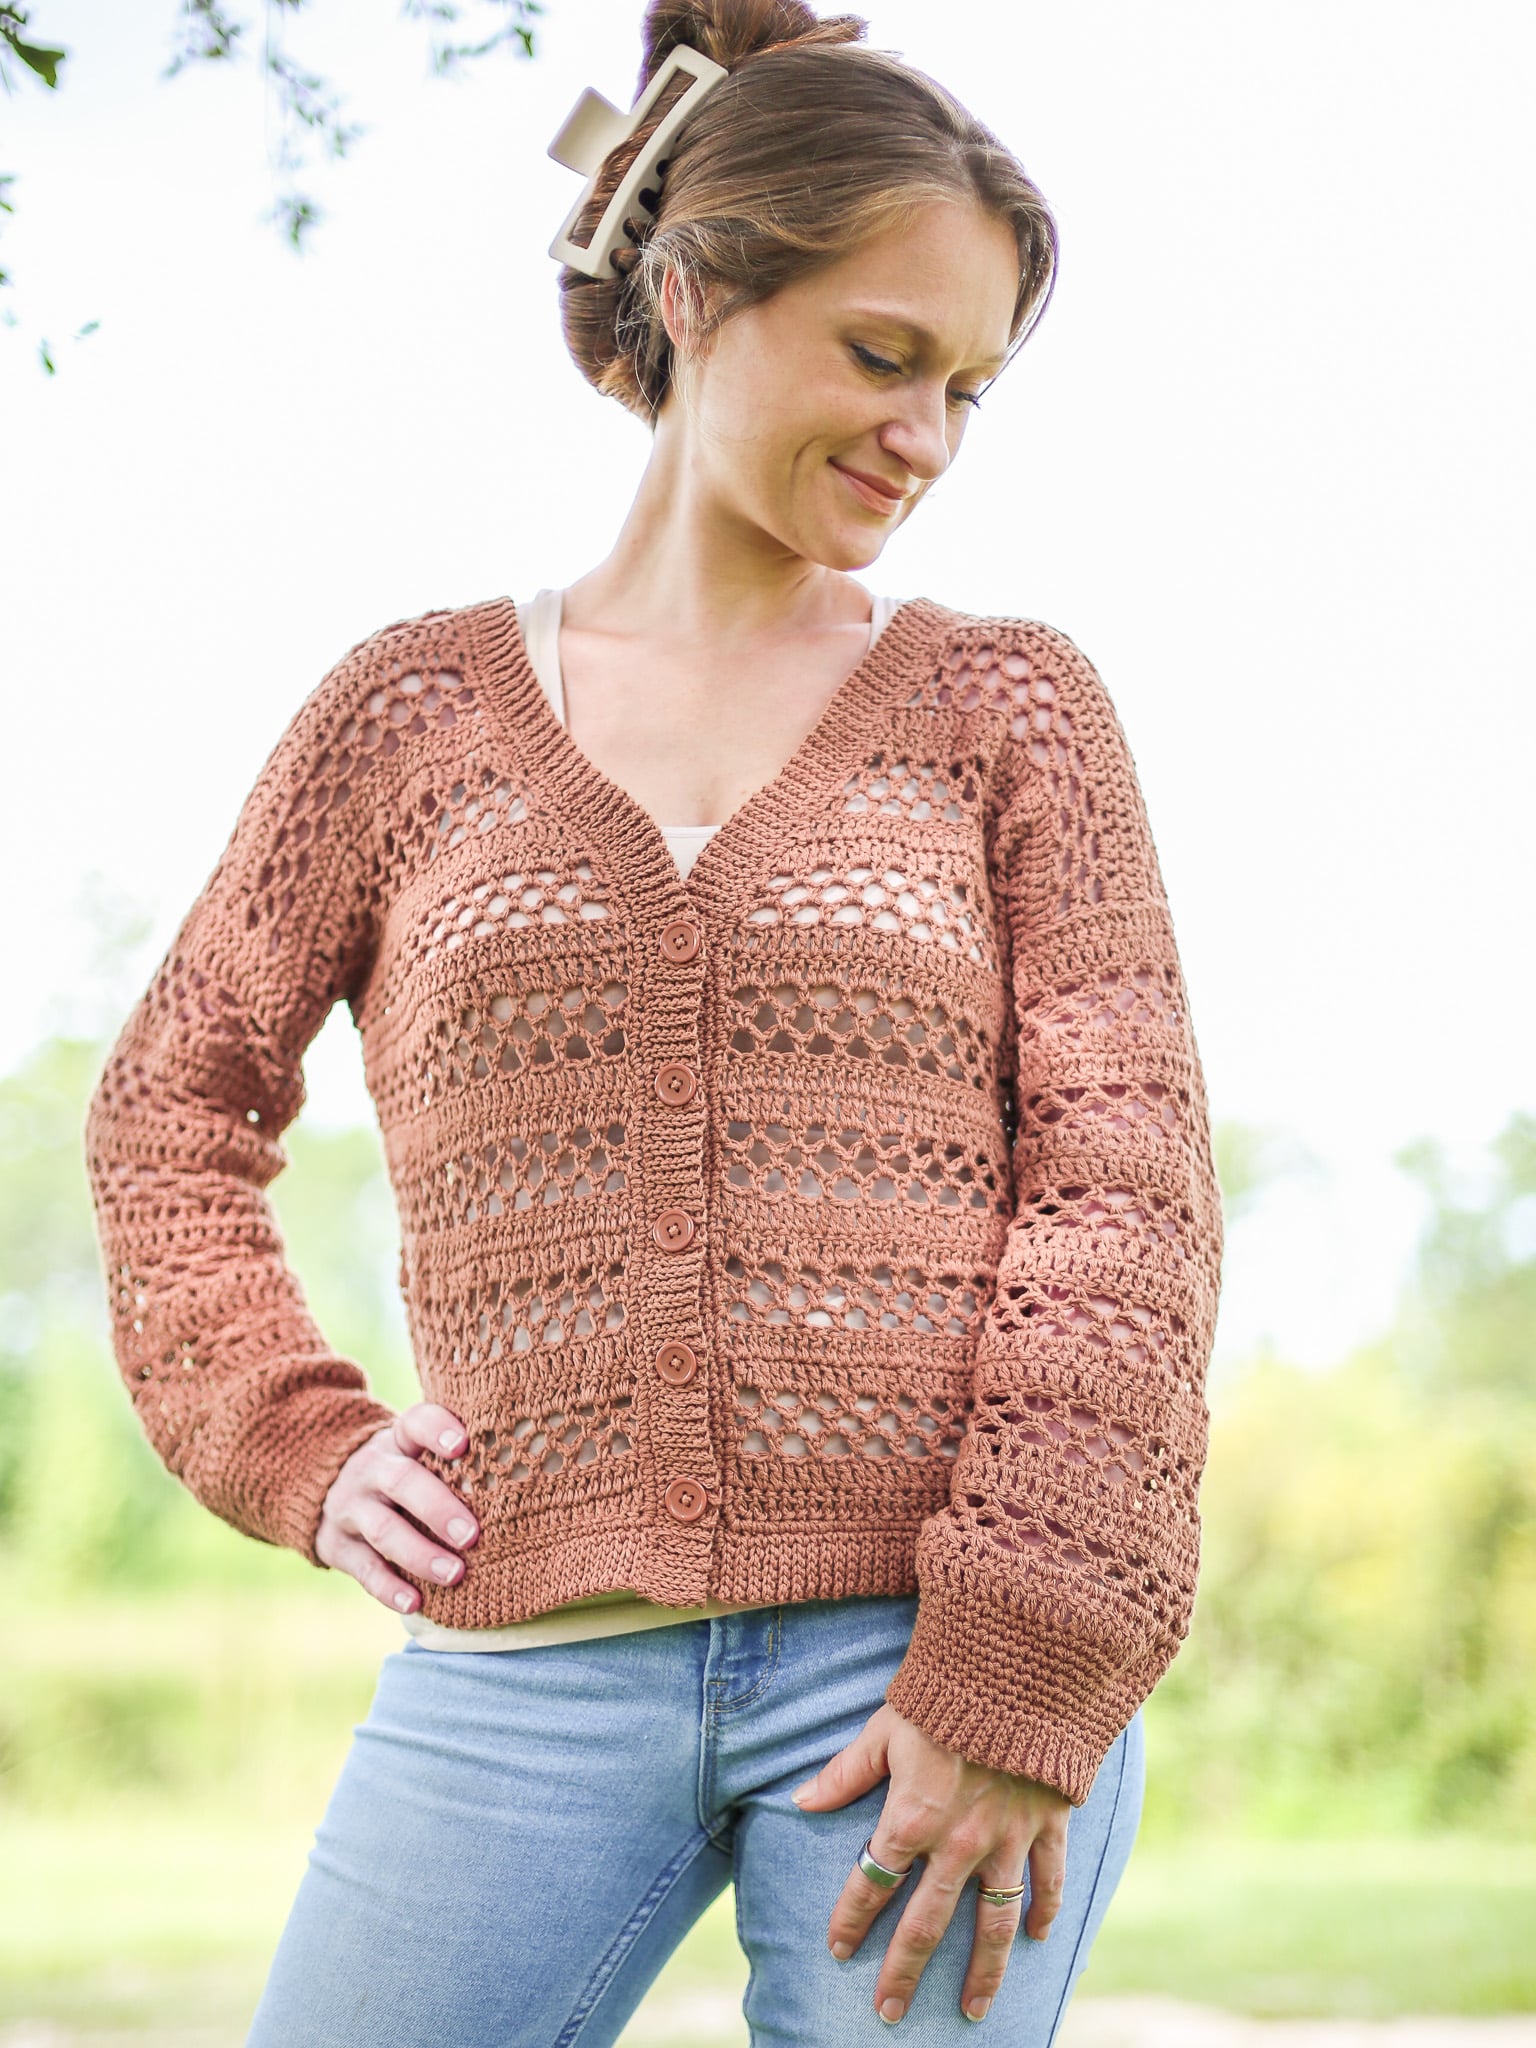
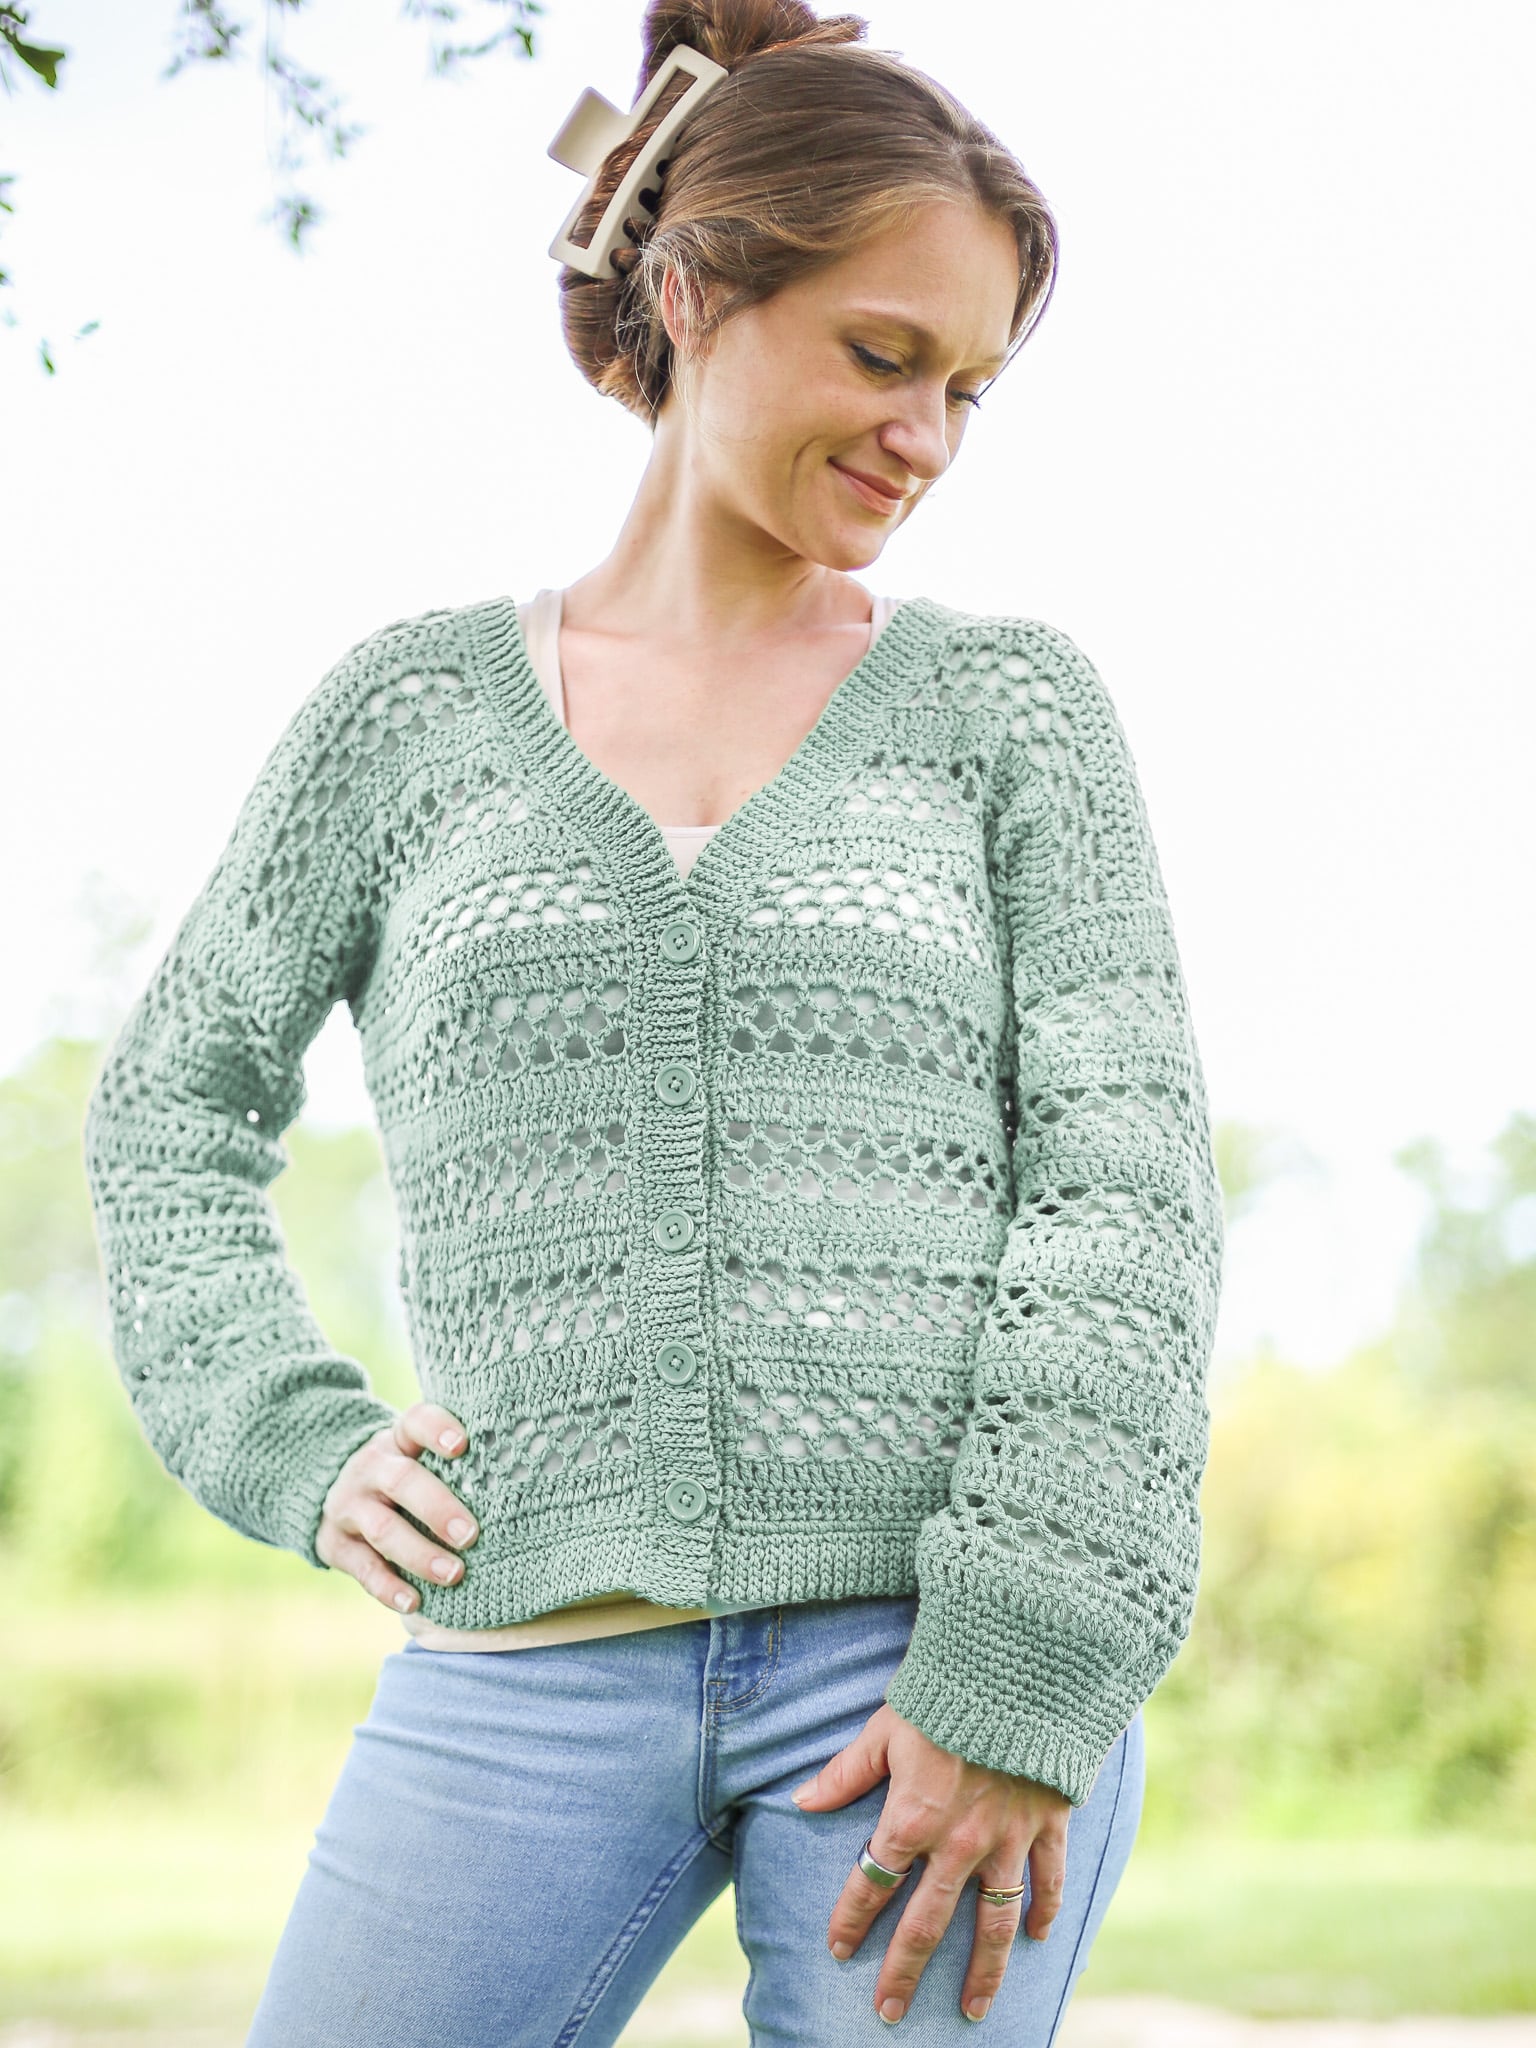
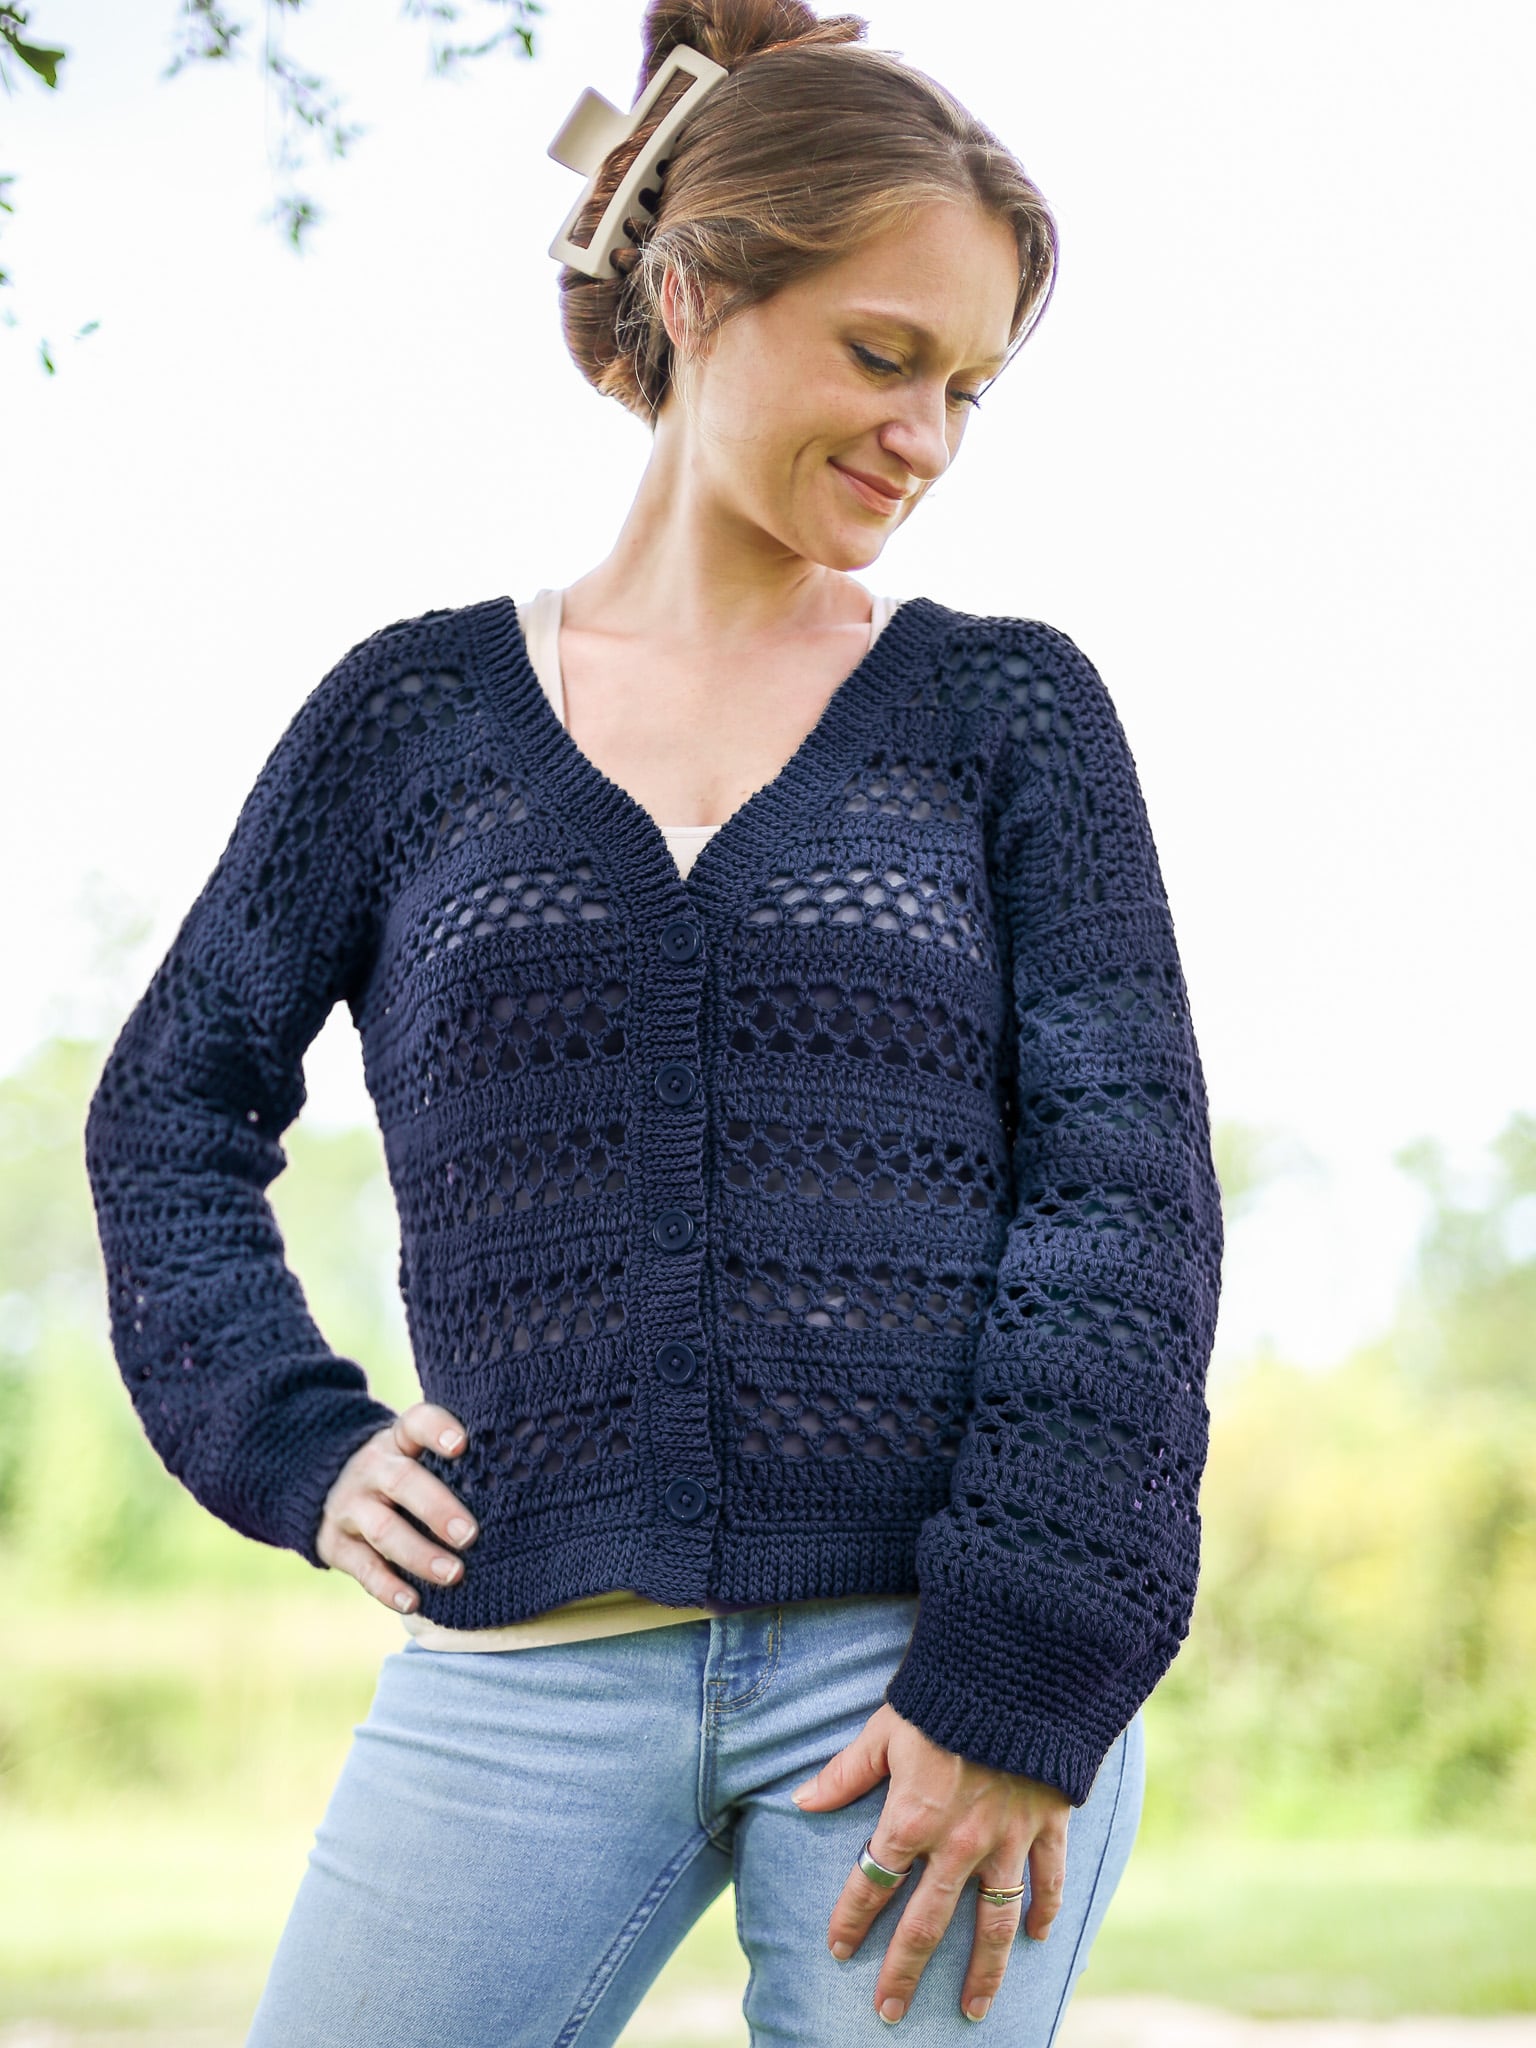
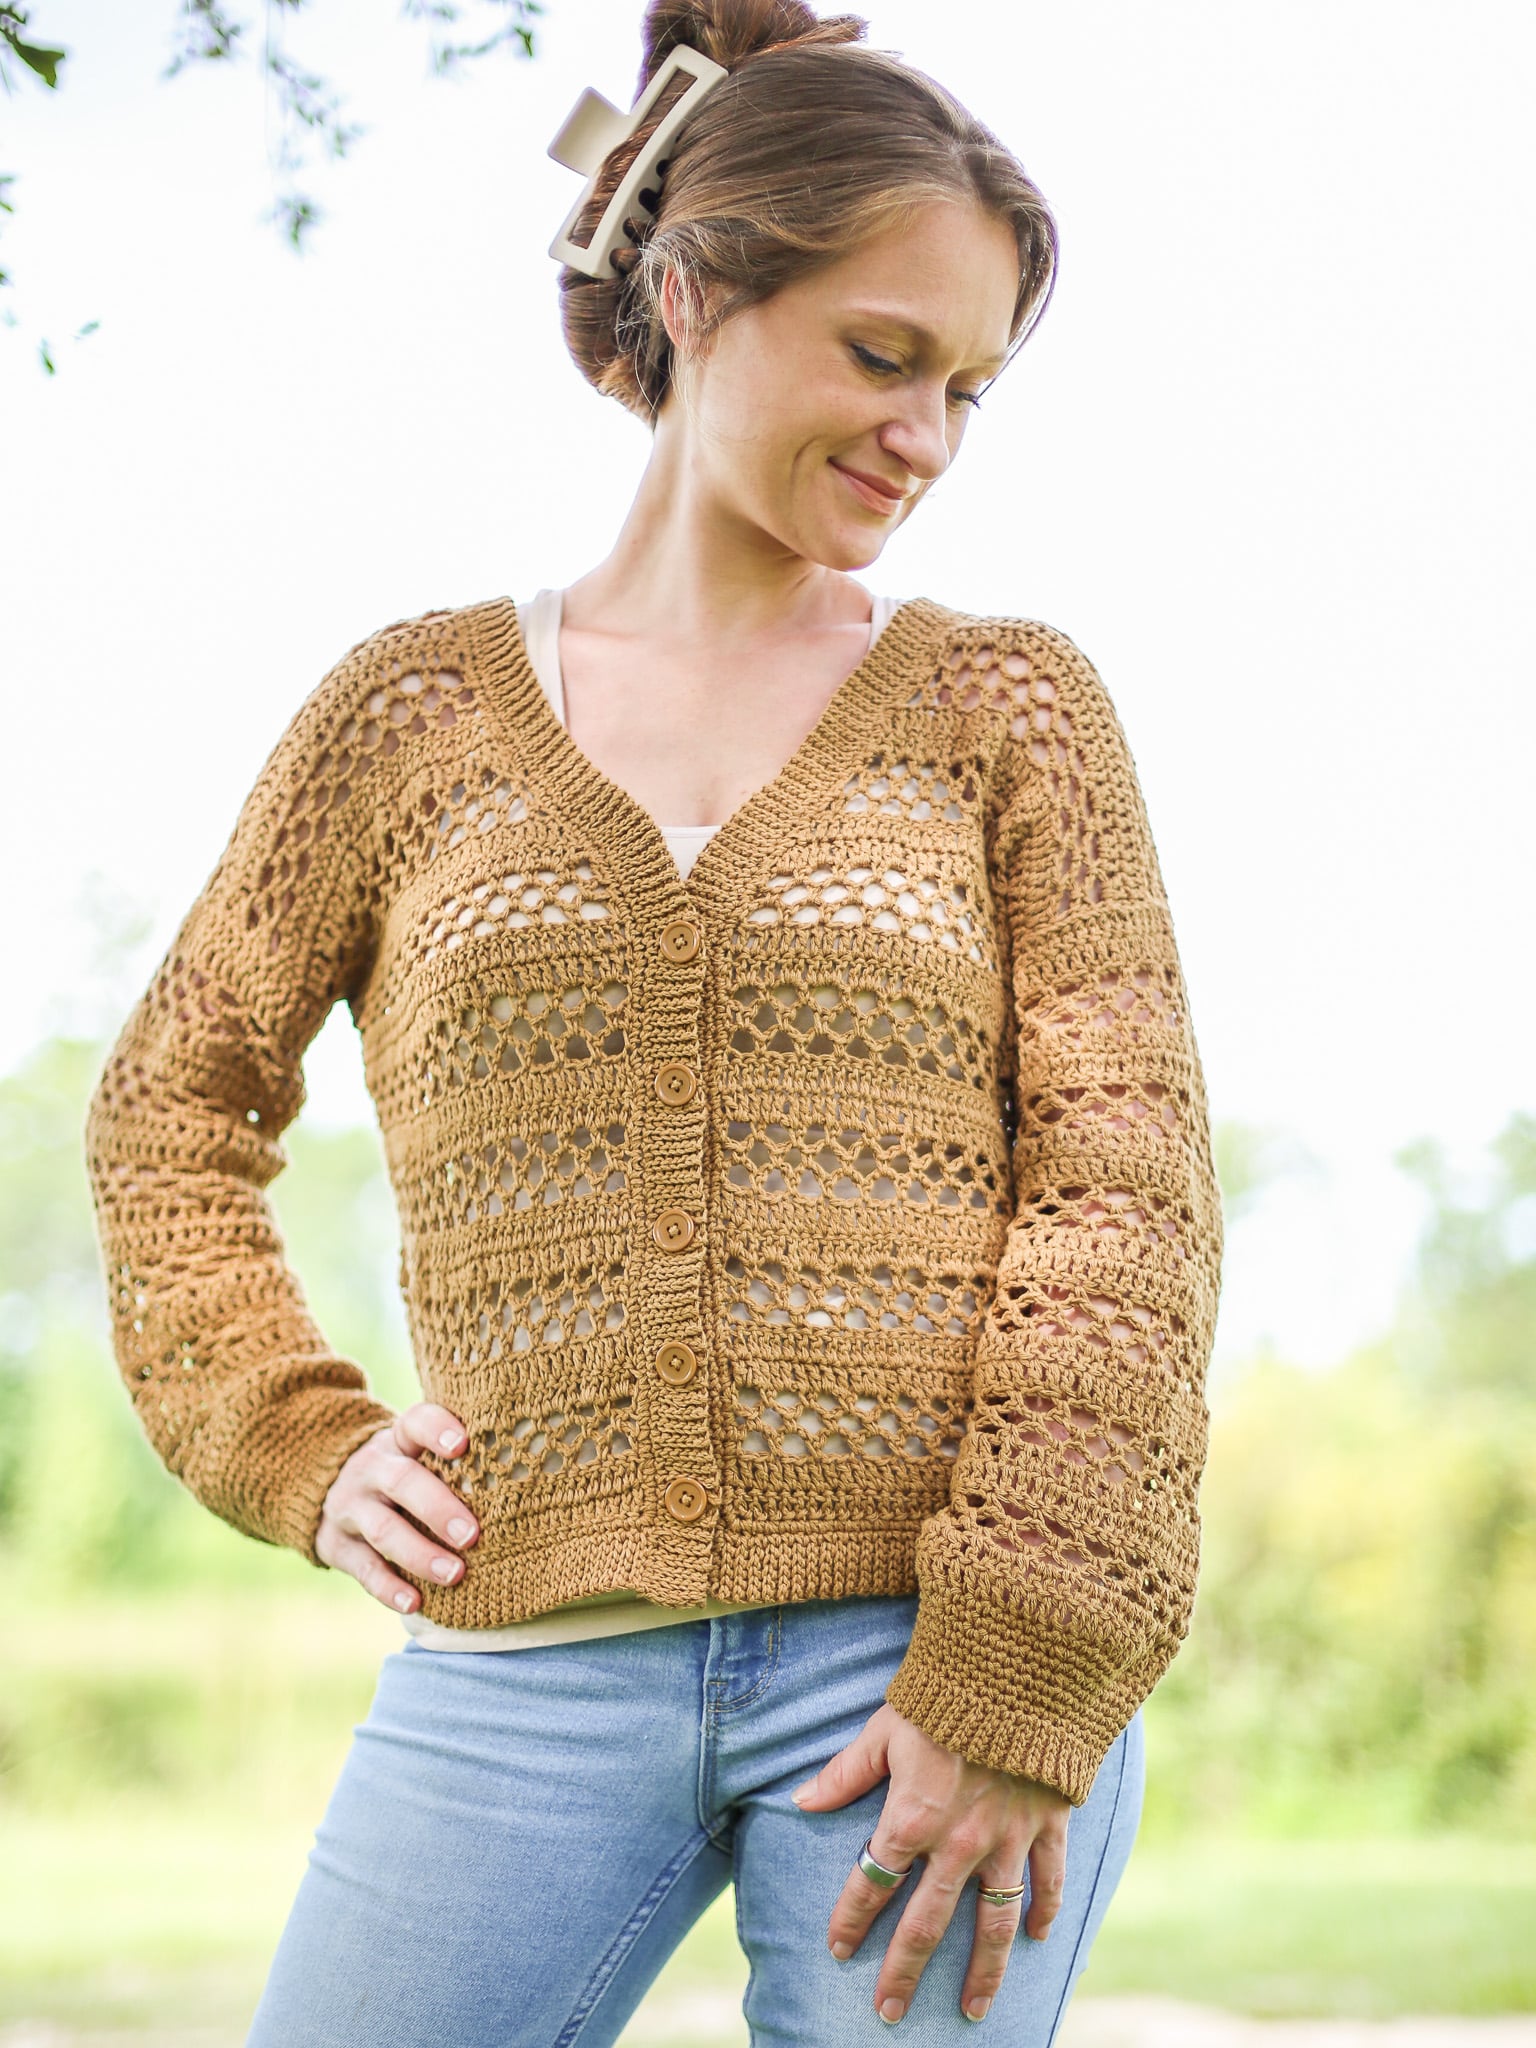
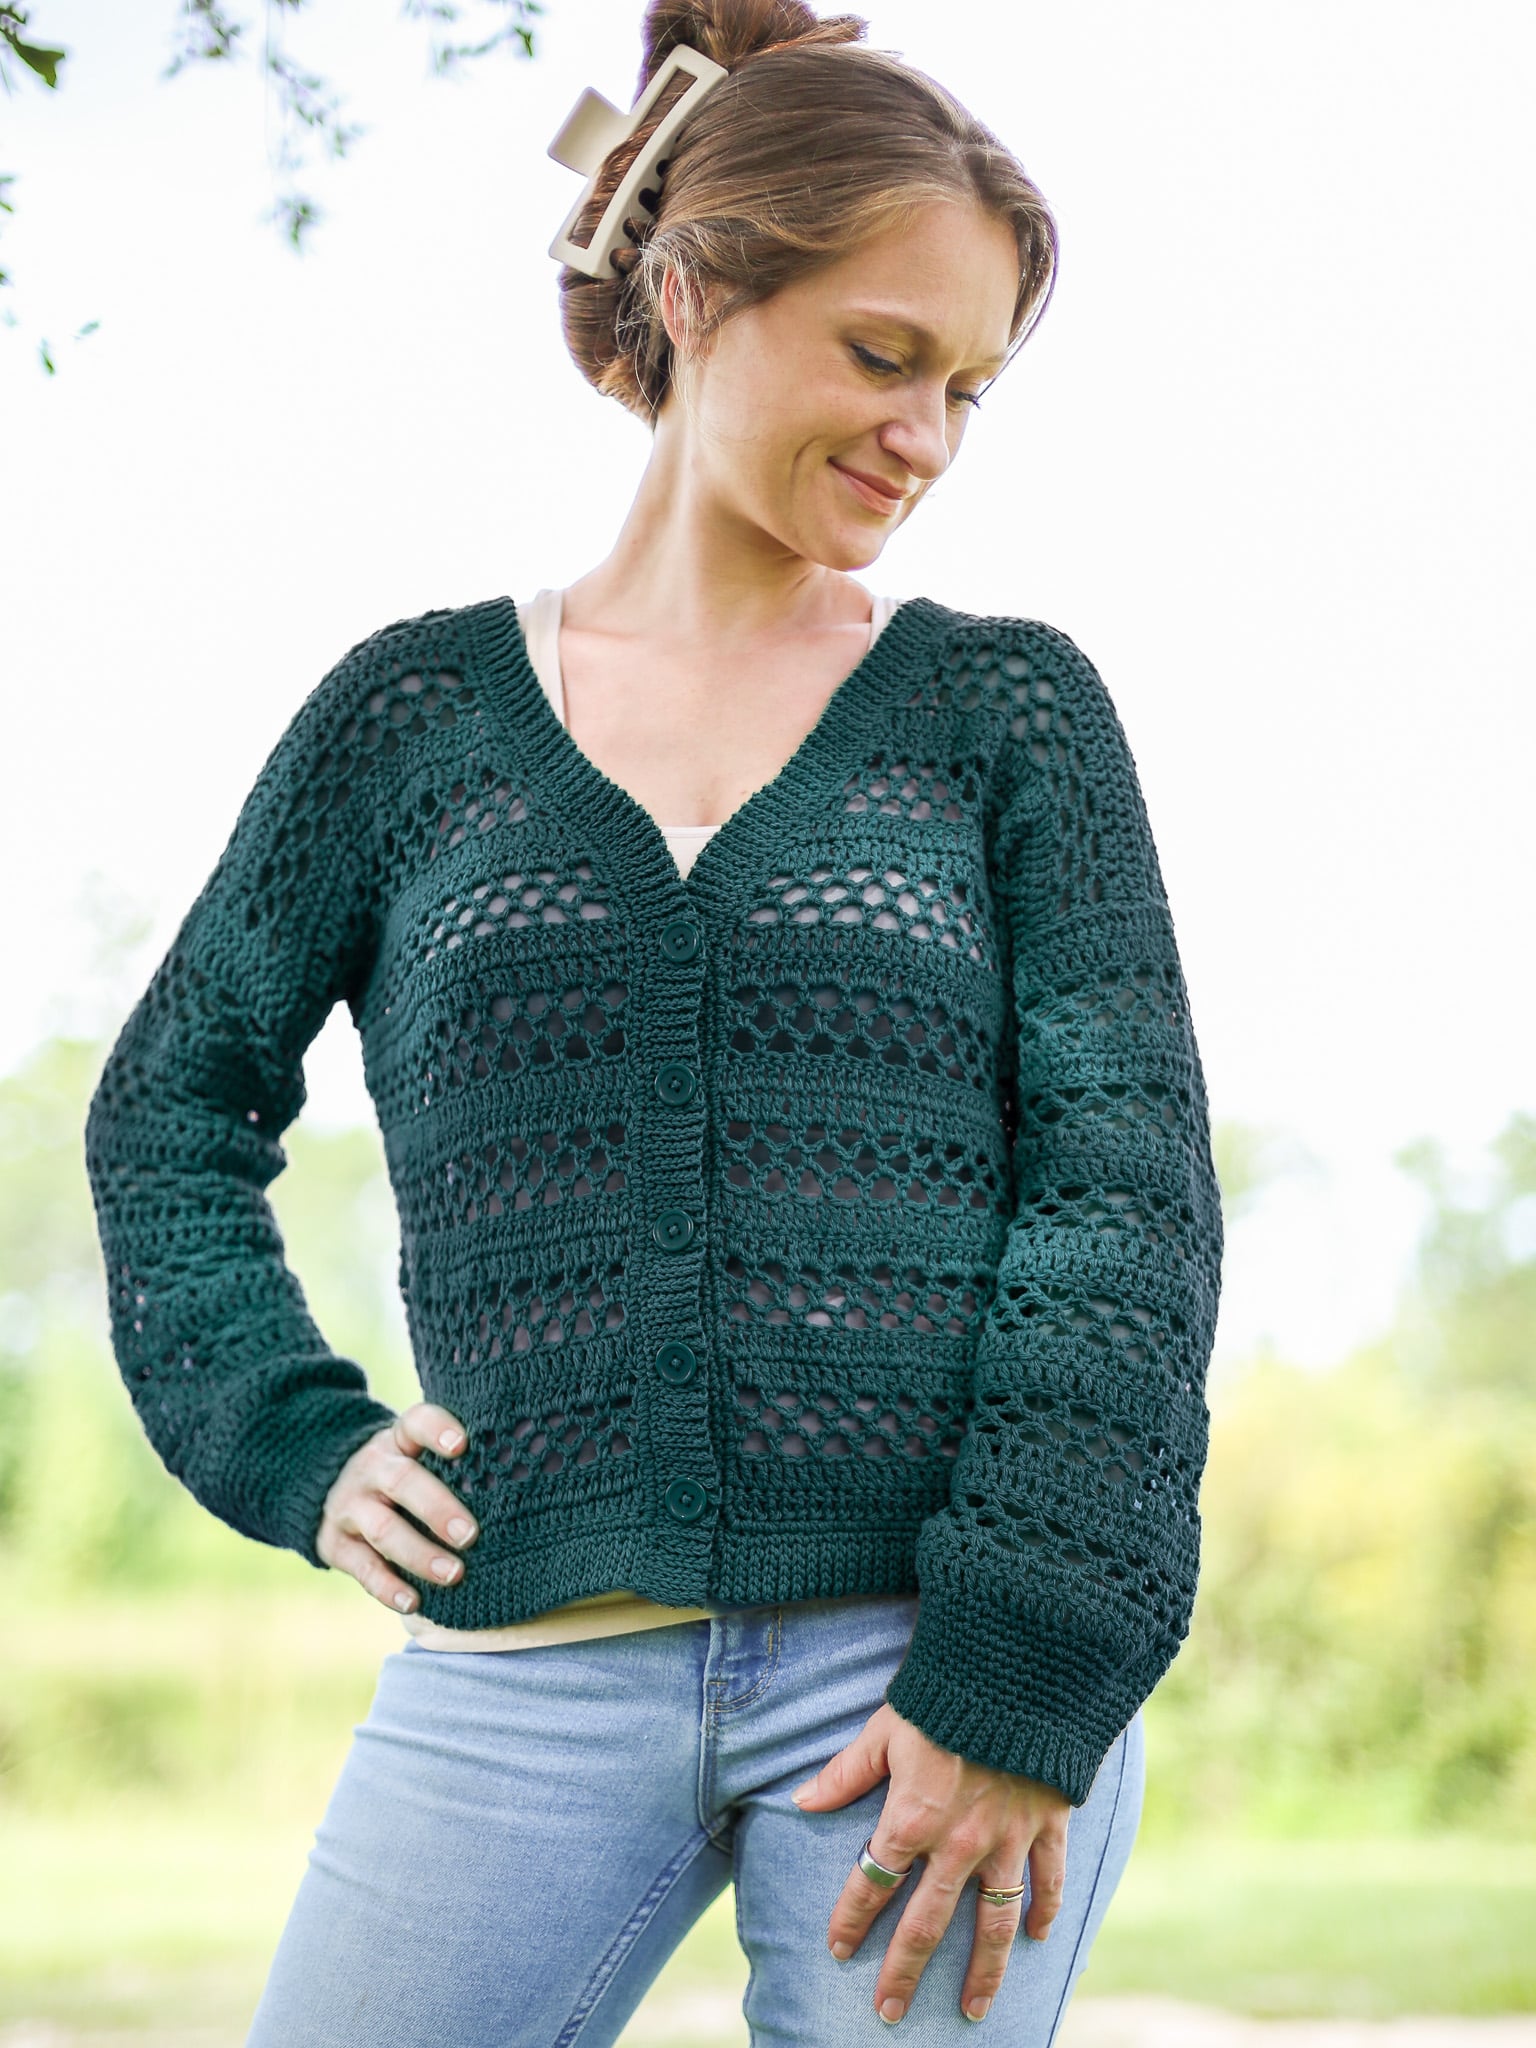
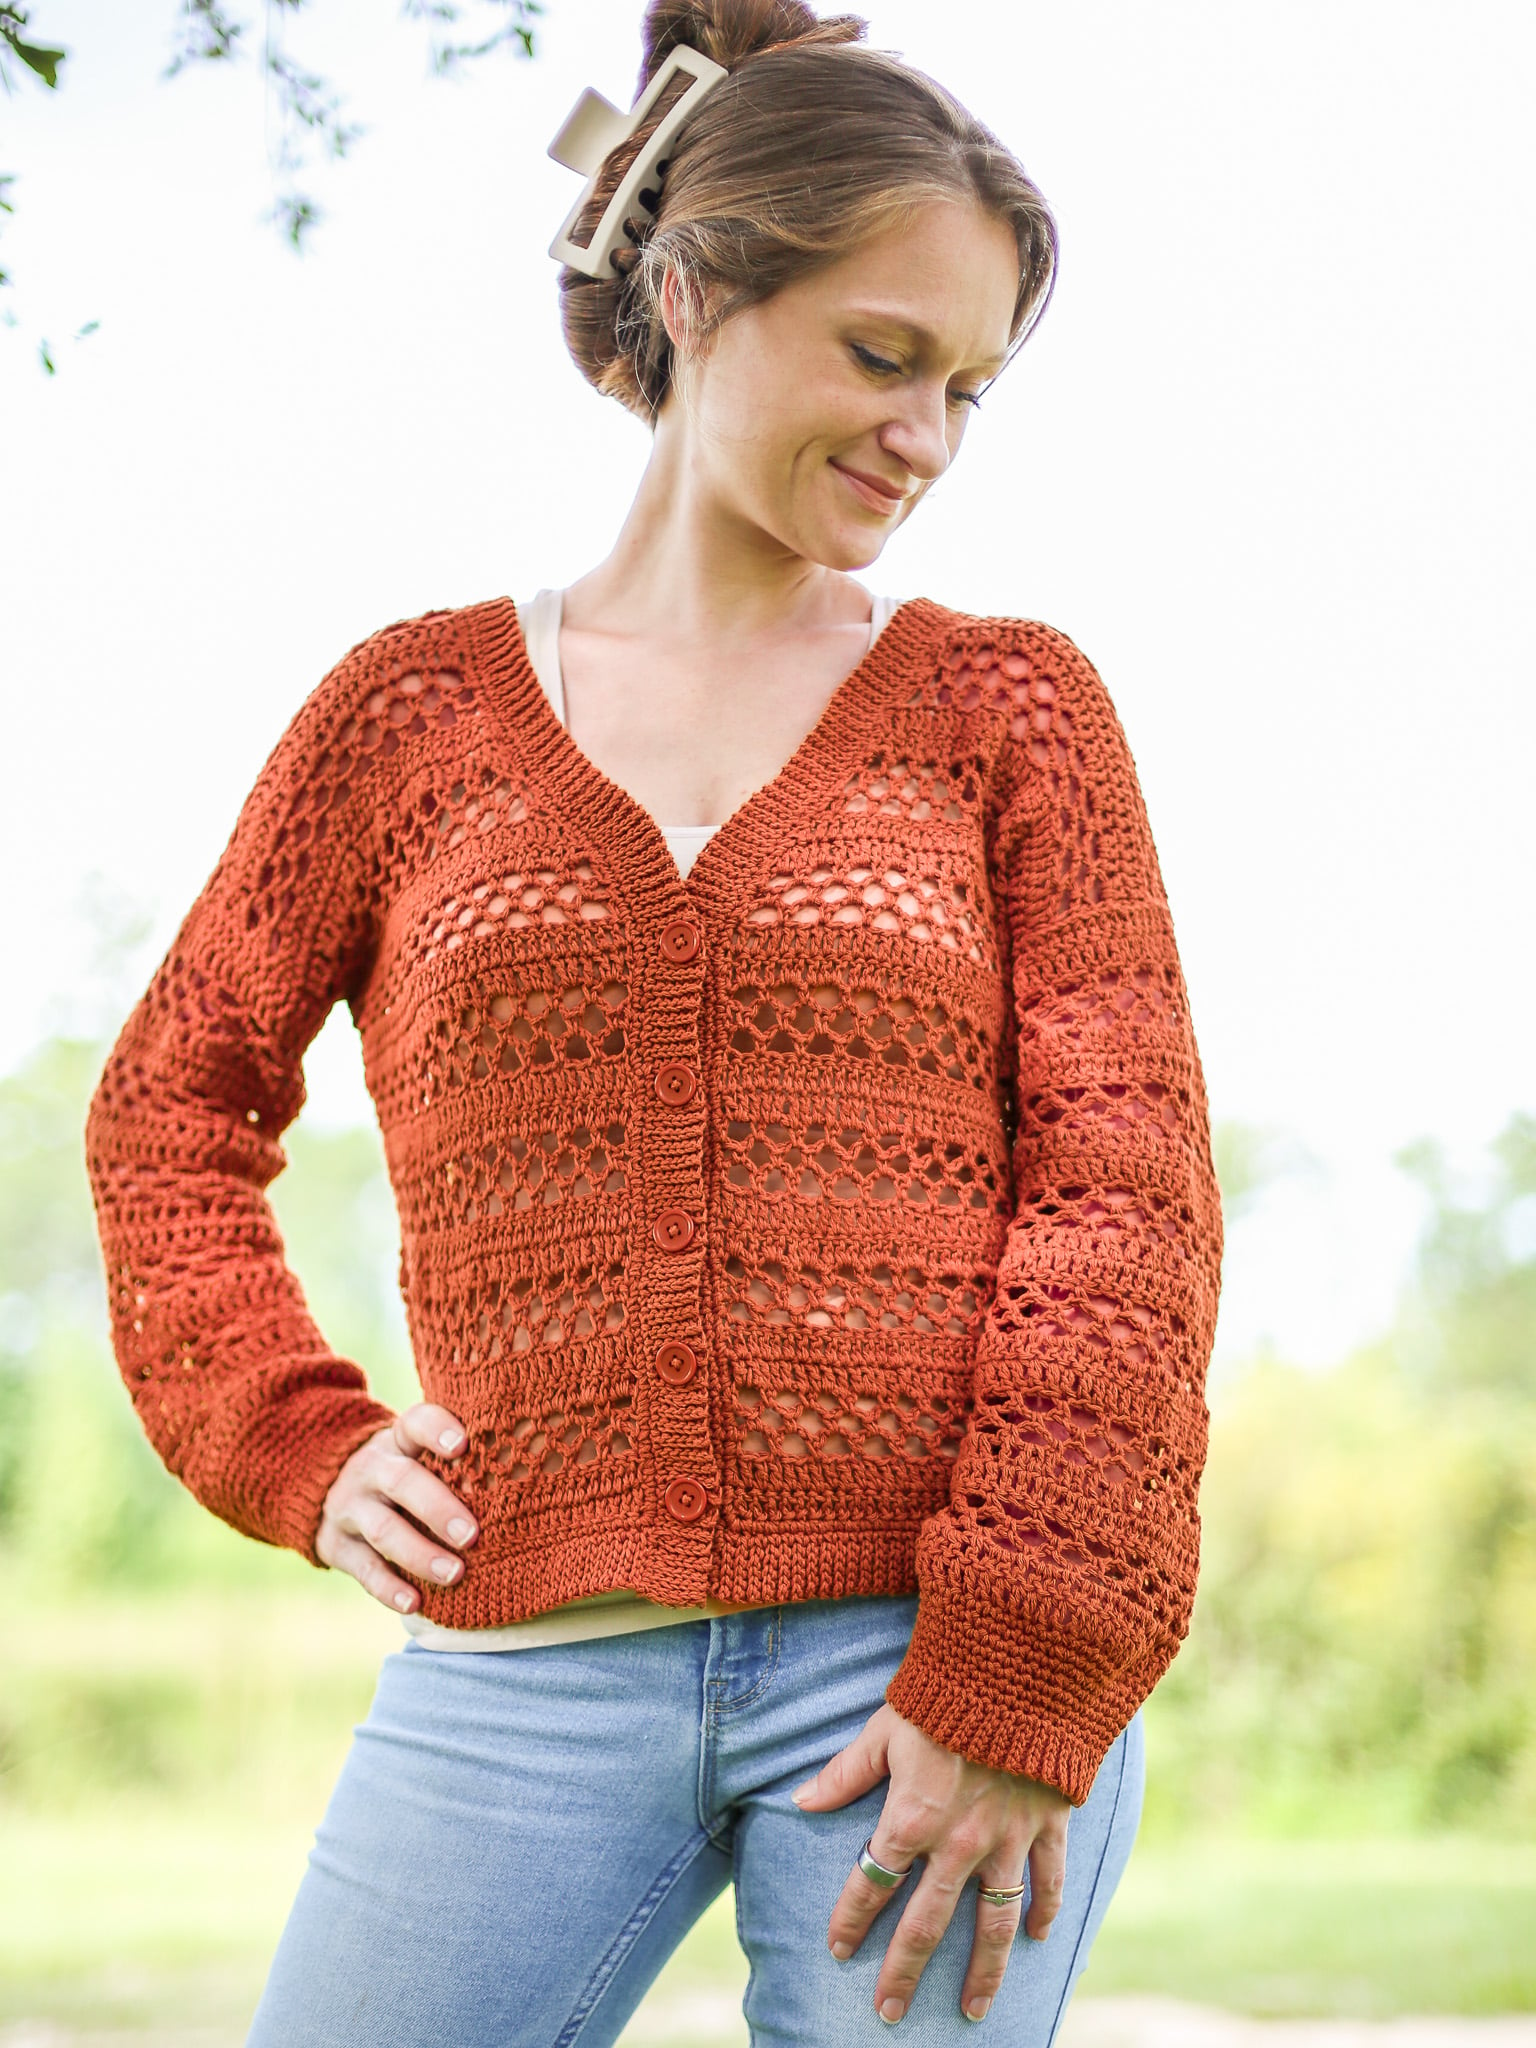
- Cotton Hemp (worsted but heavier than TOL)
- Pima Cotton (worsted, super soft)
- 24/7 DK (DK, soft, great drape)
- Cottino (DK, cotton/wool blend, perfect for any season)
Come find me on…
- Like my Facebook Page
- Join my Facebook group!
- Subscribe to my YouTube Channel for Free Crochet Tutorials
- Get PDFs on Etsy
- Get PDFs on Ravelry
- Sign Up for the Life and Yarn Newsletter for more free modern crochet patterns!
- Please Note: Some links may be affiliate links that help to support the Life + Yarn Blog with a small commission at no added cost to you, thank you!
- Copyright 2026, Life and Yarn, Brianna Iaropoli. Pattern contents are NOT to be re-shared, DIRECT LINKS ONLY to this post for the pattern.
Materials
Walking into a yarn store without knowing what you need is how we end up with sparkly acrylic bound to sit on a shelf for a decade or a new hook we don’t need…ask me how I know.
I’ve been there, but I have been more intentional about my yarn stash the past few years and I am happy to report everything is yarn I love, yay!
Ready to crochet your new favorite layering piece, something you will actually wear? Here’s what you will need!
- Size 5.00mm crochet hook
- 4 (5, 5) (6, 6) Skeins of Lion Brand Touch of Linen in Dijon [682-170H]
- Dk Weight No. 4 – 775 (890, 970) (1140, 1165) yards
- Sample uses (5) 20mm buttons. I got this set of buttons that has 15 different colors for plenty of options!
Optional Materials
- Stitch markers to track pattern repeats and rows.
- Measuring tape for checking gauge on your swatch AND throughout the pattern.
- Scissors and a yarn needle for weaving in ends.
- Blocking mats or a towel, a steamer and pins if you want crisp edges.
Gauge
- Make a Fdc of 21 and complete 13 rows.
- Unblocked : 19 sts by 12 rows in pattern repeat is 5.25 by 5.25 inches.
- Blocked : 19 sts by 12 rows in pattern repeat is 5.25 by 5.50 inches.
- Wether you are working with the recommended yarn, a yarn of similar fiber content or something different, gauge for this pattern along side your preferred blocking method is EXTREMELY important to make sure your cardigan is the right size, fits properly and you have enough yardage.
- Lion Brand’s Touch of Linen can block out significantly in this stitch row-wise, not stitch-wise meaning you will definitely gain length on your panels.
- You will need to create a swatch larger than the given gauge to measure your gauge:
Make a Fdc of 21 and complete 13 rows. - My UNBLOCKED gauge is 19 sts by 12 rows in pattern repeat is 5.25 by 5.25 inches using a 5.00 mm hook. Once BLOCKED the swatch measures 5.25 x 5.50 inches. Make sure you let your swatch dry fully before measuring.
- If your swatch is too small go UP to a larger hook, if your swatch it too big go DOWN to a smaller hook size.
- For this pattern I only did a light steam blocking to relax the fabric, open the stitches and straighten my edges since that was all that was needed to open the breathable construction of this stitch combo.
- If using a different fiber, like wool for example, you may need to change your hook and/or blocking method to reach the same Blocked/Finished Gauge.
Sizing
- XS/S (M/L, XL/2XL) (3/4XL, 5XL)

Tips for Sizing
To make different sizes, custom sizes or change your fit in any way, here are some tips for adjusting this crochet project.
- How to Adjust the Length of the Body: The length of your body is dictated by the number of rows in this pattern. To add length you will add/subtract rows to the Body Panels. Remember to add/subtract the same number of rows to both Front Panels.
- How to Adjust the Width of the Body: The width of your body is dictated by the number of stitches in this pattern. To add/subtract width you will add/subtract stitches in 3’s. Remember to add the same number of stitches to both Front Panels.
- How to Adjust the Neck Opening: To adjust the Neck Opening you will need to do more or less decrease rows. This can be tricky since you need to work back to a multiple of 3+1 for the next set of loops to work.
- How to Adjust the Sleeves: The sleeve width is dictated by the number of stitches, add or subtract stitches by 3’s. If you would like shorter or longer sleeves you will need to add or subtract rows.
- IMPORTANT NOTE: Any changes to sizing will affect your yardage, buy an extra skein if you plan to adjust sizing to avoid running out of yarn or lot color variations.
Stitch Descriptions and Abbreviations
- Chain Stitch – ch
- Stitch(es) – st(s)
- Skip – sk
- Slip Stitch – sl st
- Single Crochet – sc
- Half Double Crochet – hdc
- Double Crochet – dc
- Back Loop Only – blo
- Single Crochet 2 Together – sc2otg – Work to stitches together for a decrease.
- Stacked Single Crochet as hdc – STsc/hdc – insert your hook into the designated stitch, YO, pull up a loop, YO, pull through both loops, insert your hook into the second vertical bar on the stitch you just created, YO, pull up a loop, YO, pull though all loops.
- Stacked Single Crochet as dc – STsc/dc – insert your hook into the designated stitch, YO, pull up a loop, YO, pull through both loops, *insert your hook into the second vertical bar on the stitch you just created, YO, pull up a loop, YO, pull though all loops, repeat from * one more time.
- Stacked Single Crochet as dc2tog – STsc/dc2og – insert your hook into the designated stitch, YO, pull up a loop, insert your hook into the next st, YO, pull up a loop, YO, pull through all loops, *insert your hook into the second and third vertical bar on the stitch you just created, YO, pull up a loop, YO, pull though all loops, repeat from * one more time using only the second vertical bar.
Pattern Notes
- EASE: This pattern is designed to be slightly oversized and fit a range of sizes in each size grouping. Choose the size that will give you the best fit and read more about customizing the fit in “Tips for Sizing” below.
- Measurements in Size Chart are Finished Garment Measurements, Bust is full circumference.
- * Designates a repeat.
- “sc 1” means to single crochet in the next stitch.
- “sc 2” means to single crochet in each of the next 2 stitches.
- “2 sc” means to single crochet twice in the next stitch to create an increase.
- Pattern is worked in a Multiple of 3 + 1 when using a Foundation Double Crochet Stitch.
Madeline Lightweight Cardigan Pattern
Back Panel
Row 1 – Fdc 64 (79, 91) (106, 112) stitches.
Row 2 – Turn, STsc/dc, dc in every stitch across.
[64 (79, 91) (106, 112) total stitches]
Row 3 – Turn, ch 1, sc in the first dc, *ch 3, sk next 2-dc, sc in next dc, repeat from * to end working your last sc in STsc/dc-st.
[21 (26, 30) (35, 37) ch-3 loops]
Row 4 – Turn, STsc/hdc, ch 1, sc in next ch-3 loop, *ch 3, sc in next ch-3 loop, repeat from * across all ch-3 loops, ch 1, hdc in last sc-st.
[20 (25, 29) (34, 36) ch-3 loops and 1 ch-1 sp]
Row 5 – Turn, ch 1, sc in hdc, *ch 3, sc in next ch-3 loop, repeat from * across all ch-3 loops, ch 3, sc in STsc/hdc-st.
[21 (26, 30) (35, 37) ch-3 loops]
Row 6 – Turn, STsc/dc, *2 dc in ch-3 loop, 1 dc in next sc, repeat from * to end. [64 (79, 91) (106, 112) total stitches]
Row 7 – Turn, STsc/dc, dc in every stitch across working your last sc in STsc/dc-st. [64 (79, 91) (106, 112) total stitches]
Rows 8 to 31 – Rep. Rows 3-7 ending on a Row 6 repeat, finish off.
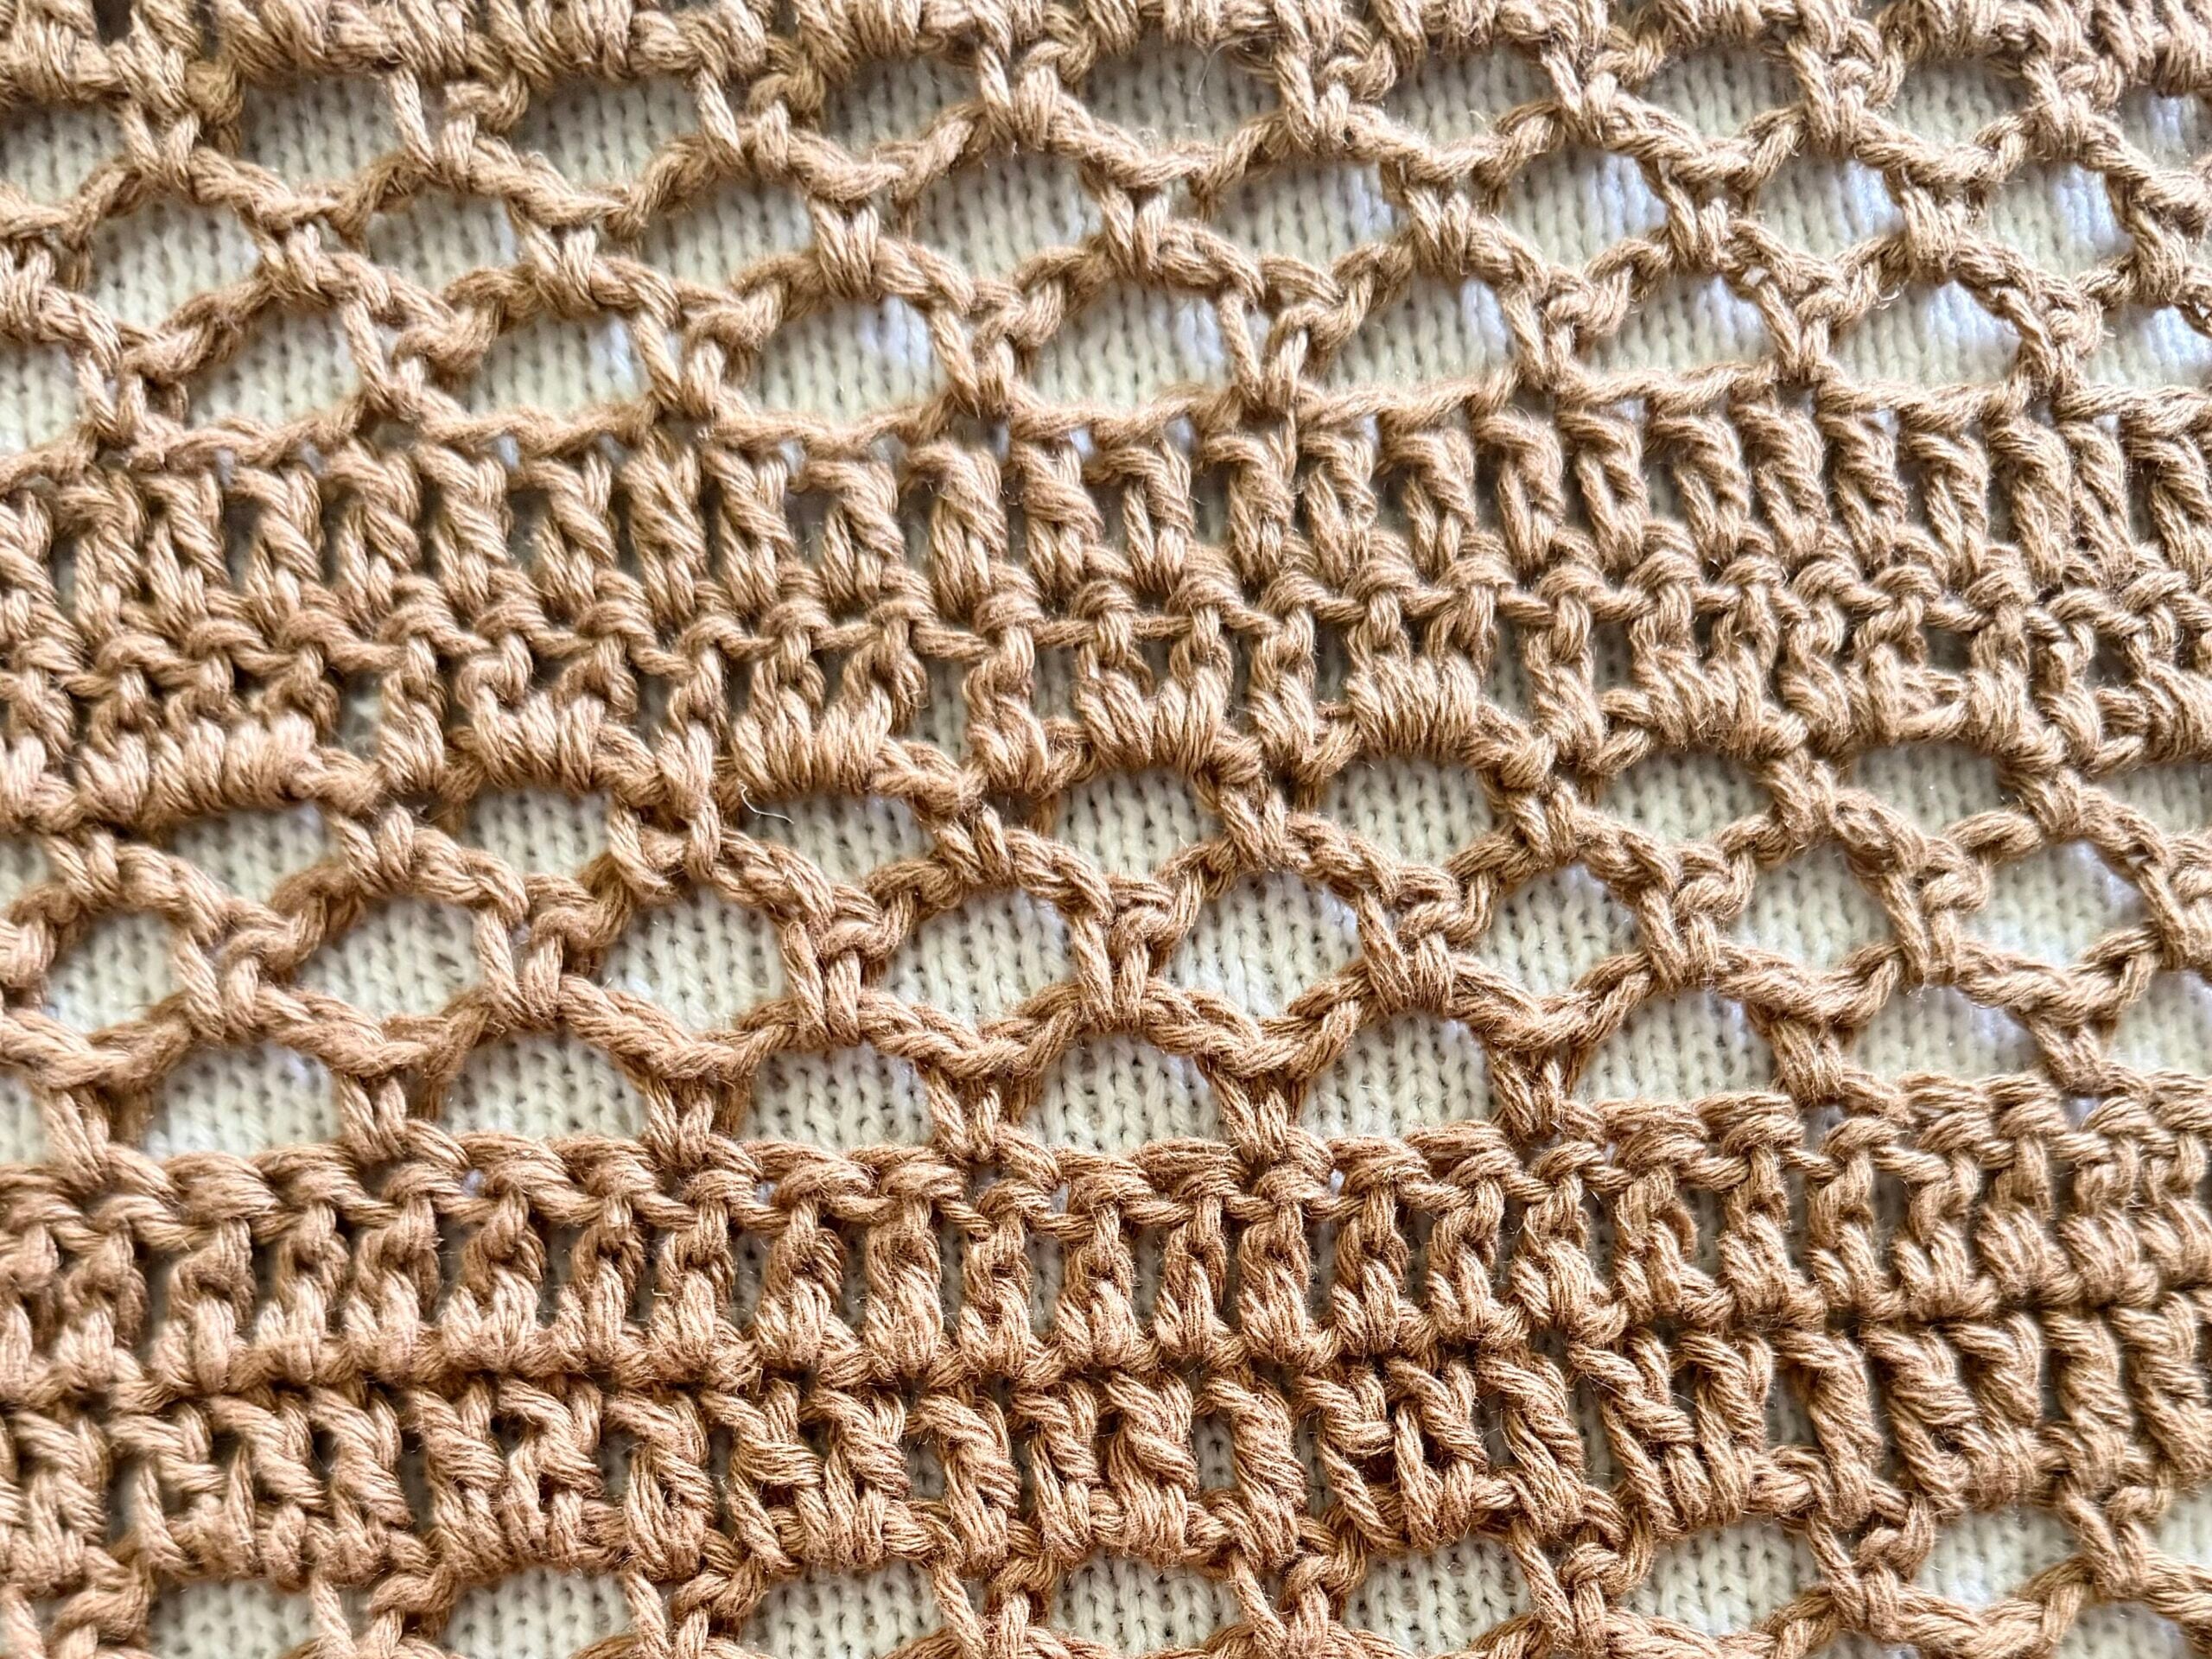
Front Panels – Make Two (2)
Note: You will be making two (2) Front Panels, there is no need to create a Right or a Left Panel since there is no wrong side on this pattern. You will simply flip one panel to create a “Right” and a “Left”.
Row 1 – Fdc 31 (40, 46) (52, 55) stitches.
Row 2 – Turn, STsc/dc, dc in every stitch across. [31 (40, 46) (52, 55) total stitches]
Row 3 – Turn, ch 1, sc in the first dc, *ch 3, sk next 2-dc, sc in next dc, repeat from * to end working your last sc in STsc/dc-st.
[10 (13, 15) (17, 18) ch-3 loops]
Row 4 – Turn, STsc/hdc, ch 1, sc in next ch-3 loop, *ch 3, sc in next ch-3 loop, repeat from * to last ch-3 loop, ch 1, hdc in last sc-st.
[9 (12, 14) (16, 17) ch-3 loops and 1 ch-1 sp]
Row 5 – Turn, ch 1, sc in hdc, sk ch-1 sp, *ch 3, sc in next ch-3 loop, repeat from * to last ch-3 loop, ch 3, sc in STsc/hdc-st.
[10 (13, 15) (17, 18) ch-3 loops]
Row 6 – Turn, STsc/dc, *2 dc in ch-3 loop, 1 dc in next sc, repeat from * to end.
[31 (40, 46) (52, 55) total stitches]
Row 7 – Turn, STsc/dc, dc in every stitch across working your last sc in STsc/dc-st.
[31 (40, 46) (52, 55) total stitches]
Row 8 – 25 – Rep. Rows 3-7 ending on a repeat for Row 5 before beginning the decrease rows.
Next: Move onto “Decrease Rows to Create Neck” section below.
Decrease Rows to Create Neck
Decrease Row 1 (Modified Row 6) – Turn, STsc/dc, *2 dc in ch-3 loop, 1 dc in next sc, repeat from * to next to last ch-3 loop leaving the last (sc, ch-3 loop, sc) unworked for the decrease stitches, dc2tog in next sc and ch-3 loop, dc2tog again in same ch-3 loop and last sc-st. [29 (38, 44) (50, 53) total stitches]
Decrease Row 2 (Modified Row 7) – Turn, STsc/dc2tog, dc in every stitch across.
[28 (37, 43) (49, 52) total stitches]
Decrease Row 3 (Modified Row 3) – Turn, ch 1, sc in the first dc, *ch 3, sk next 2-dc, sc in next dc, repeat from * until 3 sts remain, ch 1, sk next 2-dc, hdc in STsc/dc2tog.
[8 (11, 13) (15, 16) ch-3 loops]
Decrease Row 4 (Modified Row 4) – Turn, STsc/hdc, ch 1, sk ch-1 sp, sc in next ch-3 loop, *ch 3, sc in next ch-3 loop, repeat from * to last ch-3 loop, ch 1, hdc in last sc-st.
[7 (10, 12) (14, 15) ch-3 loops] and (2) ch-1 sps]
Decrease Row 5 (Modified Row 5) – Turn, ch 1, sc in hdc, sk ch-1 sp, *ch 3, sc in next ch-3 loop, repeat from * to last ch-3 loop, ch 3, sc in ch-1 sp. [8 (11, 13) (15, 16) ch-3 loops]
Decrease Row 6 (Modified Row 6) – Turn, STsc/dc2tog in sc and ch-3 loop, dc2tog in same ch-3 loop and next sc, *2 dc in ch-3 loop, 1 dc in next sc, repeat from * to end. [23 (32, 38) (44, 47) total stitches]
Decrease Row 7 (Modified Row 7) – Turn, STsc/dc, dc across until 2 sts remain, dc2tog. [22 (31, 37, 43, 46) total stitches]
Decrease Row 8 (Modified Row 3) – Turn, ch 1, sc in the first dc, ch 1, sk 2-dc, sc in next dc, *ch 3, sk next 2-dc, sc in next dc, repeat from * to end working your last sc in STsc/dc-st. [6 (9, 11) (13, 14) ch-3 loops and (1) ch-1 sp]
Decrease Row 9 (Modified Row 4) – Turn, STsc/hdc, ch 1, sc in next ch-3 loop, *ch 3, sc in next ch-3 loop, repeat from * to last ch-3 loop, ch 1, sk ch-1 sp, hdc in last sc-st. [6 (9, 11) (13, 14) ch-3 loops and (1) ch-1 sps]
Decrease Row 10 (Modified Row 5) – Turn, ch 1, sc in hdc, sk ch-1 sp, *ch 3, sc in next ch-3 loop, repeat from * to last ch-3 loop, ch 3, sc in STsc/hdc-st. [6 (9, 11) (13, 14) ch-3 loops]
Next: Move onto “Shoulder Section” below.
Shoulder Section
Next Row – Turn, STsc/dc, *2 dc in ch-3 loop, 1 dc in next sc, repeat from * to end. [19 (28, 34) (40, 43) total stitches]
Next Row – Turn, STsc/dc, dc in every stitch across working your last sc in STsc/dc-st. [19 (28, 37) (40, 43) total stitches]
Next: Repeat Rows 3 to 7 once more from beginning of “Front Panels – Make Two” instructions only, stitch counts will be less due to previous decreases.
Then: Repeat Rows 3 to 6 once more and finish off.
Row 1 – Fdc 43 (46, 58) (67, 67) stitches.
Row 2 – Turn, STsc/dc, dc in every stitch across. [43 (46, 58) (67, 67) total stitches]
Row 3 – Turn, ch 1, sc in the first dc, *ch 3, sk next 2-dc, sc in next dc, repeat from * to end working your last sc in STsc/dc-st. [14 (15, 19) (22, 22) ch-3 loops]
Row 4 – Turn, STsc/hdc, ch 1, sc in next ch-3 loop, *ch 3, sc in next ch-3 loop, repeat from * to last ch-3 loop, ch 1, hdc in last sc-st. [13 (14, 18) (21, 21) ch-3 loops and 1 ch-1 sp]
Row 5 – Turn, ch 1, sc in hdc, *ch 3, sc in next ch-3 loop, repeat from * to last ch-3 loop, ch 3, sc in STsc/hdc-st. [14 (15, 19) (22, 22) ch-3 loops]
Row 6 – Turn, STsc/dc, *2 dc in ch-3 loop, 1 dc in next sc, repeat from * to end. [43 (46, 58) (67, 67) total stitches]
Row 7 – Turn, STsc/dc, dc in every stitch across working your last sc in STsc/dc-st. [43 (46, 58) (67, 67) total stitches]
Rows 8 to 37 (37, 22) (27, 27) – Rep. Rows 3-7, finish off.
Assembly
- Steam block all panels, this stitch opens up more row-wise than stitch-wise and you want to make sure you have the full length of the panels so that the body side seams and arm seams to do not create any pinching.
- Once steamed and dry, seam your Front Panels to your Back Panels working from the shoulders into the neck to keep your stitches properly aligned.
- Working from the waist up, seam your Front and Back Panels together for the body of your cardigan. Be sure to leave the correct opening to attach your arms.
- Seam your Arm Panels closed using the row ends.
- Seam your arms to the body keeping the arm seam aligned with the armpit on the cardigan.
Body Trim
Next: Now that you have the bulk of your Cardigan assembled you will place one round of single crochet around the entire body of the cardigan with the Right Side facing you as follows:
Next: Begin in a Fdc of one of the Body Panels and single crochet in every stitch around, then place 3 sc in the last stitch to turn and work up the side of the cardigan where the buttons and neck trim will be using the row ends.
Next: Work across the back of the neck in the final row of double crochets, then work back down in the row ends on the opposite side of the cardigan, place 3 sc in the final stitch and sl st to join to your first single crochet made for the trim, finish off.
Back Neck Trim
Note: Here we are creating a filler section of ribbing across the back of the neck that you will work to when creating the ribbing on the front of the cardigan.
Next: From the inside corner of the back of the neck, count back 6 sts, insert your hook, pull up a loop, sl st 5 to work down the side of the neck, sl st into the next stitch where the neck opening turns. This will be 6 sts over 7 sts, the 1st stitch used to pull up a loop is not worked again, it is just a place holder to attach your yarn.
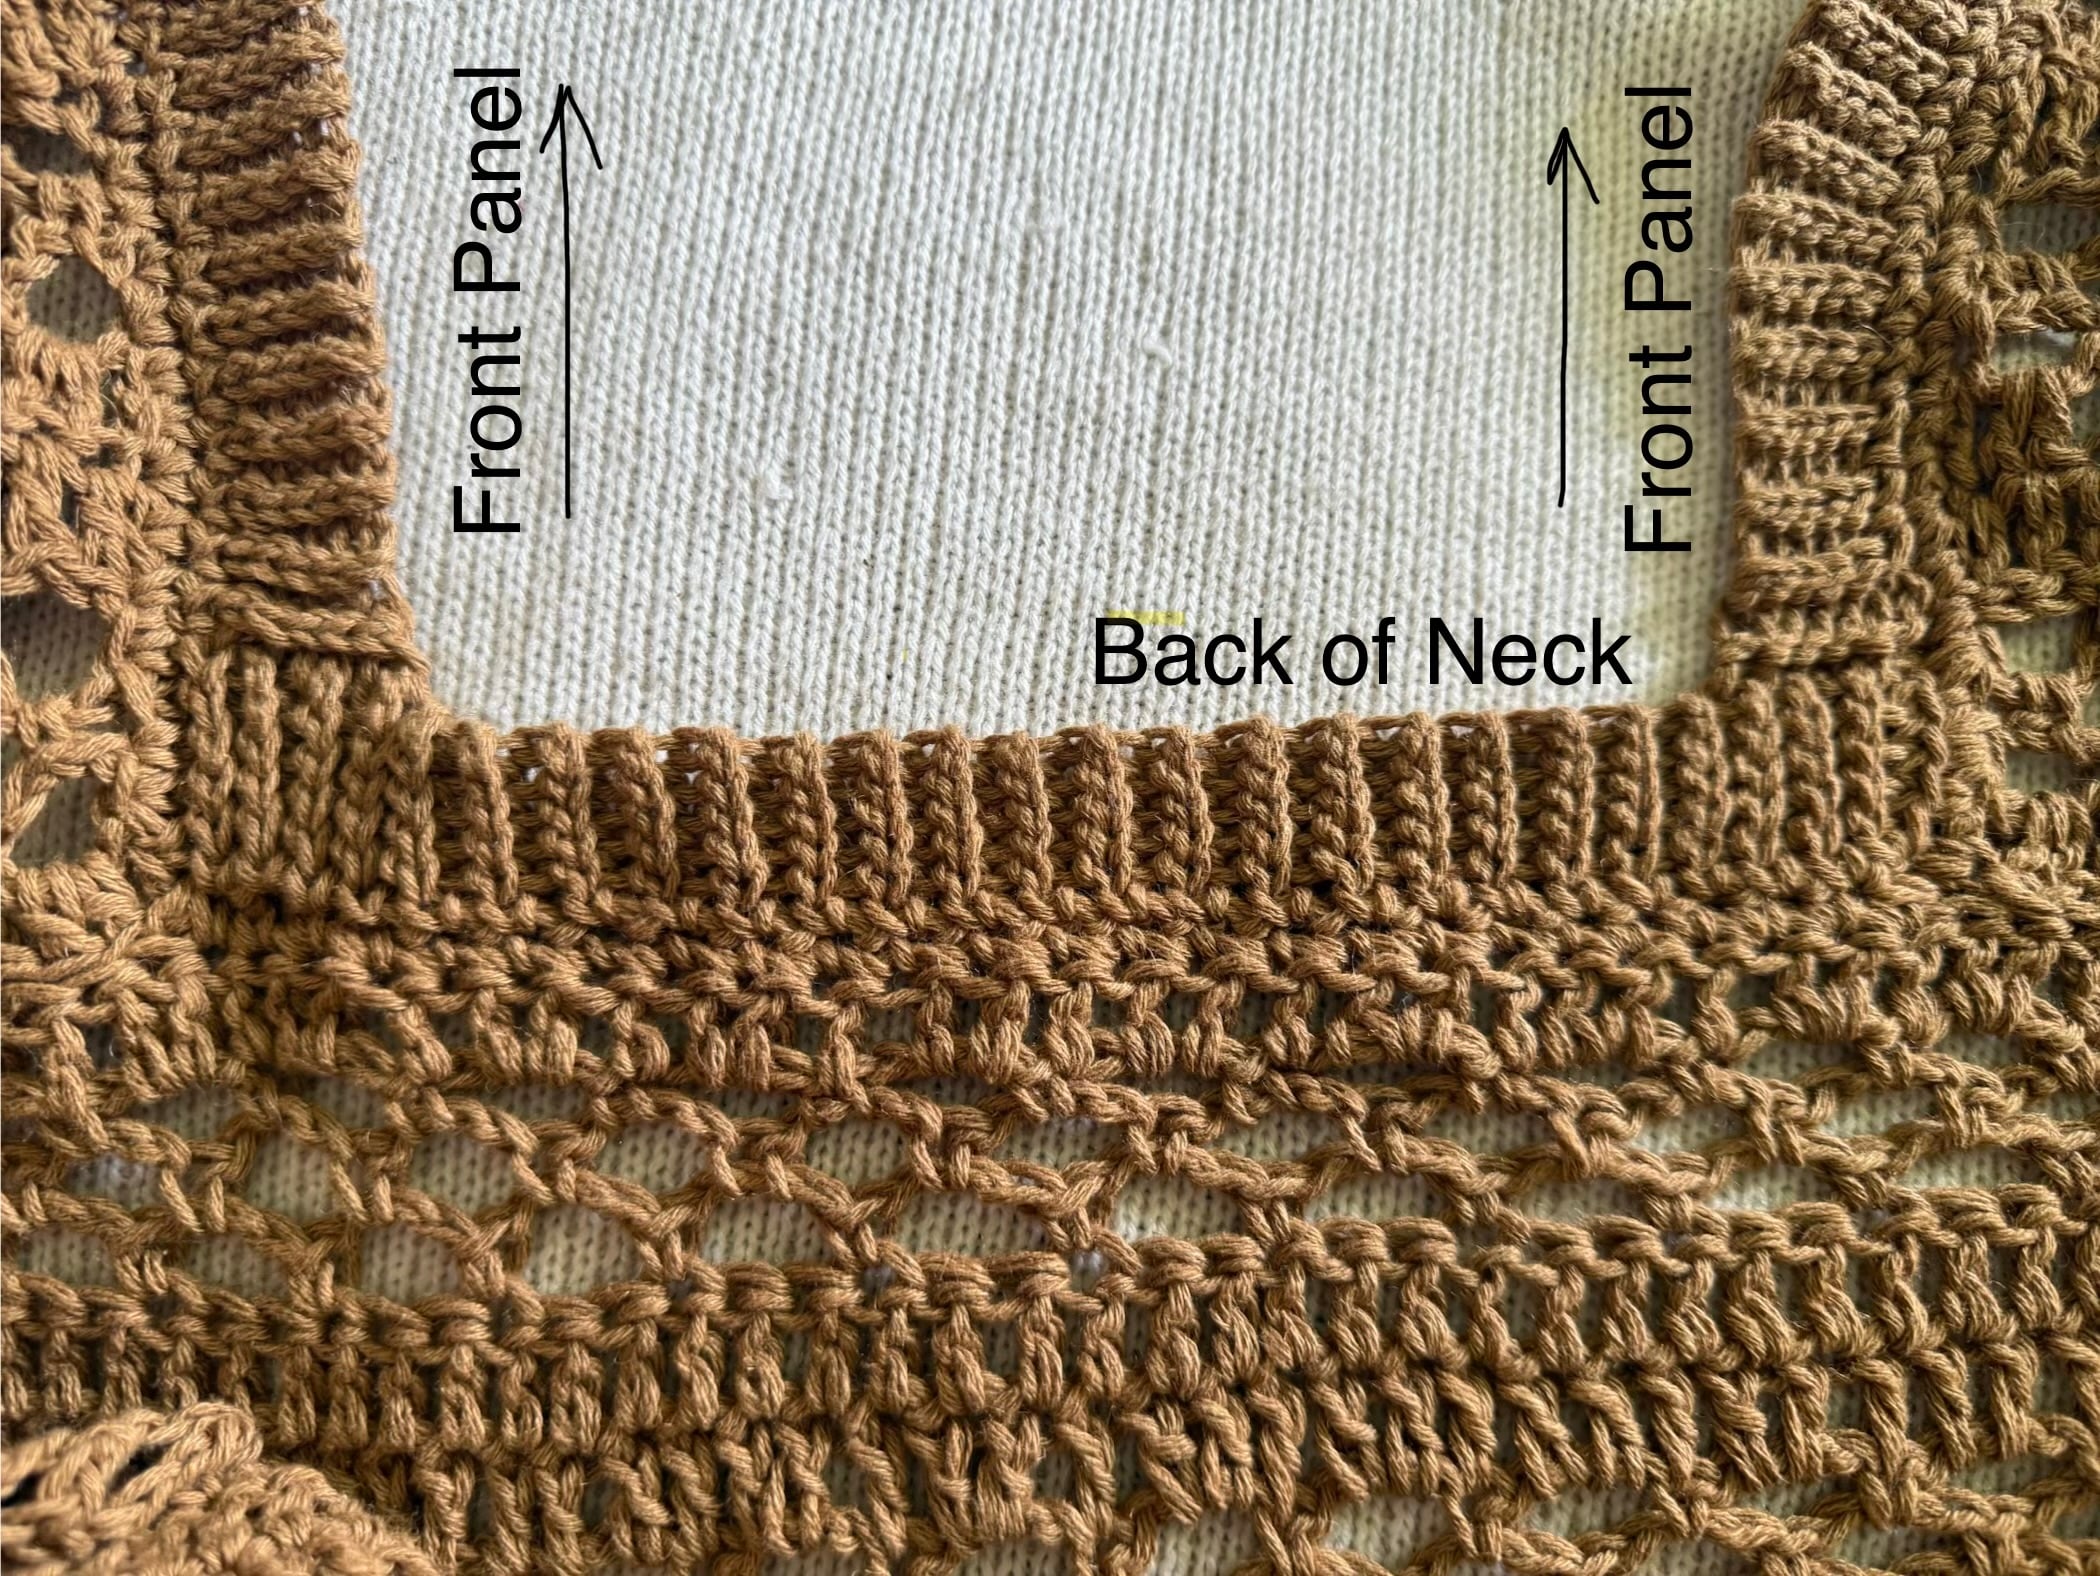
- Turn, sk 1 sl st, sl st 5 blo.
- Ch 1, turn, sl st 5 blo, sl st into next st.
- Repeat Step 1 and 2 to the end, then seam your last row to the single crochet body trim to complete the Back Neck Trim.
Waist Trim
Next: Reattaching your yarn at the bottom of your cardigan in the Single Crochet Body Trim to create the Ribbing as Waist Trim.
- Chain 6, turn so that the wrong side of the cardigan is facing you, sl st in the second chain from the hook and each next chain back to the cardigan. [5 total sl sts]
- Sl st in the next st of the cardigan, turn, skip first sl st, sl st blo next 5 sts.
- Turn, ch 1, sl st blo in next 5 sl sts.
- Sl st in the next st of the cardigan, turn, skip first sl st, sl st blo next 5 sts.
- Repeat Steps 3 and 4. You should be at the edge of the trim, not the cardigan side when you finish before rotating to begin the Collar Trim in the next section.
Collar Trim – 1st side
- Chain 6, turn so that the wrong side of the cardigan is facing you, sl st in the second chain from the hook and each next chain back to the cardigan/waist trim. [5 total sl sts]
- Sl st in the next st of the cardigan/waist trim, turn, skip first sl st, sl st blo next 5 sts.
- Turn, ch 1, sl st blo in next 5 sl sts.
- Sl st in the next st of the cardigan/waist trim, turn, skip first sl st, sl st blo next 5 sts.
- Repeat Steps 3 and 4 until you reach the Back Neck Trim and seam together.
Collar Trim – 2nd Side – Optional Buttons
Next: If you would like to add buttons this is where you will make the button holes. First choose your buttons and sew them evenly on the Collar Trim – 1st Side. While working this side of your Collar Trim you will need to remember when to place a button hole.
- Working in the Row Ends of the “Back Neck Trim” place 5 sl sts with the wrong side of the cardigan facing you, sl st into the next row end of the Front Panel. [6 total sl sts]
- Turn, skip first sl st, sl st blo next 5 sts. [5 total sl sts]
- Turn, ch 1, sl st blo in next 5 sl sts. [5 total sl sts]
- Sl st in the next st of the cardigan, turn, skip first sl st, sl st blo next 5 sts.
- Repeat Steps 3 and 4 until you reach the bottom of the Waist Trim.
FOR BUTTON HOLES: When you reach the location of a button you will need to skip stitches to create an opening. For EXAMPLE I needed to skip 2 sts and create a 2-ch opening for my buttons to fit. So where I needed an opening I did “ch 1, sl st 2, (ch 2, sk 2) sl st 1” for Step 3, then for Step 4 “Sl st in the next st of the cardigan, turn, sk first sl st, sl s 5 blo” using the chains as well.
Sleeve Cuffs
Next: Reattach your yarn in a stitch in the end of the sleeve and work all rounds with Right Side facing.
Note: No slip stitch to join until last round, use a stitch marker to mark your first/last stitch.
Note: Decrease Rounds will not always end with a sc2tog.
Round 1 – Sc in every stitch around. [43 (46, 58, 67, 67) total stitches]
Round 2 – *Sc 7, sc2tog, repeat from * to end. [39 (41, 52, 60, 60) total stitches]
Round 3 – Sc in every stitch around. [39 (41, 52, 60, 60) total stitches]
Round 4 – *Sc 7, sc2tog, repeat from * to end. [35 (37, 47, 54, 54) total stitches]
Round 5 – Sc in every stitch around. [35 (37, 47, 54, 54) total stitches]
Round 6 – *Sc 7, sc2tog, repeat from * to end. [32 (33, 42, 48, 48) total stitches]
Round 7 – Sc in every stitch around. [32 (33, 42, 48, 48) total stitches]
Note: For Sizes XS/S and M/L move onto “Sleeve Trim” instructions below, continue with Rounds 9 to 11 for remaining sizes.
Round 8 – *Sc 7, sc2tog, repeat from * to end. [x (x, 38, 43, 43) total stitches] For Sizes XS/S and M/L move onto “Sleeve Trim” instructions below, continue with Rounds 9 to 11 for remaining sizes.
Round 9 – Sc in every stitch around. [x (x, 38, 43, 43) total stitches]
Round 10 – *Sc 7, sc2tog, repeat from * to end. [x (x, 34, 39, 39) total stitches]
Round 11 – Sc in every stitch around. [x (x, 34, 39, 39) total stitches]
Sleeve Trim
Next: Sl St to join to your next stitch.
- Chain 6, turn so that the wrong side of the cuff is facing you, sl st in the second chain from the hook and each next chain back to the cuff. [5 total sl sts]
- Sl st in the next st of the cuff, turn, skip first sl st, sl st blo next 5 sts.
- Turn, ch 1, sl st blo in next 5 sl sts.
- Sl st in the next st of the cuff, turn, skip first sl st, sl st blo next 5 sts.
- Repeat Steps 3 and 4 to the end and seam together.
I hope you enjoyed making this free crochet pattern for a perfect lacy cardigan! How will you wear your? Over your favorite dress? With jeans an a tank? Be sure to sign up for my email subscription so you never miss new free patterns!