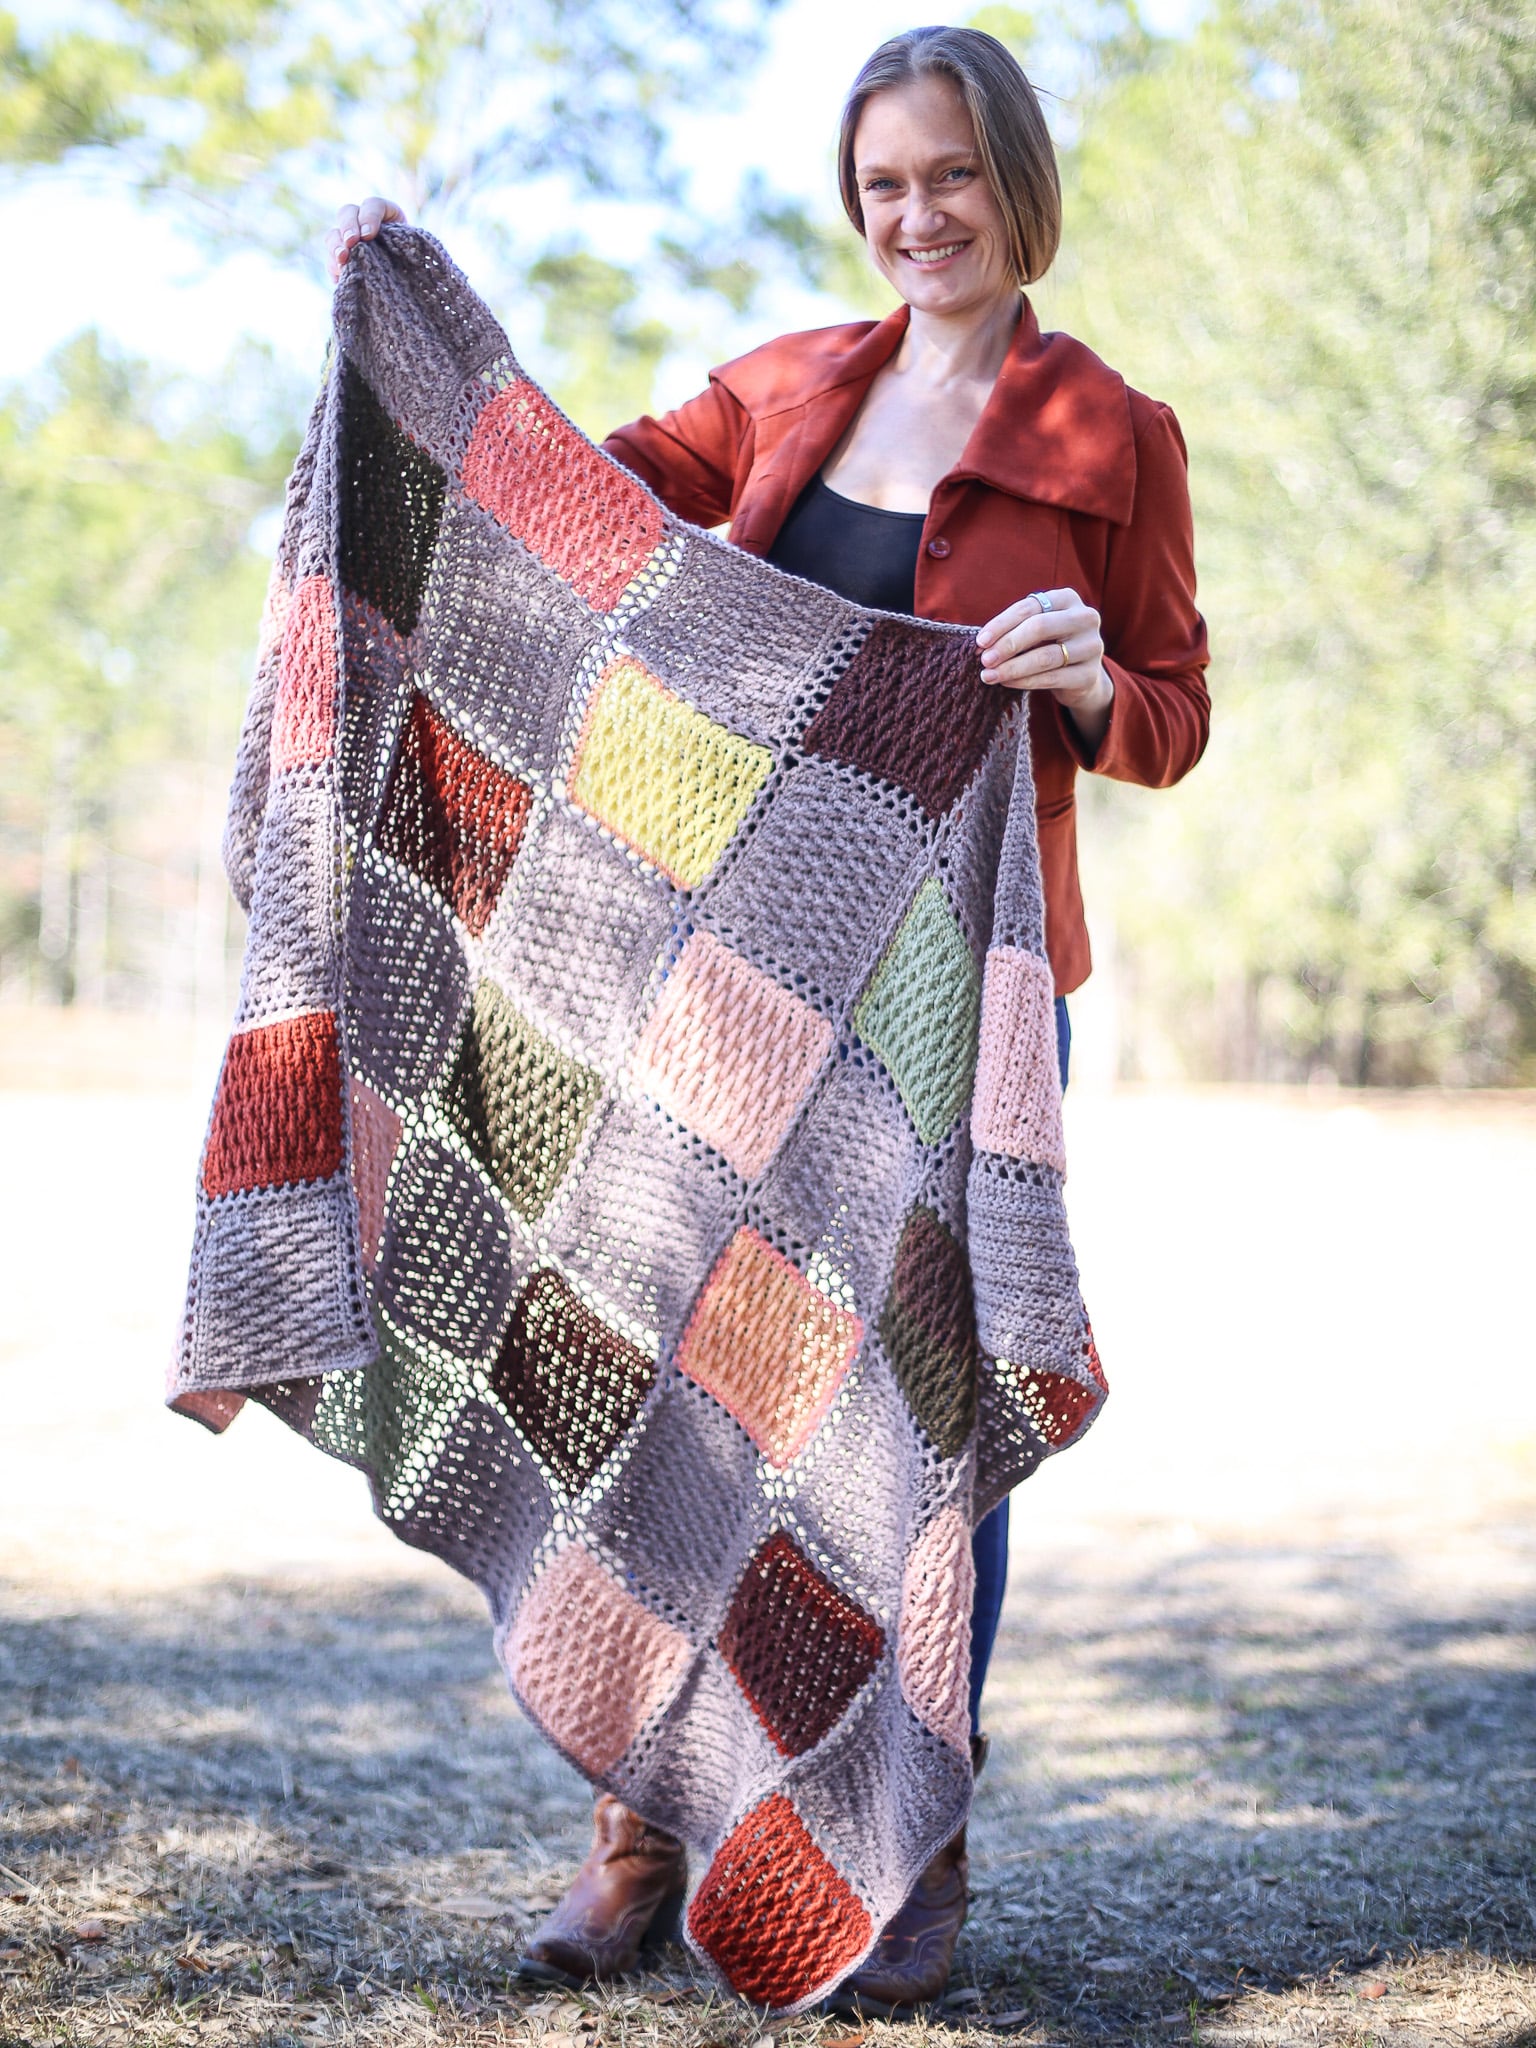
Heirloom Crochet Cable Blanket – Cozy Free Throw Pattern
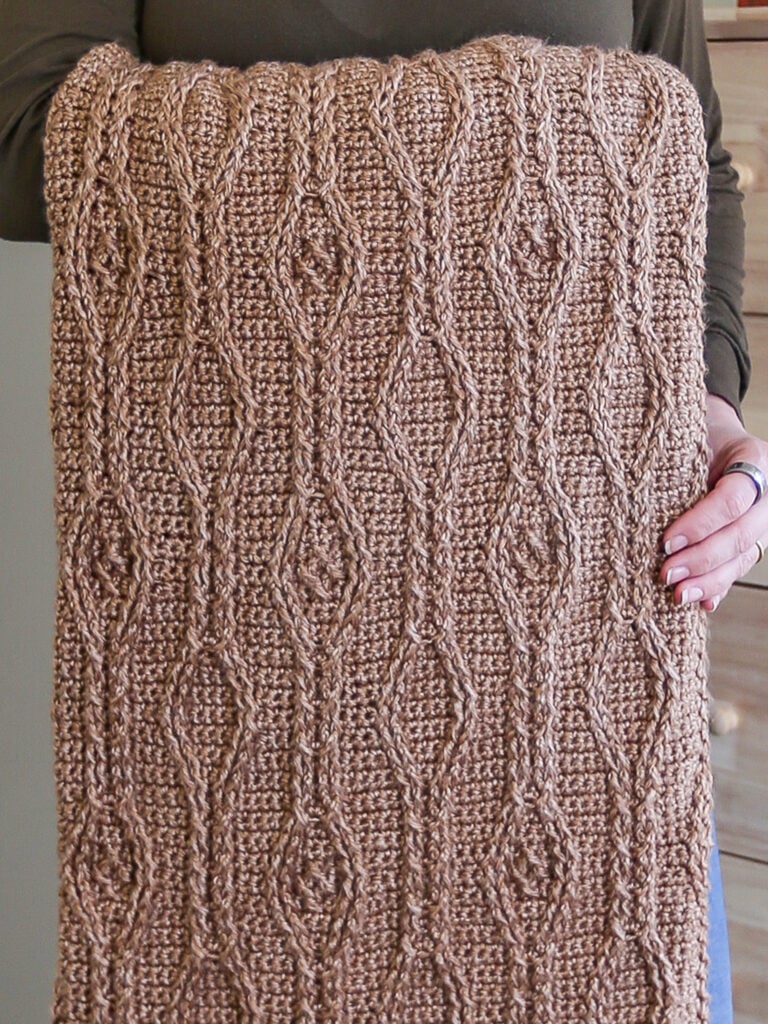
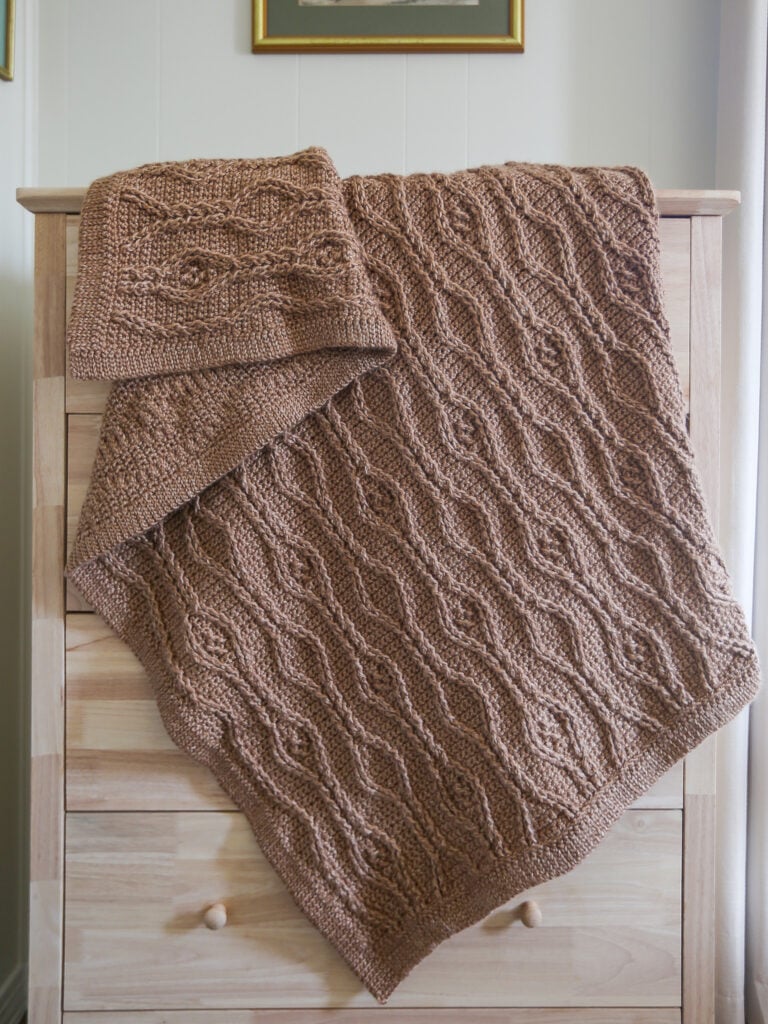
Make this Crochet Cable Blanket using Worsted Weight Yarn to create a stunning throw that is reminiscent of a cable knit blanket. This handmade home decor project will be perfect to add to your living room and will surely become a heirloom for your family.
Read more below and use this free pattern to make a stunning, cozy crochet blanket this season. There is a full stitch diagram included after the written pattern instructions. A video tutorial is in the making, so don’t worry if you need so extra help! Happy crocheting!
Best Bang for your Buck, get a Kit From Lion Brand includes printable PDF and Yarn!
Or get an ad-free PDF Version on Etsy or Ravelry!
About this Cable Crochet Blanket
This cable afghan pattern is classified as an Advanced Skill Level pattern due to the nature of cable stitches and is written in US Terms.
If this is your first time trying a crochet cable pattern then the gauge swatch will be a great way to see how comfortable you are creating this blanket.
Crochet cables are created by placing front post stitches in stitches from prior rows.
While the cables are made with fairly simple stitches, it is the stitch placement that makes this crochet technique more advanced.
For an Intermediate Crocheter this is a great pattern if you are starting to look for crochet projects with cables.
I choose to use FPdc (Front Post Double Crochet) to create my cables, however some people choose to use FPtr (Front Post Treble Crochet Stitches) since they are longer.
If you find that your tension is too tight using the FPdc stitches then you can swap out for FPtr. Be mindful of yardage since this will use up more yarn and you will need every little bit recommended for this free crochet pattern.
Placing a stitch marker between each cable repeat will make staying on track easier.
The trim on the blanket may look wavy or pinch but once complete a good blocking or washing will help relax this project just like all of your other crochet blankets.
Yarn Substitutes
You should be able to substitute any worsted-weight yarn for this pattern, but here are a few of my favorite swap to use from Lion Brand Yarn.
- Vanna’s Choice
- Color Theory
- Wool-Ease Classic
Come find me on…
- Like my Facebook Page
- Join my Facebook group!
- Subscribe to my YouTube Channel for Free Crochet Tutorials
- Get PDFs on Etsy
- Get PDFs on Ravelry
- Sign Up for the Life and Yarn Newsletter for more free modern crochet patterns!
- Please Note: Some links may be affiliate links that help to support the Life + Yarn Blog with a small commission at no added cost to you, thank you!
- Copyright 2025, Life and Yarn, Brianna Iaropoli. Pattern contents are NOT to be re-shared, DIRECT LINKS ONLY to this post for the pattern.
Materials to make a Crochet Cable Blanket
- 5.50 mm crochet hook size
- 11 Skeins of Lion Brand Heartland in Indiana Dunes [136-128F]
- Stitch Markers (optional)
- Darning Needle
Gauge
- 22 sts by 32 rows is 6” by 7” in pattern repeat.
Sizing
- Throw: 45 by 55 inches.
Stitch Descriptions and Abbreviations
- Chain Stitch – ch
- Stitch(es) – st(s)
- Skip – sk
- Back Loop Only – blo
- Slip Stitch – sl st
- Single Crochet – sc
- Front Post Double Crochet – FPdc -Work a double crochet as you normally would by placing your hook from front to back to front around the post of the designated stitch.
- Foundation Single Crochet – Fsc – Chain 2, insert hook into 2nd chain from hook, yarn over and pull up a loop (2 loops on hook), yarn over, draw through 1 loop, (2 loops on hook with 1 ch created), yarn over, draw through all loops (1 loop on hook, 1 foundation single crochet with chain at the bottom). *Insert hook to the bottom of the stitch you just made, it will look like the top or “V” of a stitch, yarn over, pull up 1 loop (2 loops on hook), yarn over, draw through 1 loop (2 loops on hook with 1 ch created), yarn over, draw through all loops;* repeat from * to * for desired amount of stitches.
Pattern Notes
- * Designates a repeat.
- “sc 1” means to single crochet in the next stitch.
- “sc 2” means to single crochet in each of the next 2 stitches.
- “2 sc” means to single crochet twice in the next stitch to create an increase.
- There are NO chain 1’s in the cable section but there ARE chain 1’s in the trim rows.
- Check out more of my Free Crochet Throw Blanket Patterns.
Important for Info Crochet Cables
- Be mindful of when it is noted to work behind or in front of a FPdc when crossing sts.
- When a FPdc is created make sure to skip the single crochet stitches behind.
- You will have the same number of stitches in all cable rows as single crochet rows, the stitch count does not change in the rows.
- To create the Row 3 FPdc sts you will work them in the Fsc Row. Each next cable row will work its FPdc sts in FPdc sts of the previous row.
- Reference the stitch diagram for the repeats and proper stitch placement, note that FPdc sts are worked in FPdc sts but for clarity the diagram does NOT show the overlap.
- NOTE: The Stitch Diagram shows 2 sets of repeats.
- The Stitch Diagram for Row Repeats has the order of the placement of the FPdc sts alphabetized if you prefer a visual. Be mindful of if you are working in FRONT or BEHIND of a FPdc.
- FPdc sts are always worked in FPdc sts with the exception of Row 3 where the FPdc sts are worked in the Foundation Single Crochet Stitches of Row 1.
Make this Crochet Cable Blanket Pattern
Row 1 – Fsc 148
Row 2 – Turn, sc across in each stitch.
Note: To create the Row 3 FPdc sts you will work them in the Fsc Row. Each next cable row will work its FPdc sts in FPdc sts of the previous row.
Row 3 – Turn, sc 2, *sc 3, FPdc in each of next 2-sc sts, sc 2, FPdc in each of next 4-sc sts, sc 2, FPdc in each of next 2-sc sts, sc 3, repeat from * across, sc 2 in remaining sts.
Row 4 – Turn, sc across in each stitch.
Row 5 – Turn, sc 2, *sc 2, FPdc in each of next 2-FPdc, sc 3, sk next FPdc, FPdc in next FPdc, FPdc in previous FPdc working behind the last FPdc created, sk next FPdc, FPdc in next FPdc, FPdc in previous FPdc working in front the last FPdc created, sc 3, FPdc in each of next 2-FPdc, sc 2, repeat from * across, sc 2 in remaining sts.
Row 6 – Turn, sc across in each stitch.
Row 7 – Turn, sc 2, *sc 1, FPdc in each of next 2-FPdc, sc 4, FPdc in each of next 4-FPdc, sc 4, FPdc in each of next 2-FPdc, sc 1, repeat from * across, sc 2 in remaining st.
Row 8 – Turn, sc across in each stitch.
Row 9 – Turn, sc 2, *FPdc in each of next 2-FPdc, sc 5, sk next FPdc, FPdc in next FPdc, FPdc in previous FPdc working behind the last FPdc created, sk next FPdc, FPdc in next FPdc, FPdc in previous FPdc working in front of the last FPdc created, sc 5, FPdc in each of next 2-FPdc, repeat from * across, sc 2 in remaining sts.
Row 10 – Turn, sc across in each stitch.
Row 11 – Turn, sc 2 *sk next FPdc, FPdc in next FPdc, FPdc in previous FPdc working in front of the last FPdc created, sc 4, FPdc in each of next 2-FPdc, sc 2, FPdc in each of next 2-FPdc, sc 4, sk next FPdc, FPdc in next FPdc, FPdc in previous FPdc working behind the last FPdc created, repeat from * across, sc 2 in remaining sts.
Row 12 – Turn, sc across in each stitch.
Row 13 – Turn, sc 2, *FPdc in each of next 2-FPdc, sc 3, FPdc in each of next 2-FPdc, sc 4, FPdc in each of next 2-FPdc, sc 3, FPdc in each of next 2-FPdc, repeat from * across, sc 2 in remaining sts.
Row 14 – Turn, sc across in each stitch.
Row 15 – Turn, sc 2, *sk next FPdc, FPdc in next FPdc, FPdc in previous FPdc working in front of the last FPdc created, sc 2, FPdc in each of next 2-FPdc, sc 2, sk next FPdc, FPdc in next FPdc, FPdc in previous FPdc working in front of the last FPdc created, sc 2, FPdc in each of next 2-FPdc, sc 2, sk next FPdc, FPdc in next FPdc, FPdc in previous FPdc working behind the last FPdc created, repeat from * across, sc 2 in remaining sts.
Row 16 – Turn, sc across in each stitch.
Row 17 – Turn, sc 2, *FPdc in each of next 2-FPdc, sc 2, FPdc in each of next 2-FPdc, sc 1, (sk next FPdc, FPdc in next FPdc, FPdc in previous FPdc working in front of the last FPdc created) two times, sc 1, FPdc in each of next 2-FPdc, sc 2, FPdc in each of next 2-FPdc, repeat from * across, sc 2 in remaining sts.
Row 18 – Turn, sc across in each stitch.
Row 19 – Turn, sc 2, *sk next FPdc, FPdc in next FPdc, FPdc in previous FPdc working in front of the last FPdc created, sc 3, FPdc in each of next 2-FPdc, sc 1, sk next FPdc, FPdc in next FPdc, FPdc in previous FPdc working in front of the last FPdc created, sc 1, FPdc in each of next 2-FPdc, sc 3, sk next FPdc, FPdc in next FPdc, FPdc in previous FPdc working behind the last FPdc created, repeat from * across, sc 2 in remaining sts.
Row 20 – Turn, sc across in each stitch.
Row 21 – Turn, sc 2, *FPdc in each of next 2-FPdc, sc 4, FPdc in each of next 2-FPdc, sc 2, FPdc in each of next 2-FPdc, sc 4, FPdc in each of next 2-FPdc, repeat from * across, sc 2 in remaining sts.
Row 22 – Turn, sc across in each stitch.
Row 23 – Turn, sc 2 *sk next FPdc, FPdc in next FPdc, FPdc in previous FPdc working in front of the last FPdc created, sc 5, FPdc in each of next 4-FPdc, sc 5, sk next FPdc, FPdc in next FPdc, FPdc in previous FPdc working behind the last FPdc created, repeat from * across, sc 2 in remaining sts.
Row 24 – Turn, sc across in each stitch.
Row 25 – Turn, sc 2, *sc 1, FPdc in each of next 2-FPdc, sc 4, sk next FPdc, FPdc in next FPdc, FPdc in previous FPdc working behind the last FPdc created, sk next FPdc, FPdc in next FPdc, FPdc in previous FPdc working in front of the last FPdc created, sc 4, FPdc in each of next 2-FPdc, sc 1, repeat from * across, sc 2 in remaining sts.
Row 26 – Turn, sc across in each stitch.
Row 27 – Turn, sc 2, *sc 2, FPdc in each of next 2-FPdc, sc 3, FPdc in each of next 4-FPdc, sc 3, FPdc in each of next 2-FPdc, sc 2, repeat from * across, sc 2 in remaining sts.
Row 28 – Turn, sc across in each stitch.
Row 29 – Turn, sc 2, *sc 3, FPdc in each of next 2-FPdc, sc 2, sk next FPdc, FPdc in next FPdc, FPdc in previous FPdc working behind the last FPdc created, sk next FPdc, FPdc in next FPdc, FPdc in previous FPdc working in front the last FPdc created, sc 2, FPdc in each of next 2-FPdc, sc 3, repeat from * across, sc 2 in remaining sts.
Row 30 – Turn, sc across in each stitch.
Row 31 – Turn, sc 2, *sc 3, FPdc in each of next 2-FPdc, sc 2, FPdc in each of next 4-FPdc, sc 2, FPdc in each of next 2-FPdc, sc 3, repeat from * across, sc 2 in remaining sts.
Repeat Row 4 to 31 – 7 MORE times ending the last repeat on Row 30 do NOT cut your and move onto Blanket Trim Instructions below.

Blanket Trim Instructions
Your last row for each side will end at the farthest corner of the blanket, this is extremely important so that you can create the next corner properly.
- Chain 6, turn so that the right side of the blanket is facing you, sl st in the second chain from the hook and each next chain back to the blanket. [5 total sl sts]
- Sl st in the next st of blanket, turn, skip first sl st, sl st blo next 5 sts.
- Turn, ch 1, sl st blo in next 5 sl sts.
- Sl st in the next st of blanket, turn, skip first sl st, sl st blo next 5 sts.
- Repeat Steps 3 and 4, skipping every 8th stitch on the blanket to keep your trim from getting wavy to the last stitch. You should be at the edge of the trim, not the blanket side.
- Now repeat Steps 1 to 5 except you will be working in the Row Ends not stitches.
- Now repeat Steps 1 to 5 except you will be working in the Foundation Single Crochet Stitches.
- Now repeat Steps 1 to 5 except you will be working in the Row Ends not stitches.
- Finish off.