Free Crochet Throw Pattern
How To Make A Crochet Blanket!
I love blankets and I had a ton of mill ends cotton that just wanted to become a simple crocheted blanket pattern! When I began making this project I didn’t intend in writing up this free crochet throw pattern! But once I go close to finishing it up I realized I had to share these simple crochet stitches with you! This is such a perfect throw for so many occasions, like an easy crochet baby blanket or house warming gift!

Design Story and Inspiration
As you may or may not know, I had our second little guy at the beginning of August 2019! So what that meant for Life and Yarn is that I was not doing as much designing as I normally would and spending more time working on some selfish projects! However, as much as I tried to stay away from designing, it’s just not in my nature! So, that’s where this post comes in! This is my informal write up of this Free Crochet Throw Pattern. This is one of my many projects I had going as selfish makes to use up some of my yarn stash! Think of this simple crocheted blanket pattern as more of a recipe than a pattern! Have some fun with it and adjust it however you would like!
I wrote up this “how to make a crochet blanket” with the intention of it being easy to customize and to be a stash busting project! This is a great beginner friendly crochet pattern if you have a ton of the same weight yarn that you don’t have a project for! Just keep adding colors and rounds using these simple crochet stitches! What else is fun about this simple crochet pattern is you can keep going until it becomes the size you want! Perfect as an easy crochet baby blanket or a king size throw!

This pattern and its photographs are property of Life and Yarn. This pattern and the design are subject to copyright and are for personal use only with the exception of items made from it. You may sell your finished items, but please give credit to the designer and creator, Brianna Iaropoli of Life and Yarn.
Pattern contents are NOT to be re-shared, DIRECT LINKS ONLY to this post for the pattern.
Stitch Descriptions and Abbreviations
- Chain Stitch – CH / Slip Stitch – Sl St / Double Crochet – dc
- Foundation Double Crochet – Fdc – Chain 3, yarn over, insert hook into 3rd chain from hook, yarn over and pull up loop (3 loops on hook), yarn over, pull through 1 loop on hook (3 loops on hook), yarn over and pull through 2 loops (2 loops on hook), yarn over, pull through all loops, (1 foundation double crochet with chain at bottom) *Yarn over, insert hook to bottom of the stitch you just made. It will look like the top or “V” of a stitch. Yarn over and pull up loop (3 loops on hook), yarn over, pull through 1 loop (3 loops on hook), yarn over, pull through 2 loops (2 loops on hook), yarn over and pull through all loops.
- Puff Stitch – PS – Yarn over, insert hook into stitch or space and pull up a loop, repeat 3 more times, yarn over, pull through all loops on hook.
- * – Designates a repeat.

Come find me on…
- Like my Facebook Page
- Join my Facebook group!
- Get PDFs on Etsy
- Get PDFs on Ravelry
- Sign Up for the Life and Yarn Newsletter
Materials
4.50 mm Crochet Hook
(Clover and Furls are my favorites!)
Yarn Needle
Scissors
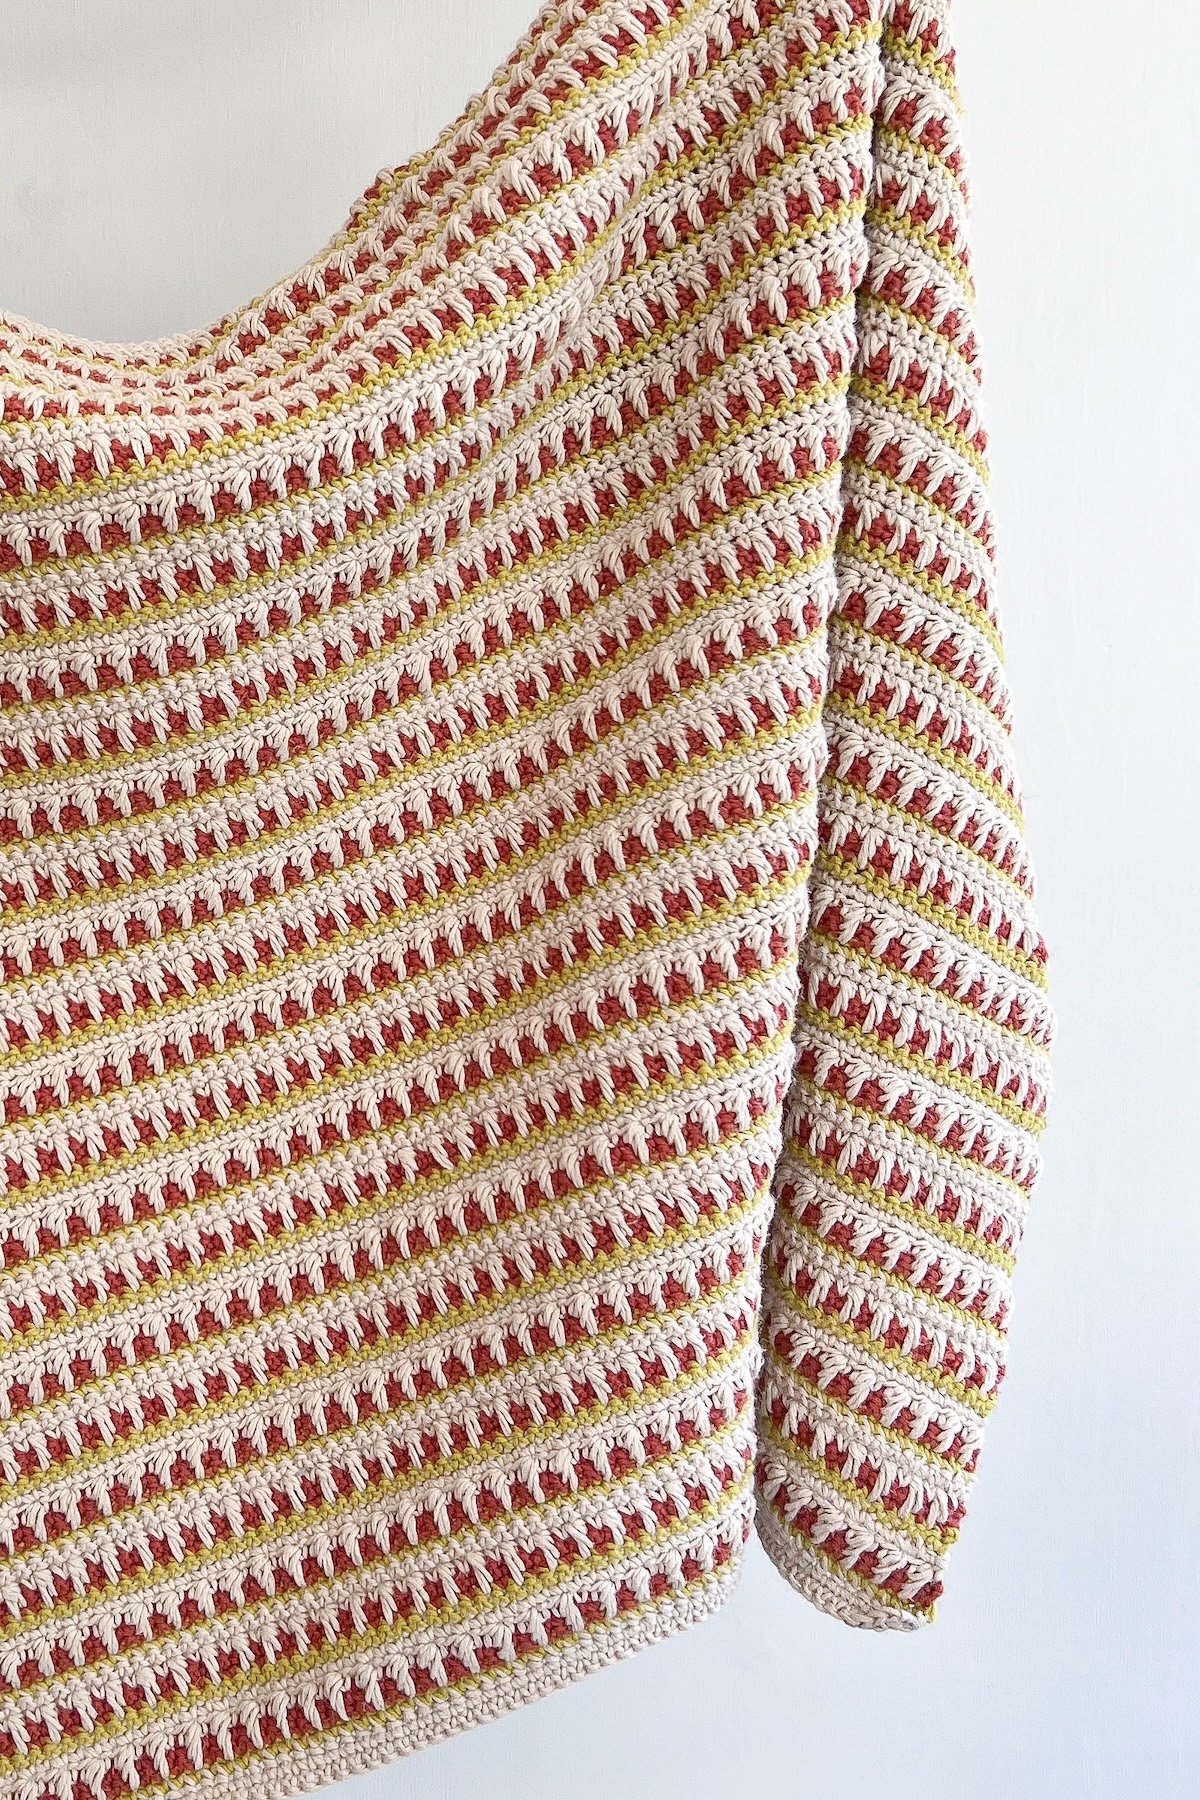
#4 Weight Cotton – I used Bernat Salt and Pepper 5 Skeins, 573 yards each
Gauge
Remember I said this is more of a recipe than a pattern? That means for this simple crocheted blanket pattern you can get creative with your gauge too! Go looser, go tighter, try a totally different yarn weight! Imagine still using worsted weight yarn and just a bit bigger of a hook and this would become a beautiful easy crochet baby blanket! But to make yours like mine I used worsted weight cotton and a 4.50 mm hook to achieve a gauge of 14 sts x 8 rows in hdc is 4″x4″.
Size
50″ x 58″ from a total of 55 rounds. Please note, this easy crochet throw pattern is written so you may go smaller or larger. You may do as many or as little rounds as you would like!

Before you begin…
Remember this is meant to be more of a recipe than a pattern. Get creative! Do some color work! Add some other fun stitches! Double the size! Go up a hook for a looser material! Whatever you want but enjoy getting creative!
Pattern for a Crocheted Blanket
Round 1
Fdc 15, ch 3, 3 dc in base of last Fdc, ch 3, dc in same space, dc across in each next dc (14 sts, 15 total on side), ch 3, 3 dc in same space as last dc, ch 3, sl st to 1st dc.
Round 2
Ch 2, dc across, *2 dc in ch-3, ch 3, 2 dc in ch-3, dc in each dc. Repeat from * for remaining sides until you reach the first side and then dc in remaining dc sts, sl st to first dc.
Round 3 and on.
Repeat Round 2, each round will increase by 16 sts.
Decorative Rounds
Alternat *1 dc, ch 1 or *1 PS, ch 1 around.
I also added 3 rounds of a solid grey yarn as I had to finish off when I knew I was running out of my Bernat Salt and Pepper cotton! Imagine doing this crocheted blanket in a neutral and adding a pop of color for an easy crochet baby blanket?! How cute would that’s be!
I hope you are enjoying this simple modern crochet blanket pattern! I love creating beginner friendly free crochet patterns, so be sure to check out my other free crochet patterns! You can also sign up for the Life and Yarn Newsletter so you never miss a more free pattern release!


I like the look of this blanket but I don’t understand the pattern at all. I am going to try anyhow and see if I can figure it out. Right now my brain is just not wrapping around how you get from fdc 15 to a blanket with 4 sides. Lol. Maybe my own inner designer eye is broken today ??
Hahahaha think of it like this…when you make a regular granny square all of your sides are even so you only have to work in the bottom of the one stitch…to make a rectangle you have to have one side longer…so you work across the bottom Fdc…does that help?
Yes that helps lol. I don’t know why some concepts are harder to grasp unless I see them but yes this helps. Thank you ?
I know what you mean!
I love the blanket! I have a question, what does PS stand for? Would love to see the blanket laid out can’t seem to picture it my mind! Thanks for your help.
Puff stitch! I have a few rounds where I threw in some chains and puffs for fun!
I love this pattern and am anxious to get started. I was going to go to Ravelry and pay for the pattern because I like to help designers but the mention above only leads to a cardigan on Ravelry, not this pattern.
Also, I am not sure what a puff stitch consists of – thanks for your help!
Hi Patty!!! That’s so sweet! This pattern was so simple I decided to just post it Free without a pdf, I didn’t realize I had a Ravelry link! I appreciate it SO much that you buy PDFs for the free patterns, so put so much time into the formatting!
I have also updated the pattern to include the puff stitch instructions!
I hope you enjoy making this throw blanket!!! Thank you!!!
Thank you for your response, and for the pattern!
Gorgeous throw. My hubby and I have been married almost 38 yrs. empty nesters, been caring for family for the last 7 years. Just moved to our first place without anything… starting over. Waiting for new furniture to come. Been shopping with hubby and he keeps looking at throws. I saw this and knew he would love it!!! Thank you so much for sharing it. He asked when we were looking if I thought I could make something like this one only bigger. Can’t wait to get started!
?
That’s wonderful! It’s a great throw to make any size you would like! I hope you enjoy it!!!
What a beautiful throw blanket! I absolutely love that it is made in rounds so you can make it as large or small as you want. It’s also so simple but looks very chic :) Great job! This is on my to-make list now.
Kailey at http://crochetunraveled.com/
thank you!
It took me a bit of trial and error but I gauged up to a 6.0mm hook and removed a chain in the corners. The corners were initially too sharp, making the blanket not lay flat. I still get the key holes and it seems to work better for me. It might be because the first layer of FDC are a bit tight (I tried to make them looser each time.) anyway, it’s a great simple pattern to learn crochet in the round with. I’m planning to add some variations for visual interest. Thanks for this!