Free Summer Crochet Cardigan Pattern – Customize for Any Season
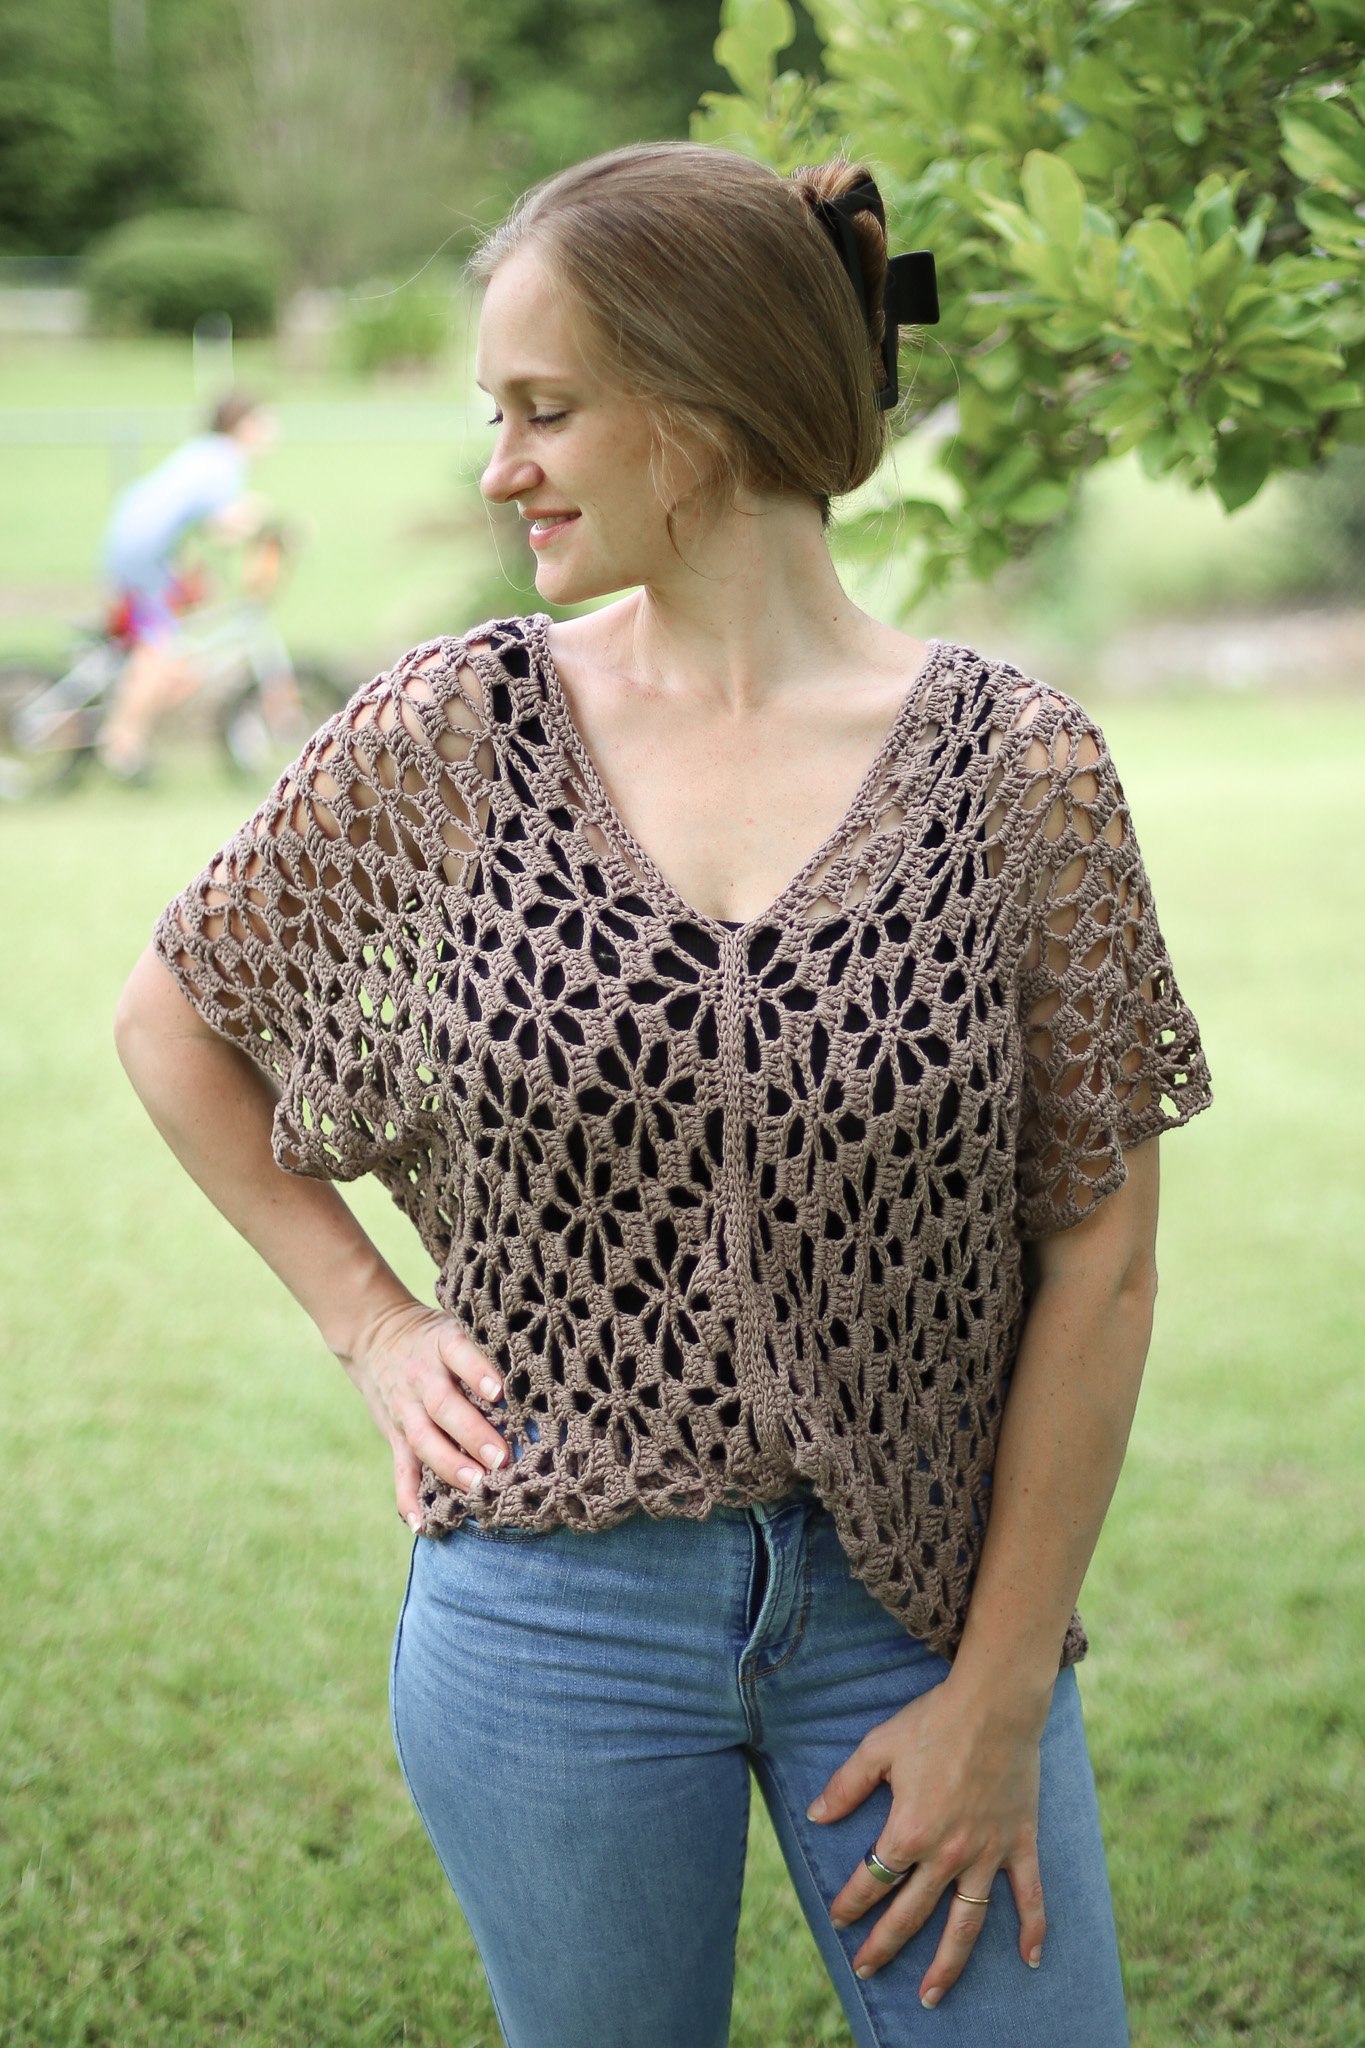
Crochet the perfect collared crochet summer cardigan pattern with cables that can be styled year round with any wardrobe! This cute short sleeve cardigan can be worn over a tank top or maxi dress and perfect for lazy days, running errands or office meetings! You can easily modify this free pattern to have long sleeves by adding more rounds when you create the short sleeves! This is a great pattern for determined beginner crocheters!
Best Bang for your Buck, get a Kit From Lion Brand includes a printable ad-free pdf of this pattern and Yarn!
Get a printable pdf crochet pattern on my Etsy Shop or Ravelry!

Pattern Description
This lightweight cardigan is considered to be an Advanced Skill Level Pattern written in US Terms.
Made with cables and simple construction, no separate panels to reduce the use of seams this can be an easy pattern if you take it slow and be mindful of your stitch placement.
If you are comfortable with basic stitches and front post double crochet stitches you should have no issues creating this slightly oversized crochet cardigan pattern with cables. Just pay close attention to your stitch placement!
Swap this DK weight wool blend suggested in this pattern for a cotton yarn if preferred!
The cables are on the front of the cardigan as well as the back and are worked in on continuous piece.
Leave a long tail after adding the Side Extensions to reduce any ends that need to be woven in.
While this gorgeous crochet summer cardigan pattern does not have open stitches, the dk weight yarn makes this cardigan top perfect for warm weather.
I designed this pattern have 4 different sizes made is ranges to cover the smallest size to larger sizes. Check your measurements and choose your best fit based on how much ease you would like.
The Side Panel Extensions are a unique feature in this pattern and allow you to really customize the bust size of this cardigan, just add more rows as needed. However, be mindful that this will affect the arm opening sizing and adjust accordingly.

Yarn Substitutes
- Coboo
- Mandala
- Superwash Merino
- 24/7 Cotton DK
Come find me on…
- Like my Facebook Page
- Join my Facebook group!
- Subscribe to my YouTube Channel for Free Crochet Tutorials
- Get PDFs on Etsy
- Get PDFs on Ravelry
- Sign Up for the Life and Yarn Newsletter for more free modern crochet patterns!
Materials
- 5.50 mm Crochet Hook
- 5 (5, 6, 7) Skeins of Lion Brand Wool-Ease DK in Peach [#636-135S]
Lion Brand Yarns are some of my favorite and this is one I feel like I waited years for! I am so excited that Lion Brand Finally introduced a DK Weight of their Classic Wool-Ease! It did not disappoint, be sure to try it and check out all the yarn colors available! - #3 DK Weight Yarn – 1160 (1160, 1392, 1624) yards
Gauge
- 14 sts x 14 rows is 4×4” in sc – BLOCKED
- Pre-blocked is very close to 4×4”
- When creating this piece the cables can make the panels look very wonky. A good steam blocking will relax all of the stitches, especially the cable section to make everything fall nicely.
- If your double crochet stitches are just too tight in your cables you can switch them to treble crochet stitches.
- If your swatch is too big you need to go down a crochet hook size, if it is too small you need to go up a coronet hook size.
Sizing
- XS/S (M/L, XL/2XL, 3XL/4XL) – See Size Chart.

Stitch Descriptions and Abbreviations
- Chain Stitch – ch
- Slip Stitch – sl st
- Stitch(es) – st(s)
- Skip – sk
- Stitch Marker – SM
- Single Crochet – sc
- Half Double Crochet – hdc
- Front Post Double Crochet – FPdc -Work a double crochet as you normally would by placing your hook from front to back to front around the post of the designated stitch.
- Foundation Single Crochet – Fsc – Chain 2, insert hook into 2nd chain from hook, yarn over and pull up a loop (2 loops on hook), yarn over, draw through 1 loop, (2 loops on hook with 1 ch created), yarn over, draw through all loops (1 loop on hook, 1 foundation single crochet with chain at the bottom). *Insert hook to the bottom of the stitch you just made, it will look like the top or “V” of a stitch, yarn over, pull up 1 loop (2 loops on hook), yarn over, draw through 1 loop (2 loops on hook with 1 ch created), yarn over, draw through all loops;* repeat from * to * for desired amount of stitches.
Pattern Notes
- XS/S (M/L, XL/2XL, 3XL/4XL) – See Size Chart.
- * Designates a repeat.
- Be mindful of when it is noted to work behind or in front of a FPdc when crossing sts.
- When a FPdc is created you must make sure to skip the stitches behind in the row you are working. For Example: When you “FPdc 2” you must skip the next 2 sts in the row you are creating, leaving them unworked, so each row has the same number of sts.
- Row 4 of the Cables notes when to skip stitches after making FPdc sts as a reminder. Apply skipping the same number of sts as FPdc sts made in all FPdc rows.
- “sc 1” means to single crochet in the next stitch.
- “sc 2” means to single crochet in each of the next 2 stitches.
- “2 sc” means to single crochet twice in the next stitch to create an increase.

Crochet Summer Cardigan Pattern
Back Panel
Row 1 – Fsc 50 (60, 70, 88)
Rows 2 and 3 – Turn, ch 1, sc across.
Row 4 – Turn, ch 1, sc 2 (3, 6, 9), *sc 2, working in Row 2 come down to corresponding stitch and count over 2 sts, FPdc in that stitch, FPdc in next stitch of Row 2, sk 2 sc in working row, sc 2, FPdc in each of next 2 sts of Row 2, sk 2 sc of Row 2, FPdc in each of next 2 sts of Row 2, sk 4 sc in working row, sc 2, FPdc in each of next 2 sts of Row 2, sc 2*, sc 14 (22, 26, 38) repeat from * to *, sc in remaining sts.
Row 5 – Turn, ch 1, sc 50 (60, 70, 88).
Row 6 – Turn, ch 1, sc 2 (3, 6, 9), *sc 1, FPdc in each of next 2-FPdc, sc 3, sk 2-FPdc, FPdc in each of next 2-FPdc, FPdc in previous 2-FPdc working behind the last 2 FPdc just created, sc 3, FPdc in each of next 2-FPdc, sc*, sc 14 (22, 26, 38), repeat from * to *, sc in remaining sts.
Row 7 – Turn, ch 1, sc 50 (60, 70, 88).
Row 8 – Turn, ch 1, sc 2 (3, 6, 9), *sc, FPdc in each of next 2-FPdc, sc 3, FPdc in each of next 4-FPdc, sc 3, FPdc in each of next 2-FPdc, sc, *sc 14 (22, 26, 38), repeat from * to *, sc in remaining sts.
Row 9 – Turn, ch 1, sc 50 (60, 70, 88).
Row 10 – Turn, ch 1, sc 2 (3, 6, 9), *sc 2, FPdc in each of next 2-FPdc, sc 2, sk 2-FPdc, FPdc in each of next 2-FPdc, FPdc in previous 2-FPdc working behind the last 2 FPdc just created, sc 2, FPdc in each of next 2-FPdc, sc 2, * sc 14 (22, 26, 38) repeat from * to *, sc in remaining sts.
Row 11 – Turn, ch 1, sc 50 (60, 70, 88).
Row 12 – Turn, ch 1, sc 2 (3, 6, 9), *sc 3, FPdc in each of next 4-FPdc, sc 2, FPdc in each of next 4-FPdc, sc 3, * sc 14 (22, 26, 38) repeat from * to *, sc in remaining sts.
Row 13 – Turn, ch 1, sc 50 (60, 70, 88).
Row 14 – Turn, ch 1, sc 2 (3, 6, 9), *sc 3, sk 2-FPdc, FPdc in each of next 2-FPdc, FPdc in previous 2-FPdc working behind the last two just created, sc 2, sk 2-FPdc, FPdc in each of next 2-FPdc, FPdc in previous 2-FPdc working in front of the last two just created, sc 3, * sc 14 (22, 26, 38) repeat from * to *, sc in remaining sts.
Row 15 – Turn, ch 1, sc 50 (60, 70, 88).
Row 16 – Turn, ch 1, sc 2 (3, 6, 9), *sc 2, FPdc in each of next 2-FPdc, sc 2, FPdc in each of next 4-FPdc, sc 2, FPdc in each of next 2-FPdc, sc 2, * sc 14 (22, 26, 38) repeat from * to *, sc in remaining sts.
Rows 17 to 68 – Repeat Rows 5 to 16, ending with a Row 8 Repeat.
Continue to Split For Neck and Front Panels.

Neck and Front Panel A
Reference Stitch Diagram above.
Row 1 – Turn, ch 1, sc 20 (25, 30, 39).
Row 2 – Turn, ch 1, sc 2 (3, 6, 9), sc 2, FPdc in each of next 2-FPdc, sc 2, sk 2-FPdc, FPdc in each of next 2-FPdc, FPdc in previous 2-FPdc working behind the last 2 FPdc just created, sc 2, FPdc in each of next 2-FPdc, sc in remaining sts.
Row 3 – Turn, ch 1, sc 20 (25, 30, 39).
Row 4 – Turn, ch 1, sc 2 (3, 6, 9), sc 3, FPdc in each of next 4-FPdc, sc 2, FPdc in each of next 4-FPdc, sc in remaining sts.
Row 5 – Turn, ch 1, sc 20 (25, 30, 39).
Row 6 – Turn, ch 1, sc 2 (3, 6, 9), sc 3, sk 2-FPdc, FPdc in each of next 2-FPdc, FPdc in previous 2-FPdc working behind the last two just created, sc 2, sk 2-FPdc, FPdc in each of next 2-FPdc, FPdc in previous 2-FPdc working in front of the last two just created, sc in remaining sts.
Row 7 – Turn, ch 1, sc 20 (25, 30, 39).
Row 8 – Turn, ch 1, sc 2 (3, 6, 9), sc 2, FPdc in each of next 2-FPdc, sc 2, FPdc in each of next 4-FPdc, sc 2, FPdc in each of next 2-FPdc, sc in remaining sts.
Row 9 – Turn, ch 1, sc 20 (25, 30, 39).
Row 10 – Turn, ch 1, sc 2 (3, 6, 9), sc 1, FPdc in each of next 2-FPdc, sc 3, sk 2-FPdc, FPdc in each of next 2-FPdc, FPdc in previous 2-FPdc working behind the last 2 FPdc just created, sc 3, FPdc in each of next 2-FPdc, sc in remaining sts.
Row 11 – Turn, ch 1, sc 20 (25, 30, 39).
Row 12 – Turn, ch 1, sc 2 (3, 6, 9), sc, FPdc in each of next 2-FPdc, sc 3, FPdc in each of next 4-FPdc, sc 3, FPdc in each of next 2-FPdc, sc in remaining sts.
Row 13 – Turn, ch 1, sc sc 20 (25, 30, 39).
Row 14 – Turn, ch 1, sc 2 (3, 6, 9), sc 2, FPdc in each of next 2-FPdc, sc 2, sk 2-FPdc, FPdc in each of next 2-FPdc, FPdc in previous 2-FPdc working behind the last 2 FPdc just created, sc 2, FPdc in each of next 2-FPdc, sc in remaining sts.
Row 15 – Turn, ch 1, sc 20 (25, 30, 39).
Row 16 – Turn, ch 1, sc 2 (3, 6, 9), sc 3, FPdc in each of next 4-FPdc, sc 2, FPdc in each of next 4-FPdc, sc in remaining sts.
Row 17 – Turn, ch 1, sc 20 (25, 30, 39).
Row 18 – Turn, ch 1, sc 2 (3, 6, 9), sc 3, sk 2-FPdc, FPdc in each of next 2-FPdc, FPdc in previous 2-FPdc working behind the last two just created, sc 2, sk 2-FPdc, FPdc in each of next 2-FPdc, FPdc in previous 2-FPdc working in front of the last two just created, sc in remaining sts.
Row 19 – Turn, ch 1, sc 20 (25, 30, 39).
Row 20 – Turn, ch 1, sc 2 (3, 6, 9), sc 2, FPdc in each of next 2-FPdc, sc 2, FPdc in each of next 4-FPdc, sc 2, FPdc in each of next 2-FPdc, sc in remaining sts.
Rows 21 to 81 – Repeat Rows 9 to 20, ending with a Row 9 Repeat, finish off.
From last stitch of Row 1 on Front Panel A, skip 10 sts and reattach your yarn, chain 1, continue to Row 1 Instructions below for Front Panel B.
Neck and Front Panel B
Row 1 – Sc 20 (25, 30, 39).
Row 2 – Turn, ch 1, sc 2 (6, 8, 14), sc 2, FPdc in each of next 2-FPdc, sc 2, sk 2-FPdc, FPdc in each of next 2-FPdc, FPdc in previous 2-FPdc working behind the last 2 FPdc just created, sc 2, FPdc in each of next 2-FPdc, sc in remaining sts.
Row 3 – Turn, ch 1, sc 20 (25, 30, 39).
Row 4 – Turn, ch 1, sc 2 (6, 8, 14), sc 3, FPdc in each of next 4-FPdc, sc 2, FPdc in each of next 4-FPdc, sc in remaining sts.
Row 5 – Turn, ch 1, sc 20 (25, 30, 39).
Row 6 – Turn, ch 1, sc 2 (6, 8, 14), sc 3, sk 2-FPdc, FPdc in each of next 2-FPdc, FPdc in previous 2-FPdc working behind the last two just created, sc 2, sk 2-FPdc, FPdc in each of next 2-FPdc, FPdc in previous 2-FPdc working in front of the last two just created, sc in remaining sts.
Row 7 – Turn, ch 1, sc 20 (25, 30, 39).
Row 8 – Turn, ch 1, sc 2 (6, 8, 14), sc 2, FPdc in each of next 2-FPdc, sc 2, FPdc in each of next 4-FPdc, sc 2, FPdc in each of next 2-FPdc, sc in remaining sts.
Row 9 – Turn, ch 1, sc 20 (25, 30, 39).
Row 10 – Turn, ch 1, sc 2 (6, 8, 14), sc 1, FPdc in each of next 2-FPdc, sc 3, sk 2-FPdc, FPdc in each of next 2-FPdc, FPdc in previous 2-FPdc working behind the last 2 FPdc just created, sc 3, FPdc in each of next 2-FPdc, sc in remaining sts.
Row 11 – Turn, ch 1, sc 20 (25, 30, 39).
Row 12 – Turn, ch 1, sc 2 (3, 6, 14), sc, FPdc in each of next 2-FPdc, sc 3, FPdc in each of next 4-FPdc, sc 3, FPdc in each of next 2-FPdc, sc in remaining sts.
Row 13 – Turn, ch 1, sc 20 (25, 30, 39).
Row 14 – Turn, ch 1, sc 2 (6, 8, 14), sc 2, FPdc in each of next 2-FPdc, sc 2, sk 2-FPdc, FPdc in each of next 2-FPdc, FPdc in previous 2-FPdc working behind the last 2 FPdc just created, sc 2, FPdc in each of next 2-FPdc, sc in remaining sts.
Row 15 – Turn, ch 1, sc 20 (25, 30, 39).
Row 16 – Turn, ch 1, sc 2 (6, 8, 14), sc 3, FPdc in each of next 4-FPdc, sc 2, FPdc in each of next 4-FPdc, sc in remaining sts.
Row 17 – Turn, ch 1, sc 20 (25, 30, 39).
Row 18 – Turn, ch 1, sc 2 (6, 8, 14), sc 3, sk 2-FPdc, FPdc in each of next 2-FPdc, FPdc in previous 2-FPdc working behind the last two just created, sc 2, sk 2-FPdc, FPdc in each of next 2-FPdc, FPdc in previous 2-FPdc working in front of the last two just created, sc in remaining sts.
Row 19 – Turn, ch 1, sc 20 (25, 30, 39).
Row 20 – Turn, ch 1, sc 2 (6, 8, 14), sc 2, FPdc in each of next 2-FPdc, sc 2, FPdc in each of next 4-FPdc, sc 2, FPdc in each of next 2-FPdc, sc in remaining sts.
Rows 21 to 81 – Repeat Rows 9 to 20, ending with a Row 9 Repeat, finish off.
In this next section we will be adding an extension by using the row ends that will be centered under the armpit.
Side Panel Extensions
NOTE: The Side Panel Extensions are a unique feature in this pattern and allow you to really customize the bust size of this cardigan, just add more rows as needed.
With Right Sides Facing, Reattach your yarn in either the First Stitch of the Back Panel or the Last Stitch of the Front Panel so that you are working from the bottom up, chain 1 and follow the Row 1 Instructions placing one stitch per row end.
You Should create the same amount of stitches as row ends used.
For example, if you are creating the XS/S you will make 57 single crochet stitches using 57 single crochet row ends.
The Extension may be puckered, that is normal and will correct itself once blocked.
Row 1 – Sc 57 (53, 50, 47)
Rows 2 to 7 – Turn, ch 1, sc across, finish off.
Repeat on the other side to create the second side extension.
Cardigan Body
- For this section, you will fold your Front Panels down onto your Back Panel with the right OR wrong sides facing depending on your seaming method of choice to keep them as invisible as possible.
- Thread your darning needle and seam your side extension to the panel it aligns with starting from the waist.
- Make sure to keep them properly aligned and the stitch count to row count equal. For example, if you are creating the XS/S you will seam 57 single crochet stitches to 57 single crochet row ends.
- Finish off and repeat on the other side.
Short Sleeves
Reattach your yarn where the Side Extension meets a Body Panel, chain 1 and continue to Round 1 Instructions.
Sl St to join at the end of each round.
Round 1 – Sc in each stitch and row end evenly placing 5 sc in the side extension, skipping the first row worked in the row ends of the Body Panel and the row used in the seam. [40 (48, 54, 60) total sc sts]
Rounds 2 and 3 – Turn, ch 1, sc around. [40 (48, 54, 60) total sc sts]
Round 4 – Turn, ch 1, * sc 8, sc2tog, repeat from * around, some rounds end partially in a repeat. [36 (44, 49, 54) total sc sts]
Round 5 – Turn, ch 1, sc around. [36 (44, 49, 54) total sc sts]
Rounds 6 to 10 – Turn, ch 2, hdc around. [36 (44, 49, 54) total hdc sts] Finish off on Round 10.
Repeat for second sleeve.
Collar
With Right Sides Facing, reattach your yarn at the bottom of a Front Panel, chain 2 and follow the Row 1 Instructions placing one stitch per row end.
Buttons are optional but instructions are included.
Row 1 – Hdc 81 up towards the neck opening in row ends, 3hdc in corner, 10 hdc in neck opening sts, 3hdc in corner, hdc 81 down towards the waist in row ends. [178 hdc sts]
Row 2 – Turn, ch 2, hdc in each stitch placing 3hdc in center st of both previous 3-hdc sts. [182 hdc sts]
Rows 3 to 6 (9 if not placing buttons) – Turn, ch 2, hdc in each stitch placing 3hdc in center st of both previous 3-hdc sts. Each row will increase by 4 sts.[Row 6 finished with a stitch count of 198 hdc sts]
With your Buttons of choice, attach them where you would like them on your cardigan collar. Then before starting Row 7, use stitch markers to note their location on the opposite collar side. You will need to decided how many stitches to skip with chains to create the button opening. The buttons I used are 7/8” so skipped 2 stitches with 2 chs, you may need more or less depending on your button choice.
Row 7 – Optional Button Row – Turn, ch 2, hdc in each stitch placing 3hdc in center st of both previous 3-hdc sts, skip the appropriate number of stitches with chains where an opening is needed for the buttons placed on the opposite side of the collar. The stitch count will still increase by 2. [202 hdc sts]
Row 8 – Turn, ch 2, hdc in each stitch and chain placing 3hdc in center st of both previous 3-hdc sts. [206 hdc sts]
Row 9 – Turn, ch 2, hdc in each stitch placing 3hdc in center st of both previous 3-hdc sts. [210 hdc sts]
Finish off.
Waist Trim Bottom Ribbing
Row 1 – Reattach your yarn with Right Side Facing, chain 2 and make one row of hdc across the bottom hem of your cardigan using the row ends and stitches.
Rows 2 to 4 – *Turn, ch 2, alternate FP/BPdc to end, repeat from * making sure to place FPdc sts in BPdc sts and BPdc sts in FPdc sts to create your ribbing. Finish off, weave in your ends.
I hope you enjoyed this summer project that can be customized for any season! Check out more of my free crochet cardigan patterns and pick your next project!