Free Lacy Summer Crochet Cardigan Pattern & Easy Tutorial
This is a Great Beginner Crochet Summer Cardigan Pattern for the Warmer Months if you want to make Light Weight Cardigans and are new to crochet. This unique crochet pattern is made from one large rectangle, uses minimal seaming and only two basic crochet stitches. Read more below about this Free Lacy Crochet Cardigan Pattern and use the Free Pattern in the blog post. There is also a helpful video tutorial if you are a visual learner. Happy Crocheting!
Best Bang for your Buck, get a Kit From Lion Brand includes printable PDF and Yarn!
Get an ad-free PDF Version on Etsy or Ravelry!
Simple Construction for a Crochet Summer Cardigan
To create this Easy Crochet Cardigan Pattern all you will need to do make one simple rectangle, two small seams and then add your double crochet trim, it’s really that easy of pattern. Let’s go into a bit more detail.
Firstly, you may notice that I classified this as an Intermediate Skill Level Pattern not easy, but here’s why:
- It uses Lion Brand Yarn Mandala String a self striping yarn which is a CYC 1 type of yarn that can be intimidating to new crocheters. The color I used is called Balled and has very subtle pastel neutral colors giving it an ombre yarn effect.
- Since the yarn is so small it can make stitch placement, especially on the first row of this lace stitch difficult. Don’t worry, it gets much easier once you have some more crochet fabric to hold onto.
- This lacy design requires a lot of skipped stitches, working in chain spaces and in general you need to be very mindful of your stitch placement. It’s not hard but I can be overwhelming for new crocheters, but I promise you can do it.
So back to the construction of this free crochet pattern that is perfect for warm weather. This easy crochet pattern is made in one piece with two seams to create the arm opening for age semi short sleeves.
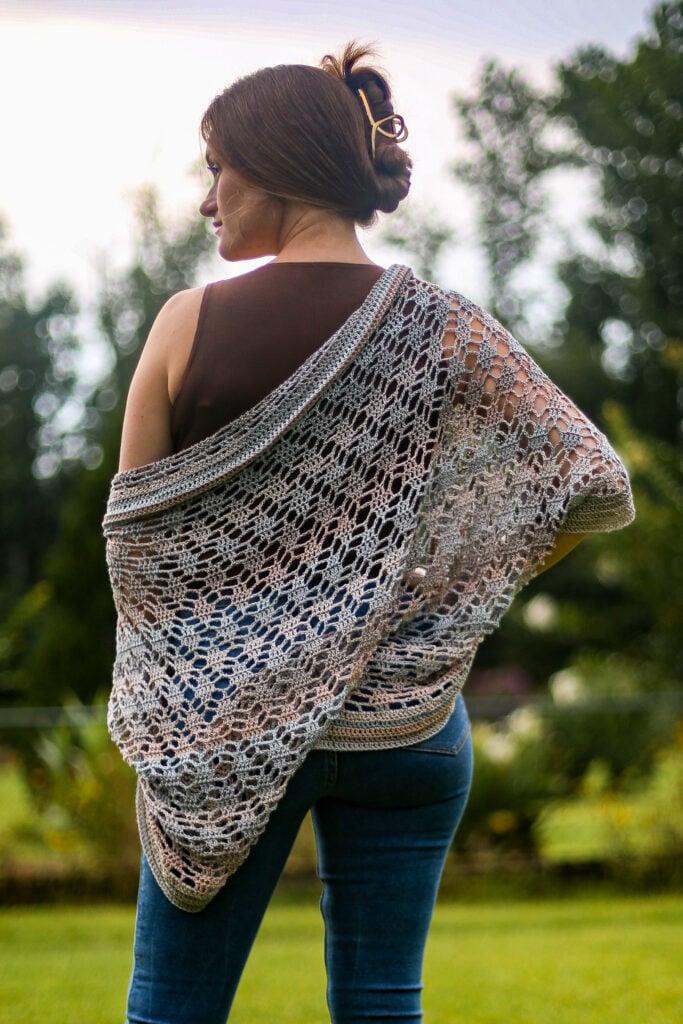
If you look at how this lacy crochet cardigan pattern fits you may notice it wears a bit like a kimono with its oversized fist and wide sleeves.
Once you make your seams that essentially forms the front panels and back panel you will reattach your yarn on the body and arm openings to create the trim.

Crochet Tips
If this is your first cardigan I would highly suggest using stitch markers in the last stitch of each row until you come comfortable working in your turning chains.
Leave a long tail when you finish your body panel to seam for your arm opening.
The first few rows will be frustrating using lightweight yarn but once you get a few done the stitch placement becomes easy and this fun project works up surprisingly quick.
if you are using the recommended yarn it can be tricky to keep together. I would actually recommend working from the outside of the skein because when working from the center it collapses easily and tangles.
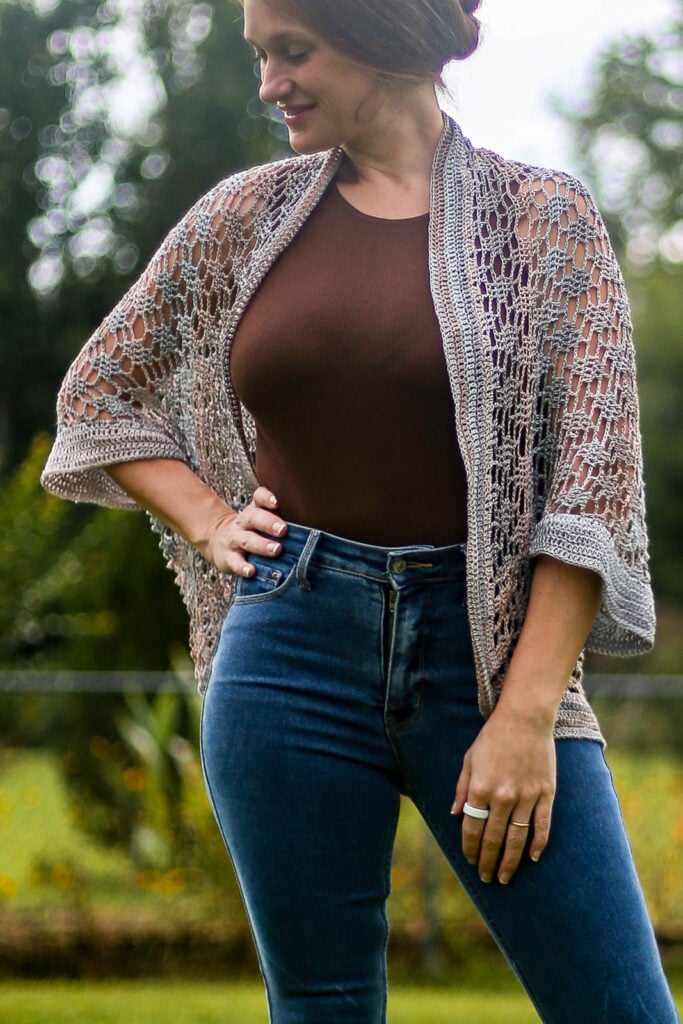
There are no right sides on this lacy cardigan crochet pattern so there is not a wrong way to wear it!
Customizing This Perfect Cardigan
You can customize this beautiful cardigan and make it a perfect addition to you collection of lacy crochet cardigans in many ways.
Just imagine if you did an extra set of repeats, maybe two or three to really add some length while making this lacy spring cardigan pattern. That would make it more of a duster and be perfect for the warmer months.
Or what if you did one or two sets of repeats less? Ten this classic lacy cardigan would become more of a lacy shrug making it a perfect choice to wear with a summer dress!
When add the trim to the arm openings, you can keep going and give your stylish new cardigan long sleeves!
If you love lacy cardigan patterns and want more summer crochet projects check out the Shirts and Top Category on the Life and Yarn Blog!
Yarn Substitutes
There are not a lot of CYC 1 weight yarns that I have experience with to recommend of this pattern other than Circulo’s Anne. As long as you create gauge swatch you can use any light weight yarn you would like.
A CYC 2 would also work with this pattern, again just be sure to check gauge. Circulo Yarns has a ton of lighter weight yarns available that I love so you should check them out if you want to find a cotton yarn to make this versatile cardigan in.
Come find me on…
- Like my Facebook Page
- Join my Facebook group!
- Subscribe to my YouTube Channel for Free Crochet Tutorials
- Get PDFs on Etsy
- Get PDFs on Ravelry
- Sign Up for the Life and Yarn Newsletter for more free modern crochet patterns!
Materials
- 4.00 mm Crochet Hook
- 3 (3, 4) Skeins of Lion Brand Mandala String in Ballad [#557-216AA]
- #1 Super Fine Weight – 875 (1050, 1225) yards
Gauge
- Ch 26 and follow pattern to create 1 repeat. Swatch will measure approximately 3.5 by 3.5 inches.
Sizing
- Petit (Standard, Plus) – Petit (xs/s/m) Standard (s/m/l) Plus (m/l/xl/2xl)
Stitch Descriptions and Abbreviations
- Chain Stitch – ch
- Slip Stitch – sl st
- Stitch(es) – st(s)
- Skip – sk
- Space – sp
- Turning Chain – tch-(x)
- Single Crochet – sc
- Double Crochet – dc
Pattern Notes
- * Designates a repeat.
- “sc 1” means to single crochet in the next stitch.
- “sc 2” means to single crochet in each of the next 2 stitches.
- “2 sc” means to single crochet twice in the next stitch to create an increase.
- Main Panel – 35” (38.5”, 42”) wide x 28” (28”, 31.8”) long.
- Turning Chains DO count as stitches in this pattern.
- Pattern is written for Petite, Standard, and Plus Size with adjustments in parentheses.
- Petite (Standard, Plus) – use corresponding number for your size.
- Petite fits sizes XS-M, Standard fits sizes M-L and Plus fits sizes L- 2X.
- Choose your size bracket based on desired fit.
Body Panel
Row 1 – Ch 206 (226, 246) dc in tenth ch from hook, dc in each of next 2 chs, (ch 3, sk 3), dc in next ch, *(ch 3, sk 3), dc in each of next 3 chs, (ch 3, sk 3), dc in next ch, repeat from * across to end.
Row 2 – Turn, ch 5 (counts as 1 dc, ch 2), dc in next ch-3 sp, dc 3, dc in next ch-3 sp, *ch 5, sk next dc, dc in next ch-3 sp, dc 3, dc in next ch-3 sp, repeat from * across to t-ch, sk 2-chs, dc in tch.
Row 3 – Turn, ch 6 (counts as dc, ch 3), sk next dc, dc 3, sk next dc, ch 3, *dc in ch-5 sp, ch 3, sk next dc, dc 3, sk next dc, ch 3, repeat from * across to tch-5, sk 2 chs, dc in tch-5.
Row 4 – Turn, ch 3 (counts as dc), dc in ch-3 sp, ch 3, sk next dc, dc in next dc, sk next dc, *ch 3, dc in next ch-3 sp, dc in next dc, dc in next ch-3 sp, ch 3, sk next dc, dc in next dc, sk next dc, repeat from * across to tch-6, ch 3, dc 2 in tch-6.
Row 5 – Turn, ch 3 (counts as dc), dc in next dc, dc in next ch-3 sp, ch 5, sk next dc, *dc in next ch-3 sp, dc 3, dc in next ch-3 sp, ch 5, sk next dc, repeat from * across to last ch-3 sp,dc in ch-3 sp, dc in sc, dc in tch-3.
Row 6 – Turn, ch 3 (counts as dc), dc in next dc, ch 3, sk next dc, dc in ch-5 sp, ch 3, sk next dc, *dc 3, ch 3, sk next dc, dc in ch-5 sp, ch 3, sk next dc, repeat from * across to last 2 dc and tch-3, sk next dc, dc in next dc, dc in tch-3.
Row 7 – Turn, ch 6 (counts as dc, ch 3), *dc in ch-3 sp, dc in next dc, dc in ch-3 sp, ch 3, sk next dc, dc in next dc, sk next dc, ch 3, repeat from * across to final dc and tch-3, dc in tch-3.
Rows 8 – 64 (64, 64) – Repeat Rows 2 – 7

Assembly
Step 1 – Lay your panel flat and fold your corresponding corners in to Point A and B like the diagram below. To do this you will bring your top corner together with your bottom corner on the same side so that a point is created as shown in Step 2.
Step 2 – Reattach your yarn at Point A and with a mattress stitch, seam in to Point C leaving 6 to 8 inches open, you may add more or less rows to your seam to customize your fit. Finish off and repeat from Point B to Point D.
Reattach your yarn at Point A as shown in Step 2, ch 2 (does NOT count as a stitch for trim) and dc evenly around, *sl st to ch-2, ch 2, dc in each stitch, repeat from * for 3 more rounds. (5 total rounds)
Reattach your yarn at Point C as shown in Step 2, ch 2 (does NOT count as a stitch for trim) and dc evenly around, *sl st to ch-2, ch 2, dc in each stitch, repeat from * for 3 times. (5 total rounds)
If you love this pattern check out more of my free crochet cardigan patterns!