Reversible Double Brim Crochet Beanie – Easy Free Hat Pattern
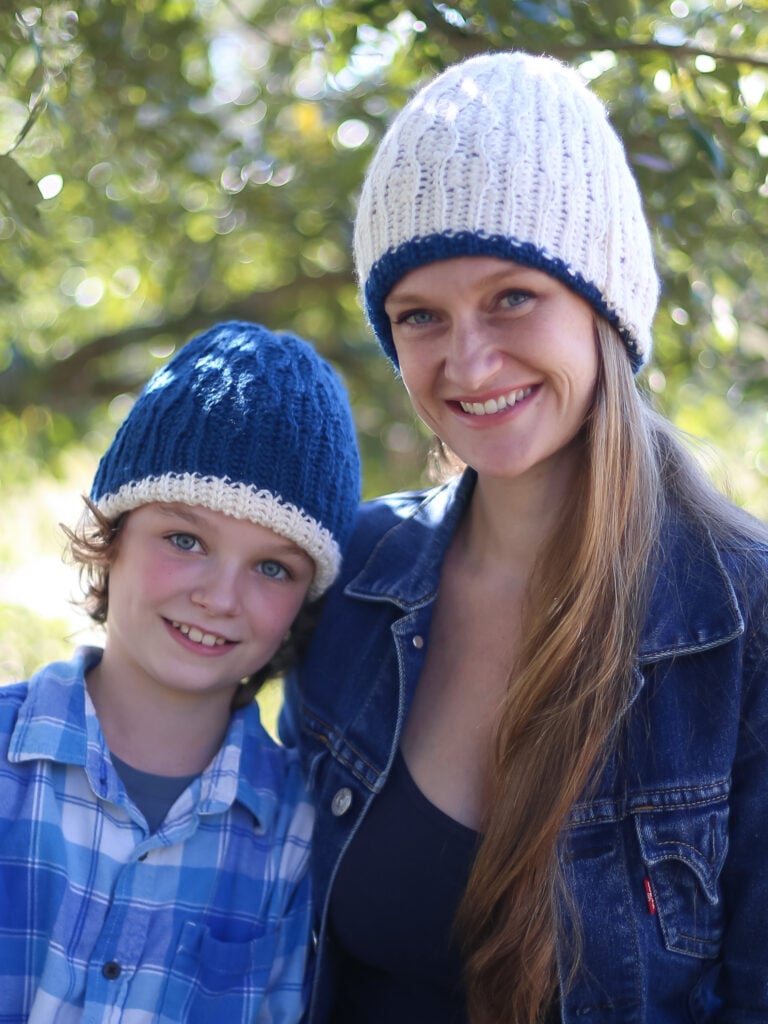
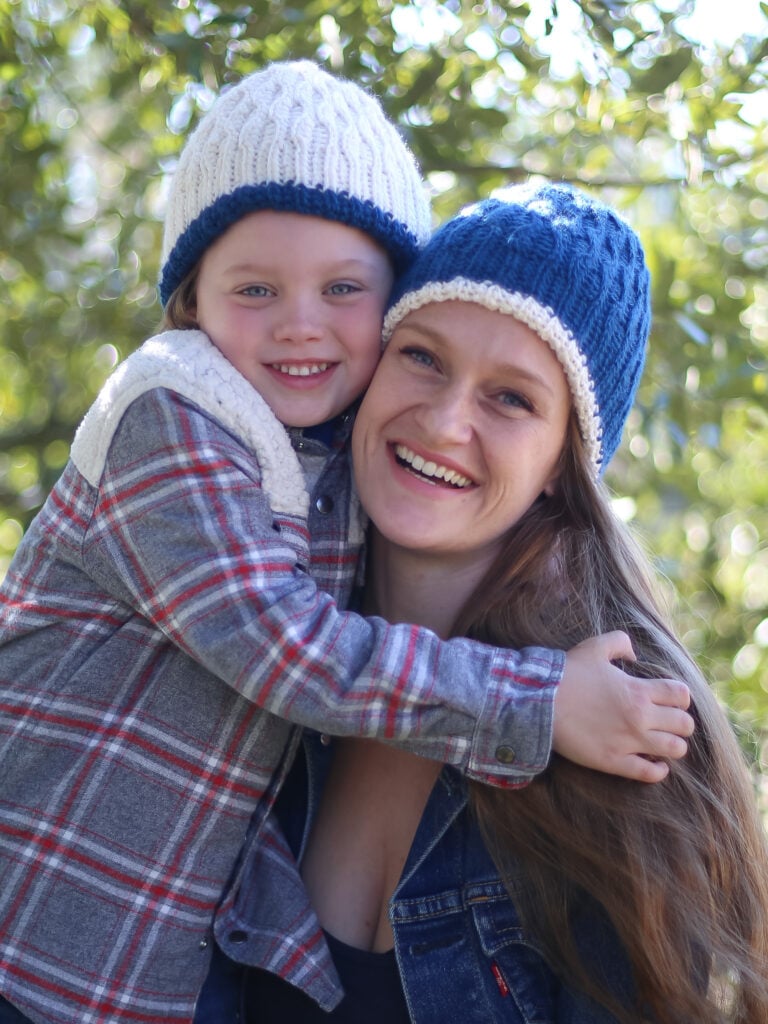
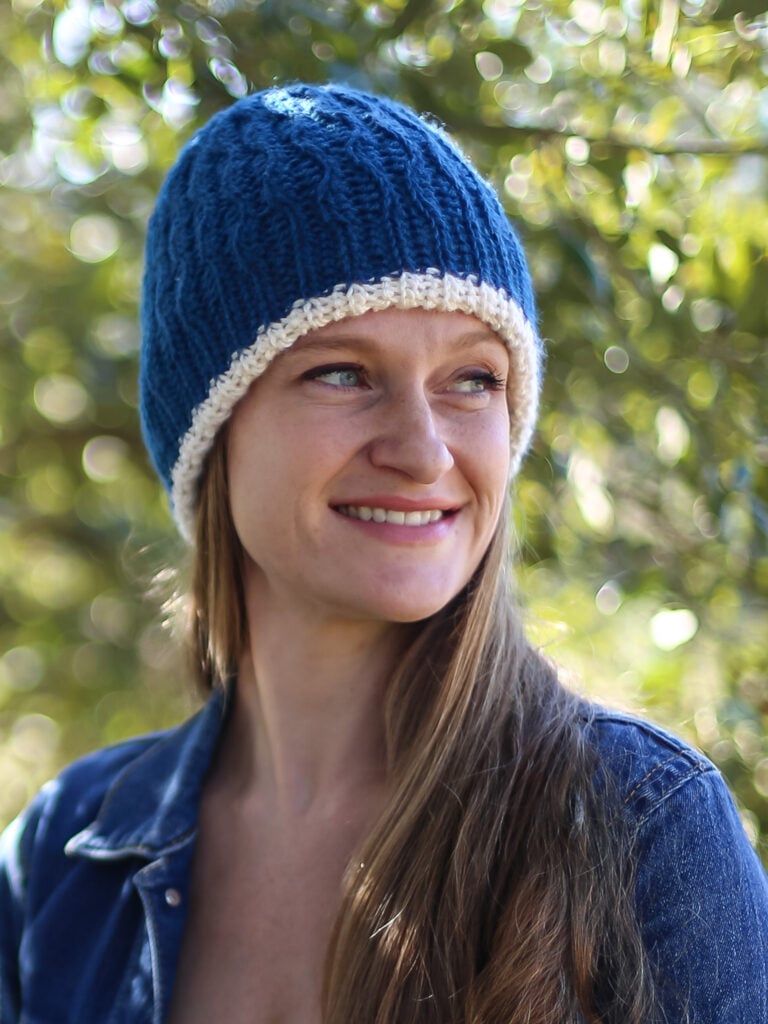
Make this knit-look crochet beanie cap pattern using a gorgeous textured stitch! This perfect hat is made with two colors of worsted weight yarn and an easy colorwork technique to switch colors so that you can make this hat reversible!
Creating this squishy, double brim crochet beanie is easy with the help of the step-by-step video tutorial alongside the free written pattern below!
Best Bang for your Buck, get a Kit From Lion Brand includes a printable ad-free pdf pattern and Yarn!
Get a printable pdf of the pattern on my Etsy Shop or Ravelry!
Easy Crochet Beanie Tutorial for Beginners
This crochet beanie is noted as an Intermediate Skill Level Pattern due to the nature of the stitches, the construction and the color work or color change.
However, a confident beginner can definitely follow this crochet cap pattern if they are comfortable with basic stitches and willing to try new crochet techniques.
To easily be able to complete this crochet beanie tutorial you will need to know how to make a Chain Stitch, Slip Stitches, Half Double Crochet Stitch and how to work in the Back Loop Only.
You will also need to know or lean how to make a Yarn Over Slip Stitch, a Color Change and a Foundation Single Crochet.
Don’t Worry! I show these in depth in the video tutorial and explain them further below. So keep reading to get started making a reversible beanie today!
Crochet Hat Sizing and Construction
Use this crochet beanie size guide to make a smaller size or larger size if needed to create your perfect fit. Tips and stitch multiple are explained below.
- This crochet beanie design is written in 4 sizes that are very easy to customize!
- When you make this cozy crochet hat you will make a hat panel in back and forth rows. This means the brim of the hat is worked at the same time of the body of the hat. No need for a magic circle here!
- So, if you wanted to turn this into a slouchy crochet beanie you would make the hat panel longer by adding more stitches
- Or if you wanted to make this easy crochet beanie wider you would need to add more rows.
- The multiple for the Almond Stitch section is 8 plus the brim stitches.
- In the pattern you have 46 (62, 78, 78) total stitches. The first 16 (24, 32, 32) is the Almond stitch section on one side then 7 (7, 7, 7) brim stitches, a color change, then 7 (7, 7, 7) brim stitches and then the final 16 (24, 32, 32) almond. You would add or subtract by 8’s in the end sections and add or subtract as many as you would like in the brim section.
Keep scrolling for the free pattern for this double thick crochet beanie project!
Yarn Substitutes
- Vanna’s Choice
- Color Theory
- Wool Ease Classic Worsted
Come find me on…
- Like my Facebook Page
- Join my Facebook group!
- Subscribe to my YouTube Channel for Free Crochet Tutorials
- Get PDFs on Etsy
- Get PDFs on Ravelry
- Sign Up for the Life and Yarn Newsletter for more free modern crochet patterns!
- Please Note: Some links may be affiliate links that help to support the Life + Yarn Blog with a small commission at no added cost to you, thank you!
- Copyright 2025-2026, Life and Yarn, Brianna Iaropoli. Pattern contents are NOT to be re-shared, DIRECT LINKS ONLY to this post for the pattern.
- Looking for more free crochet hat patterns? Check out my Hats and Accessories Category!
Materials
- Size 5.5 mm crochet hook
- 2 skeins Wool Ease Recycled in Royal Blue [632-109P] – Color A
- 2 skeins Wool Ease Recycled in Cream [632-098W] – Color B
- #4 Worsted Weight Yarn
Color A – 90 (145, 165, 175) yds
Color B – 90 (145, 165, 175) yds - Yarn Needle
Gauge
- 16 sts x 14 rows in Pattern Repeat is 4” x 4”.
Sizing
- Baby (Child, Adult Small, Adult Large)
- 4 Skeins can make an Adult Size plus Baby or Child.
- Baby is more of an infant size. For 3-6 months or 6-9 months up to 1 year add an extra set of almonds to each side. So an additional 8 sts in each color.
Crochet Beanie Size Guide

Stitch Descriptions and Abbreviations
- Chain Stitch – ch
- Slip Stitch – sl st
- Stitch(es) – st(s)
- HalfDouble Crochet – hdc
- Back Loop Only – blo
- Yarn Over Slip Stitch – YOslst – YO, sl st into designated st (3 loops on hook), YO, pull through all loops on hook.
- Color Change – CC – Before Completing your last st, switch to the next color, keep the dropped color to the front of your work (facing you) so that it is at the back of your work for the next row.
- Foundation Single Crochet – Fsc – Chain 2, insert hook into 2nd chain from hook, yarn over and pull up a loop (2 loops on hook), yarn over, draw through 1 loop, (2 loops on hook with 1 ch created), yarn over, draw through all loops (1 loop on hook, 1 foundation single crochet with chain at the bottom). *Insert hook to the bottom of the stitch you just made, it will look like the top or “V” of a stitch, yarn over, pull up 1 loop (2 loops on hook), yarn over, draw through 1 loop (2 loops on hook with 1 ch created), yarn over, draw through all loops;* repeat from * to * for desired amount of stitches.
Pattern Notes
- * Designates a repeat.
- “sc 1” means to single crochet in the next stitch.
- “sc 2” means to single crochet in each of the next 2 stitches.
- “2 sc” means to single crochet twice in the next stitch to create an increase.
- After Row 1 all following Rows are worked in the Back Loop Only (blo) to create the ridges.
- When using the recommended yarn you will have a lot of stretch in the fabric created with this stitch making these hats super cozy!
Crochet Ribbed Beanie Pattern
Begin with Color A
Row 1 – Fsc 23 (31, 39, 39), CC to Color B, Fsc 23 (31, 39, 39). [46 (62, 78, 78) total stitches]
Note: Remaining Rows are worked in the Back Loop Only (blo) to create the ridges.
Row 2 – Ch 1, turn, (hdc 4, sl st 4,) over 16 (24, 32, 32) sts, YOslst 7 (7, 7, 7), CC to Color A, YOslst 7 (7, 7, 7), (hdc 4, sl st 4,) over 16 (24, 32, 32) sts. [46 (62, 78, 78) total stitches]
Row 3 – Ch 1, turn, (sl st 4, hdc 4) over 16 (24, 32, 32) sts, YOslst 7 (7, 7, 7), CC to Color B, YOslst 7 (7, 7, 7), (sl st 4, hdc 4) over 16 (24, 32, 32) sts. [46 (62, 78, 78) stitches]
Row 4 – Ch 1, turn, (sl st 4, hdc 4) over 16 (24, 32, 32) sts, YOslst 7 (7, 7, 7), CC to Color A, YOslst 7 (7, 7, 7), (sl st 4, hdc 4) over 16 (24, 32, 32) sts. [46 (62, 78, 78) stitches]
Row 5 – Ch 1, turn, (hdc 4, sl st 4,) over 16 (24, 32, 32) sts, YOslst 7 (7, 7, 7), CC to Color B, YOslst 7 (7, 7, 7), (hdc 4, sl st 4,) over 16 (24, 32, 32) sts. [46 (62, 78, 78) total stitches]
Rows 6 to 57 (61, 67, 71) – Repeat Rows 2 – 5. All Sizes end on a Row 5 Repeat except the Adult Small which will end on a Row 3 Repeat.
Assembly
Finish off on Color B leaving a tail 3 times the length of the Color B section.
- Thread your darning needle with the Color B tail and with the Right Sides facing seam Row 1 Fsc sts to the stitches of your final row to begin creating a tube. Finish off at Color A.
- With Color A, cut a piece 3 times the length of the Color A side, thread your darning needle and with the Right Sides facing seam Row 1 Fsc sts to the stitches of your final row to complete your tube. Finish off at Color B.
- Using the corresponding color cinch up the Row Ends of each side to close off your tube.
- Then push one side into the other side so that the cinched ends meet to form the hat. Now you can easily flip between colors!


