Free Lace Shell Stitch Evergreen Crochet Cardigan
Free Crochet Cardigan Pattern – Evergreen Cardigan
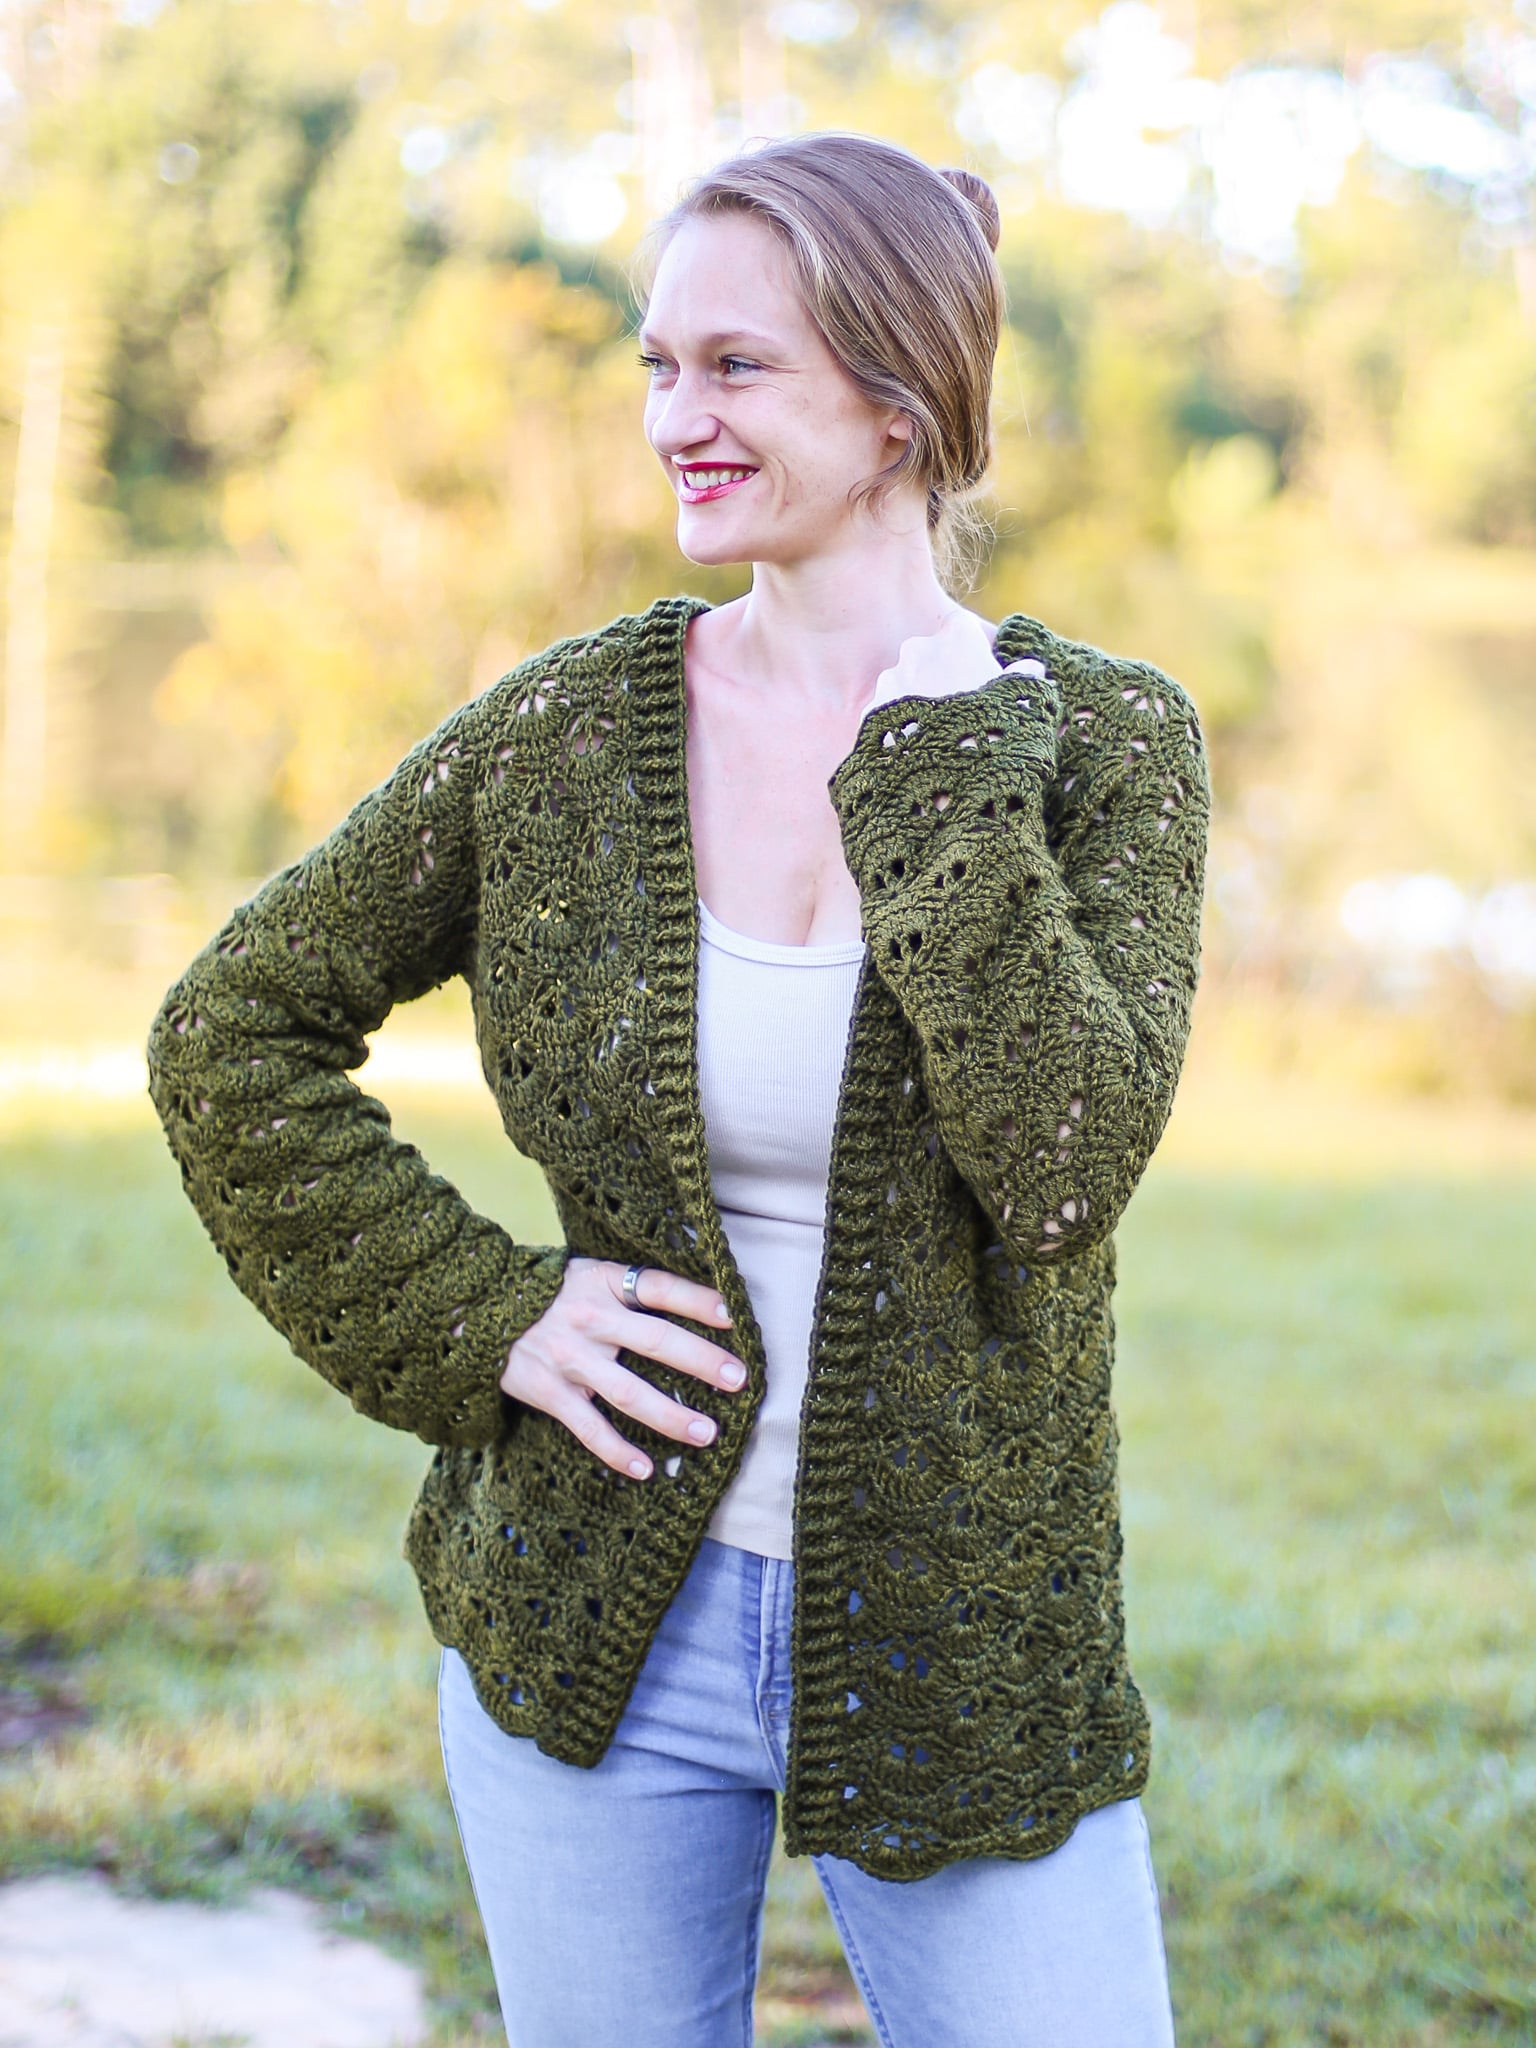
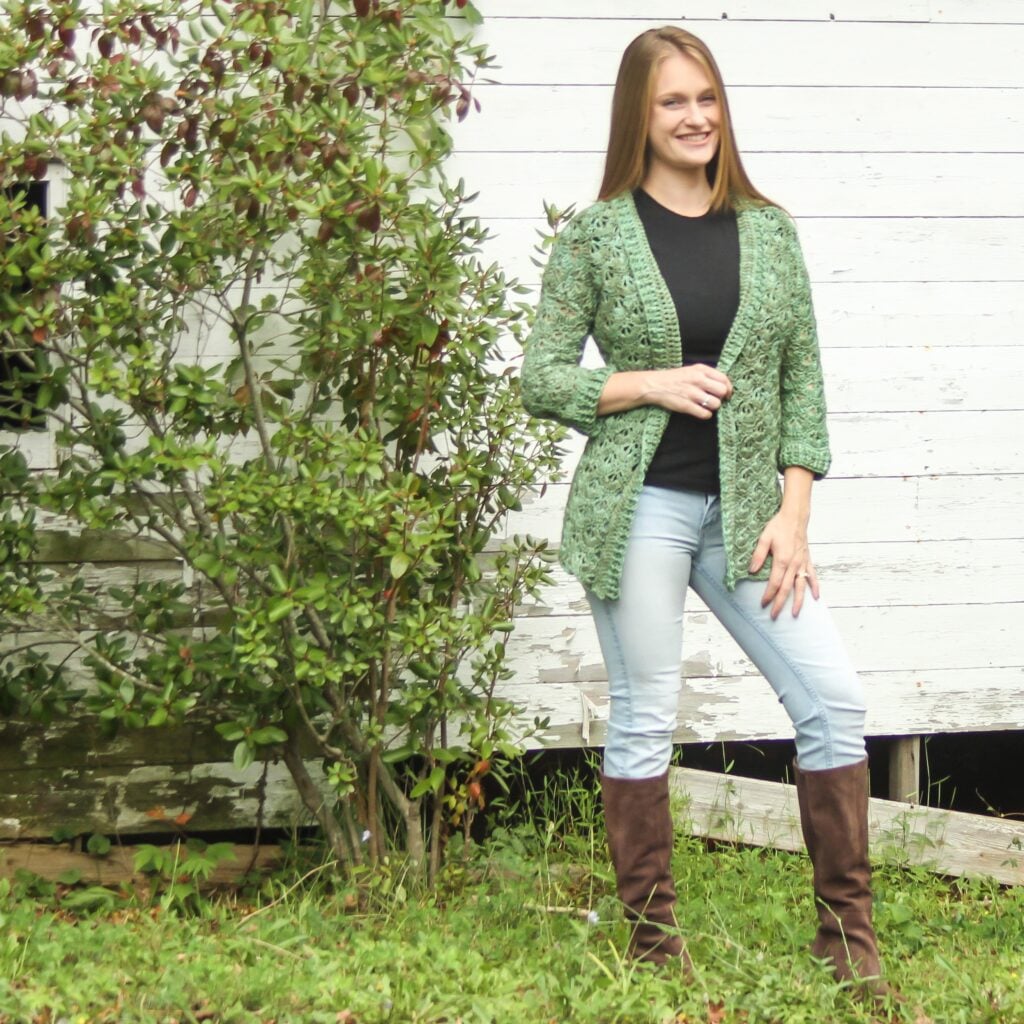
Originally published in October of 2019 this gorgeous shell stitch cardigan was in desperate need of an update so a new sample cardigan was needed! I remember creating this free crochet pattern and making it a second time reminded me of how much I love this stunning shell stitch!
I really love this shell stitch combo and the original yarn so it took some time to find a perfect substitute for the one of a kind hand dyed yarn that I used. I wanted something equally as pretty but much more affordable and accessible. Lion Brand’s Wool-Ease Recycled was the perfect choice, not to mention the Olive color paired perfectly with this being called the Evergreen Cardigan!
Use the Easy to Navigate Table of Contents below the first photo to easily jump around in the blog post while using this free crochet cardigan pattern!
Best Bang for your Buck, get a Kit From Lion Brand that includes a printable ad-free pdf pattern and Yarn!
Get a printable pdf crochet pattern on my Etsy Shop or Ravelry!
Pattern Overview
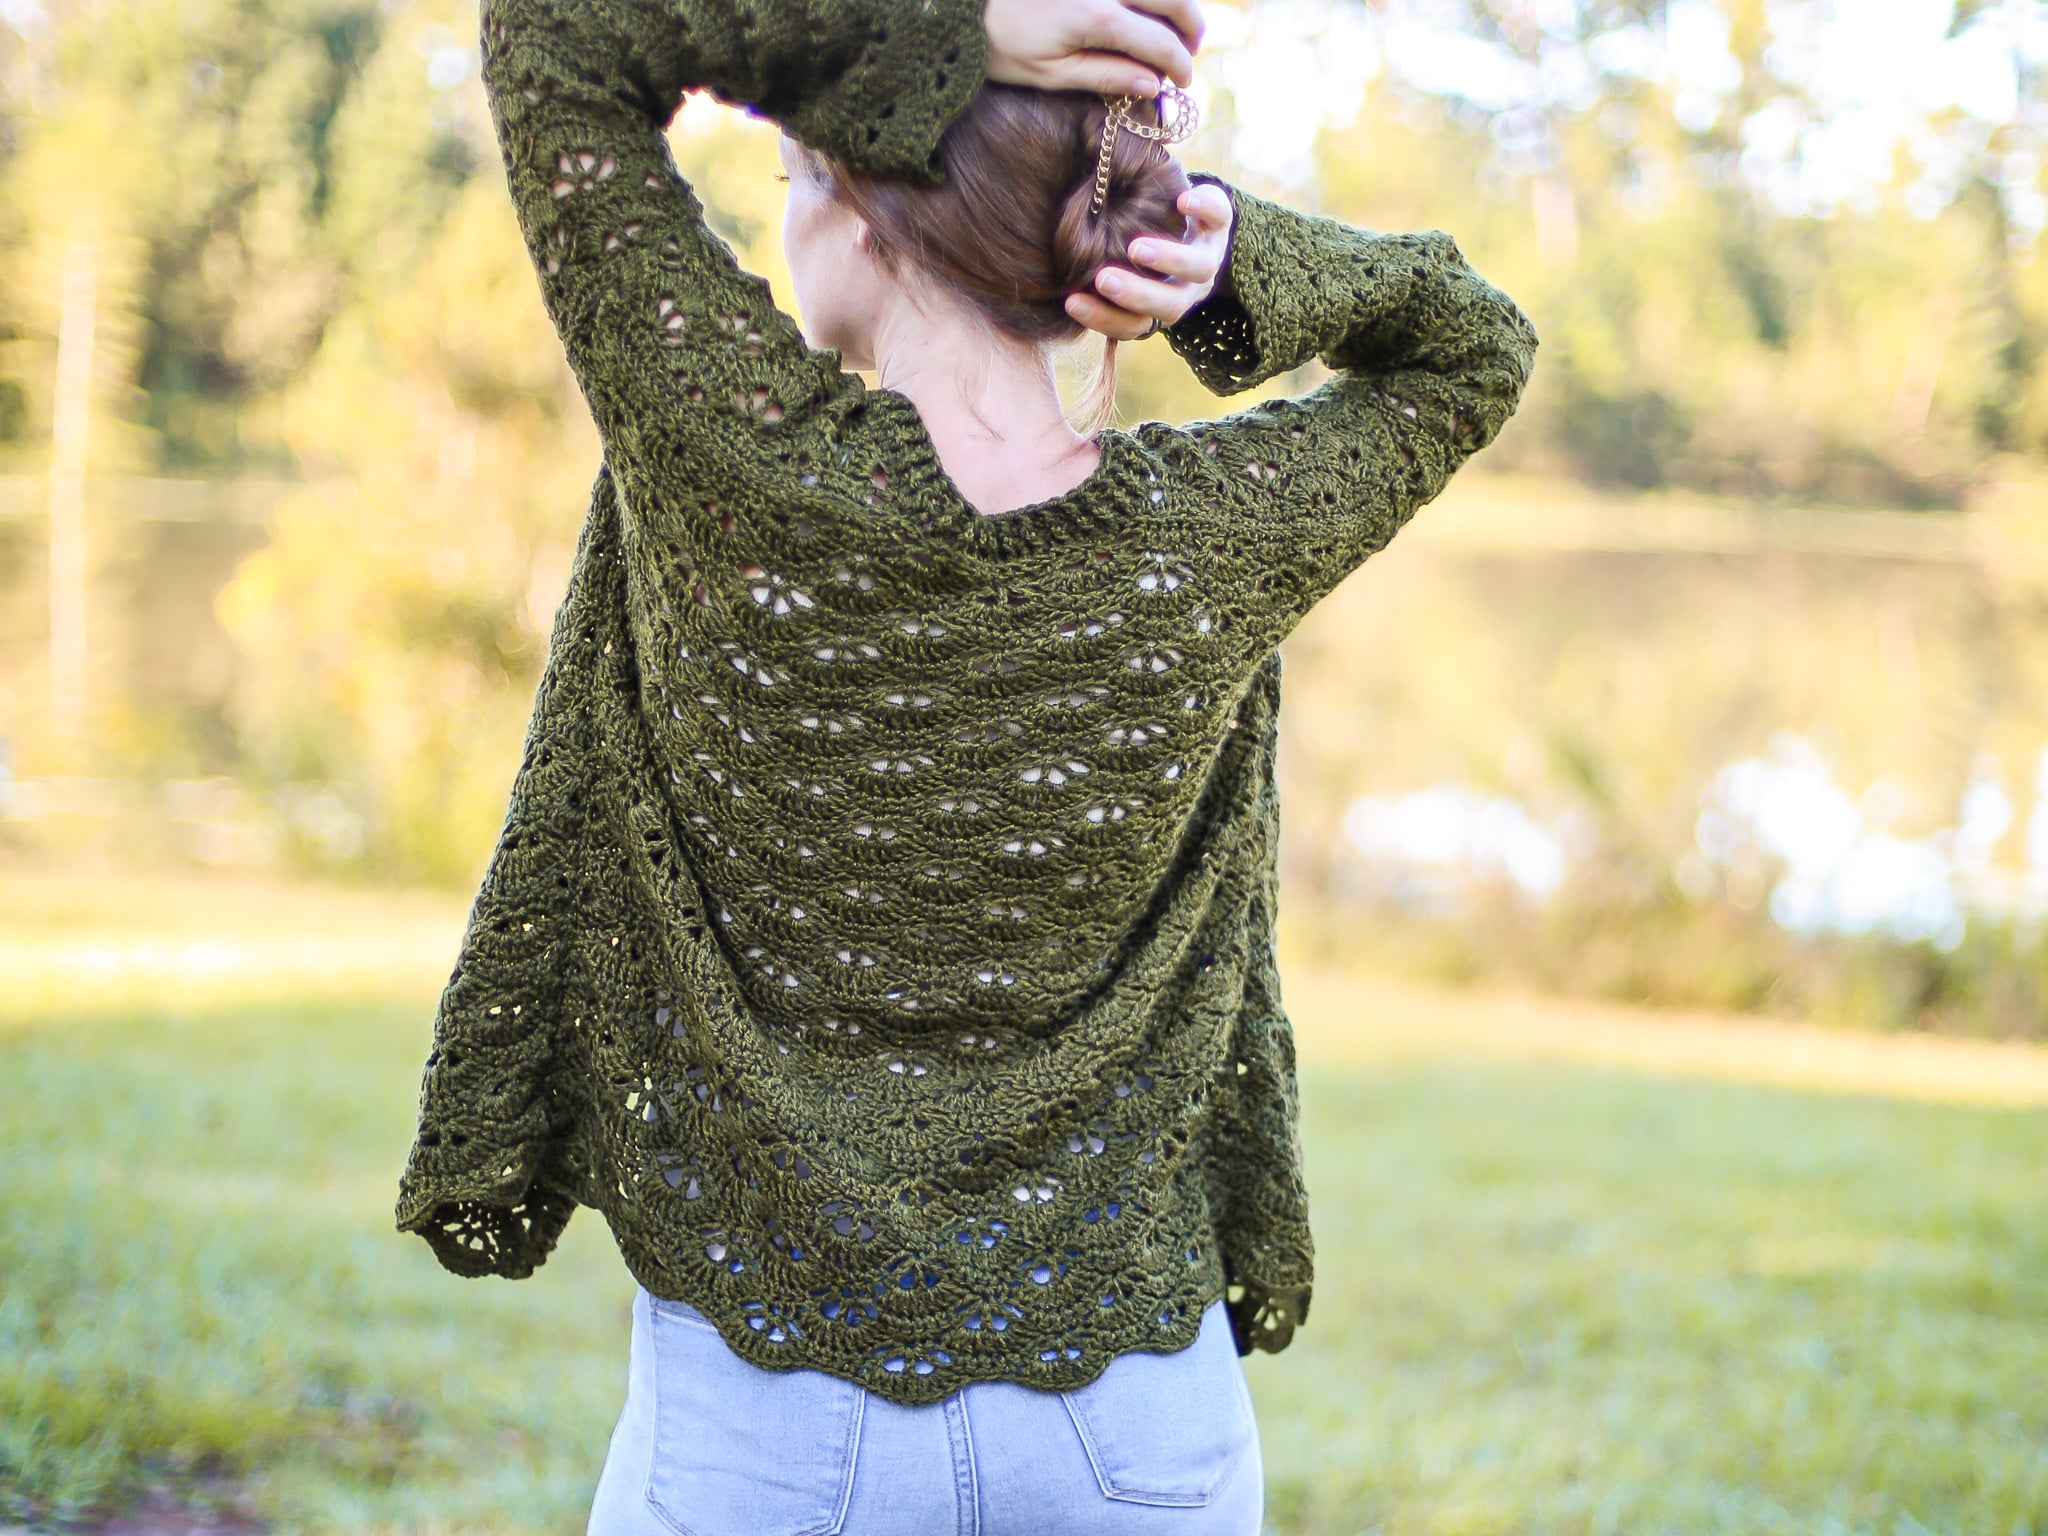
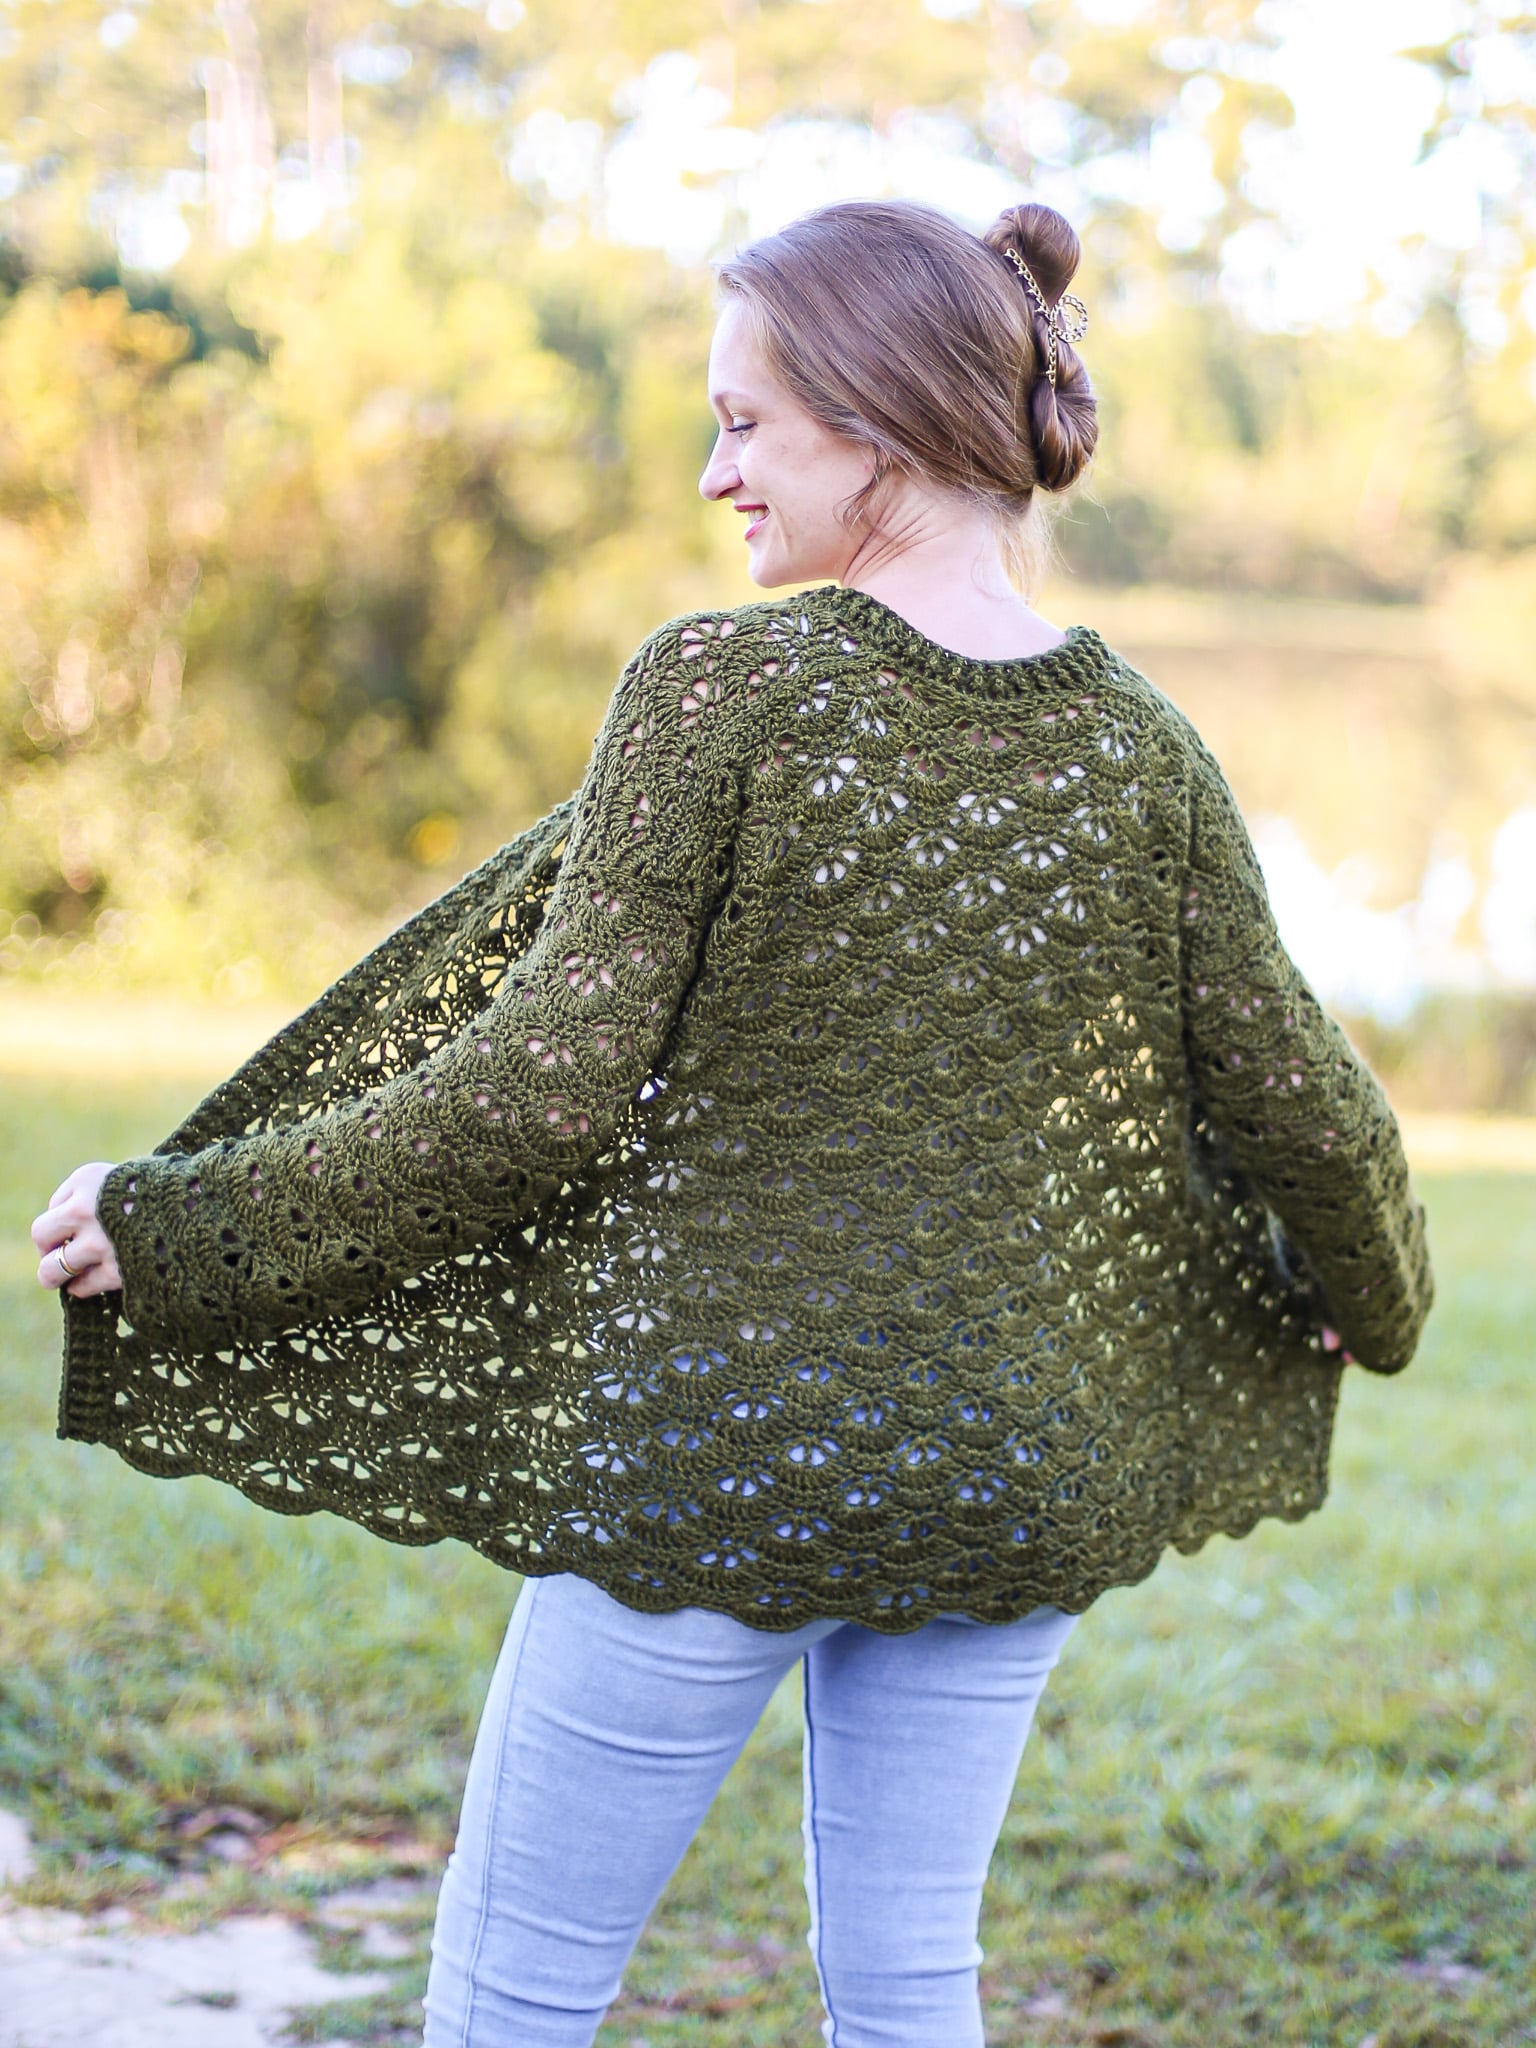
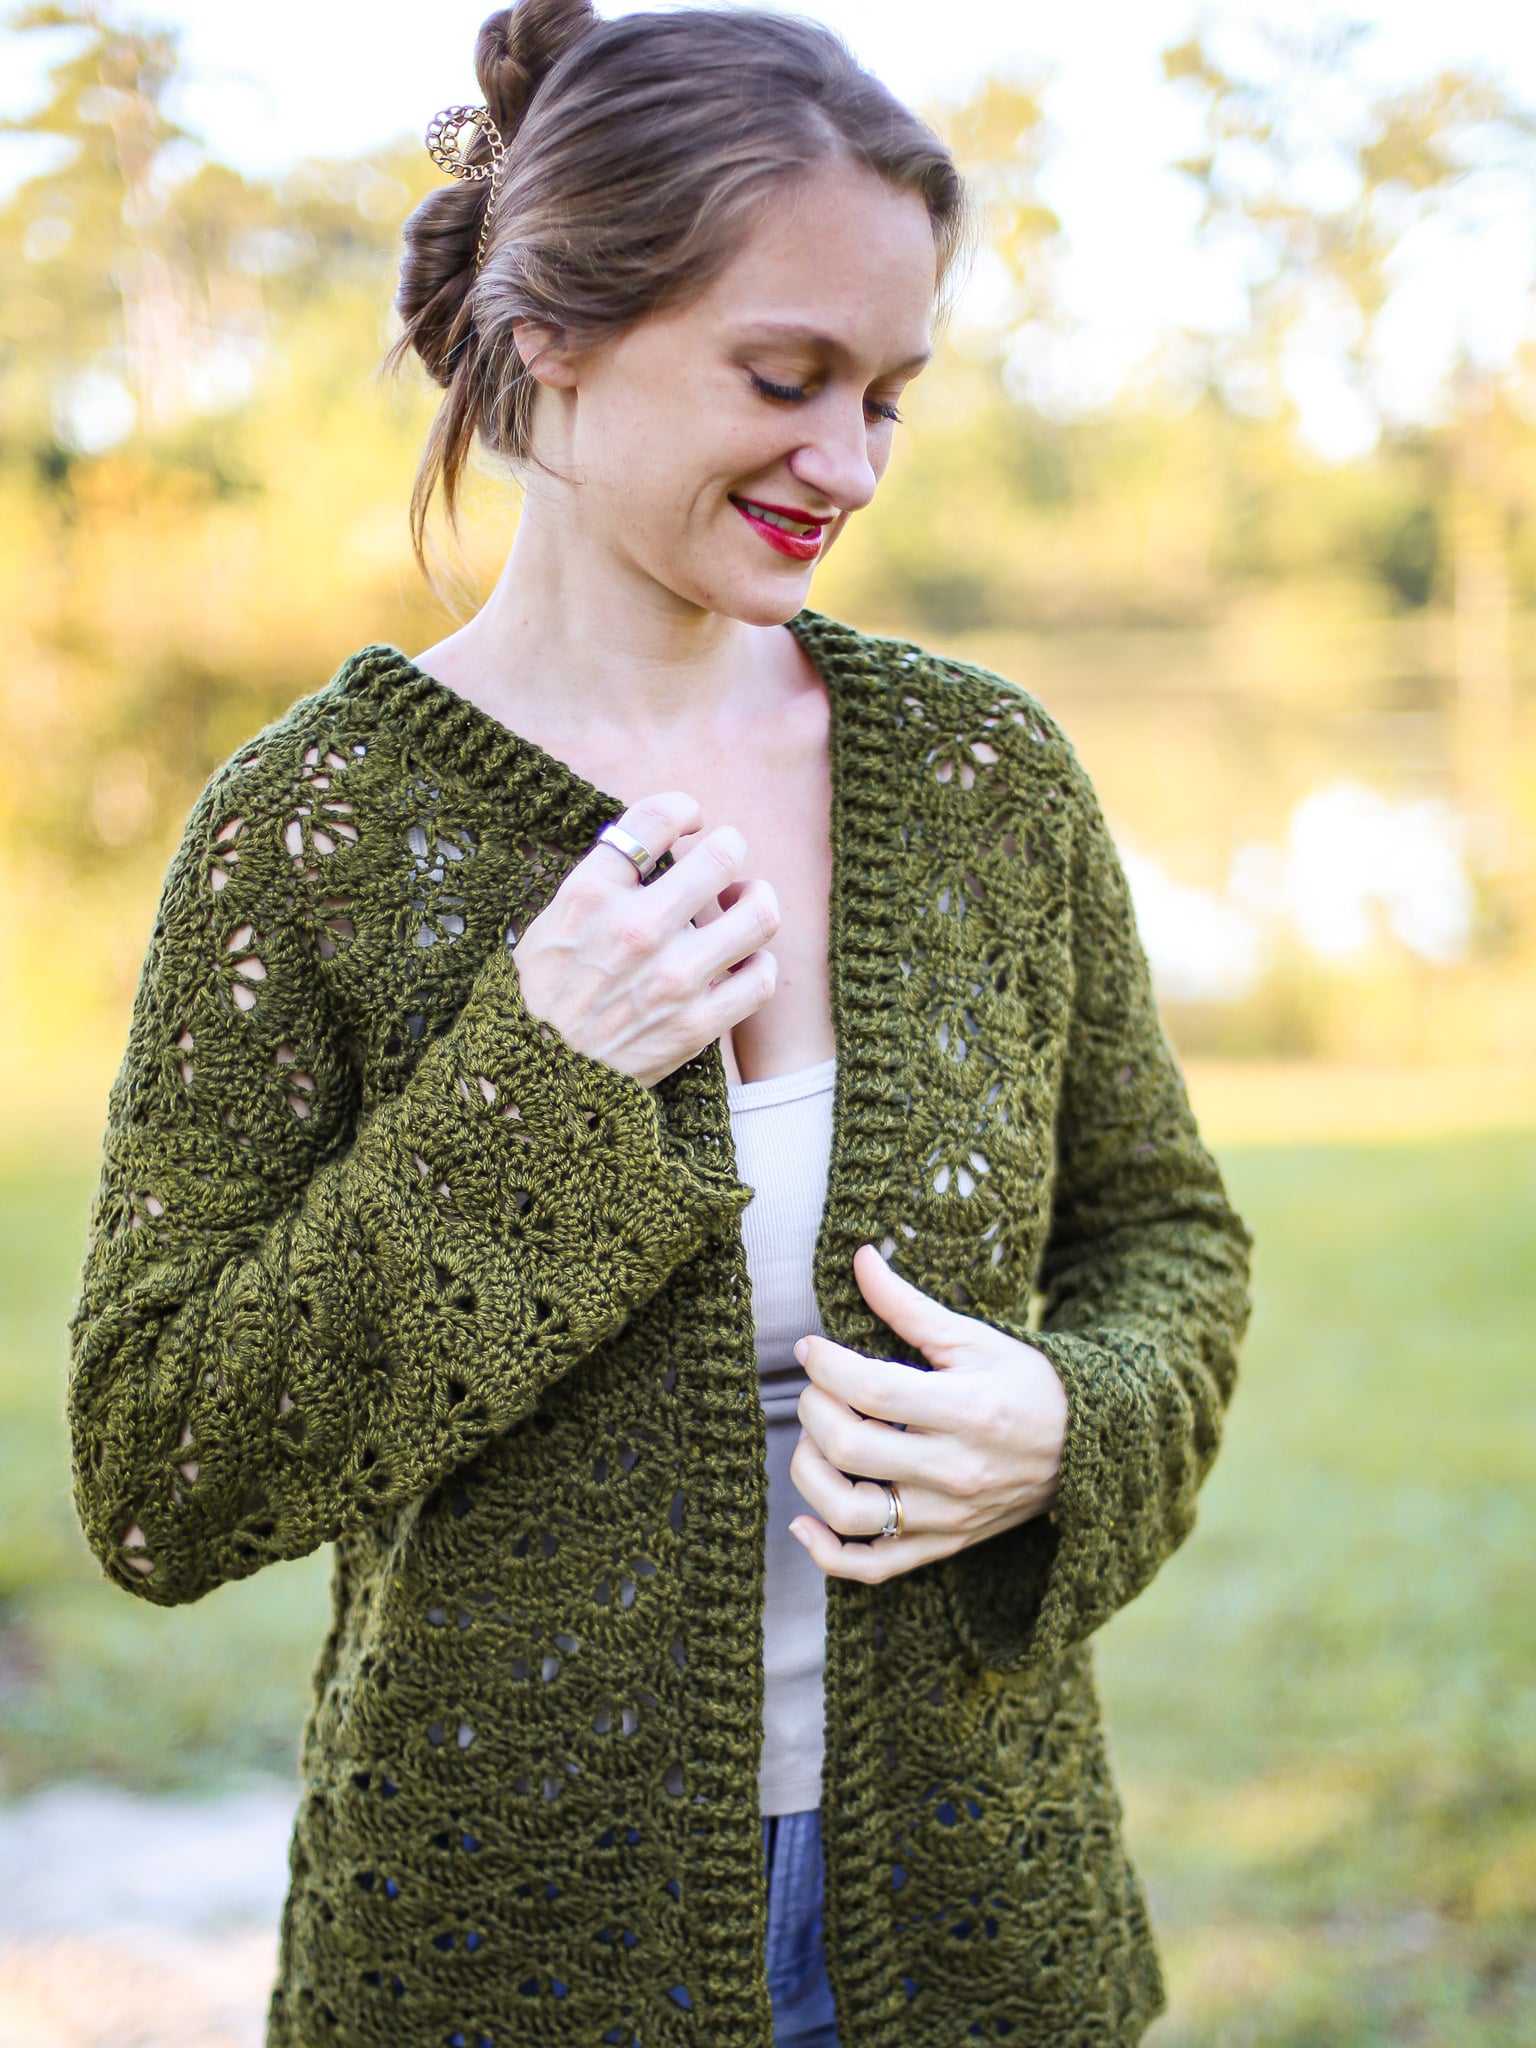
The Evergreen Cardigan is an Intermediate Skill Level Pattern that uses US Terminology. This vintage style pattern is made with five (5) rectangular panels and seams for added structure. The neckline ribbing and trims are added after so they can easily be customized. Read more about making this crochet shell stitch cardigan fit your style perfectly below and how to adjust the sizing.
Made using a shell stitch pattern that has a longer repeat multiple means that this pattern is made using size groupings and has a very relaxed fit. Reference the Size Chart to pick the size to fit you best. Feel free to mix and match pieces and use the Sizing Tips to make a custom crochet cardigan.
Why You’ll Love Making This Scalloped Stitch Cardigan
- Made using 5 rectangular panels with no shaping, simple construction!
- Seamed for added structure so that that this crochet cardigan lasts and holds its shape.
- Lightweight and Breathable for warmer weather.
- Oversized with positive ease making this casual vibe cardi perfect for layering on fall days!
- Fan-like scalloped double crochet techniques to create this shell stitch works up surprisingly quick.
- This is a four (4) repeat row pattern making it easy to memorize after a few sets of rows!
- Tips on How to Customize your sizing included below!
- Fully Tech Edited and graded for a range of 9 sizes.
Yarn Substitutes
This pattern was originally written and designed using a DK weight yarn. You could definitely sub a lightweight DK yarn for this pattern and still meet gauge. You may need to adjust your hook.
- Touch of Linen (worsted) would be a great sub to make this a summer cardigan.
- Pima Cotton would be another great worsted weight option to make this for the summer months.
- Mandala Ombre would be a great CYC 4 option n you want some short rows of color in your shells.
- If you want a self striping lightweight yarn try classic Mandala, a 3-weight yarn.
- I would also love so see one made using Cottino, a cotton wool dk weight!
Come find me on…
- Like my Facebook Page
- Join my Facebook group!
- Subscribe to my YouTube Channel for Free Crochet Tutorials
- Get PDFs on Etsy
- Get PDFs on Ravelry
- Sign Up for the Life and Yarn Newsletter for more free modern crochet patterns!
- Please Note: Some links may be affiliate links that help to support the Life + Yarn Blog with a small commission at no added cost to you, thank you!
- Copyright 2026, Life and Yarn, Brianna Iaropoli. Pattern contents are NOT to be re-shared, DIRECT LINKS ONLY to this post for the pattern.
Materials
- Size 5.50mm crochet hook
- 6 (7, 9, 10) Skeins of Lion Brand Wool-Ease Recycled in Olive [632-172T]
- Weight No. 4 – 975 (1375, 1710, 1935) yards
- Yarn Needle
Gauge
- Base Gauge: 14 sts by 7 rows in double crochet is 4 by 4 inches (unblocked) and 5 by 4.50 inches (blocked)
- Stitch Repeat Gauge: Fsc 25 and follow pattern repeat twice (9 rows total) is 6 by 4.5 (unblocked) and 6.5 by 4.5 inches.
- Whether you are working with the recommended yarn, a yarn of similar fiber content or something different, gauge for this pattern along side your preferred blocking method is EXTREMELY important to make sure your cardigan is the right size, fits properly and you have enough yardage.
- Lion Brand’s Wool-Ease Recycled blocks out significantly in this stitch row-wise, not as much stitch-wise meaning you will definitely gain length on your panels.
- Base Gauge: 14 sts by 7 rows in double crochet is 4 by 4 inches (unblocked) and 5 by 4.50 inches (blocked). This is a good baseline for before you create your swatch in the stitch pattern.
- Stitch Repeat Gauge: Fsc 25 and follow pattern repeat twice (9 rows total) is 6 by 4.5 (unblocked) and 6.5 by 4.5 inches (blocked) to the top of a shell from the Fsc.
- For this pattern I only did a light steam blocking to relax the fabric, open the stitches and straighten my edges. Remember different fires will behave differently.
- When adjusting sizing to customize your cardigan be sure to have extra yarn as your yarn usage might change.
Sizing
- XS/S (M/L, XL/2/3XL, 3/4/5XL)
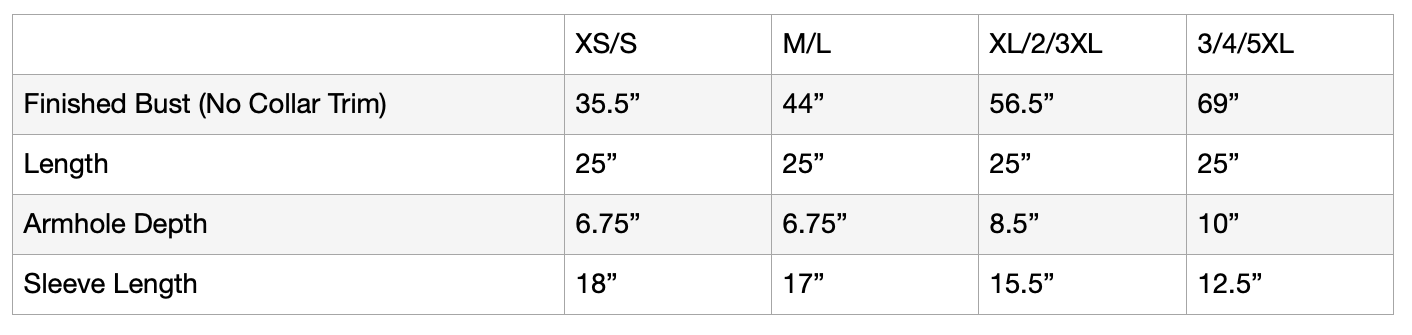
Sizing Tips & Customization
- How to Adjust the Length of the Body: The length of your body is dictated by the number of rows in this pattern. To add length you will add/subtract rows to the Body Panels. Remember to add/subtract the same number of rows to both Front Panels to keep the proper back neck drop when making your cardigan your preferred length
- How to Adjust the Width of the Body: The width of your body is dictated by the number of stitches in this pattern. Since it is a 12 stitch repeat I would suggest either going up or down a size since each size is one repeat more or less than the other. If you are in between sizes I would add a row or two of single crochet to the row ends of the body panels before seaming
- How to Adjust the Sleeves: The sleeve width is dictated by the number of stitches, add or subtract stitches by 12’s, again, this is a lot of stitches, a row or two of single crochet working up the row ends will give you more space. For sleeve length, if you would like shorter or longer sleeves you will need to add or subtract rows.
- Get Creative: Add buttons, sleeves cuffs or even front ties on your shell stitch sweater!
- IMPORTANT NOTE: Any changes to sizing will affect your yardage, buy an extra skein if you plan to adjust sizing to avoid running out of yarn or lot color variations.
Stitch Descriptions and Abbreviations
- Chain Stitch – ch
- Stitch(es) – st(s)
- Skip – sk
- Slip Stitch – sl st
- Single Crochet – sc
- Double Crochet – dc
- Foundation Single Crochet – Fsc – Chain 2, insert hook into 2nd chain from hook, yarn over and pull up a loop (2 loops on hook), yarn over, pull though 1 loop (2 loops on hook, yarn over and pull through both loops, (1 foundation single crochet with chain at the bottom). *Insert hook to the bottom of the stitch you just made, it will look like the top or “V” of a stitch, yarn over, pull up a loop (2 loops on hook), yarn over, pull through 1 loop (2 loops on hook), yarn over, pull through all loops; * repeat from * to * for desired amount of stitches.
- Front Post Double Crochet – FPdc – work a dc as you normally would but insert your hook from front to back to front around post of indicated st.
- Back Post Double Crochet – BPdc – work a dc as you normally would but insert your hook from back to front to back around post of indicated st.
Pattern Notes
- EASE: Ease will depend on your chosen size. For example, if you have a 36” Bust and choose to make the M/L you will have 8” of positive ease plus Collar Trim. If you choose to make the XS/S you would have 0.5” negative ease.
- This pattern is designed to be oversized and fit a range of sizes in each size grouping. Choose the size that will give you the best fit and read more about customizing the fit in “Tips for Sizing” below.
- Measurements in Size Chart are Finished Garment Measurements, Bust is full circumference.
- * Designates a repeat.
- “sc 1” means to single crochet in the next stitch.
- “sc 2” means to single crochet in each of the next 2 stitches.
- “2 sc” means to single crochet twice in the next stitch to create an increase.
- Pattern is worked in a Multiple of 12 + 1 when using a Foundation Double Crochet Stitch.
Crochet Shell Stitch Cardigan Pattern Free
Back Panel Instructions
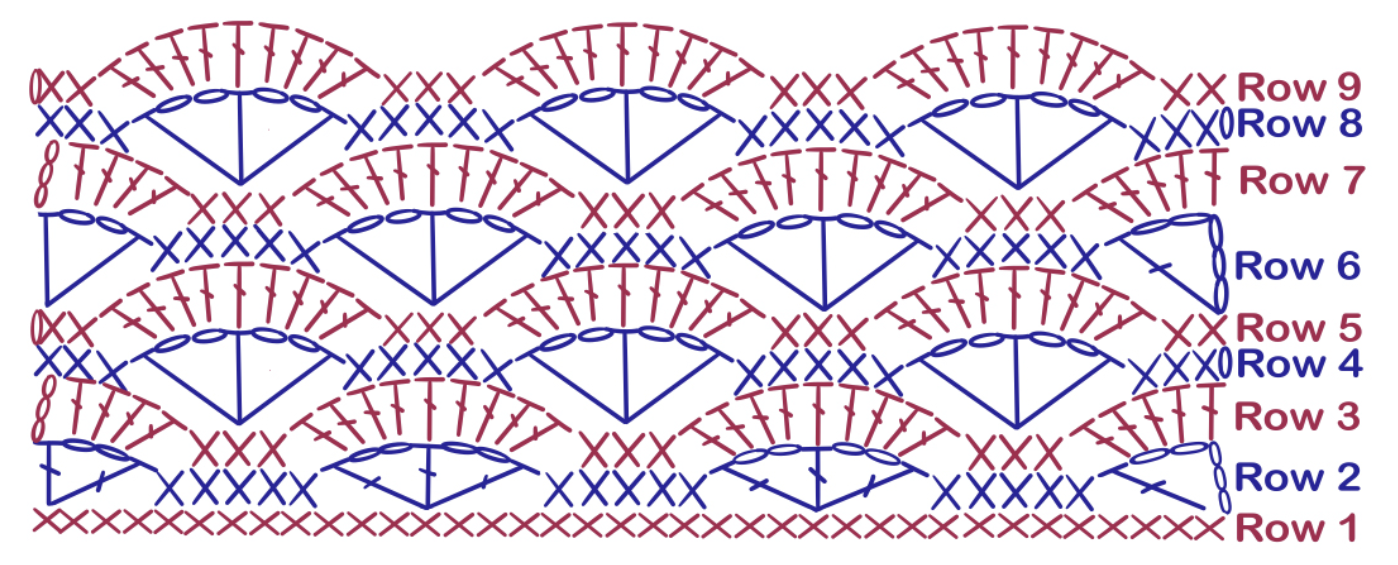
Row 1 – Fsc 61 (85, 109, 133) turn.
Row 2 – Ch 5, dc in 1st st, skip next 3 sts, *sc in next 5 sts, skip next 3 sts 3, (dc, ch 2, dc, ch 2, dc) in next st, skip next 3 sts, repeat from * until 9 sts remain, sc in next 5, skip next 3, (dc, ch 2, dc) in last st, turn.
Row 3 -Ch 3, *4 dc in next ch-2, skip next sc, sc in next 3 sc, sk next sc, 4 dc in next ch-2, dc in next dc, repeat from * across, ending with last dc in 3rd ch of turn ch, turn.
Row 4 – Ch 1, sc in first 3 sts, *skip next 3 sts, (dc, ch 2, dc, ch 2, dc) in next st, skip next 3 sts, sc in next 5, repeat from * across until 9 sts and turning ch-3 remain, skip next 3 sts, (dc, ch 2, dc, ch 2, dc) in next st, skip next 3 sts, sc in next 2 dc and 3rd ch of turning ch, turn.
Row 5 – Ch 1, 2 sc, *4 dc in next ch-2, dc in next dc, 4 dc in next ch-2, skip next 2 sts, sc in next 3 sc, repeat from * across ending with 2 sc instead of 3 sc, turn.
Rows 6 to 49 – Repeat Rows 2-5 for a total of 12 repeats.
Front Panel Instructions
Note: Make two Front Panels.
Row 1 – Fsc 25 (37, 49, 61) turn.
Row 2 – Ch 5, dc in 1st st, skip next 3 sts, *sc in next 5 sts, skip next 3 sts, (dc, ch 2, dc, ch 2, dc) in next st, skip next 3 sts, repeat from * until 9 sts remain, sc in next 5, skip next 3, (dc, ch 2, dc) in last st, turn.
Row 3 – Ch 3, *4 dc in next ch-2, skip next sc, sc in next 3 sc, sk next sc, 4 dc in next ch-2, dc in next dc, repeat from * across, ending with last dc in 3rd ch of turn ch, turn.
Row 4 – Ch 1, sc in first 3 sts, *skip next 3 sts, (dc, ch 2, dc, ch 2, dc) in next st, skip next 3 sts, sc in next 5, repeat from * across until 9 sts and turning ch-3 remain, skip next 3 sts, (dc, ch 2, dc, ch 2, dc) in next st, skip next 3 sts, sc in next 2 dc and 3rd ch of turning ch, turn.
Row 5 – Ch 1, 2 sc, *4 dc in next ch-2, dc in next dc, 4 dc in next ch-2, skip next 2 sts, sc in next 3 sc, repeat from * across ending with 2 sc instead of 3 sc, turn.
Rows 6 – 57 – Repeat Rows 2-5 for a total of 14 repeats.
Sleeve Panel Instructions
Note: Make two Sleeve Panels.
Row 1 – Fsc 49 (49, 61, 73) turn.
Row 2 – Ch 5, dc in 1st st, skip next 3 sts, *sc in next 5 sts, skip next 3 sts, (dc, ch 2, dc, ch 2, dc) in next st, skip next 3 sts, repeat from * until 9 sts remain, sc in next 5, skip next 3, (dc, ch 2, dc) in last st, turn.
Row 3 – Ch 3, *4 dc in next ch-2, skip next sc, sc in next 3 sc, sk next sc, 4 dc in next ch-2, dc in next dc, repeat from * across, ending with last dc in 3rd ch of turn ch, turn.
Row 4 – Ch 1, sc in first 3 sts, *skip next 3 sts, (dc, ch 2, dc, ch 2, dc) in next st, skip next 3 sts, sc in next 5, repeat from * across until 9 sts and turning ch-3 remain, skip next 3 sts, (dc, ch 2, dc, ch 2, dc) in next st, skip next 3 sts, sc in next 2 dc and 3rd ch of turning ch, turn.
Row 5 – Ch 1, 2 sc, *4 dc in next ch-2, dc in next dc, 4 dc in next ch-2, skip next 2 sts, sc in next 3 sc, repeat from * across ending with 2 sc instead of 3 sc, turn.
Rows 6 to 33 (37, 33, 25) – Repeat Rows 2-5 for a total of 8 (9, 8, 6) repeats.
Assembly Instructions
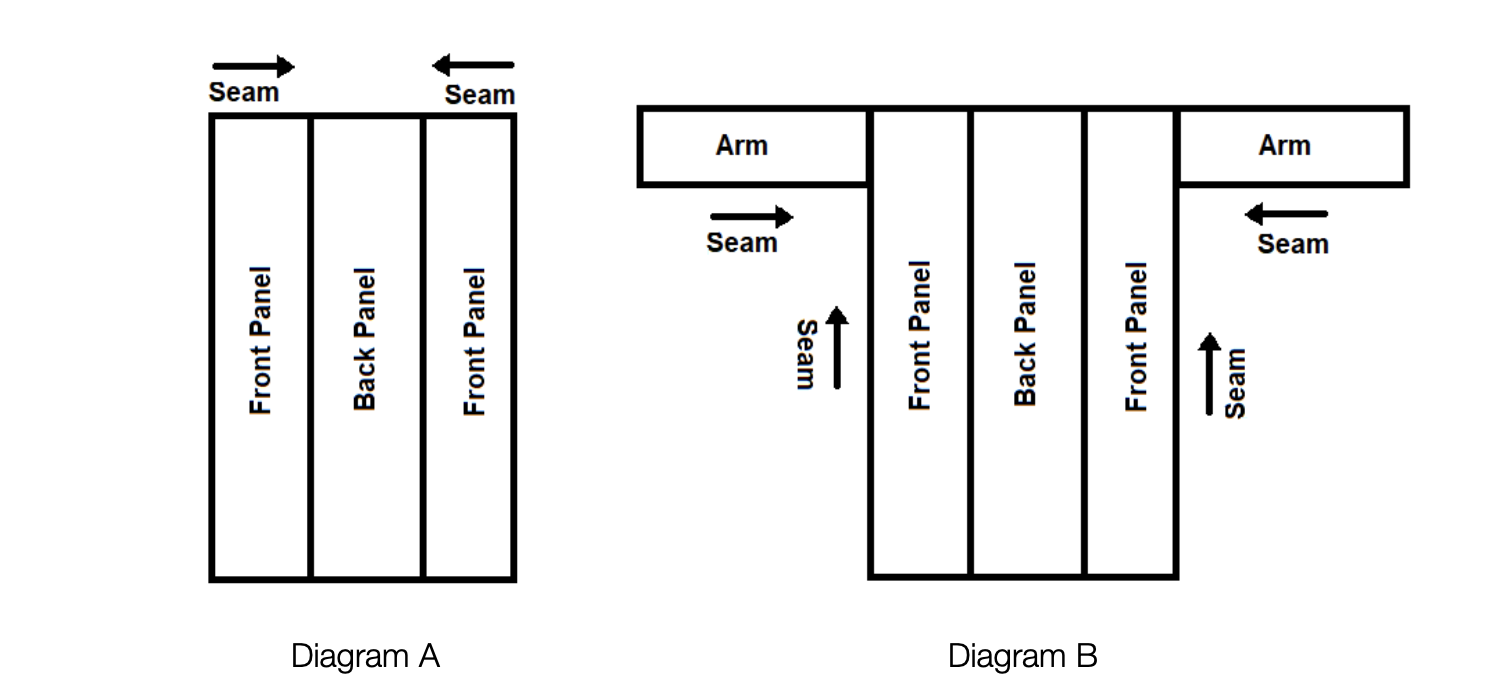
- Lay your Front Panels on top of your Back Panel in front of you with right sides facing, and with the shells coming down, meaning Row 1 is at the top where you will be seaming for the shoulders.
- You will then seam in with a mattress stitch from each outside corner the length of the Front Panels, towards the middle of the Back Panel as shown in Diagram A to create the neck. Be careful to align your stitches so that your shoulder seams are even.
- Then, fold each of your Sleeve Panels in half, right side in, and seam up the long side with a mattress stitch in the row ends.
- Lay your arms as shown in Diagram B with the straight edge/shoulder to be seamed to the Front and Back Panels.
- Mark your armpit locations and using a mattress stitch seam your arms evenly to the Body. Then use a mattress stitch on the sides for finish the Body and form the bottom hem.
Finishing Instructions for Collar
- Reattach your yarn to a bottom corner and dc evenly up to the shoulder seam, place 3 dc in the shoulder seam.
- Continue across the back panel placing 1 dc in each stitch, place 3 dc in the next shoulder seam, continue down the second side placing your dc stitches evenly.
- Ch 2, turn and dc back up to your 3-dc in the seam, dc in the 1st dc, 3 dc in the 2nd dc, 1 dc in the 3rd dc, dc evenly to the next 3-dc and repeat, dc evenly down the next side.
- Ch 2, turn, (FPdc, BPdc) up the side to the 3-dc, dc in the 1st dc, 3 dc in the 2nd dc, 1 dc in the 3rd dc, (FPdc, BPdc) to the next 3-dc and repeat, (FPdc, BPdc) down the next side.
- Repeat Step 4, 2 more times making sure to place FPdc in BPdc and BPdc in FPdc of previous rows to create the ribbing.
- Finish off and weave in all of your ends.
Finishing Instructions for Cuffs
Optional – On the arms, reattach your yarn at the cuff and do 3 rounds of (FPdc, BPdc) to create ribbing as you did on the Collar. The original of this pattern was a 3/4 sleeve cardigan but since it has been reworked to have long sleeves I have noted this as optional. The wavy edge of the shells is also a nice touch if you do not want to add these cuffs.
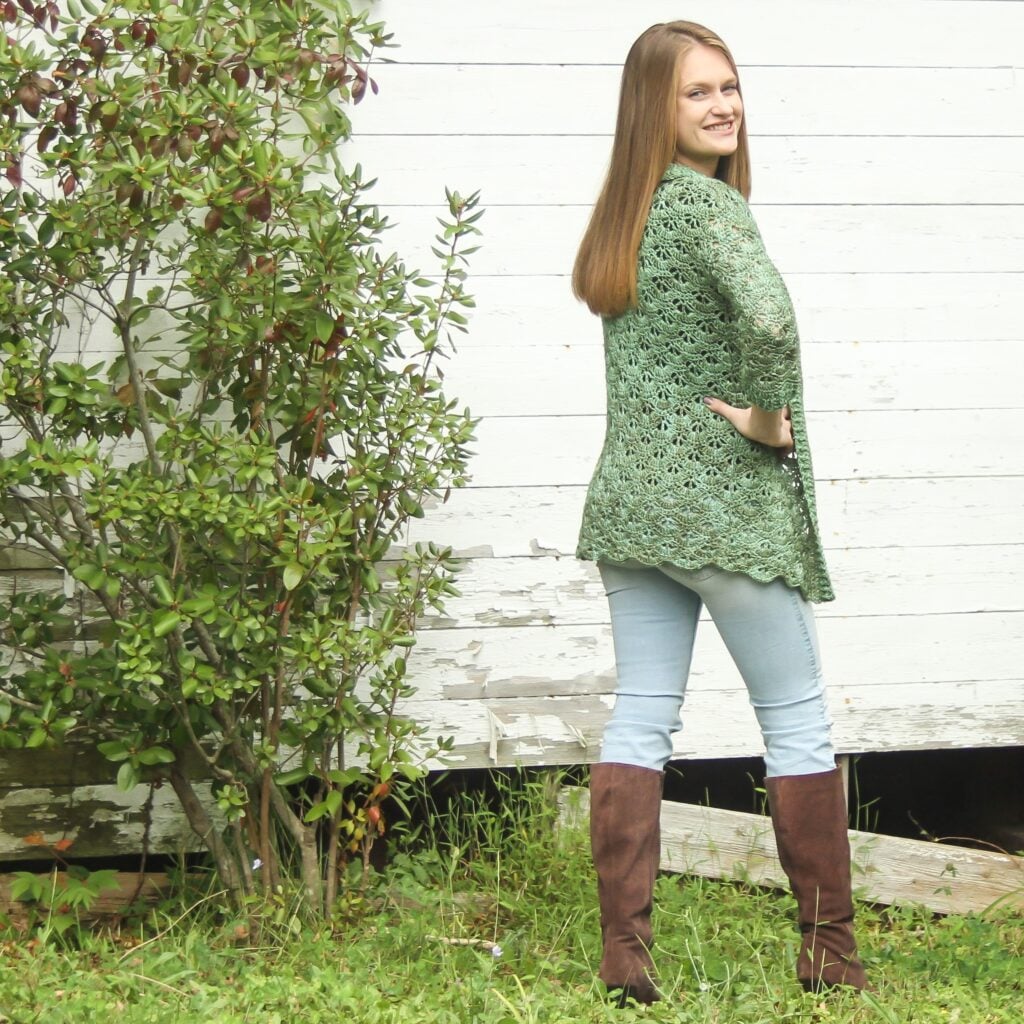
Now, enjoy your new Evergreen cardigan paired with your favorite jeans, over a maxi dress or any way you can think of! Loved this cardigan? Check out all of my Free Crochet Cardigan Patterns or my Free Crochet Sweaters and Pullovers!




Briana, it is beautiful! So glad that you finally went back to it for a great finish. Thanks so much for sharing it with us!
Lovely design
Brianna, I adore this pattern, but I can’t figure out your sizing chart. I am 16″ across the back, 6″ armhole, and 50″ bust. I am 5′ 3″ tall, and currently weight 246 lbs. Don’t let the 50″ bust fool you; I only wear a 42D, so I can’t figure that one out, either! My waist is at least 50″, and my hips several inches wider. How do I measure myself for your sizing chart? My numbers each go to a different size on your chart.
Hi Lily! This cardigan is made with drop sleeves and the arms are separate from the body, so what you could do is pick and choose your pieces. Pick the size that will work best for your bust/hips to make the body panels but don’t work all the rows to adjust the length. Then choose the arms that will best fit you from another size, just be sure when you are seaming that you use some stitch markers to locate the armpit correctly. I hope that helps! ??